Love this? Save it for later!
Share the inspiration with your friends
“You ever get hit with that unmistakable smell of cafeteria pizza from middle school?” my coworker asked me one Friday afternoon. Honestly, I wasn’t expecting to get nostalgic about school lunches while we chatted over coffee, but there it was—the sudden urge for that crispy, cheesy slice that somehow tasted like comfort and chaos all at once. The funny thing is, I hadn’t thought about that kind of pizza in years until that moment. It wasn’t fancy, and it sure wasn’t gourmet, but it had this crispy crust that cracked just right when you bit into it, with a slightly sweet tomato sauce and gooey cheese that stretched forever. Maybe you’ve been there, standing in line hoping the pizza wasn’t too soggy that day.
Well, that conversation sent me on a bit of a mission: could I capture that exact crispy school cafeteria pizza experience at home? I mean, it wasn’t just about the recipe but recreating that feeling—the easy comfort, the slightly nostalgic crunch, and the no-fuss, crowd-pleasing vibe. Turns out, with a little trial, error, and some happy kitchen accidents (yes, I forgot the baking powder once and still got a great crust!), this crispy school cafeteria pizza recipe became my go-to comfort food for those nights when I want something familiar but homemade. So, let me tell you how you can make this classic pizza magic right in your own oven—no soggy slices allowed.
Why You’ll Love This Recipe
This crispy school cafeteria pizza recipe isn’t just a throwback; it’s a tested, crowd-approved way to get that perfect crunch and flavor combo at home. Here’s why this recipe stands out:
- Quick & Easy: Ready in about 30 minutes, perfect for busy weeknights or last-minute cravings.
- Simple Ingredients: No fancy or hard-to-find items—just pantry staples like all-purpose flour, basic tomato sauce, and mozzarella cheese.
- Perfect for Casual Gatherings: Whether it’s a movie night or a laid-back weekend lunch, this pizza hits the spot.
- Crowd-Pleaser: Kids love it, adults approve, and it’s great for those picky eaters who want classic flavors.
- Unbelievably Delicious: That crispy, slightly chewy crust with balanced seasoning and melty cheese is nothing short of comforting.
What makes this pizza different from the rest? Honestly, it’s the crust technique—a blend of a quick rise and a hot oven that gives that signature crackly, crispy bottom without turning into a cardboard slab. Plus, the sauce is just lightly spiced and slightly sweet, which honestly reminds me of those school cafeteria days but with a fresher, homemade twist.
This recipe isn’t just about food; it’s about tapping into that feeling when you bite into something that feels like a warm, familiar hug from your past. It’s comfort food you can make any night of the week, without the long prep or complicated steps.
What Ingredients You Will Need
This recipe uses simple, wholesome ingredients to deliver bold flavor and satisfying texture without the fuss. Most of these are pantry staples, and you can find them at any grocery store. Here’s what you’ll need for the dough, sauce, and topping:
- For the Dough:
- 2 ½ cups (310 g) all-purpose flour, plus extra for dusting (I like King Arthur for consistent results)
- 1 teaspoon instant yeast (quick-rise works well here)
- 1 teaspoon sugar (balances the yeast and adds a touch of sweetness)
- 1 teaspoon salt
- 1 tablespoon olive oil (adds a bit of richness and helps crisp the crust)
- 1 cup (240 ml) warm water (about 110°F / 43°C)
- For the Sauce:
- 1 cup (240 ml) canned tomato sauce (plain, no herbs added)
- 1 teaspoon dried oregano
- ½ teaspoon garlic powder
- 1 teaspoon sugar (to mimic that slightly sweet cafeteria sauce)
- Salt and pepper, to taste
- Toppings:
- 2 cups (200 g) shredded mozzarella cheese (low-moisture part-skim works best)
- Optional: sliced pepperoni or your favorite toppings (keep it simple to stay true to the classic feel)
If you prefer a gluten-free option, you can swap the all-purpose flour for a 1-to-1 gluten-free baking flour blend, though the texture will be a tad different. For a dairy-free version, try using your favorite plant-based cheese alternative, but keep in mind the melt might vary.
Equipment Needed
- Large mixing bowl for the dough (a glass or stainless steel one works great)
- Measuring cups and spoons for accuracy
- Rolling pin or your hands for shaping the dough
- Pizza stone or an inverted baking sheet to mimic the school cafeteria pizza’s crisp bottom
- Oven thermometer (optional but helpful to keep your oven at a steady 475°F / 245°C)
- Pizza cutter or sharp knife for slicing
If you don’t have a pizza stone, an inverted baking sheet preheated in the oven does the trick. I’ve also used a cast-iron skillet for super-crispy edges, but that method needs a bit more hands-on attention. For budget-friendly kitchens, a heavy baking sheet works fine; just keep an eye on baking time and rotate halfway through.
Preparation Method
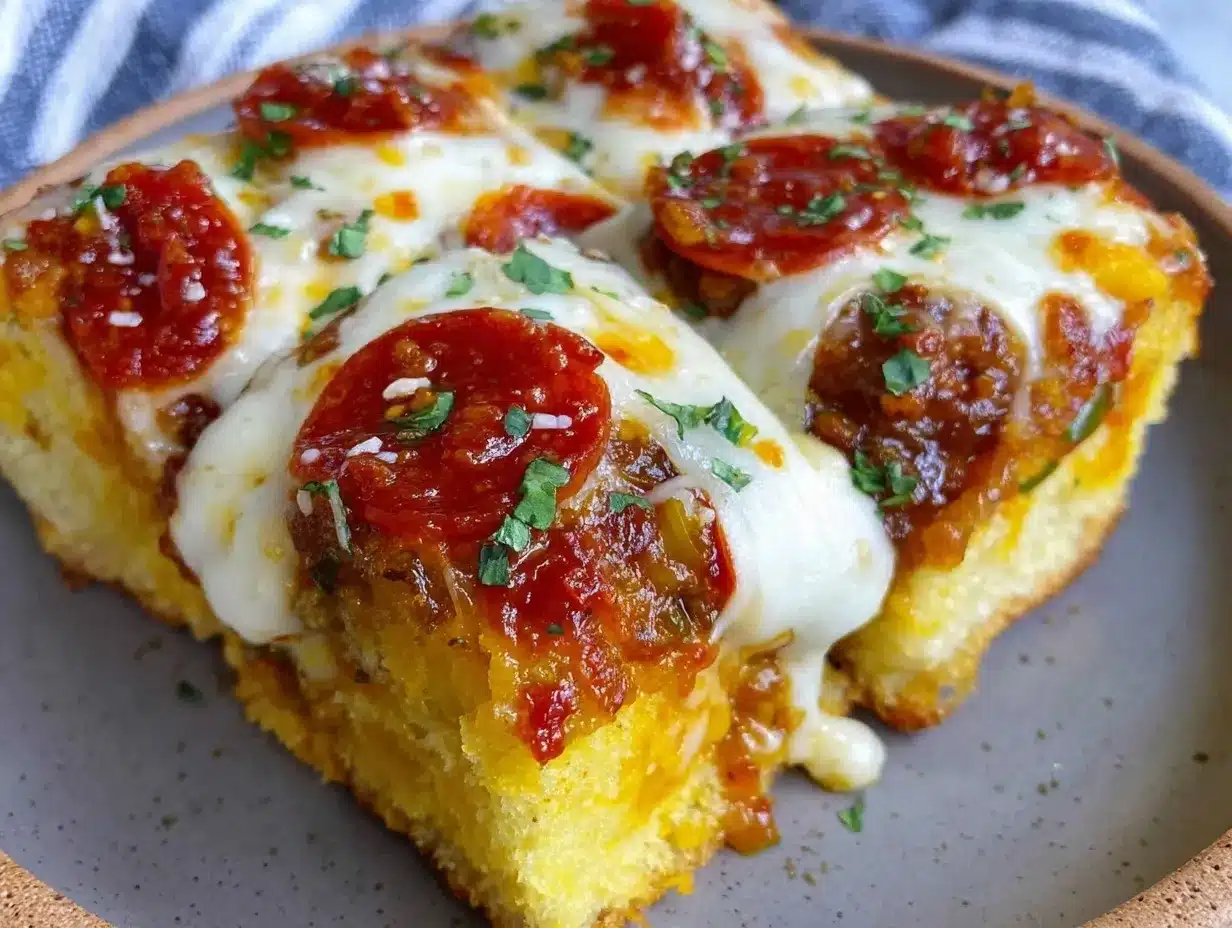
- Mix the Dough: In a large bowl, combine 2 ½ cups (310 g) flour, 1 teaspoon instant yeast, 1 teaspoon sugar, and 1 teaspoon salt. Stir to mix. Add 1 cup (240 ml) warm water and 1 tablespoon olive oil. Mix with a spoon or your hands until a rough dough forms. This takes about 5 minutes.
- Knead the Dough: Turn the dough onto a floured surface and knead for about 7–8 minutes until smooth and elastic. If the dough feels sticky, sprinkle a little more flour, but avoid adding too much to keep it tender.
- Let It Rise: Place the dough back in the bowl, cover loosely with a clean kitchen towel or plastic wrap, and let it rise in a warm spot for 45–60 minutes until doubled in size. I like to leave mine near the stove after cooking; the residual heat helps it rise nicely.
- Prepare the Sauce: While the dough rises, mix the tomato sauce with oregano, garlic powder, sugar, salt, and pepper in a small bowl. Taste and adjust seasoning. This sauce doesn’t need cooking; it’s the perfect easy layer for that school pizza vibe.
- Preheat Oven and Pizza Stone: About 30 minutes before baking, preheat your oven to 475°F (245°C). Place your pizza stone or inverted baking sheet inside to get hot. This step is key for a crispy crust.
- Shape the Dough: Once risen, punch down the dough gently and turn it onto a lightly floured surface. Roll or stretch it into a 12-inch (30 cm) circle or rectangle, depending on your pan. The dough should be about ¼ inch (6 mm) thick. If it springs back too much, let it rest for 5 minutes and try again.
- Assemble the Pizza: Place the dough on a piece of parchment paper (makes transferring easier). Spread the sauce evenly over the dough, leaving a small border around the edges. Sprinkle 2 cups (200 g) shredded mozzarella over the sauce. Add optional toppings if using.
- Bake the Pizza: Carefully slide the parchment with the pizza onto the hot stone or baking sheet. Bake for 12–15 minutes until the crust is golden and crispy, and the cheese is bubbling with slight browning spots. If you want extra crispiness, switch to broil for the last 1–2 minutes, but watch closely to avoid burning.
- Cool and Slice: Remove the pizza from the oven and let it cool for 5 minutes before slicing. This resting time helps the cheese set slightly and makes slicing cleaner.
If your crust isn’t quite as crispy as you hoped, try lowering the oven rack closer to the heat source next time or preheating the stone longer. Also, don’t overload the sauce or toppings—they can weigh down the dough and make it soggy.
Cooking Tips & Techniques
To get that signature crispy school cafeteria pizza crust, cooking technique is everything. Here are some tips I’ve learned along the way:
- Preheat the Baking Surface: Hot stones or baking sheets mimic the industrial pizza ovens schools used. Preheating for at least 30 minutes ensures a quick crust set and crispness.
- Keep Dough Hydrated but Not Wet: A slightly sticky dough feels intimidating, but it usually means a tender crust. Don’t add too much flour when kneading or shaping.
- Use Instant Yeast: It speeds up rising and works well when you’re short on time, but if you only have active dry yeast, proof it in warm water first.
- Don’t Overload the Sauce: School pizza sauce was never swimming in moisture. A thin, even layer keeps the crust crisp.
- Use Low-Moisture Mozzarella: It melts beautifully without releasing too much water, avoiding sogginess.
- Watch the Bake Time: The difference between perfect crispy and burnt is minutes here. Keep an eye in the last few minutes, especially if using broil.
- Experiment with Dough Thickness: Thinner dough gets crispier but can dry out; thicker dough stays chewy but risks sogginess. Find what works for your taste!
I once baked a pizza too thick and ended up with a doughy center—lesson learned. Also, I recommend prepping everything before the oven preheats so you’re ready to bake as soon as the stone is hot. Multitasking in the kitchen saves time and keeps things smooth.
Variations & Adaptations
This crispy school cafeteria pizza recipe is a great base for different tweaks depending on your mood or dietary needs. Here are a few ideas:
- Gluten-Free Crust: Swap the all-purpose flour with a gluten-free blend like Bob’s Red Mill 1-to-1. The texture will be a bit different but still tasty. Consider adding 1 teaspoon xanthan gum if your blend doesn’t contain it.
- Vegetarian or Vegan: Use dairy-free cheese shreds and add toppings like sautéed mushrooms, bell peppers, or olives. Use olive oil in the dough and a plant-based tomato sauce to keep it vegan.
- Spicy Twist: Add red pepper flakes to the sauce or sprinkle on top before baking for a little heat kick. A drizzle of hot honey after baking adds a surprisingly delicious contrast.
- Herb-Infused Dough: Mix dried basil or rosemary into the dough for an herby aroma that pairs beautifully with the simple sauce.
- Personal Favorite: I once added a thin layer of cream cheese under the sauce for a creamy tang that cut through the cheese richness. It was a happy accident when I ran out of regular sauce!
Whatever variation you try, just remember to keep the crust thin enough to maintain that crispy school pizza feeling.
Serving & Storage Suggestions
This pizza is best enjoyed fresh and hot, right out of the oven, with the cheese still gooey and the crust crackling when you bite into it. I like to serve it with a simple side salad or even some crunchy carrot sticks for a little freshness. A cold soda or iced tea pairs nicely, bringing that classic cafeteria vibe home.
To store leftovers, wrap slices tightly in plastic wrap or place them in an airtight container and refrigerate for up to 3 days. For longer storage, you can freeze slices individually on a baking sheet, then transfer to a freezer bag for up to 2 months.
When reheating, the key is to get the crust crispy again. I recommend reheating in a skillet over medium heat for 3–5 minutes or placing slices on a baking sheet under the broiler for just a couple of minutes. Microwaving is the quickest but tends to make the crust soggy (and nobody wants that!).
Flavors tend to deepen after refrigeration, so if you’re not in a rush, letting the pizza rest overnight can actually improve the taste.
Nutritional Information & Benefits
This crispy school cafeteria pizza recipe is a moderate treat with familiar ingredients. A typical slice (assuming 8 slices per 12-inch pizza) contains approximately:
| Calories | 280 kcal |
|---|---|
| Protein | 12 g |
| Carbohydrates | 32 g |
| Fat | 10 g |
| Fiber | 2 g |
The all-purpose flour provides energy-giving carbs, while mozzarella adds protein and calcium. Olive oil contributes heart-healthy fats. Using a simple homemade sauce lets you avoid added preservatives or excess sugar found in some store-bought pizza sauces.
This recipe can be made gluten-free or dairy-free, making it a flexible option for those with dietary restrictions. Plus, it’s a comforting meal that doesn’t rely on processed ingredients, which feels good when you want a little homemade care on your plate.
Conclusion
This crispy school cafeteria pizza recipe is a little slice of nostalgia and comfort rolled into one easy homemade meal. It’s straightforward, forgiving, and delivers that perfect crackly crust and melty cheese combo you remember from those school lunches. Honestly, it’s become a staple for my busy nights when I want something familiar but made with love (and without the sogginess!).
Feel free to customize it with your favorite toppings or tweak the dough thickness to your liking. I’d love to hear how your version turns out—maybe you’ll find your own happy accident like I did. So grab your ingredients, heat up that oven, and treat yourself to a simple pleasure that tastes like a cozy memory.
If you try this recipe, leave a comment sharing your experience or any fun twists you added. And hey, if you love the crispy crust here, you might enjoy the crispy garlic chicken I shared recently—it’s another favorite comfort dish from my kitchen to yours!
FAQs
What makes this school cafeteria pizza crust so crispy?
The secret is a hot baking surface like a pizza stone or inverted baking sheet and a thin dough rolled out evenly. Preheating the oven and stone for at least 30 minutes helps create that crackly bottom.
Can I make this pizza dough ahead of time?
Yes! You can prepare the dough and refrigerate it for up to 24 hours. Just bring it to room temperature before shaping and baking.
What’s the best way to reheat leftover pizza without losing crispiness?
Reheat slices in a skillet over medium heat or under the oven broiler for a couple of minutes. Avoid microwaving if you want to keep the crust crispy.
Can I use fresh tomatoes instead of canned tomato sauce?
You can, but you’ll need to cook and season fresh tomatoes down into a sauce first. For quick prep, plain canned tomato sauce with added oregano and garlic powder is easier and more authentic to the school pizza flavor.
Is this recipe suitable for kids?
Absolutely! The simple flavors and crispy texture are usually a hit with kids. You can keep toppings minimal or add their favorites for a personalized touch.
Pin This Recipe!
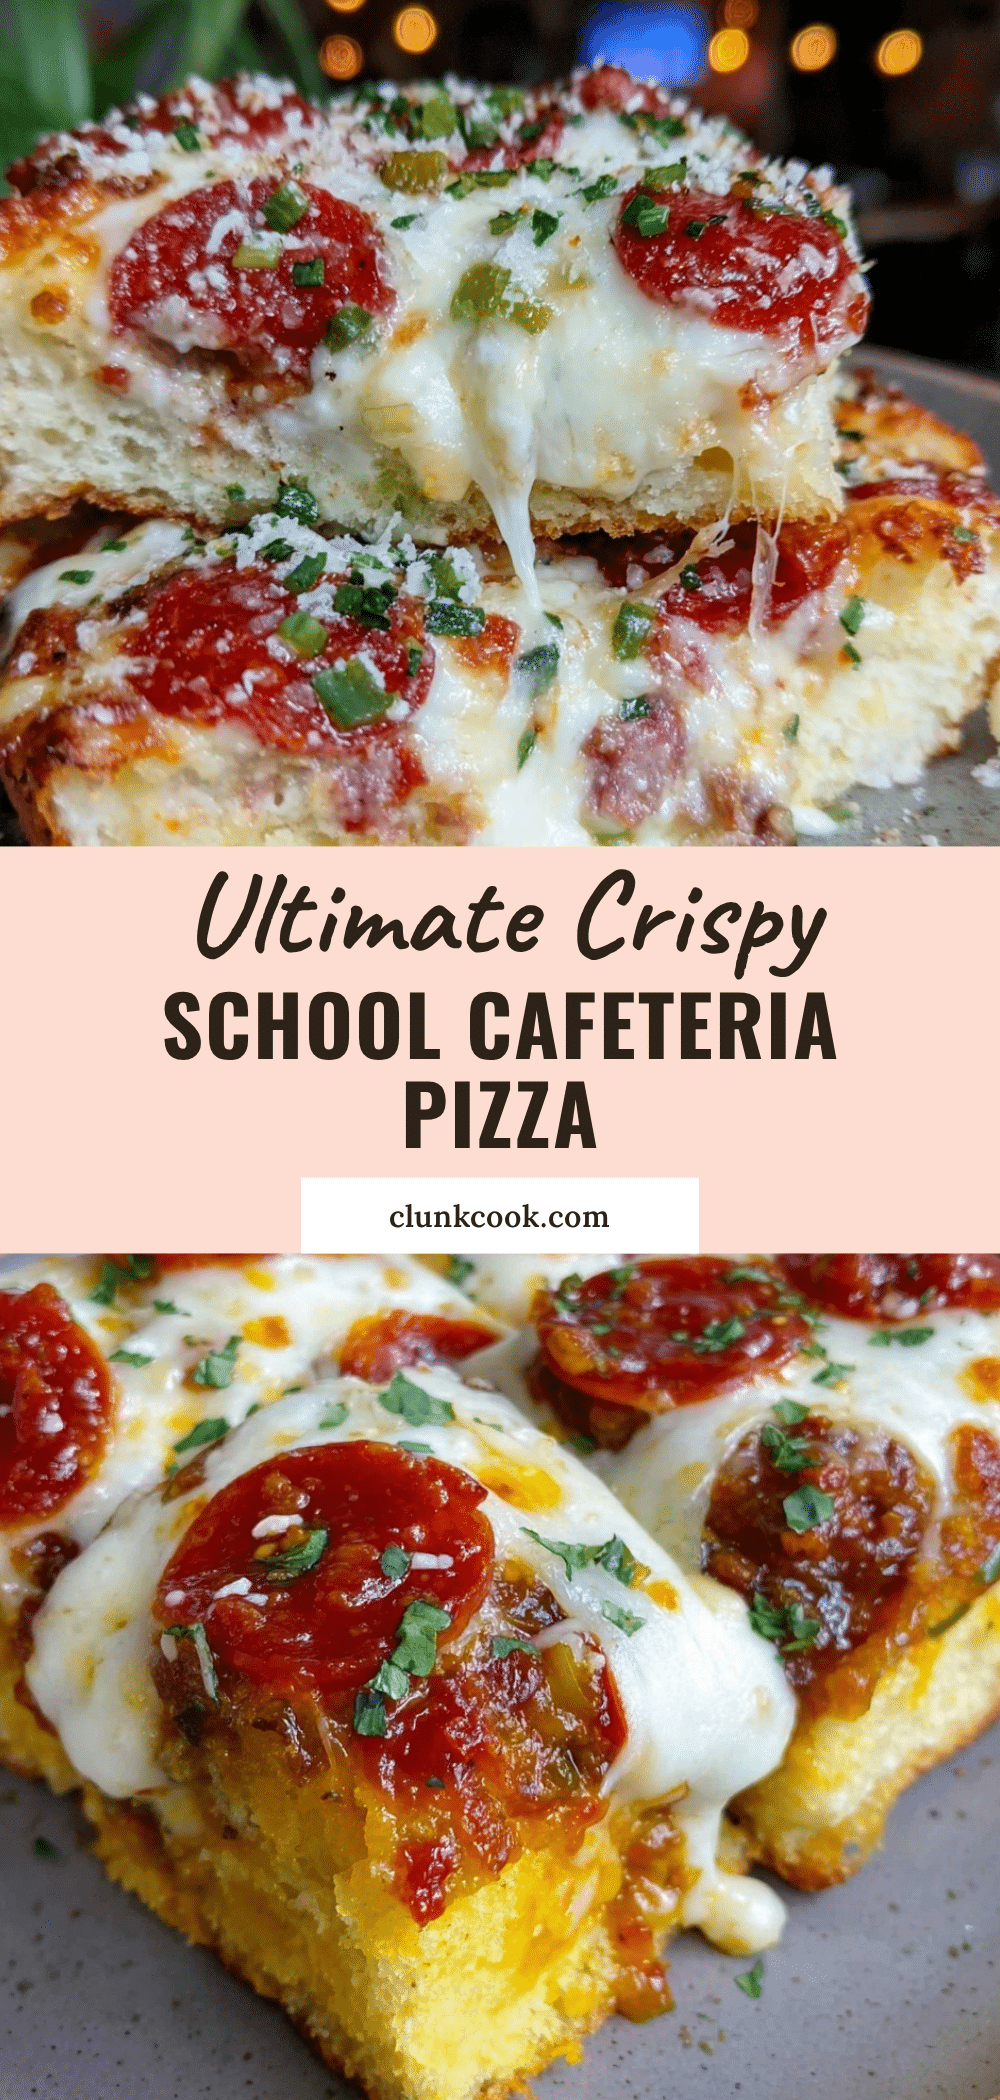
Crispy School Cafeteria Pizza Recipe Easy Homemade Comfort Food

A nostalgic, crispy school cafeteria-style pizza with a crackly crust, slightly sweet tomato sauce, and gooey mozzarella cheese. Easy to make at home with simple pantry staples.
- Prep Time: 15 minutes
- Cook Time: 15 minutes
- Total Time: 1 hour 15 minutes
- Yield: 8 servings 1x
- Category: Main Course
- Cuisine: American
Ingredients
- 2 ½ cups (310 g) all-purpose flour, plus extra for dusting
- 1 teaspoon instant yeast
- 1 teaspoon sugar
- 1 teaspoon salt
- 1 tablespoon olive oil
- 1 cup (240 ml) warm water (about 110°F / 43°C)
- 1 cup (240 ml) canned tomato sauce (plain, no herbs added)
- 1 teaspoon dried oregano
- ½ teaspoon garlic powder
- 1 teaspoon sugar
- Salt and pepper, to taste
- 2 cups (200 g) shredded mozzarella cheese (low-moisture part-skim)
- Optional: sliced pepperoni or your favorite toppings
Instructions
- Mix the Dough: In a large bowl, combine 2 ½ cups (310 g) flour, 1 teaspoon instant yeast, 1 teaspoon sugar, and 1 teaspoon salt. Stir to mix. Add 1 cup (240 ml) warm water and 1 tablespoon olive oil. Mix with a spoon or your hands until a rough dough forms. This takes about 5 minutes.
- Knead the Dough: Turn the dough onto a floured surface and knead for about 7–8 minutes until smooth and elastic. If the dough feels sticky, sprinkle a little more flour, but avoid adding too much to keep it tender.
- Let It Rise: Place the dough back in the bowl, cover loosely with a clean kitchen towel or plastic wrap, and let it rise in a warm spot for 45–60 minutes until doubled in size.
- Prepare the Sauce: While the dough rises, mix the tomato sauce with oregano, garlic powder, sugar, salt, and pepper in a small bowl. Taste and adjust seasoning.
- Preheat Oven and Pizza Stone: About 30 minutes before baking, preheat your oven to 475°F (245°C). Place your pizza stone or inverted baking sheet inside to get hot.
- Shape the Dough: Once risen, punch down the dough gently and turn it onto a lightly floured surface. Roll or stretch it into a 12-inch (30 cm) circle or rectangle, about ¼ inch (6 mm) thick.
- Assemble the Pizza: Place the dough on a piece of parchment paper. Spread the sauce evenly over the dough, leaving a small border around the edges. Sprinkle 2 cups (200 g) shredded mozzarella over the sauce. Add optional toppings if using.
- Bake the Pizza: Carefully slide the parchment with the pizza onto the hot stone or baking sheet. Bake for 12–15 minutes until the crust is golden and crispy, and the cheese is bubbling with slight browning spots. For extra crispiness, broil for the last 1–2 minutes, watching closely.
- Cool and Slice: Remove the pizza from the oven and let it cool for 5 minutes before slicing.
Notes
Preheat the baking surface for at least 30 minutes for a crispy crust. Use low-moisture mozzarella to avoid sogginess. Avoid overloading sauce or toppings to keep crust crisp. Dough can be refrigerated up to 24 hours before baking. Reheat pizza in skillet or under broiler to maintain crispiness.
Nutrition
- Serving Size: 1 slice (1/8 of 12-i
- Calories: 280
- Fat: 10
- Carbohydrates: 32
- Fiber: 2
- Protein: 12
Keywords: school cafeteria pizza, crispy pizza, homemade pizza, comfort food, easy pizza recipe, nostalgic pizza, quick pizza dough


