Love this? Save it for later!
Share the inspiration with your friends
It was 10:47 PM on a random Wednesday, and I was standing in front of my open freezer, staring at a box of those little sealed sandwiches my kids had been begging for. The price tag stared right back at me—nearly ten bucks for a box that would disappear in two days. I shut the freezer door, opened the pantry, and had one of those weird, impulsive ideas that only hit you when you’re half-tired and fully stubborn. I grabbed a loaf of bread, a jar of peanut butter, and some strawberry jam, thinking, “There has to be a better way.”
Honestly, I didn’t expect it to work on the first try. I mean, those store-bought sandwiches have that perfectly sealed edge and that soft, defrosted texture that feels like magic. But let me tell you, after a few messy attempts—and one incident where I used too much jam and it squirted out the side like a strawberry volcano—I figured it out. The trick is in the bread choice and the sealing method. And the best part? You can make a whole batch in about fifteen minutes.
Maybe you’ve been there, standing in the grocery aisle, doing the math on how many of those little pouches you can actually afford. Or maybe you just want a quick breakfast option that doesn’t involve a full production every morning. Either way, these easy copycat Uncrustables freezer sandwiches are about to change your life. They freeze beautifully, taste just like the real thing, and cost a fraction of the price. I’ve been making them for months now, and I honestly can’t go back to buying the boxed ones.
Why You’ll Love This Recipe
Look, I’ve tested this recipe about a dozen times—and fed them to some pretty tough critics (my kids, my neighbor who swears by the store-bought kind, and even my mom who said, “Why didn’t I think of that?”). So trust me when I say these sandwiches deliver on every level.
- Budget-Friendly: A whole loaf of bread, a jar of peanut butter, and some jam will make at least six sandwiches for a fraction of the cost of the boxed version. You’re saving serious money here.
- Simple Ingredients: No fancy grocery trips needed. You likely already have everything in your kitchen right now. Bread, peanut butter, jam—that’s it.
- Perfect for Busy Mornings: Grab one from the freezer, toss it in a lunchbox, and it’s thawed by lunchtime. Or microwave it for 20 seconds if you need it now.
- Crowd-Pleaser: Kids absolutely love these, but adults do too. I’ve packed them for road trips, picnics, and even late-night snacks.
- Unbelievably Delicious: The texture is soft and pillowy, the strawberry jam adds that perfect sweet-tart pop, and the peanut butter gives it that creamy, nutty richness. It’s comfort food at its simplest.
What makes this recipe different from the rest? It’s the technique. Most people just slap some PB&J on bread and call it a day, but those sandwiches get soggy. My method uses a simple trick—toasting the bread ever so slightly before assembling—that keeps the bread from getting mushy when frozen and thawed. Plus, I’ve perfected the sealing method so you get that classic crimped edge without needing a fancy gadget.
This recipe isn’t just good—it’s the kind that makes you close your eyes after the first bite. It’s comfort food reimagined: cheaper, faster, and with the same soul-soothing satisfaction. Perfect for impressing your kids without stress, or turning a simple breakfast into something memorable.
What Ingredients You Will Need
This recipe uses simple, everyday ingredients to deliver that classic PB&J flavor with a freezer-friendly twist. Here’s what you’ll need to gather:
- Bread: 8 slices of soft white bread or whole wheat bread. I prefer Wonder Bread or Nature’s Own for that soft, pillowy texture that freezes well. Avoid crusty or dense breads—they don’t seal as nicely.
- Creamy Peanut Butter: ½ cup (about 120g). I recommend Skippy or Jif for the best texture and flavor. Natural peanut butter works too, but it can separate and make the bread a bit oily after freezing.
- Strawberry Jam or Preserves: ½ cup (about 160g). Smucker’s is my go-to for that classic, sweet strawberry flavor. You can use jelly, jam, or preserves—just avoid anything with large fruit chunks that might make sealing tricky.
- Butter (optional): 2 tablespoons, softened. Spreading a thin layer of butter on the outside of the bread before sealing helps create that golden, toasted edge when you cook them—but it’s totally optional if you’re just freezing them raw.
Ingredient Selection Tips: For the best results, use bread that’s fresh but not too soft—day-old bread actually works better because it’s less likely to tear when you press the edges. If you’re using natural peanut butter, stir it really well before spreading to ensure even consistency. And for the jam, look for one that’s thick and spreadable—runny jam will make a mess when you’re sealing the edges.
Substitution Guidance: Need a gluten-free option? Use Canyon Bakehouse gluten-free bread—it freezes surprisingly well. For a nut-free version, swap peanut butter with SunButter or WowButter. And if you’re not a fan of strawberry, any flavor of jam works—grape, raspberry, or even apple butter are all delicious.
Equipment Needed
You don’t need much to make these sandwiches, which is part of the beauty. Here’s what you’ll want on hand:
- Rolling Pin: For flattening the bread slightly so it seals better. A wine bottle works in a pinch!
- Round Cookie Cutter or Large Biscuit Cutter: About 4 inches in diameter. This gives you that classic Uncrustables shape. No cutter? Use a wide-mouth mason jar ring or just cut squares with a knife.
- Fork: For crimping the edges if you’re not using a cutter. This is my go-to method when I’m feeling lazy—it works perfectly.
- Baking Sheet: Lined with parchment paper, for freezing the sandwiches flat before storing them in bags.
- Freezer-Safe Bags or Containers: For storing the finished sandwiches. Ziploc freezer bags work great.
- Butter Knife: For spreading the peanut butter and jam evenly. A small offset spatula works even better.
Personal Experience: I started out using a knife to cut the shapes, and honestly, it was a mess. The round cookie cutter was a game-changer—it seals the edges and cuts the shape in one motion. I found mine at a thrift store for two bucks, so keep an eye out. And if you’re making a big batch, a pie crust crimper or empanada press speeds things up considerably.
Preparation Method
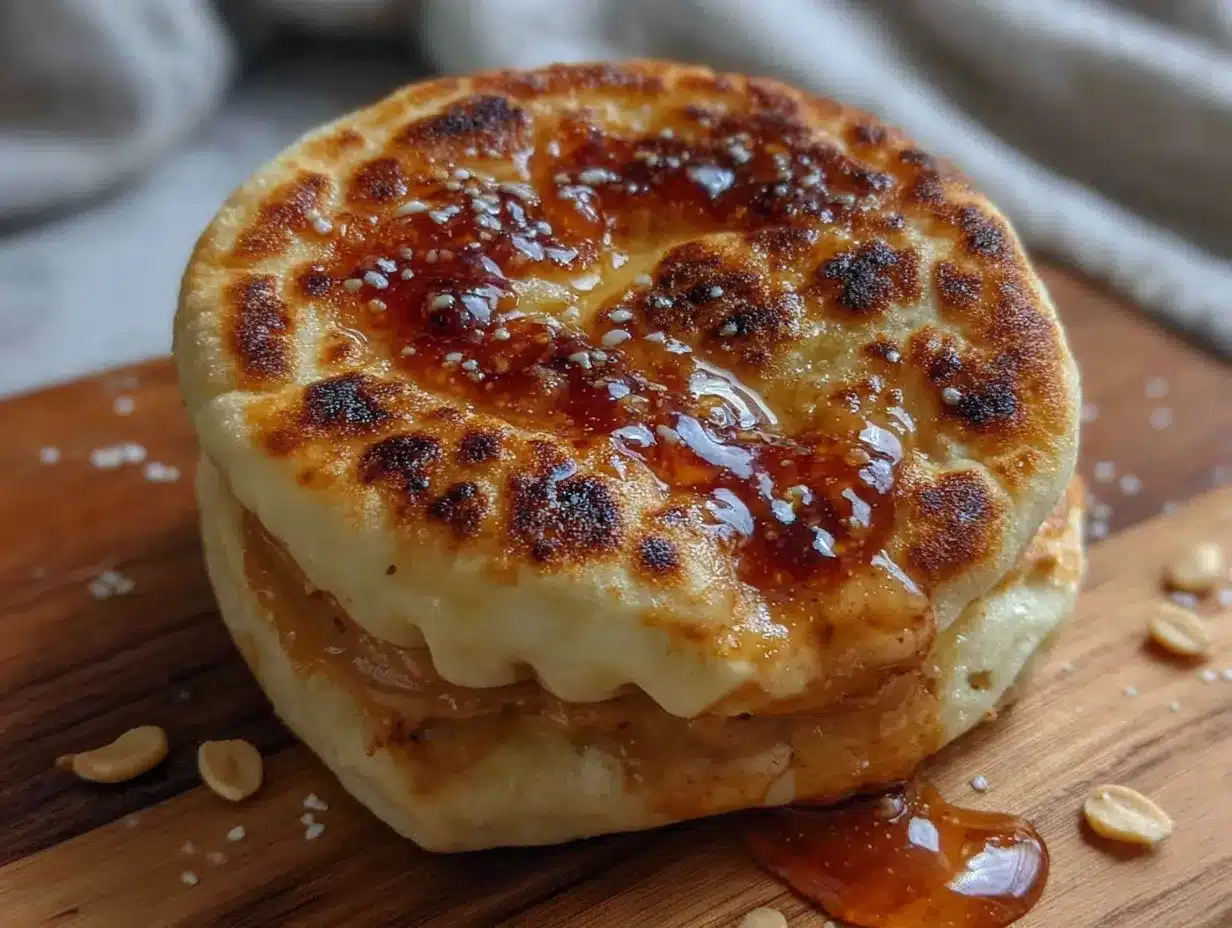
Follow these steps carefully, and you’ll have a freezer full of perfect little sandwiches in no time. I’ve included all the little tricks I learned the hard way so you don’t have to.
- Prepare the Bread: Lay out 8 slices of bread on a clean work surface. Using your rolling pin, gently roll each slice to flatten it slightly—about ¼ inch thick. This makes the bread more pliable and helps it seal better. Don’t press too hard or you’ll tear the bread. Light, even pressure is key.
- Spread the Peanut Butter: Take 4 slices of the flattened bread and spread about 2 tablespoons of peanut butter on each one. Leave a ½-inch border around the edges—this is crucial for sealing. If you spread the PB all the way to the edge, it will ooze out when you press the sandwich together.
- Add the Jam: On the same 4 slices, spread about 2 tablespoons of strawberry jam on top of the peanut butter. Again, leave that border. Pro tip: If your jam is runny, spoon it into a small bowl and stir it first to break up any large fruit pieces.
- Top with Remaining Bread: Place the remaining 4 slices of flattened bread on top of the filled slices. Press down gently around the edges to start the sealing process.
- Seal the Edges: This is the most important step. Using a fork, press down firmly around the entire edge of each sandwich, creating a crimped seal. Go around twice to make sure it’s tight. If you’re using a round cookie cutter, press down firmly and twist slightly to cut and seal in one motion.
- Trim the Crusts (Optional): If you want that classic Uncrustables look, use a sharp knife or pizza cutter to trim off the crusts. I usually leave them on for extra fiber—my kids don’t even notice.
- Flash Freeze: Place the sealed sandwiches on a parchment-lined baking sheet in a single layer. Don’t let them touch each other. Pop the sheet in the freezer for at least 2 hours, or until the sandwiches are solid. This step prevents them from sticking together when you bag them up.
- Package for Storage: Once frozen solid, transfer the sandwiches to a freezer-safe bag or container. Squeeze out as much air as possible before sealing. Label with the date—they’ll keep for up to 3 months.
Sensory Cues: When you press the fork into the bread, you should feel a slight resistance but not so much that the bread tears. The edges should look like a pie crust—uniformly crimped and sealed. When you pick up a finished sandwich, it should feel sturdy, not floppy. The peanut butter and jam should be completely contained, with no oozing.
Cooking Tips & Techniques
I’ve made these sandwiches more times than I can count, and I’ve definitely had my share of failures. Here’s what I’ve learned:
- Don’t Overfill: This is the number one mistake. Too much filling and the sandwiches won’t seal properly—they’ll burst open in the freezer or when you thaw them. Stick to about 2 tablespoons of each spread.
- Room Temperature Ingredients: Let the peanut butter and jam come to room temperature before spreading. Cold peanut butter tears the bread, and cold jam doesn’t spread evenly. Trust me, I learned this after ruining three slices in a row.
- Use the Right Bread: Soft, squishy white bread works best. Whole wheat is fine, but avoid anything with seeds or nuts on the crust—they make sealing difficult. I once tried using a hearty multigrain bread and the edges wouldn’t seal at all.
- Freeze Flat, Store Upright: Flash freezing the sandwiches flat on a baking sheet ensures they maintain their shape. Once frozen, you can store them upright like vinyl records to save space.
- Double Seal for Leak-Proof Sandwiches: If you’re packing these for lunch and want to avoid any jam disasters, go around the edges twice with your fork. The double seal is worth the extra 30 seconds.
- Timing is Everything: Make these on a Sunday afternoon when you have a few minutes. A batch of 8 sandwiches takes about 20 minutes from start to freezer. Future you will be so grateful.
Personal Failure: I once tried to speed things up by using a sandwich press, thinking it would seal and toast them in one step. Big mistake. The jam melted and leaked everywhere, and I spent an hour cleaning the press. Stick to the fork method—it’s simple and it works.
Variations & Adaptations
Once you’ve mastered the basic recipe, the possibilities are endless. Here are some variations I’ve tried and loved:
- Nutella & Banana: Swap the peanut butter for Nutella and add a few thin slices of banana. These taste like a dessert—my kids go crazy for them.
- Fluffernutter: Use marshmallow fluff instead of jam for a New England classic. The fluff freezes beautifully and stays soft when thawed.
- Apple Cinnamon: Mix ½ cup of apple butter with ½ teaspoon of cinnamon and use that instead of jam. It tastes like autumn in a sandwich.
- Healthy Twist: Use whole wheat bread, natural peanut butter, and sugar-free jam. These still freeze perfectly and are a great option for school lunches.
- Savory Version: Believe it or not, you can make savory freezer sandwiches too. Use cream cheese and cucumber slices, or ham and cheese. Just skip the jam!
Dietary Adaptations: For a gluten-free version, use your favorite gluten-free bread. Just note that GF bread can be more fragile, so handle it gently when rolling and sealing. For a vegan option, use plant-based butter and a nut-free spread like SunButter. I’ve tested both and they work well—just don’t overfill.
Personal Favorite: My current obsession is the “PB&J with a Twist”—I add a thin layer of cream cheese under the jam. It adds a tangy richness that takes the sandwich to another level. Try it once and you’ll be hooked.
Serving & Storage Suggestions
These sandwiches are designed for convenience, but here’s how to get the best results every time:
- For Lunchboxes: Take a frozen sandwich straight from the freezer and pop it in a lunchbox. It will be perfectly thawed by lunchtime—soft, not soggy, and ready to eat.
- For Quick Breakfast: Microwave a frozen sandwich for 20-25 seconds. The peanut butter gets slightly warm and melty, and the bread stays soft. It’s like a warm hug in sandwich form.
- For Room Temperature: Let the sandwich sit on the counter for about 30 minutes. This is my preferred method—the texture is closest to fresh.
- Storage: Keep frozen sandwiches in a sealed freezer bag for up to 3 months. If you’re stacking them, separate layers with parchment paper to prevent sticking.
- Reheating Tips: For a crispy exterior, toast the thawed sandwich in a pan with a little butter for 1-2 minutes per side. The peanut butter gets gooey and the bread gets golden—it’s a whole different experience.
Flavor Development: Honestly, these sandwiches taste better after they’ve been frozen for a few days. The flavors meld together somehow, and the texture becomes more uniform. I actually prefer day-old frozen sandwiches to fresh ones. Don’t ask me why—it’s just one of those kitchen mysteries.
Nutritional Information & Benefits
Here’s the estimated nutritional breakdown for one sandwich (using white bread, creamy peanut butter, and strawberry jam):
| Nutrient | Amount Per Serving |
|---|---|
| Calories | 320 |
| Total Fat | 16g |
| Saturated Fat | 3g |
| Carbohydrates | 38g |
| Fiber | 3g |
| Sugar | 14g |
| Protein | 10g |
| Sodium | 320mg |
Health Benefits: Peanut butter is packed with protein and healthy fats that keep you full and satisfied. Strawberry jam provides a dose of vitamin C and antioxidants (especially if you use a brand with real fruit). Whole wheat bread adds extra fiber for digestive health. These sandwiches are a balanced option for a quick breakfast or lunch—they’ve got carbs for energy, protein for satiety, and just enough sweetness to feel like a treat.
Dietary Considerations: This recipe can be made gluten-free, vegan, or nut-free with simple substitutions. It’s naturally dairy-free (unless you add butter). For lower sugar, use sugar-free jam and natural peanut butter. I personally love that I can control exactly what goes into these—no preservatives, no weird additives, just real food.
Conclusion
These easy copycat Uncrustables freezer sandwiches are one of those recipes that just makes life simpler. They’re budget-friendly, incredibly easy to make, and they save you time on those chaotic mornings when every minute counts. Whether you’re packing school lunches, prepping for a road trip, or just want a quick snack that actually tastes good, these little sandwiches deliver every single time.
I love that I can customize them however I want—different jams, different nut butters, even savory versions for a change of pace. And honestly, there’s something satisfying about pulling a homemade sandwich out of the freezer instead of a box from the store. It feels like a small win, but it adds up.
So go ahead—grab your bread, your peanut butter, and your jam. Make a big batch this weekend. Your future self (and your kids, if you’re sharing) will thank you. And when you do, drop a comment below and let me know how they turned out. Did you try a fun variation? Did your kids love them? I want to hear all about it. Happy cooking!
Frequently Asked Questions
Can I use natural peanut butter for these sandwiches?
Yes, but stir it really well first. Natural peanut butter can separate, and the oil can make the bread soggy. I recommend using a standard creamy peanut butter for the best texture and sealing results.
How long do these sandwiches last in the freezer?
They’ll stay fresh for up to 3 months in a sealed freezer bag. After that, the bread might start to get freezer burn. I always label mine with the date so I know when to use them up.
Do I have to toast the bread before assembling?
No, you don’t have to toast it. I actually prefer using fresh, untoasted bread because it stays softer after freezing. The rolling step is enough to make the bread pliable for sealing.
Can I make these without a round cookie cutter?
Absolutely! You can use a knife to cut the sandwiches into squares or rectangles. Just crimp the edges with a fork to seal them. The shape doesn’t matter—they’ll taste the same.
Can I use jelly instead of jam?
Yes, jelly works perfectly. Just be aware that jelly is usually thinner and more runny, so be extra careful when sealing the edges. I recommend using a thicker jam or preserves for the best results.
Pin This Recipe!
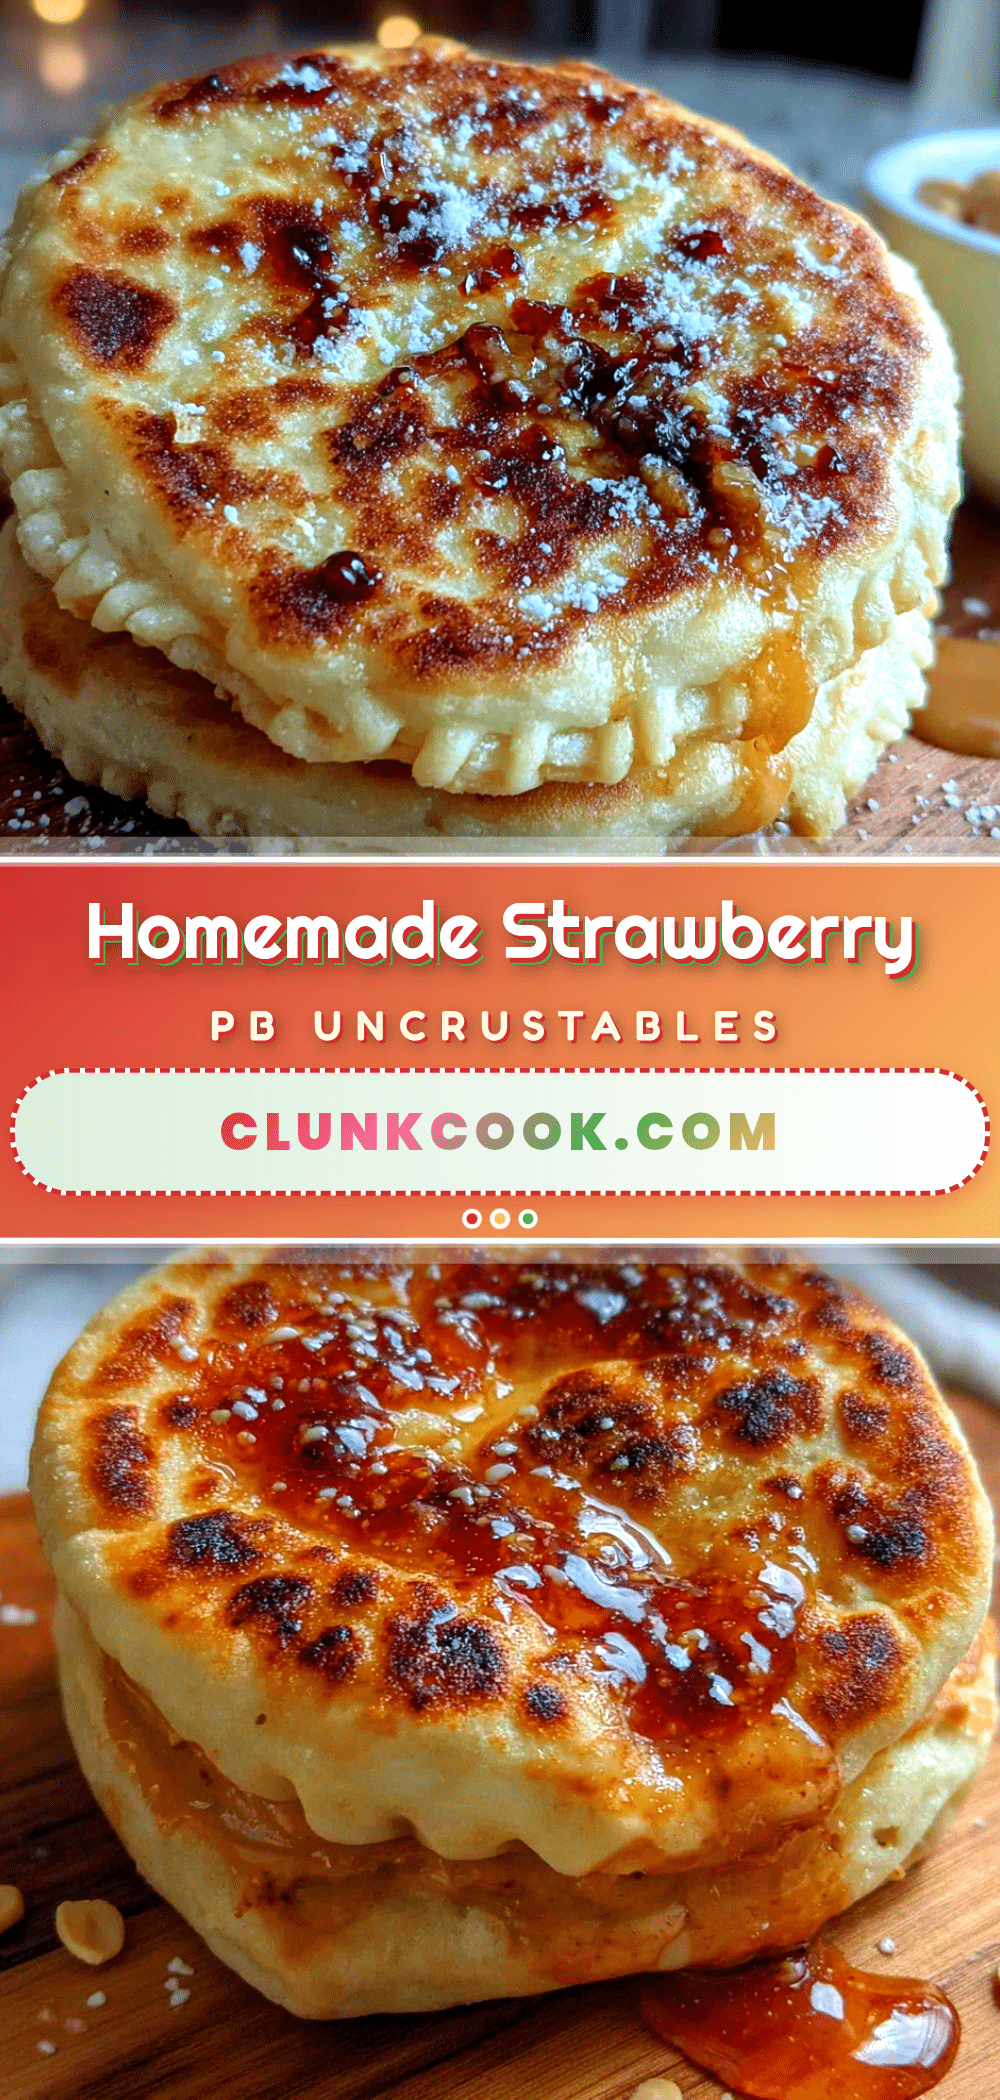
Easy Copycat Uncrustables: Best Strawberry PB Freezer Sandwiches
These easy copycat Uncrustables freezer sandwiches are budget-friendly, incredibly easy to make, and perfect for busy mornings. Made with simple ingredients like bread, peanut butter, and strawberry jam, they freeze beautifully and taste just like the real thing.
- Prep Time: 15 minutes
- Cook Time: 0 minutes
- Total Time: 2 hours 15 minutes (including freezing time)
- Yield: 4 servings 1x
- Category: Snack
- Cuisine: American
Ingredients
- 8 slices soft white bread or whole wheat bread (e.g., Wonder Bread or Nature’s Own)
- ½ cup creamy peanut butter (e.g., Skippy or Jif)
- ½ cup strawberry jam or preserves (e.g., Smucker’s)
- 2 tablespoons butter, softened (optional)
Instructions
- Prepare the Bread: Lay out 8 slices of bread on a clean work surface. Using a rolling pin, gently roll each slice to flatten it slightly—about ¼ inch thick. This makes the bread more pliable and helps it seal better. Don’t press too hard or you’ll tear the bread. Light, even pressure is key.
- Spread the Peanut Butter: Take 4 slices of the flattened bread and spread about 2 tablespoons of peanut butter on each one. Leave a ½-inch border around the edges—this is crucial for sealing. If you spread the PB all the way to the edge, it will ooze out when you press the sandwich together.
- Add the Jam: On the same 4 slices, spread about 2 tablespoons of strawberry jam on top of the peanut butter. Again, leave that border. Pro tip: If your jam is runny, spoon it into a small bowl and stir it first to break up any large fruit pieces.
- Top with Remaining Bread: Place the remaining 4 slices of flattened bread on top of the filled slices. Press down gently around the edges to start the sealing process.
- Seal the Edges: This is the most important step. Using a fork, press down firmly around the entire edge of each sandwich, creating a crimped seal. Go around twice to make sure it’s tight. If you’re using a round cookie cutter, press down firmly and twist slightly to cut and seal in one motion.
- Trim the Crusts (Optional): If you want that classic Uncrustables look, use a sharp knife or pizza cutter to trim off the crusts. I usually leave them on for extra fiber—my kids don’t even notice.
- Flash Freeze: Place the sealed sandwiches on a parchment-lined baking sheet in a single layer. Don’t let them touch each other. Pop the sheet in the freezer for at least 2 hours, or until the sandwiches are solid. This step prevents them from sticking together when you bag them up.
- Package for Storage: Once frozen solid, transfer the sandwiches to a freezer-safe bag or container. Squeeze out as much air as possible before sealing. Label with the date—they’ll keep for up to 3 months.
Notes
For best results, use fresh but not too soft bread; day-old bread works better. Let peanut butter and jam come to room temperature before spreading. Double seal the edges for leak-proof sandwiches. Flash freeze flat before storing upright to save space.
Nutrition
- Serving Size: 1 sandwich
- Calories: 320
- Sugar: 14
- Sodium: 320
- Fat: 16
- Saturated Fat: 3
- Carbohydrates: 38
- Fiber: 3
- Protein: 10
Keywords: copycat uncrustables, freezer sandwiches, PB&J, strawberry, peanut butter, freezer meal, lunchbox, kid-friendly


