Love this? Save it for later!
Share the inspiration with your friends
Hatch green chile season is basically a religious holiday in New Mexico, and I say that as someone who didn’t grow up there. I was visiting a friend in Santa Fe a few years back, and her neighbor—a retired electrician named Carlos—was roasting chiles in his driveway. The smell hit me before I even got out of the car. That smoky, slightly sweet, almost floral aroma stopped me cold. Carlos wasn’t trying to impress anyone. He was just standing there in a faded flannel shirt, turning a wire drum over a propane burner like it was the most ordinary Tuesday of his life.
I walked over, and he handed me a paper bag of warm roasted chiles without me even asking. “Freeze these,” he said. “You’ll thank me in January.” I honestly had no idea what I was going to do with a five-pound bag of roasted peppers, but I nodded like I had a plan. That night, my friend made these little cheeseburger sliders with some of the chiles, and I swear I almost cried. The way the roasted green chile melted into the American cheese, the little bit of heat that crept up on you—it was the kind of meal that makes you close your eyes on the first bite.
I’ve been making my own version ever since, and let me tell you, these Hatch green chile cheeseburger sliders are the recipe I get asked for the most. Maybe you’ve been there—you taste something at someone else’s house and you know you’ll never be satisfied with your old way of doing things again. That’s exactly what happened to me. I tweaked the seasoning, figured out the perfect bun-to-patty ratio, and landed on a method that makes these sliders dangerously easy to eat. You’ll thank me later.
Why You’ll Love This Recipe
These aren’t just sliders. They’re a full-on flavor experience wrapped in a soft bun, and they come together faster than you’d expect. Here’s why this recipe earns a permanent spot in your rotation:
- Quick & Easy: From start to finish, these sliders are ready in about 30 minutes. Perfect for game day, busy weeknights, or when the craving for something smoky and cheesy hits out of nowhere.
- Simple Ingredients: Ground beef, slider buns, American cheese, and roasted Hatch chiles. That’s basically the whole grocery list. No weird specialty items required.
- Perfect for Gatherings: Sliders are the ultimate crowd food. They’re easy to hold, easy to customize, and everyone from picky kids to adventurous eaters loves them.
- Crowd-Pleaser: I’ve served these at backyard barbecues, Super Bowl parties, and casual dinner with friends. They disappear every single time. No leftovers, ever.
- Unbelievably Delicious: The combination of juicy beef, melted cheese, and roasted green chile is next-level comfort food. The chiles add a subtle smokiness and a gentle heat that builds with each bite.
What makes these sliders different from the average burger recipe is the chile. Most burger recipes treat the toppings as an afterthought. Here, the roasted Hatch green chile is the star. The char from the roasting process adds a depth of flavor you just can’t get from canned chiles. Plus, the cheese melts into the chile, creating this gooey, savory layer that holds everything together.
This is the kind of recipe that makes you look like a hero with minimal effort. It’s comfort food reimagined—faster, more flavorful, and with the same soul-soothing satisfaction as a full-size burger. Honestly, I think I like these sliders better than regular burgers now. Don’t tell my grill.
What Ingredients You Will Need
This recipe uses simple, wholesome ingredients to deliver bold flavor and satisfying texture without the fuss. Most of these are pantry staples or easy to find at any grocery store, especially during Hatch chile season.
- For the patties:
- 1 pound ground beef (80/20 blend works best for juicy sliders)
- 1 teaspoon salt
- ½ teaspoon black pepper
- ½ teaspoon garlic powder
- ½ teaspoon onion powder
- 1 tablespoon Worcestershire sauce (adds umami depth)
- For the chiles:
- 4-6 fresh Hatch green chiles (or frozen roasted Hatch chiles, thawed)
- 1 tablespoon olive oil (for roasting, if using fresh)
- For the sliders:
- 8 slider buns (I prefer brioche or potato rolls for softness)
- 8 slices American cheese (or pepper jack for extra heat)
- 2 tablespoons butter, melted (for toasting buns)
- Optional toppings: sliced red onion, lettuce, tomato, pickles, mayo, or mustard
Ingredient Tips: If you can’t find fresh Hatch chiles, look for frozen roasted Hatch chiles in the freezer section of well-stocked grocery stores. The brand 505 Southwestern makes a decent jarred version, but honestly, nothing beats the real roasted ones. For the beef, don’t go leaner than 85/15. Sliders are small, so you need that fat to keep them moist. I’ve tried 93/7 and they came out dry—learn from my mistake.
Substitution Guidance: Use ground turkey or chicken for a lighter option (just add a tablespoon of olive oil to the mix to keep it moist). For a gluten-free version, use gluten-free slider buns or lettuce wraps. If you want less heat, remove the seeds and membranes from the chiles before roasting.
Equipment Needed
You don’t need a fancy kitchen to make these sliders, but a few tools will make the process smoother:
- Cast iron skillet or griddle: A flat cooking surface gives you a nice sear on the patties. I use my 12-inch cast iron skillet, and it works like a charm.
- Sharp knife and cutting board: For prepping the chiles and any toppings.
- Small bowl: For mixing the seasoning into the beef.
- Spatula: A thin metal spatula is best for flipping sliders without breaking them.
- Pastry brush: For brushing melted butter on the buns before toasting.
- Sheet pan or baking sheet: If you’re roasting fresh chiles in the oven.
- Tongs: For handling hot chiles and flipping them during roasting.
Budget-Friendly Options: Don’t have a cast iron skillet? A non-stick frying pan works fine. No pastry brush? Use a paper towel dipped in melted butter. No tongs? Two forks work in a pinch. The key is the chiles and the beef—the tools are just helpers.
I’ve made these sliders on a camping stove with a beat-up aluminum pan, and they were still incredible. Don’t overthink the equipment.
Preparation Method
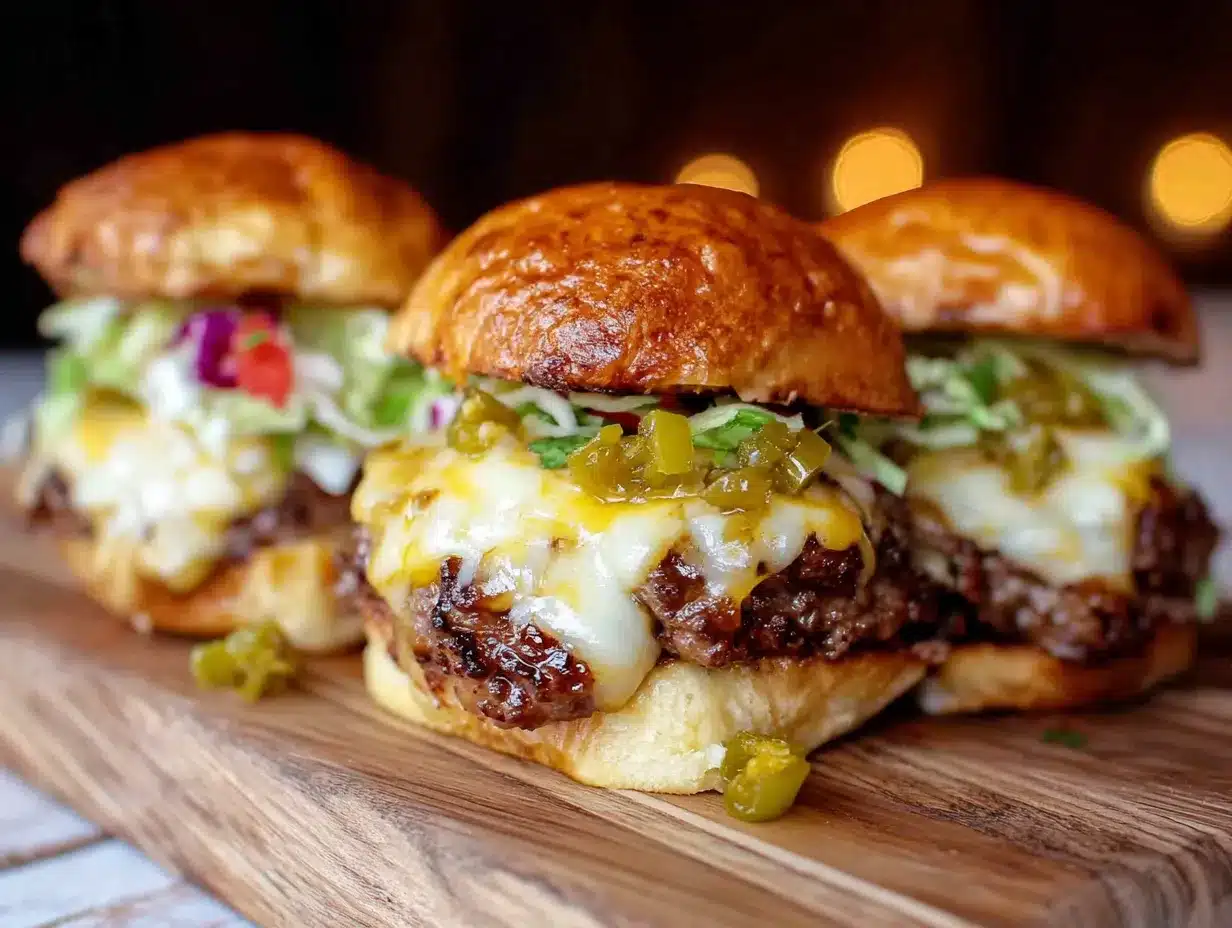
Let’s get cooking. This whole process takes about 30 minutes from start to finish. Here’s the step-by-step:
- Roast the chiles (if using fresh): Place your Hatch green chiles on a baking sheet lined with foil. Broil on high for 5-7 minutes per side, until the skin is charred and blistered. You want them blackened in spots—that’s where the smoky flavor comes from. Alternatively, you can roast them directly over a gas flame on your stovetop using tongs. Once charred, transfer them to a bowl and cover with plastic wrap for 10 minutes. This steams the skin loose.
- Peel and prep the chiles: After steaming, rub the blackened skin off with your fingers or a paper towel. Don’t rinse them—you’ll wash away flavor. Remove the stems and seeds (leave some seeds if you want more heat). Slice the chiles into strips about 2 inches long. Set aside.
- Season the beef: In a medium bowl, combine the ground beef, salt, pepper, garlic powder, onion powder, and Worcestershire sauce. Mix gently with your hands until just combined. Overmixing makes tough sliders. Trust me, I learned this the hard way.
- Form the patties: Divide the beef into 8 equal portions (about 2 ounces each). Roll each portion into a ball, then flatten into a thin patty about 3 inches wide. Make a small indentation in the center of each patty with your thumb—this prevents them from puffing up into meatballs as they cook.
- Toast the buns: While the pan heats, split your slider buns and brush the cut sides with melted butter. Heat a large skillet or griddle over medium heat. Place the buns cut-side down and toast for 1-2 minutes until golden brown. Remove and set aside.
- Cook the patties: Increase the heat to medium-high. Place the patties in the hot skillet, leaving space between them. Cook for 2-3 minutes on the first side. You’ll see the edges start to brown and juices rise to the surface. Flip the patties with your spatula.
- Add the cheese and chiles: Immediately after flipping, place a slice of American cheese on each patty. Top with a few strips of roasted Hatch green chile. Cover the pan with a lid for about 30 seconds to help the cheese melt evenly.
- Assemble the sliders: Place each cheesy, chile-topped patty on a toasted bun bottom. Add any additional toppings you like—I’m partial to a thin slice of red onion and a smear of mayo. Cap with the bun top and press down gently.
- Serve immediately: These sliders are best hot off the pan. The cheese is gooey, the chile is warm, and the bun is perfectly crisp. Serve with pickles, chips, or a simple side salad.
Sensory Cues: When the patties hit the pan, you should hear a satisfying sizzle. If it’s silent, your pan isn’t hot enough. When you flip, the cooked side should be deep brown with crispy edges. The cheese should be fully melted and slightly dripping over the edges of the patty. The chiles should be soft and fragrant.
Cooking Tips & Techniques
I’ve made these sliders probably fifty times by now, and I’ve messed up plenty along the way. Here’s what I’ve learned:
Don’t skip the indent. I know it sounds fussy, but that little thumbprint in the center of each patty is the difference between a flat slider and a puffy one. The meat shrinks as it cooks, and the indent compensates for that. Without it, you get a round patty that doesn’t sit flat on the bun.
Hot pan, cold patties. Shape your patties and pop them in the fridge for 10 minutes before cooking. Cold patties sear better and stay juicier inside. I once cooked room-temperature patties and they turned out gray and sad. Never again.
Don’t press down on the patties. I know it’s tempting to smash them with your spatula, but that squeezes out all the juices. Let them cook undisturbed. The only time you should press is if you’re making a smash burger style, which is a different recipe entirely.
Toast the buns. This is non-negotiable. A untoasted bun gets soggy from the chile juices and the meat drippings. Toasted buns hold up and add a pleasant crunch. I’ve forgotten to toast buns before, and the sliders fell apart in my hands. Learn from my laziness.
Work in batches if needed. Don’t crowd the pan. If your skillet is small, cook the patties in two batches. Overcrowding lowers the pan temperature and steams the meat instead of searing it. You want a sear, not a steam bath.
Variations & Adaptations
This recipe is flexible, and I’ve tried several variations over the years. Here are some of my favorites:
- Spicy Smash Burger Style: Instead of forming thick patties, place small balls of beef directly on a hot, oiled griddle and smash them flat with a spatula. Cook for 2 minutes, flip, add cheese and chiles, and serve. You get crispy, lacy edges and a thinner patty that’s all about texture.
- Turkey or Chicken Version: Substitute ground turkey or chicken for the beef. Add 1 tablespoon olive oil and 1 extra tablespoon Worcestershire sauce to the mix for moisture. Cook to an internal temperature of 165°F. They won’t be as juicy as beef, but the chiles add enough flavor to compensate.
- Breakfast Sliders: Use the same chiles and cheese, but swap the beef patty for a fried egg and a slice of crispy bacon. Serve on toasted buns with a drizzle of hot sauce. I made these for a brunch party and they were a hit.
- Vegetarian Option: Replace the beef patty with a thick slice of grilled portobello mushroom or a black bean burger patty. Roast the mushroom with olive oil, salt, and pepper, then top with cheese and chiles. It’s surprisingly satisfying.
- Heat Level Adjustment: For mild sliders, remove all seeds and membranes from the chiles. For medium heat, leave some seeds. For extra heat, add a few slices of pickled jalapeño or a drizzle of hot honey on top.
I’ve personally tried the smash burger style and the breakfast version, and both are fantastic. The smash burger version is now my go-to for game day—it’s faster and the crispy edges are addictive.
Serving & Storage Suggestions
These sliders are best served immediately, while the cheese is still molten and the buns are warm. Here’s how to make the most of them:
Serving Temperature: Serve hot, straight from the pan. If you’re making a large batch for a party, keep them warm on a baking sheet in a 200°F oven for up to 30 minutes. Cover loosely with foil to prevent the buns from drying out.
Presentation: Arrange the sliders on a platter with a pile of crispy french fries, potato chips, or a simple coleslaw. Add a small bowl of pickles and some extra roasted chile strips on the side for anyone who wants more heat. I like to serve them with a dipping sauce made from equal parts mayo and ketchup with a squeeze of lime.
Complementary Dishes: These sliders pair beautifully with a cold beer, a margarita, or a simple lemonade. For sides, think classic barbecue fare: baked beans, corn on the cob, or a southwestern corn salad with black beans and avocado.
Storage: Leftover sliders (if you have any) can be stored in an airtight container in the refrigerator for up to 3 days. The buns will soften, but the flavor will still be good. To reheat, wrap each slider in foil and warm in a 350°F oven for 10 minutes, or microwave for 30-45 seconds. The oven method keeps the buns from getting soggy.
Freezing: You can freeze the cooked patties (without buns) for up to 2 months. Wrap each patty individually in plastic wrap, then place in a freezer bag. To serve, thaw in the refrigerator overnight, then reheat in a skillet and assemble with fresh buns and toppings.
Flavor Development: The chiles actually get better after a day or two in the fridge. The flavors meld together, and the heat becomes more integrated. If you’re meal prepping, cook the patties and chiles ahead of time, then reheat and assemble when you’re ready to eat.
Nutritional Information & Benefits
Here’s an approximate nutritional breakdown per slider (based on one patty with cheese, chiles, and a brioche bun):
- Calories: 320
- Protein: 18g
- Fat: 18g
- Carbohydrates: 22g
- Fiber: 2g
- Sugar: 4g
- Sodium: 580mg
Health Benefits: Hatch green chiles are rich in vitamin C and vitamin A, and they contain capsaicin, which has anti-inflammatory properties. The beef provides high-quality protein, iron, and B vitamins. Using 80/20 beef adds flavor, but you can reduce fat by draining the pan after cooking or using a leaner blend.
Dietary Considerations: This recipe is naturally gluten-free if you use gluten-free buns or lettuce wraps. It’s also low-carb if you skip the bun entirely. For a lower-sodium version, use low-sodium cheese and skip the added salt in the beef.
Potential Allergens: Dairy (cheese, butter), gluten (buns), and eggs (if using brioche buns). Check your bun ingredients if you have allergies.
I’m not a nutritionist, but I believe in balance. These sliders are a treat, not an everyday meal. Pair them with a big salad or some roasted vegetables, and you’ve got a satisfying, well-rounded dinner.
FAQs
Can I use canned Hatch green chiles instead of fresh?
Yes, but the flavor won’t be as smoky or complex. Canned chiles are already roasted and peeled, so they’re convenient. Drain them well before using. For best results, look for fire-roasted canned chiles.
How do I know when the patties are cooked through?
For sliders, cook until the internal temperature reaches 160°F for medium doneness. If you don’t have a thermometer, look for clear juices running from the patty and no pink in the center when you cut into one. Sliders cook fast, so keep an eye on them.
Can I make these sliders on a grill?
Absolutely. Preheat your grill to medium-high heat. Cook the patties for 2-3 minutes per side, adding cheese and chiles during the last minute. Toast the buns cut-side down on the grill for about 30 seconds. The grill adds a nice smoky char.
What if I can’t find Hatch green chiles?
You can substitute Anaheim chiles, which are milder but have a similar shape and texture. Poblano chiles also work, though they’re slightly darker and earthier. For a completely different but still delicious option, use roasted jalapeños for more heat.
How do I prevent the sliders from falling apart?
Make sure your patties are well-formed but not overworked. Use a thin spatula to flip them gently. Don’t overload the buns with wet toppings like tomatoes or pickles—place them on the side instead. Toasting the buns also helps them hold up better.
Conclusion
These Hatch green chile cheeseburger sliders are more than just a recipe—they’re a little piece of New Mexico that you can make in your own kitchen. The smoky chiles, the melty cheese, the juicy beef—it all comes together in a way that feels both familiar and exciting. I’ve made these for backyard barbecues, rainy weeknights, and lazy Sunday afternoons, and they never disappoint.
I hope you give them a try and make them your own. Add extra chiles if you like heat. Swap the cheese for pepper jack. Serve them with a cold beer and good company. That’s what this recipe is really about—sharing something delicious with the people you care about.
If you make these sliders, I’d love to hear how they turned out. Leave a comment below, tag me in your photos, or tell me about your own Hatch chile adventures. And if you’re looking for more crowd-pleasing recipes, check out our smash burger recipe or these green chile chicken tacos for another way to use those roasted chiles. Happy cooking!
Pin This Recipe!
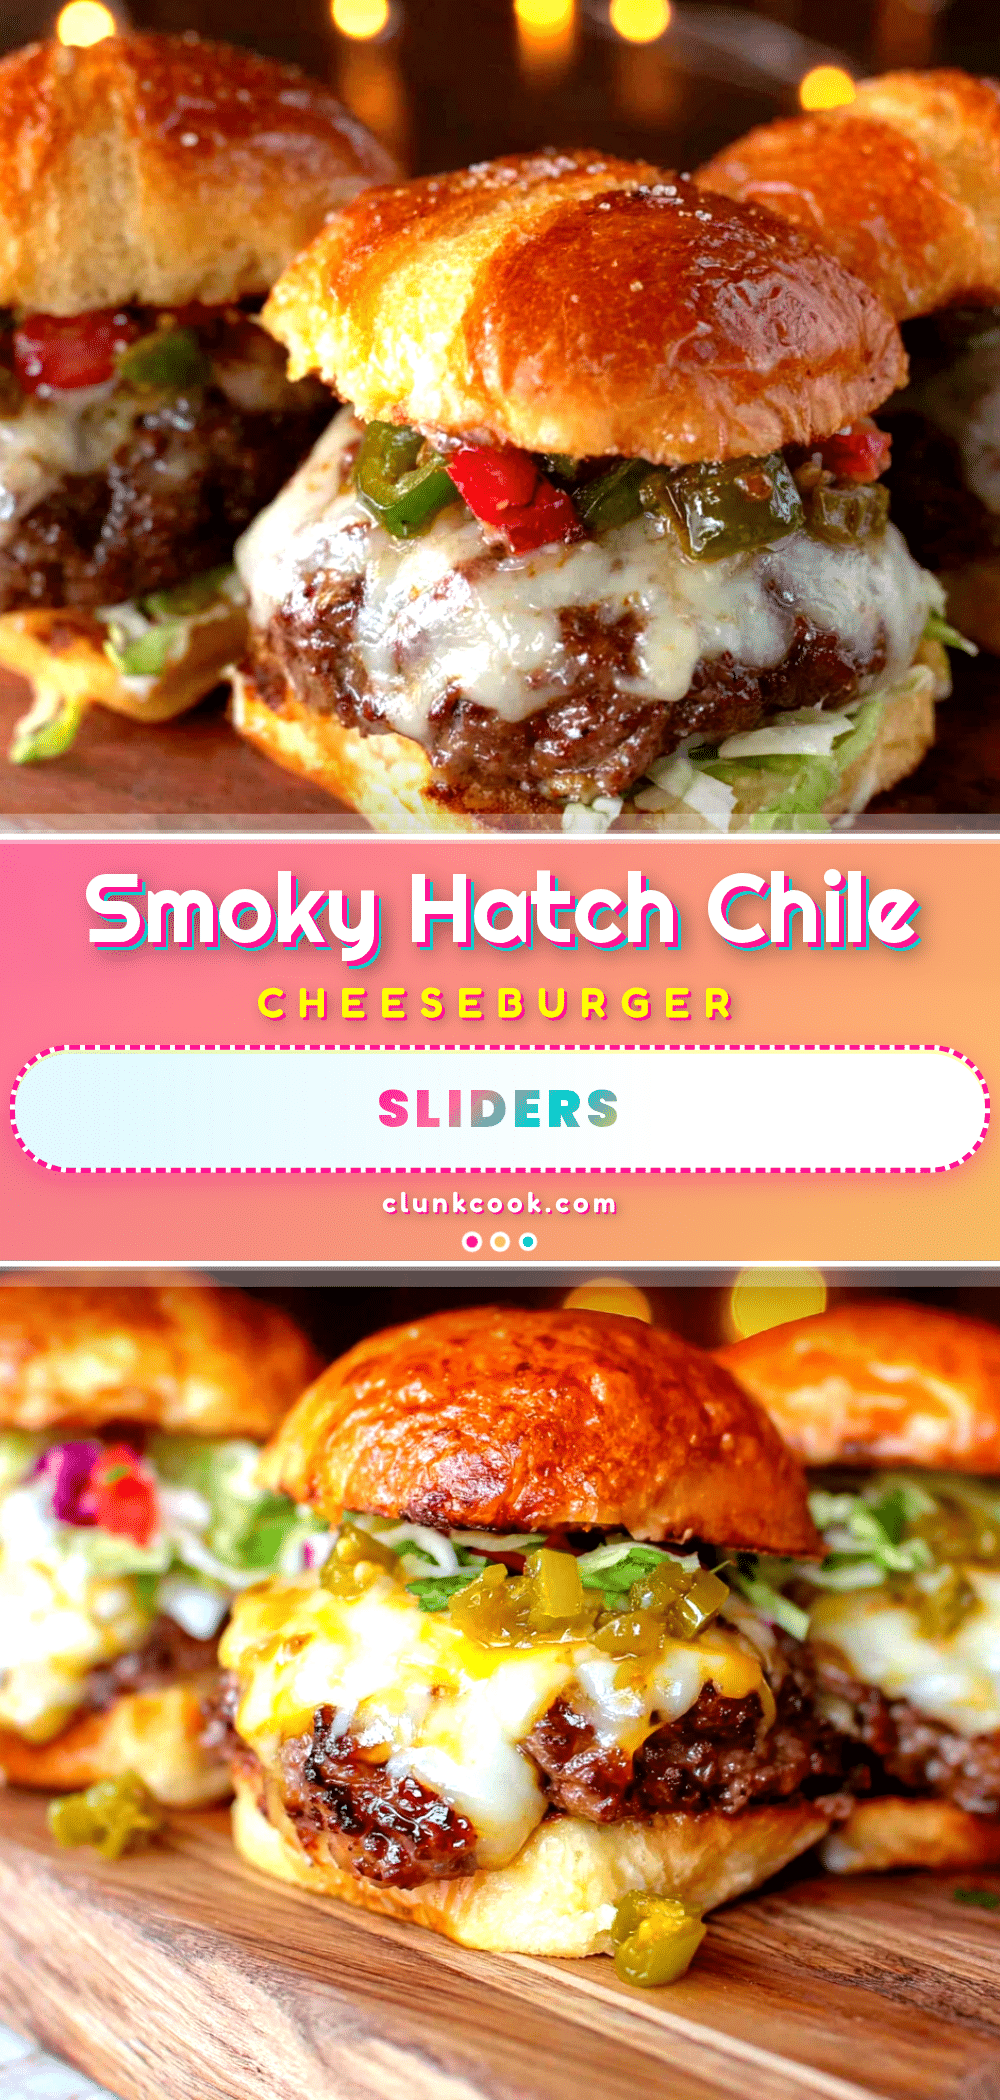
Best Hatch Green Chile Cheeseburger Sliders Recipe
Juicy sliders topped with melted American cheese and smoky roasted Hatch green chiles, ready in about 30 minutes. Perfect for game day, weeknights, or any gathering.
- Prep Time: 15 minutes
- Cook Time: 15 minutes
- Total Time: 30 minutes
- Yield: 8 sliders 1x
- Category: Main Course
- Cuisine: American
Ingredients
- 1 pound ground beef (80/20 blend)
- 1 teaspoon salt
- ½ teaspoon black pepper
- ½ teaspoon garlic powder
- ½ teaspoon onion powder
- 1 tablespoon Worcestershire sauce
- 4–6 fresh Hatch green chiles (or frozen roasted Hatch chiles, thawed)
- 1 tablespoon olive oil (for roasting, if using fresh)
- 8 slider buns (brioche or potato rolls)
- 8 slices American cheese (or pepper jack)
- 2 tablespoons butter, melted (for toasting buns)
- Optional toppings: sliced red onion, lettuce, tomato, pickles, mayo, or mustard
Instructions
- Roast the chiles (if using fresh): Place Hatch green chiles on a foil-lined baking sheet. Broil on high for 5-7 minutes per side until skin is charred and blistered. Alternatively, roast directly over a gas flame using tongs. Transfer to a bowl, cover with plastic wrap, and let steam for 10 minutes.
- Peel and prep the chiles: Rub off the blackened skin with fingers or a paper towel. Remove stems and seeds (leave some seeds for more heat). Slice into strips about 2 inches long. Set aside.
- Season the beef: In a medium bowl, combine ground beef, salt, pepper, garlic powder, onion powder, and Worcestershire sauce. Mix gently with hands until just combined. Do not overmix.
- Form the patties: Divide beef into 8 equal portions (about 2 ounces each). Roll into balls, then flatten into thin patties about 3 inches wide. Make a small indentation in the center of each patty with your thumb.
- Toast the buns: Split slider buns and brush cut sides with melted butter. Heat a large skillet or griddle over medium heat. Place buns cut-side down and toast for 1-2 minutes until golden brown. Remove and set aside.
- Cook the patties: Increase heat to medium-high. Place patties in the hot skillet, leaving space between them. Cook for 2-3 minutes on the first side until edges brown and juices rise. Flip patties.
- Add cheese and chiles: Immediately after flipping, place a slice of American cheese on each patty. Top with a few strips of roasted Hatch green chile. Cover the pan with a lid for about 30 seconds to melt cheese evenly.
- Assemble the sliders: Place each cheesy, chile-topped patty on a toasted bun bottom. Add optional toppings. Cap with bun top and press down gently.
- Serve immediately: Best hot off the pan. Serve with pickles, chips, or a simple side salad.
Notes
For best results, shape patties and refrigerate for 10 minutes before cooking. Do not press down on patties while cooking. Toast buns to prevent sogginess. Work in batches if needed to avoid overcrowding the pan.
Nutrition
- Serving Size: 1 slider
- Calories: 320
- Sugar: 4
- Sodium: 580
- Fat: 18
- Saturated Fat: 8
- Carbohydrates: 22
- Fiber: 2
- Protein: 18
Keywords: Hatch green chile, cheeseburger sliders, green chile burgers, slider recipe, game day food, New Mexico recipe


