Love this? Save it for later!
Share the inspiration with your friends
I was standing in the frozen food aisle of my local grocery store last September, not even thinking about dinner, when the smell of roasting chiles hit me from the deli side of the store. And just like that, I was twelve years old again, sitting on a splintery wooden bench at the Santa Fe Farmers Market, watching a man in a stained apron turn a giant mesh drum of green chiles over an open flame. The skin blistered and blackened, and that smoky, earthy, almost floral smell filled the whole plaza. My dad handed me a paper cone of roasted Hatch chiles, still warm, and told me not to burn my fingers. I didn’t listen. I never listened. I burned my fingers every single time. That memory—the heat on my hands, the smell in my hair, the way the chiles tasted like the New Mexico sun—hit me so hard I almost dropped my shopping basket. I grabbed a bag of frozen roasted Hatch chiles right there, even though it was September and I live in Ohio now, and I drove home with the windows down, already planning this dip. Honestly, I’ve been chasing that feeling ever since. This creamy Hatch chile queso dip with charred corn is my best attempt yet. Maybe you’ve got a memory like that too—a taste you just can’t let go of. This one’s for us.
Why You’ll Love This Recipe
Let me tell you, I’ve tested a lot of queso recipes in my day. Some were too gloppy, some were too spicy, and some just tasted like melted cheese and regret. This one is different. This creamy Hatch chile queso dip with charred corn is the one I keep coming back to, and I think you will too.
- Quick & Easy: This comes together in just 15 minutes flat. Seriously, from fridge to table in the time it takes to open a bag of tortilla chips. Perfect for those “oh no, people are coming over in twenty minutes” moments.
- Simple Ingredients: No fancy cheese counter required. You probably have most of this in your kitchen right now—milk, butter, flour, and some good melting cheese.
- Perfect for Game Day: This dip is a touchdown waiting to happen. It’s great for Super Bowl parties, tailgates, or just a Tuesday night when you need something warm and cheesy.
- Crowd-Pleaser: I brought this to a neighborhood potluck last fall, and three different people asked for the recipe before I even sat down. It’s that kind of dip.
- Unbelievably Delicious: The smoky heat from the Hatch chiles, the sweet pop of charred corn, and that velvety smooth cheese base? It’s next-level comfort food.
What makes this recipe different? It’s the charred corn, honestly. Most queso recipes just dump in the chiles and call it a day. But that little bit of caramelized sweetness from the corn balances the heat perfectly. It’s not just another queso—it’s my best version.
What Ingredients You Will Need
This recipe uses simple, wholesome ingredients to deliver bold flavor and satisfying texture without the fuss. Most of these are pantry staples, but a few are worth seeking out for the real deal experience.
For the Queso Base
- 2 tablespoons unsalted butter (adds richness and helps the roux)
- 2 tablespoons all-purpose flour (thickens the sauce without making it gluey)
- 1 cup whole milk (use 2% if that’s what you have, but whole milk gives the creamiest result)
- 8 ounces white American cheese, cubed (I recommend Land O’Lakes for the smoothest melt—don’t skip this one)
- 4 ounces Monterey Jack cheese, shredded (adds that perfect stretchy texture)
- 1/2 cup roasted Hatch green chiles, chopped (mild or hot, your call—I use mild for a crowd)
For the Charred Corn

- 1 cup frozen or fresh corn kernels (if using frozen, thaw and pat dry first)
- 1 teaspoon olive oil (for charring)
- 1/4 teaspoon salt
- 1/4 teaspoon smoked paprika (not regular—trust me on this)
For Garnish
- 1/4 cup fresh cilantro, chopped
- 1 jalapeño, thinly sliced (optional, for heat seekers)
- 1/2 cup diced tomatoes or pico de gallo
- Lime wedges, for serving
When choosing your Hatch chiles, look for the ones labeled “roasted” in the frozen section or canned. I prefer the frozen ones from 505 Southwestern if I can find them—they have the best smoky flavor. If you’re feeling ambitious, you can roast fresh Hatch chiles yourself when they’re in season around late summer. Just blister them over a gas flame or under the broiler, steam them in a bowl covered with plastic wrap for 10 minutes, then peel off the skin.
Equipment Needed
You don’t need a lot of fancy gear for this one, which is part of the beauty of it.
- A medium saucepan: Nothing fancy, just something with a heavy bottom so the milk doesn’t scorch. I use my old Calphalon one that’s seen better days, and it works perfectly.
- A whisk: A silicone whisk is nice here because it won’t scratch your pan, but a metal one works fine too.
- A cast iron skillet or non-stick pan: For charring the corn. Cast iron gives you the best char marks, but a non-stick pan will work in a pinch.
- A wooden spoon or spatula: For stirring. Don’t use a metal spoon in your non-stick pan if you go that route.
- A cutting board and sharp knife: For chopping the chiles and garnishes.
- A small bowl: For mixing the corn with the oil and spices before charring.
If you don’t have a cast iron skillet, don’t sweat it. Just use whatever pan you have and crank the heat up a little higher. The corn will still get some color on it. I’ve made this in a cheap non-stick pan more times than I can count, and it’s always delicious.
Preparation Method
Alright, let’s get cooking. This whole thing takes about 15 minutes from start to finish, so have your chips ready.
- Char the corn first. Heat your cast iron skillet or non-stick pan over medium-high heat. While it’s heating, toss the corn kernels (if using frozen, make sure they’re thawed and patted dry—wet corn won’t char, it’ll steam) with the olive oil, salt, and smoked paprika in a small bowl. Once the pan is hot (a drop of water should sizzle and evaporate immediately), add the corn in a single layer. Don’t stir it for 2 to 3 minutes. Let it sit and get those beautiful blackened spots. Then stir and cook for another 1 to 2 minutes until it’s charred all over. Transfer to a plate and set aside.
- Start the queso base. In your medium saucepan, melt the butter over medium heat. Once it’s melted and bubbly, add the flour. Whisk constantly for 1 to 2 minutes. This is your roux, and it should smell a little nutty and look like wet sand. Don’t let it brown—you want a blonde roux here.
- Add the milk slowly. Pour in the milk while whisking constantly. Keep whisking until the mixture thickens, about 2 to 3 minutes. It should coat the back of a spoon. If it looks lumpy, don’t panic—just keep whisking. It will smooth out.
- Melt the cheese. Reduce the heat to low. Add the cubed American cheese and shredded Monterey Jack a handful at a time, stirring constantly with your wooden spoon or spatula. Let each addition melt completely before adding the next. This is the secret to a smooth, not-grainy queso. Don’t rush it.
- Add the Hatch chiles. Once all the cheese is melted and the sauce is smooth and glossy, stir in the chopped Hatch chiles. Taste it now—this is when you decide if you need more heat. If you want it spicier, add a pinch of cayenne or some of the jalapeño slices.
- Fold in the charred corn. Reserve a tablespoon or two of the charred corn for garnish, then fold the rest into the queso. Stir gently until it’s all combined.
- Serve immediately. Pour the queso into a serving bowl. Top with the reserved charred corn, the chopped cilantro, sliced jalapeño if using, and a generous spoonful of pico de gallo or diced tomatoes. Squeeze a lime wedge over the top right before serving.
A quick note: If your queso starts to thicken as it sits, just stir in a splash of warm milk to loosen it back up. This happens naturally as it cools.
Cooking Tips & Techniques
I’ve made this creamy Hatch chile queso dip with charred corn about a dozen times now, and I’ve learned a few things the hard way so you don’t have to.
The biggest mistake people make with queso is using pre-shredded cheese. I know, I know, it’s convenient. But pre-shredded cheese is coated in cellulose and anti-caking agents that prevent it from melting smoothly. You’ll end up with a grainy, clumpy mess. Buy a block and shred it yourself. It takes two extra minutes and makes all the difference.
Low and slow is your friend. When you’re melting the cheese, keep the heat on low. High heat will cause the proteins in the cheese to seize up and turn into a stringy, oily disaster. Patience, my friend.
Don’t skip the roux. I know some queso recipes just dump cheese into milk and hope for the best. That works okay for nacho cheese sauce, but for a truly creamy, stable queso that doesn’t separate when it sits, you need that butter and flour base. It’s the difference between a dip and a sauce.
About the corn: The first time I made this, I didn’t pat the frozen corn dry. It steamed instead of charring, and I ended up with sad, pale corn. Learn from my mistake. Dry corn is happy corn.
If you’re making this for a party, you can char the corn and chop the chiles a day ahead. Just keep them in the fridge, and the actual cooking takes almost no time.
Variations & Adaptations
This recipe is pretty forgiving, so feel free to play around with it.
Make it vegetarian: It already is! Just make sure your American cheese doesn’t contain animal rennet if that’s a concern for you. Most white American cheese is fine, but check the label.
Make it spicier: Use hot Hatch chiles instead of mild, or add a diced serrano pepper when you char the corn. I made this once with a habanero-infused hot sauce stirred in at the end, and it was incredible—but definitely not for the faint of heart.
Make it smokier: Swap the smoked paprika for chipotle powder, or add a few drops of liquid smoke to the milk. This gives it a real campfire vibe.
Swap the cheese: If you can’t find white American cheese, use yellow American—the flavor is the same, it just looks different. You can also use all Monterey Jack, but it won’t be quite as creamy. Pepper Jack is a great option if you want extra heat.
Try a different corn: In the summer, I use fresh corn on the cob. Just cut the kernels off and char them the same way. It’s even sweeter. In the winter, frozen corn is totally fine.
Make it dairy-free: I haven’t personally tested this, but a friend of mine used unsweetened oat milk and a vegan cheddar shred, and she said it worked. She added a teaspoon of nutritional yeast for extra cheesy flavor. Let me know if you try it!
Serving & Storage Suggestions
This dip is best served hot, right after you make it. The cheese is at its stretchiest and creamiest when it’s fresh off the stove.
Serving temperature: Serve it warm, not boiling hot. Let it sit for a minute or two after cooking so no one burns their tongue. I always set it out with a small spoon so people can drizzle it over their chips or tacos.
What to serve with it: Obviously, tortilla chips are the classic choice. But this queso is also amazing on nachos, drizzled over tacos, or even spooned onto a baked potato. I’ve been known to eat it with a spoon straight from the bowl, but I’m not recommending that. Okay, maybe I am.
Storage: Leftover queso will keep in an airtight container in the fridge for up to 3 days. The texture will thicken quite a bit as it sits, so don’t be alarmed.
Reheating: The best way to reheat this is on the stovetop over low heat, stirring constantly and adding a splash of milk to loosen it up. You can microwave it in 30-second bursts, stirring between each, but it’s more likely to get grainy. I’ve had better luck with the stovetop method.
Flavor development: Honestly, the flavors actually get better after a day in the fridge. The Hatch chile flavor mellows and blends with the cheese, and the corn sweetness becomes more pronounced. So if you’re planning ahead, make it a day early and reheat it gently.
Nutritional Information & Benefits
Let’s be real—this is a cheese dip, so it’s not health food. But here’s what you’re looking at per serving (about 1/4 cup, assuming 8 servings):
- Calories: approximately 220
- Fat: 16g
- Carbohydrates: 8g
- Protein: 10g
- Fiber: 1g
- Sugar: 3g
That said, there are some bright spots. Hatch chiles are a great source of vitamin C and capsaicin, which can help boost metabolism. Corn provides fiber and antioxidants like lutein, which is good for eye health. And hey, cheese has calcium and protein. So it’s not all bad, right?
If you’re watching your sodium, use low-sodium American cheese and skip the added salt in the corn. You can also use a reduced-fat Monterey Jack, though the texture won’t be quite as luxurious.
This recipe is naturally gluten-free as long as you use a gluten-free all-purpose flour blend in the roux. Just swap the regular flour 1:1 with your favorite GF blend.
Conclusion
This creamy Hatch chile queso dip with charred corn is the kind of recipe that makes you look like a hero with almost no effort. It’s smoky, cheesy, a little sweet, and just spicy enough to keep things interesting. Whether you’re serving it for game day, a casual get-together, or just a quiet night in with a bag of chips, it delivers every single time.
I love this recipe because it brings back that memory of the Santa Fe market every time I make it. But more than that, I love that it’s become a new memory—one I get to share with the people around my table. I hope you make it your own. Maybe throw in some extra jalapeños, or top it with crumbled cotija cheese. Whatever you do, just promise me you’ll serve it with good chips and good company.
If you try this recipe, I’d love to hear about it. Drop a comment below and let me know how it turned out, or tag me in your photos if you share them online. And if you have a favorite Hatch chile memory, I’d love to hear that too. Happy cooking, friends!
Frequently Asked Questions
Can I use canned Hatch chiles instead of frozen roasted ones?
Absolutely. Canned Hatch chiles work perfectly fine. Just drain them well before chopping and adding to the queso. The flavor won’t be quite as smoky as fresh-roasted, but it’s still delicious.
Why did my queso turn out grainy?
This usually happens for one of two reasons: you used pre-shredded cheese, or you cooked it over too high heat. Always shred your own cheese from a block and keep the heat on low when melting. If it’s already grainy, try whisking in a splash of warm milk and a teaspoon of cornstarch dissolved in water to smooth it out.
Can I make this in a slow cooker?
Yes, but it’s a little trickier. I recommend making the roux and cheese sauce on the stovetop first, then transferring it to a slow cooker on the “warm” setting to keep it hot for serving. Don’t try to cook it from scratch in the slow cooker—you’ll end up with a separated mess.
How can I make this spicier without changing the texture?
Add a pinch of cayenne pepper or a few dashes of your favorite hot sauce at the end. You can also use hot Hatch chiles instead of mild, or char a serrano pepper alongside the corn and chop it up into the dip. The heat will distribute evenly without affecting the creaminess.
Can I freeze this queso?
I don’t recommend it. Dairy-based sauces tend to separate and become grainy when frozen and thawed. If you have leftovers, just store them in the fridge for up to 3 days and reheat gently on the stovetop. This dip is best enjoyed fresh.
Pin This Recipe!
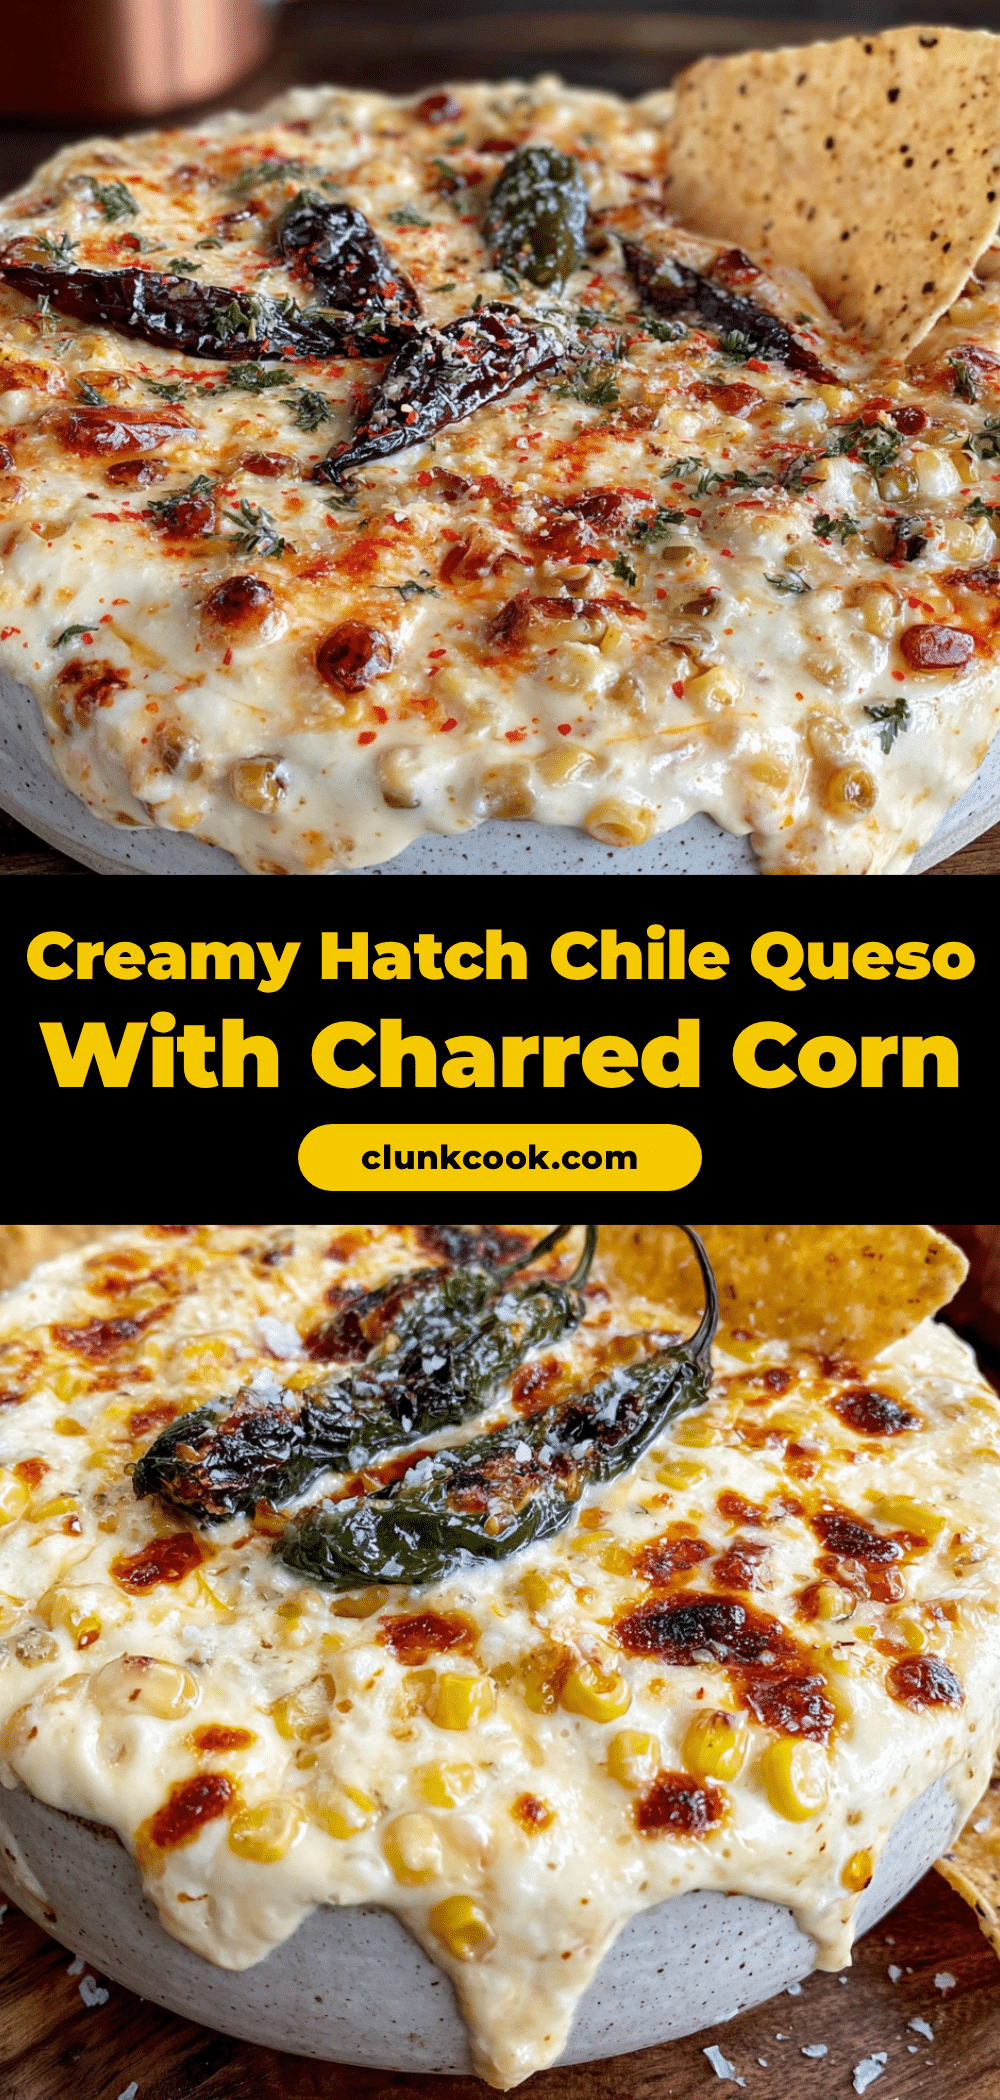
Creamy Hatch Chile Queso Dip with Charred Corn – Easy 15-Minute Appetizer

This creamy Hatch chile queso dip with charred corn is a quick and easy 15-minute appetizer that combines smoky Hatch chiles, sweet charred corn, and a velvety smooth cheese base. Perfect for game day or any gathering, it’s a crowd-pleaser that brings back the taste of New Mexico.
- Prep Time: 5 minutes
- Cook Time: 10 minutes
- Total Time: 15 minutes
- Yield: 8 servings 1x
- Category: Appetizer
- Cuisine: Southwestern
Ingredients
- 2 tablespoons unsalted butter
- 2 tablespoons all-purpose flour
- 1 cup whole milk
- 8 ounces white American cheese, cubed
- 4 ounces Monterey Jack cheese, shredded
- 1/2 cup roasted Hatch green chiles, chopped
- 1 cup frozen or fresh corn kernels
- 1 teaspoon olive oil
- 1/4 teaspoon salt
- 1/4 teaspoon smoked paprika
- 1/4 cup fresh cilantro, chopped
- 1 jalapeño, thinly sliced (optional)
- 1/2 cup diced tomatoes or pico de gallo
- Lime wedges, for serving
Instructions
- Char the corn: Heat a cast iron skillet or non-stick pan over medium-high heat. Toss corn kernels with olive oil, salt, and smoked paprika. Add to hot pan in a single layer; cook without stirring for 2-3 minutes until charred. Stir and cook 1-2 minutes more. Transfer to a plate and set aside.
- Start the queso base: In a medium saucepan, melt butter over medium heat. Add flour and whisk constantly for 1-2 minutes until a blonde roux forms (do not let it brown).
- Add milk slowly: Pour in milk while whisking constantly. Continue whisking until mixture thickens, about 2-3 minutes, until it coats the back of a spoon.
- Melt the cheese: Reduce heat to low. Add cubed American cheese and shredded Monterey Jack a handful at a time, stirring constantly until each addition is fully melted before adding the next.
- Add Hatch chiles: Once cheese is melted and sauce is smooth, stir in chopped Hatch chiles. Taste and adjust heat if desired.
- Fold in charred corn: Reserve a tablespoon or two of charred corn for garnish. Fold the rest into the queso gently.
- Serve immediately: Pour queso into a serving bowl. Top with reserved charred corn, chopped cilantro, sliced jalapeño (if using), and pico de gallo or diced tomatoes. Squeeze a lime wedge over the top before serving.
Notes
For best results, shred cheese from a block instead of using pre-shredded. Keep heat low when melting cheese to avoid graininess. If queso thickens as it sits, stir in a splash of warm milk. Charred corn can be made a day ahead.
Nutrition
- Serving Size: 1/4 cup
- Calories: 220
- Sugar: 3
- Sodium: 480
- Fat: 16
- Saturated Fat: 9
- Carbohydrates: 8
- Fiber: 1
- Protein: 10
Keywords: Hatch chile queso, charred corn queso, easy queso dip, 15-minute appetizer, game day dip, creamy cheese dip, Southwestern dip


