Love this? Save it for later!
Share the inspiration with your friends
I used to think crispy wings were strictly a restaurant thing. You know that feeling when you order them at a bar and they come out with that shatteringly crisp skin, and you just assume it’s impossible to replicate at home without a deep fryer? I was convinced of this for years. Honestly, I’d tried baking wings more times than I care to admit, and they always came out sad—flabby skin, soggy bottoms, and a general lack of excitement. It was a Tuesday night, and I was staring at a bag of frozen chicken wings in my grocery cart, feeling defeated before I even started.
Then my neighbor, an older guy named Pete who gardens like it’s an Olympic sport, saw me sighing over the frozen poultry aisle. He didn’t say much at first. He just pointed at the bag and said, “You’re overthinking it. The secret isn’t the fryer. It’s patience and a wire rack.” That was it. He walked away with his bag of soil, and I stood there, a little confused but oddly hopeful. That conversation—short, simple, and completely unexpected—changed the way I cook chicken forever.
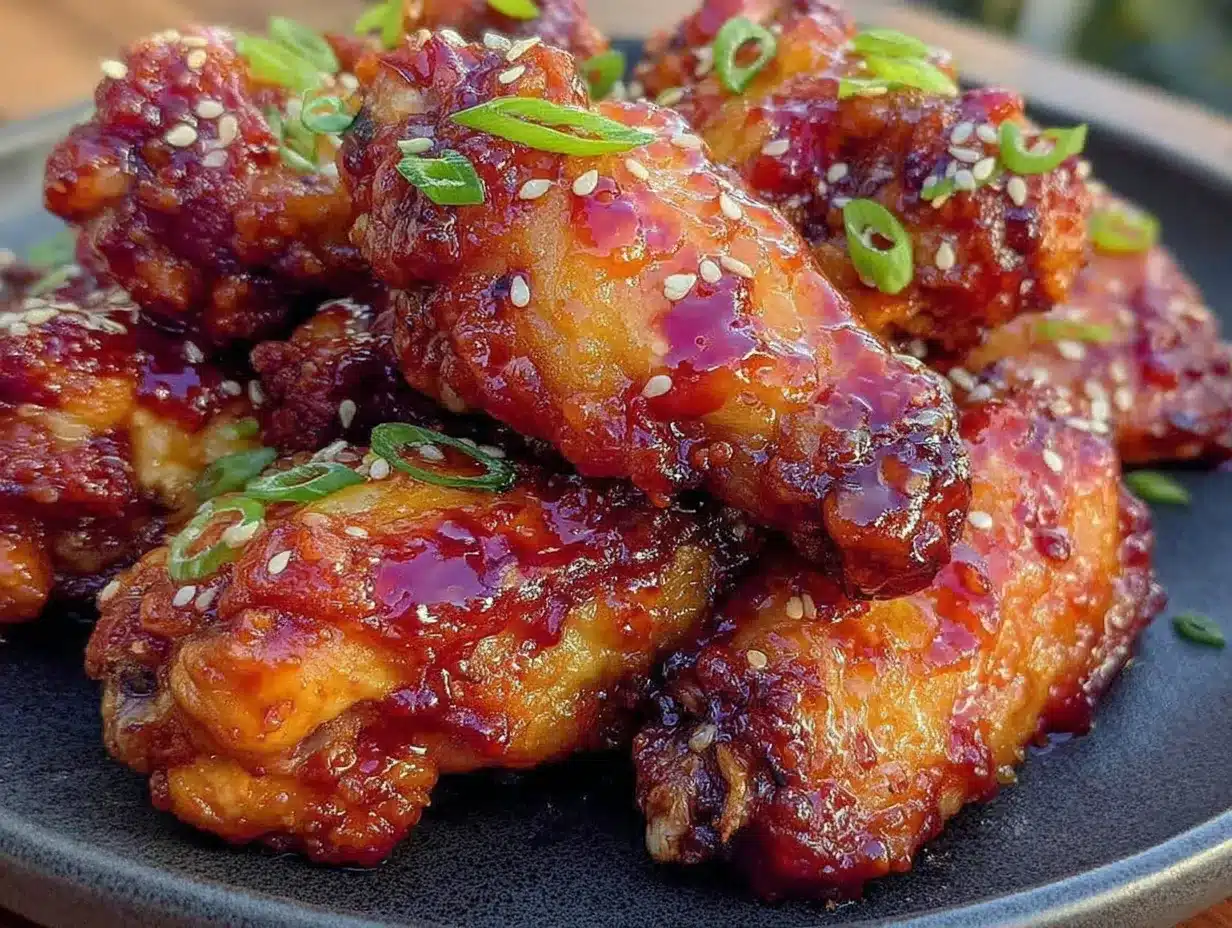
So I went home, grabbed a baking sheet, and started experimenting. I burned a batch. I undercooked another. But eventually, I cracked the code for these crispy baked chicken wings with honey garlic glaze. They come out of the oven golden, the skin is so crunchy it practically sings, and that sticky, sweet-savory glaze clings to every nook and cranny. I mean, the first time I pulled a perfect tray out, I actually texted Pete a photo. He replied with a thumbs-up emoji. That’s high praise from a guy who grows his own tomatoes.
What I love most about this recipe is that it proves you don’t need fancy equipment or a culinary degree. You just need a little time, a few pantry staples, and the willingness to trust the process. Maybe you’ve been let down by baked wings before too. Let me tell you, this version is different. It’s the kind of recipe that makes you look forward to game day, or a random Wednesday, just so you have an excuse to make them again.
Why You’ll Love This Recipe
Let’s be real—there are a million wing recipes out there. But these crispy baked chicken wings with honey garlic glaze stand out for a few very specific reasons. I’ve tested this method more times than I can count, and every single time, the results are consistent. No guesswork, no soggy surprises. Here’s what makes them special:
- Seriously Crispy Without Frying: The combination of a dry brine, baking powder, and a high oven temperature delivers skin that crackles when you bite into it. No deep fryer required.
- Simple Pantry Ingredients: You probably already have honey, soy sauce, garlic, and chicken wings in your kitchen. No weird specialty items that you’ll use once and forget about.
- Perfect for Game Day or Weeknight Dinner: These wings are crowd-pleasers. I’ve brought them to potlucks and watched them disappear in minutes. But they’re also easy enough to whip up on a busy Tuesday.
- That Sticky, Sweet-Savory Glaze: The honey garlic glaze is the star here. It’s not just sweet—it has depth from soy sauce and a little kick from garlic. It coats the wings beautifully without making them soggy.
- Foolproof Method: I’ve made every mistake possible with wings. This recipe accounts for all of them. From drying the skin properly to glazing at the right moment, every step is designed for success.
I remember the first time I served these to my family. My husband, who usually claims he “doesn’t care about chicken wings,” ate a dozen without saying a word. Then he looked at me and said, “Okay, these are actually incredible.” That’s the kind of reaction that keeps me coming back to this recipe. It’s not just good—it’s the kind of food that makes people close their eyes after the first bite.
Whether you’re hosting a party or just want to treat yourself to something special, these wings deliver. They’re comfort food reimagined—healthier than fried, faster than you’d think, but with the same soul-soothing satisfaction.
What Ingredients You Will Need
This recipe uses simple, wholesome ingredients to deliver bold flavor and that irresistible crispy texture. Most of these are pantry staples, which makes this dish perfect for spontaneous cravings. Here’s everything you’ll need, broken down by category:
For the Chicken Wings
- 3 pounds chicken wings, separated into drumettes and flats (about 24 pieces). I prefer buying whole wings and cutting them myself—it’s cheaper and you can save the tips for stock. Look for wings that are plump and have a healthy pink color.
- 1 tablespoon baking powder (NOT baking soda—this is crucial). Baking powder raises the pH of the skin, helping it brown and crisp up beautifully. I use aluminum-free baking powder to avoid any metallic aftertaste.
- 1 teaspoon salt. I use kosher salt for its clean flavor and easy pinch-ability.
- 1/2 teaspoon black pepper, freshly ground.
- 1/2 teaspoon garlic powder. Adds a subtle savory note to the skin itself.
- 1/2 teaspoon onion powder. Rounds out the flavor profile.
For the Honey Garlic Glaze
- 1/3 cup honey. Use a good quality honey—it makes a difference in flavor. If your honey is crystallized, gently warm it up before using.
- 3 tablespoons soy sauce. I use low-sodium soy sauce so I can control the salt level. Tamari or coconut aminos work great for gluten-free options.
- 4 cloves garlic, minced. Fresh garlic is non-negotiable here. The pre-minced stuff in a jar just doesn’t have the same punch.
- 1 tablespoon rice vinegar. Adds a touch of acidity to balance the sweetness. Apple cider vinegar works in a pinch.
- 1 teaspoon sesame oil. Optional, but it adds a lovely nutty depth. Don’t skip it if you have some on hand.
- 1/2 teaspoon red pepper flakes. For a gentle kick. Adjust based on your heat tolerance.
- 1 tablespoon cornstarch. This helps thicken the glaze so it clings to the wings perfectly.
- 2 tablespoons water. To dissolve the cornstarch.
For Garnish (Optional but Recommended)
- Sesame seeds, toasted.
- Chopped green onions.
- Lime wedges, for squeezing over the top.
I’ll be honest—I’ve made this recipe with substitutions when I was out of something, and it still turned out great. For instance, once I didn’t have rice vinegar, so I used a splash of lemon juice instead. The glaze was slightly different but still delicious. Don’t stress if you need to swap something. Just note that the baking powder is not optional. It’s the magic ingredient for crispy skin.
When it comes to the chicken wings themselves, I recommend buying fresh if you can. Frozen wings work too, but you need to thaw them completely and pat them very dry. Excess moisture is the enemy of crispiness.
Equipment Needed
You don’t need a lot of fancy gear to make these crispy baked chicken wings with honey garlic glaze. Here’s what I use and recommend:
- Baking Sheet: A rimmed baking sheet is essential. It catches any drips and prevents a mess in your oven. I use a half-sheet pan (18×13 inches) for this recipe.
- Wire Rack: This is the secret weapon. A wire rack set inside the baking sheet allows air to circulate all around the wings, ensuring they crisp up evenly. If you don’t have one, you can flip the wings halfway through, but the rack makes a big difference.
- Large Bowl: For tossing the wings with the dry seasoning mixture. I use a stainless steel bowl because it’s lightweight and easy to clean.
- Small Saucepan: For making the glaze. A 1-quart saucepan works perfectly.
- Whisk: To combine the glaze ingredients smoothly.
- Tongs: For flipping the wings and transferring them to the glaze. Silicone-tipped tongs are gentle on the non-stick coating of your bakeware.
- Pastry Brush: Optional, but helpful for applying the glaze evenly. You can also just toss the wings in the glaze using tongs.
- Instant-Read Thermometer: Not strictly necessary, but it gives peace of mind. Chicken wings are safe to eat at 165°F (74°C), but I find they’re best at around 175°F (80°C) because the connective tissue breaks down more.
If you’re on a budget, skip the wire rack and just flip the wings halfway through baking. It’s not as perfect, but it still works. I’ve done it that way plenty of times when my rack was in the dishwasher. Also, a good pair of kitchen shears makes cutting whole wings a breeze. I bought a cheap pair years ago, and they’re still going strong.
One tip: line your baking sheet with aluminum foil before placing the wire rack on top. It makes cleanup so much easier. The glaze can get sticky, and scraping it off a bare pan is no fun.
Preparation Method
Alright, let’s get cooking. This method for crispy baked chicken wings with honey garlic glaze is straightforward, but each step matters. Trust me, I’ve learned the hard way what happens when you rush.
- Prep the Wings: Start by patting the chicken wings completely dry with paper towels. This is the most important step. Any moisture on the skin will steam the wings instead of crisping them. If you have time, let them sit uncovered in the fridge for an hour after drying—this dries out the skin even more. I do this whenever I can, and the results are noticeably better.
- Season the Wings: In a large bowl, combine the baking powder, salt, pepper, garlic powder, and onion powder. Add the dried wings and toss thoroughly until every piece is coated. The baking powder might look a little dusty on the wings, but that’s exactly what we want. Don’t skip this—it’s the key to that shatteringly crisp skin.
- Set Up the Rack: Place a wire rack inside a rimmed baking sheet. Arrange the wings on the rack in a single layer, making sure they aren’t touching. Crowding the pan will trap steam and prevent crisping. If you need to, use two baking sheets. I’ve made that mistake before, and the wings came out pale and sad.
- Bake the Wings: Preheat your oven to 425°F (220°C). Bake the wings for 45-50 minutes, flipping them halfway through. The exact time depends on the size of your wings. You’re looking for deep golden brown skin that looks crispy. The wings should feel firm when you poke them. If you’re using a thermometer, aim for 175°F (80°C) in the thickest part of a drumette.
- Make the Glaze: While the wings bake, prepare the glaze. In a small saucepan, combine the honey, soy sauce, minced garlic, rice vinegar, sesame oil, and red pepper flakes. In a separate small bowl, whisk together the cornstarch and water until smooth. Bring the saucepan to a gentle simmer over medium heat, then whisk in the cornstarch slurry. Cook for 2-3 minutes, stirring constantly, until the glaze thickens slightly. It should coat the back of a spoon. Remove from heat and set aside.
- Glaze the Wings: Once the wings are out of the oven, let them rest for 2-3 minutes. Then, using tongs, transfer them to a large bowl. Pour about half the glaze over the wings and toss gently until they’re evenly coated. Don’t add all the glaze at once—you want a thin, even coating, not a heavy, soggy layer. If you want extra glaze, serve it on the side for dipping.
- Finish and Serve: Return the glazed wings to the wire rack and broil for 1-2 minutes. Watch them closely—the sugar in the honey can burn quickly. This step caramelizes the glaze and gives it that beautiful, sticky finish. Remove from the oven, sprinkle with sesame seeds and green onions, and serve immediately with lime wedges on the side.
A few notes from my experience: The broiling step is optional, but I highly recommend it. It takes the wings from great to unforgettable. Also, if you’re making a large batch, keep the finished wings warm in a low oven (200°F) while you finish the rest. Just don’t cover them with foil, or the steam will ruin the crispiness.
Cooking Tips & Techniques
After making these crispy baked chicken wings with honey garlic glaze more times than I can count, I’ve picked up a few tricks that make all the difference. Let me share them so you don’t have to learn the hard way like I did.
The Drying Method Matters: I cannot stress this enough—dry skin is crispy skin. Pat the wings dry with paper towels, then let them sit uncovered in the fridge for at least 30 minutes. I once skipped this step because I was in a hurry, and the wings came out with chewy, rubbery skin. Never again. The fridge air dries out the surface, which is exactly what you want.
Don’t Skip the Baking Powder: I know it sounds weird, but baking powder is the secret to oven-fried texture. It creates tiny bubbles on the skin’s surface, increasing the surface area and helping it brown. One time, I accidentally used baking soda instead. Huge mistake. The wings had a weird, soapy taste. Stick with baking powder, and make sure it’s fresh.
Flip at the Right Time: Flip the wings halfway through baking. This ensures even cooking and crisping on both sides. I set a timer on my phone so I don’t forget. If you’re using a wire rack, flipping is easier because the wings don’t stick.
Glaze at the End: Never add the glaze before baking. The sugar in the honey will burn in the oven, and you’ll end up with bitter, blackened wings. Always bake the wings plain, then glaze them after they’re cooked. This is the most common mistake I see in wing recipes, and it ruins an otherwise perfect dish.
Watch the Broiler: When you broil the glazed wings, keep your eyes on them. The sugar caramelizes quickly, and it can go from golden to burnt in seconds. I usually broil for 90 seconds, then check. If they need more, I give them another 30 seconds. It’s better to under-broil than over-broil.
Balance the Flavors: The honey garlic glaze is sweet, salty, and slightly tangy. If you find it too sweet, add a splash more rice vinegar. If it’s too salty, add a little more honey. Taste as you go and adjust. Cooking is about your preferences, not strict rules.
I once made a batch where I forgot to add the cornstarch to the glaze. It was still tasty, but it was runny and didn’t stick to the wings well. That little bit of cornstarch makes a big difference in texture. Don’t skip it.
Variations & Adaptations
One of the best things about this recipe is how adaptable it is. I’ve experimented with different flavors and dietary needs, and here are some variations I’ve loved:
Spicy Honey Garlic Wings
If you like heat, add an extra teaspoon of red pepper flakes to the glaze, or stir in a tablespoon of sriracha. I made this version for a friend who loves spicy food, and she said it was the best wing she’d ever had. You can also drizzle the finished wings with chili oil for an extra kick.
Gluten-Free Version
This recipe is naturally gluten-free if you use tamari or coconut aminos instead of soy sauce. The baking powder is usually gluten-free, but double-check the label. I’ve served this to gluten-sensitive guests multiple times, and they’ve never complained.
Air Fryer Method
You can make these wings in an air fryer for even crispier results. Cook at 400°F (200°C) for 20-25 minutes, shaking the basket halfway through. Then glaze and broil for 1 minute. The air fryer circulates heat so efficiently that the skin gets incredibly crunchy. I use this method when I’m only making a small batch.
Lemon Pepper Variation
Skip the honey garlic glaze and toss the baked wings with a mixture of melted butter, lemon zest, and cracked black pepper. This is a classic flavor combination that’s light and bright. I make this version in the summer when I want something less heavy.
Dietary Adjustments
For a lower-sugar option, use a sugar-free honey substitute or reduce the honey to 2 tablespoons and add a little more soy sauce. For a dairy-free version, this recipe is already dairy-free. If you’re watching your sodium, use low-sodium soy sauce and reduce the added salt in the dry rub.
I once tried a version with maple syrup instead of honey. It was good, but the flavor was more earthy and less floral. If you’re feeling adventurous, give it a try. Cooking is all about experimenting and finding what you love.
Serving & Storage Suggestions
These crispy baked chicken wings with honey garlic glaze are best served fresh and hot, right after that final broil. The skin is at its crispiest, and the glaze is perfectly sticky. Here’s how I like to serve them:
Arrange the wings on a large platter, sprinkle with toasted sesame seeds and chopped green onions, and add a few lime wedges on the side. The squeeze of lime right before eating brightens up the flavors beautifully. I also like to serve them with celery and carrot sticks and a side of ranch or blue cheese dressing for dipping. The cool, creamy dip contrasts perfectly with the sticky, sweet wings.
If you’re hosting a party, keep the wings warm in a low oven (200°F) on the wire rack. Don’t cover them, or the steam will soften the skin. They’ll stay crispy for about 30 minutes this way.
Storage: Store leftover wings in an airtight container in the refrigerator for up to 3 days. The skin will soften, but the flavor will still be great. I often make a double batch just so I have leftovers for lunch the next day.
Reheating: To restore crispiness, reheat the wings in the oven at 400°F (200°C) for 5-7 minutes. The microwave will make them soggy, so avoid it. I’ve also reheated them in the air fryer at 350°F (175°C) for 3-4 minutes, and they came out almost as good as fresh.
Freezing: You can freeze the baked, unglazed wings for up to 2 months. Let them cool completely, then place them in a single layer on a baking sheet and freeze until solid. Transfer to a freezer-safe bag or container. When you’re ready to eat, thaw in the refrigerator overnight, then reheat in the oven and glaze as directed. I’ve done this for meal prep, and it works beautifully.
One thing I’ve noticed is that the flavors meld together even more the next day. The honey garlic glaze seeps into the meat, making it even more flavorful. So don’t be sad if you have leftovers—they’re a treat.
Nutritional Information & Benefits
Here’s an approximate nutritional breakdown for a serving of 4-5 wings (about 1/4 of the recipe). Keep in mind that these values can vary based on the exact ingredients you use:
| Nutrient | Amount per Serving |
|---|---|
| Calories | 380 |
| Protein | 32g |
| Fat | 18g |
| Saturated Fat | 5g |
| Carbohydrates | 22g |
| Sugar | 18g |
| Sodium | 720mg |
| Fiber | 0g |
Chicken wings are a good source of protein, which is essential for muscle repair and keeping you full. They also contain selenium, which supports your immune system, and B vitamins that help with energy metabolism. The honey in the glaze provides quick energy, while the garlic offers anti-inflammatory properties. Of course, this isn’t a health food, but it’s a satisfying protein-rich meal that can fit into a balanced diet.
If you’re watching your sugar intake, you can reduce the honey or use a sugar-free alternative. For a lower-fat option, remove the skin before eating—but honestly, the skin is the best part. Everything in moderation, right?
One thing I appreciate about this recipe is that it uses real, whole ingredients. No artificial flavors or preservatives. It’s the kind of food that makes you feel good about what you’re eating, even if it’s a little indulgent.
Conclusion
These crispy baked chicken wings with honey garlic glaze have become a staple in my kitchen for good reason. They deliver that perfect combination of crunchy skin and sticky, sweet-savory glaze without the hassle of deep frying. Every time I make them, I’m reminded of that conversation with Pete in the grocery store—how a simple tip from a neighbor changed the way I cook. It’s funny how the best recipes often come from the most unexpected places.
I hope you give these wings a try. Don’t be afraid to customize them to your taste. Add more spice, swap the honey for maple syrup, or serve them with your favorite dipping sauce. Cooking is about making a recipe your own, and this one is incredibly forgiving.
When you make them, I’d love to hear how they turn out. Drop a comment below and let me know if you tried any variations. Did you use the air fryer? Did you add extra garlic? Share your experience—I read every comment and I love seeing your creations. And if you enjoyed this recipe, please share it with a friend who needs a little wing magic in their life.
Until next time, happy cooking. And remember—patience and a wire rack are all you need.
Frequently Asked Questions
Can I use frozen chicken wings for this recipe?
Yes, you can. Thaw them completely in the refrigerator overnight, then pat them very dry with paper towels. Frozen wings release more moisture, so drying them thoroughly is even more important. I’ve done this many times, and the results are still excellent.
Why are my wings not crispy?
The most common reasons are excess moisture, not using enough baking powder, or overcrowding the pan. Make sure your wings are very dry before seasoning, use the full tablespoon of baking powder, and arrange them in a single layer without touching. If you’re still having trouble, try the wire rack method—it makes a huge difference.
Can I make the glaze ahead of time?
Absolutely. You can make the glaze up to a week in advance and store it in an airtight container in the refrigerator. When you’re ready to use it, gently reheat it on the stovetop or in the microwave, whisking until smooth. This is a great time-saver if you’re planning a party.
How do I make the wings less sweet?
Reduce the honey to 2 tablespoons and add an extra tablespoon of soy sauce or rice vinegar. You can also add a pinch of salt to balance the sweetness. Taste the glaze as you go and adjust until it’s perfect for your palate.
Can I grill these wings instead of baking?
Yes, grilling works great. Preheat your grill to medium-high heat (about 400°F). Grill the wings for 20-25 minutes, turning occasionally, until they’re cooked through and charred in spots. Then toss them in the glaze and serve. The smoky flavor from the grill adds another layer of deliciousness.
Pin This Recipe!
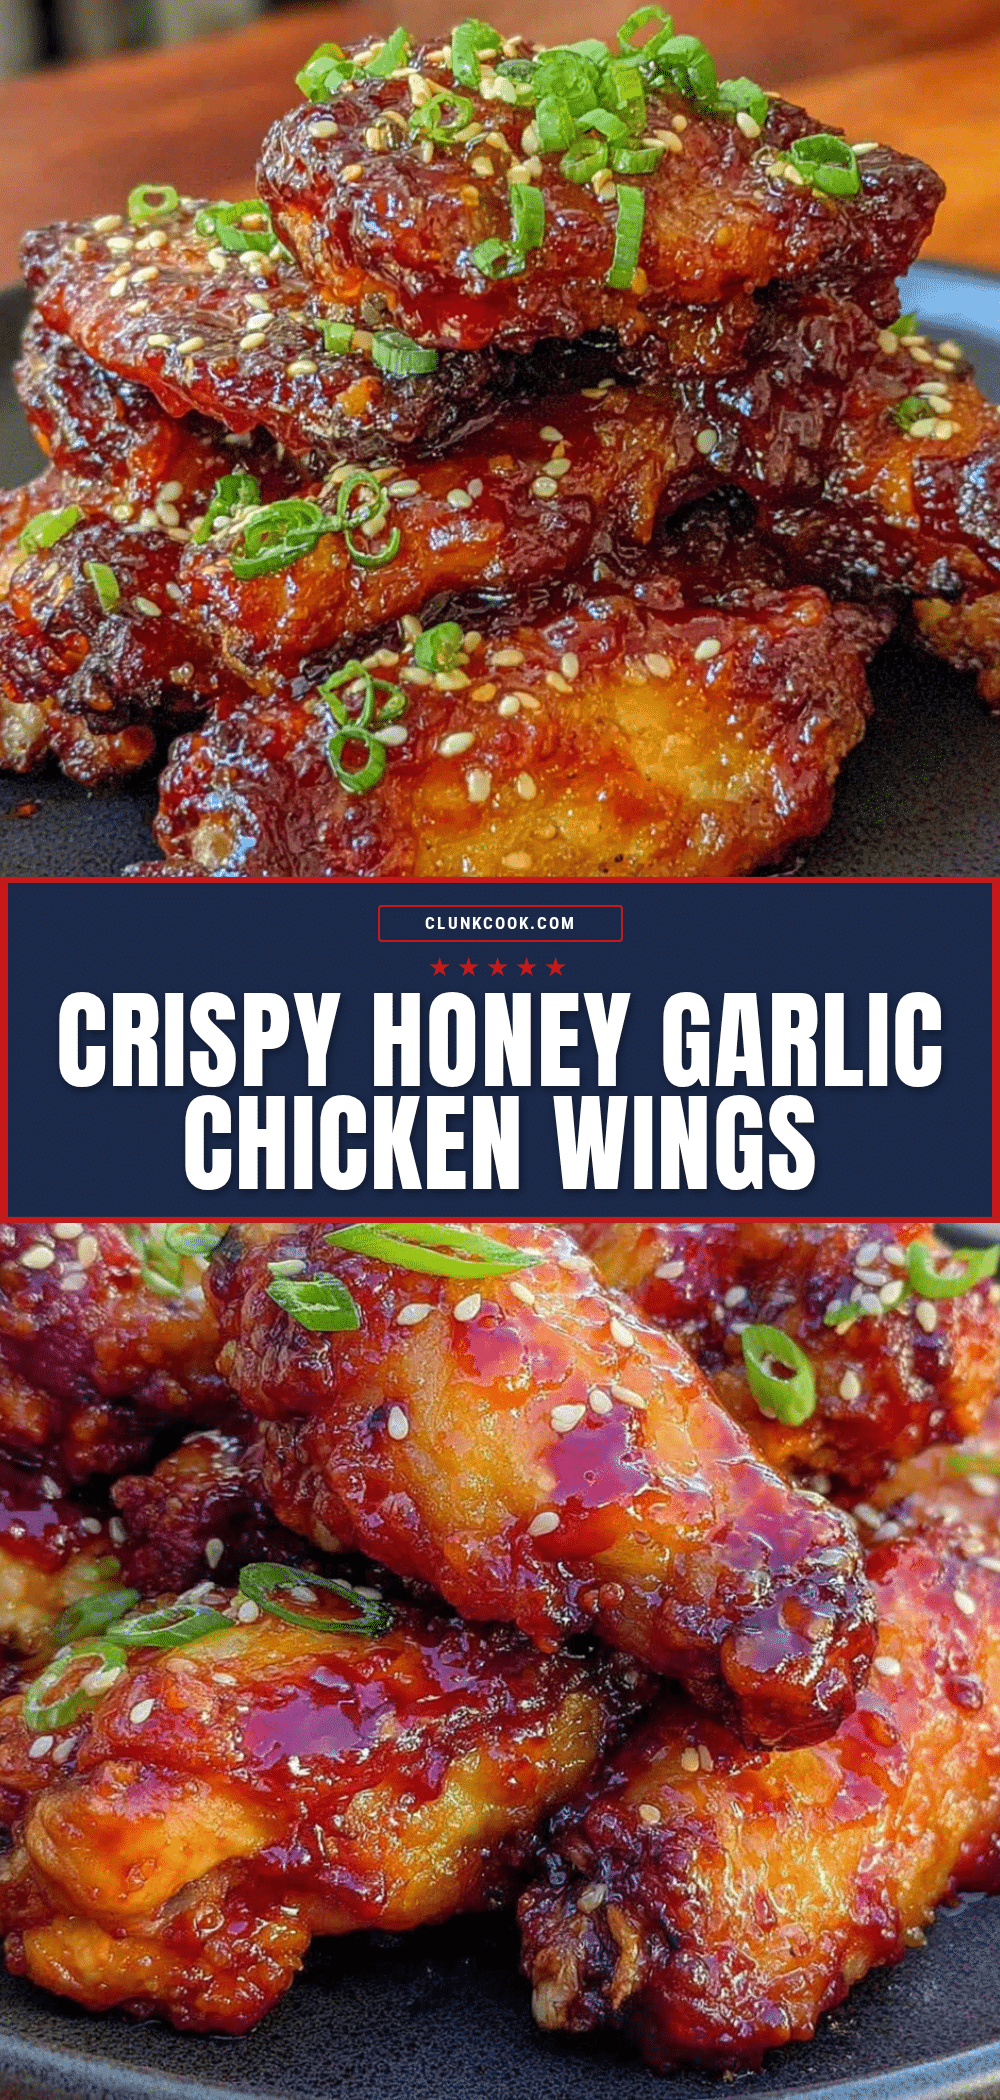
Crispy Baked Honey Garlic Chicken Wings: Easy Recipe

These crispy baked chicken wings with honey garlic glaze come out golden with shatteringly crisp skin and a sticky, sweet-savory glaze. No deep fryer required—just patience and a wire rack.
- Prep Time: 15 minutes
- Cook Time: 50 minutes
- Total Time: 1 hour 5 minutes
- Yield: 4 servings 1x
- Category: Appetizer
- Cuisine: American
Ingredients
- 3 pounds chicken wings, separated into drumettes and flats (about 24 pieces)
- 1 tablespoon baking powder (NOT baking soda)
- 1 teaspoon kosher salt
- 1/2 teaspoon black pepper, freshly ground
- 1/2 teaspoon garlic powder
- 1/2 teaspoon onion powder
- 1/3 cup honey
- 3 tablespoons low-sodium soy sauce
- 4 cloves garlic, minced
- 1 tablespoon rice vinegar
- 1 teaspoon sesame oil (optional)
- 1/2 teaspoon red pepper flakes
- 1 tablespoon cornstarch
- 2 tablespoons water
- Sesame seeds, toasted (for garnish)
- Chopped green onions (for garnish)
- Lime wedges (for serving)
Instructions
- Prep the Wings: Pat the chicken wings completely dry with paper towels. For best results, let them sit uncovered in the fridge for at least 30 minutes to further dry the skin.
- Season the Wings: In a large bowl, combine baking powder, salt, pepper, garlic powder, and onion powder. Add the dried wings and toss thoroughly until every piece is coated.
- Set Up the Rack: Place a wire rack inside a rimmed baking sheet. Arrange the wings on the rack in a single layer, making sure they aren’t touching.
- Bake the Wings: Preheat oven to 425°F (220°C). Bake for 45-50 minutes, flipping halfway through, until deep golden brown and crispy. Internal temperature should reach 175°F (80°C) in the thickest part.
- Make the Glaze: While wings bake, combine honey, soy sauce, minced garlic, rice vinegar, sesame oil, and red pepper flakes in a small saucepan. In a separate bowl, whisk cornstarch and water until smooth. Bring saucepan to a gentle simmer over medium heat, whisk in cornstarch slurry, and cook for 2-3 minutes until thickened. Remove from heat.
- Glaze the Wings: Let baked wings rest for 2-3 minutes. Transfer to a large bowl, pour about half the glaze over them, and toss gently to coat evenly.
- Finish and Serve: Return glazed wings to the wire rack and broil for 1-2 minutes, watching closely to prevent burning. Remove from oven, sprinkle with sesame seeds and green onions, and serve immediately with lime wedges.
Notes
The baking powder is crucial for crispy skin—do not substitute with baking soda. For extra crispiness, dry the wings in the fridge uncovered for an hour before seasoning. The broiling step after glazing caramelizes the glaze but watch closely to avoid burning. Leftovers can be stored in an airtight container in the fridge for up to 3 days; reheat in the oven at 400°F for 5-7 minutes to restore crispiness.
Nutrition
- Serving Size: 4-5 wings
- Calories: 380
- Sugar: 18
- Sodium: 720
- Fat: 18
- Saturated Fat: 5
- Carbohydrates: 22
- Protein: 32
Keywords: crispy baked chicken wings, honey garlic wings, baked wings, game day appetizer, easy chicken wings


