Love this? Save it for later!
Share the inspiration with your friends
The woman at the farmers’ market stall watched me stare at her pile of sugar pumpkins for what felt like forever. I was trying to figure out if I had the energy for another from-scratch pie situation, honestly. She just laughed and said, “You’re overthinking it, honey. Some things are supposed to be easy.” Then she scribbled something on a napkin and handed it over—a recipe so simple it barely counted as one. No crust to roll, no mixer to haul out, no fussing over curdling custards. Just dump, bake, and try not to eat the whole thing before dinner.
That napkin sat on my counter for three days before I actually tried it. I mean, part of me felt like I was cheating. Isn’t good baking supposed to be hard? But then Thursday night rolled around, I had a fridge full of pumpkin puree, and honestly? I was tired. So I dumped everything into a pan, crossed my fingers, and slid it into the oven. Twenty minutes later, the whole apartment smelled like autumn had moved in permanently. And when I pulled that golden, bubbly, slightly-crispy-on-the-edges thing out? Let me tell you—I took one bite and immediately texted the farmers’ market lady a photo. She replied with a single crying-laughing emoji.
This Easy Pumpkin Dump Cake with Vanilla Ice Cream became my secret weapon that season. It’s the dessert that makes people think you spent hours in the kitchen when you really just opened a few cans and let the oven do the work. Maybe you know that feeling—when you want something impressive but you’re running on fumes. Or when you need a dessert that feeds a crowd without turning your kitchen into a disaster zone. That’s exactly what this is. And honestly? The vanilla ice cream melting into those warm, spiced cake pockets is the kind of simple joy that keeps me coming back year after year.
Why You’ll Love This Recipe
Look, I have made a lot of pumpkin desserts in my time. Some were complicated. Some were disasters. This one? It’s the Goldilocks of fall baking—just right, every single time. Here is why this Easy Pumpkin Dump Cake with Vanilla Ice Cream has earned a permanent spot in my recipe box:
- Ridiculously Simple: We are talking 10 minutes of active prep. No creaming butter, no folding egg whites, no chilling dough. If you can open a can and sprinkle a box mix, you can make this.
- Pantry-Friendly Ingredients: Canned pumpkin, yellow cake mix, butter, eggs, and a few spices. That’s it. No weird specialty items that you will use once and forget about.
- Perfect for Fall Gatherings: Thanksgiving, Friendsgiving, potlucks, or just a cozy Tuesday night. It serves a crowd without any last-minute stress.
- Always a Crowd-Pleaser: I have brought this to three different holiday dinners and watched skeptics go back for seconds. The combo of warm spiced pumpkin and cold vanilla ice cream? Irresistible.
- Forgiving as Can Be: Overbake it a little? Still delicious. Use a different cake mix flavor? Works great. Forget to set a timer? The smell will remind you.
What makes this version different from every other dump cake out there? It’s the ratio. I spent a few test batches getting the pumpkin layer just right—not too wet, not too dry, with enough spice to taste like autumn in a spoonful. And the butter distribution on top? That’s the secret. You want every bit of cake mix to get a little butter love so the top bakes up golden and slightly crisp while the bottom stays soft and almost pudding-like. When you scoop it up with a big scoop of vanilla ice cream melting into those warm pockets? Honestly, it is the kind of dessert that makes you close your eyes after the first bite.
It is comfort food at its finest—simple, soul-soothing, and perfect for making a regular evening feel a little special without any of the stress.
What Ingredients You Will Need
This recipe uses simple, everyday ingredients to deliver big fall flavor with almost no effort. Most of these are probably in your pantry right now, which is exactly how I like it.
For the Pumpkin Layer
- 1 can (15 oz) pumpkin puree (not pumpkin pie filling—make sure it’s 100% pure pumpkin. I prefer Libby’s for consistent texture)
- 1 can (12 oz) evaporated milk (adds richness without being too heavy. You can use regular milk in a pinch, but evaporated gives a creamier result)
- 3 large eggs, room temperature (cold eggs can make the mixture seize up a bit. Let them sit on the counter for 15 minutes)
- 1 cup granulated sugar (just regular white sugar. No need for anything fancy)
- 1 teaspoon vanilla extract (pure vanilla if you have it, imitation works fine too)
- 2 teaspoons pumpkin pie spice (store-bought is great, or make your own with cinnamon, nutmeg, ginger, and cloves)
- 1 teaspoon ground cinnamon (because you can never have too much cinnamon in a pumpkin dessert)
- 1/4 teaspoon salt (balances the sweetness and brings out the pumpkin flavor)
For the Topping
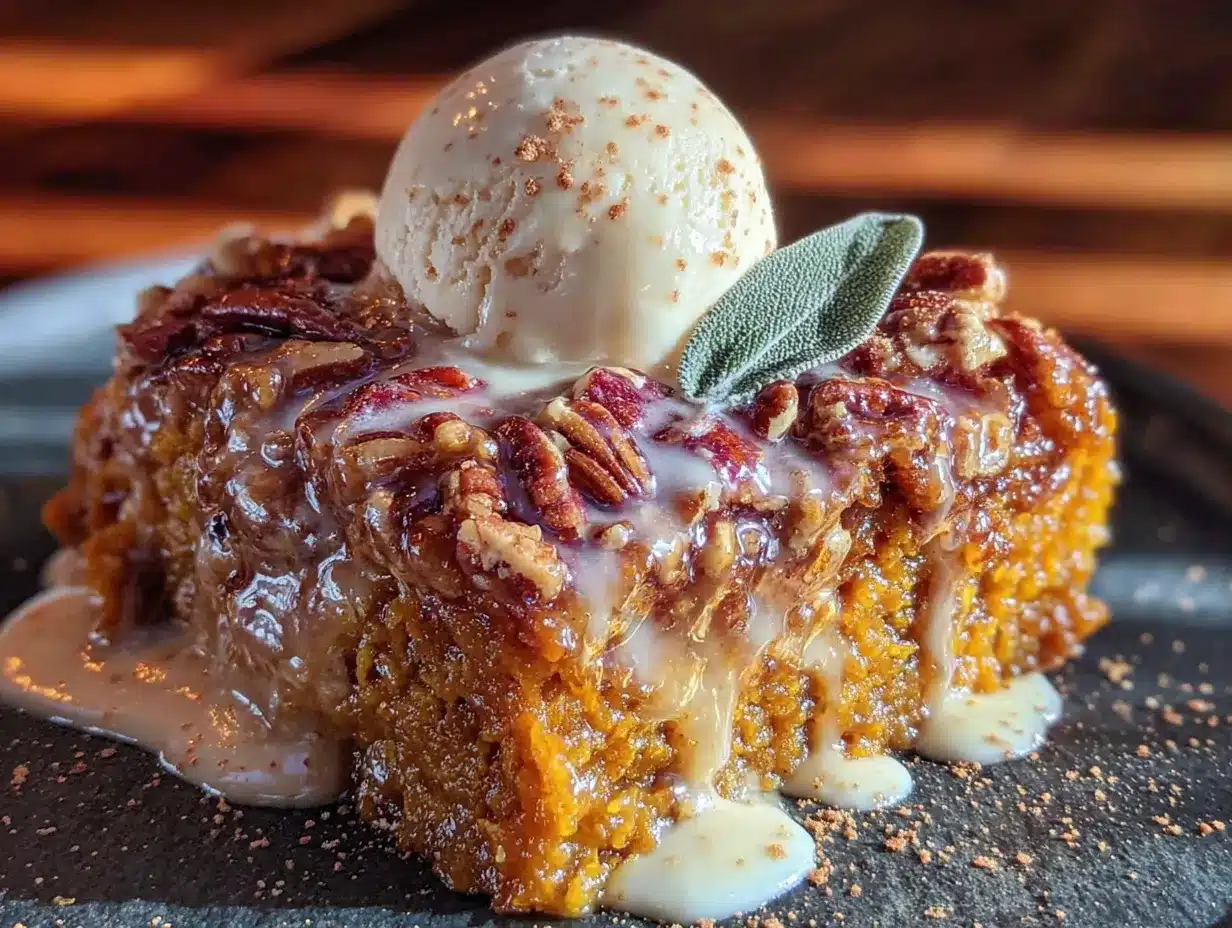
- 1 box (15.25 oz) yellow cake mix (Duncan Hines or Betty Crocker both work perfectly. Do not use a “butter recipe” or “extra moist” version—they change the texture)
- 3/4 cup unsalted butter, melted (salted butter works too, just reduce the added salt in the pumpkin layer slightly)
- 1 cup chopped pecans or walnuts (optional, but I love the crunch. Toast them first for extra flavor)
For Serving
- Vanilla ice cream (this is non-negotiable in my house. The cold creaminess against the warm spiced cake is the whole point)
Ingredient Tip: If you are using fresh pumpkin puree instead of canned, make sure it is well-drained. Fresh pumpkin has more water content and can make the layer too thin. I learned this the hard way during a particularly soggy Thanksgiving incident. Just say no to watery pumpkin.
Substitution Note: For a gluten-free version, use a gluten-free yellow cake mix. For dairy-free, substitute the evaporated milk with canned coconut milk (full fat) and use a plant-based butter. The texture will be slightly different but still delicious. I tested this for a friend with dairy allergies and it worked beautifully.
Equipment Needed
The beauty of this Easy Pumpkin Dump Cake with Vanilla Ice Cream is that you do not need a fancy kitchen to pull it off. Here is what you will need:
- 9×13-inch baking dish (glass or metal both work. Glass lets you see the bottom browning, which I like)
- Large mixing bowl (any size will do, you are just whisking pumpkin stuff)
- Whisk (a fork works in a pinch, but a whisk gets the pumpkin mixture smoother)
- Measuring cups and spoons (for the sugar and spices)
- Small saucepan or microwave-safe bowl (for melting butter)
- Rubber spatula (to scrape every last bit of pumpkin goodness into the pan)
- Cooling rack (if you have one. Not essential, but helps the cake cool evenly)
Budget-Friendly Tip: Do not own a 9×13 dish? Use a disposable aluminum pan from the grocery store. They cost like two dollars and are perfect for potlucks because you can just toss them after. I have done this more times than I care to admit.
Personal Note: I used to make this in a ceramic dish that was slightly too small. It bubbled over every single time. The smoke alarm went off. My dog hid under the bed. Learn from my mistakes—use the right size pan. Your smoke detector will thank you.
Preparation Method
Alright, let us get to the good part. This is the kind of recipe where you barely break a sweat, and I mean that in the best way possible. Follow these steps and you will have a warm, gooey, irresistible dessert in under an hour.
- Preheat your oven to 350°F (175°C). While it is heating up, lightly grease your 9×13-inch baking dish with butter or non-stick spray. I prefer butter for the flavor, but spray is faster. No judgment here.
- Make the pumpkin layer. In your large mixing bowl, combine the pumpkin puree, evaporated milk, eggs, sugar, vanilla extract, pumpkin pie spice, cinnamon, and salt. Whisk until everything is smooth and well combined. It should look like a thick, creamy, beautifully orange custard. Take a second to smell it—that is autumn right there.
- Pour the pumpkin mixture into the prepared baking dish. Use your rubber spatula to spread it evenly. Tilt the pan a little if needed. You want an even layer so everything bakes uniformly.
- Sprinkle the cake mix evenly over the top. This is the “dump” part of the dump cake. Open the box, and sprinkle the dry cake mix in an even layer over the pumpkin mixture. Do not stir it. I repeat—do not stir it. The cake mix is supposed to stay on top, where it will form that glorious golden crust. If you stir it in, you will get a completely different texture. Trust the process.
- Drizzle the melted butter over the cake mix. This is the most important step. Melt your butter (microwave in 30-second bursts or on the stovetop) and then drizzle it as evenly as possible over the entire surface of the cake mix. Try to cover as much of the dry mix as you can. Some spots will get more butter, some less—that is okay. The butter will sink down during baking and create those beautiful pockets of buttery, cakey goodness.
- Sprinkle with chopped pecans if using. Scatter them evenly over the top. They will toast up during baking and add a lovely crunch that contrasts with the soft pumpkin layer underneath.
- Bake for 45-50 minutes. Place the dish in the preheated oven and bake until the top is golden brown and the edges are bubbly. The center should be set but still have a slight jiggle—like a pumpkin cheesecake. If you insert a toothpick into the cakey top, it should come out clean. The pumpkin layer underneath will be softer, which is exactly what you want.
- Let it cool for 10-15 minutes. I know, I know. The smell is incredible and you want to dive in immediately. But letting it rest allows the layers to set slightly so you get cleaner servings. Plus, the vanilla ice cream will melt into it better if the cake is still warm but not scorching hot.
- Serve warm with a generous scoop of vanilla ice cream. This is not optional. The cold, creamy ice cream melting into the warm, spiced, buttery cake is what makes this dessert unforgettable. Scoop, serve, and watch everyone’s eyes light up.
Sensory Cue: When it is done, your kitchen will smell like a pumpkin spice candle exploded in the best way. The top should be golden brown with slightly darker edges, and you will see little bubbles of pumpkin mixture peeking through the cake layer. That is how you know it is perfect.
Troubleshooting: If the top is browning too quickly but the center is still jiggly, loosely tent the dish with aluminum foil for the last 10 minutes of baking. This will prevent the top from burning while the center finishes cooking.
Cooking Tips & Techniques
After making this Easy Pumpkin Dump Cake with Vanilla Ice Cream at least a dozen times (I am not exaggerating), I have picked up a few tricks that make the process even smoother. Here is what I wish someone had told me the first time:
- Room temperature eggs matter. Cold eggs can make the pumpkin mixture slightly lumpy and harder to whisk into a smooth consistency. Let them sit on the counter for 15-20 minutes before you start. If you forget (I do, constantly), place them in a bowl of warm water for 5 minutes.
- Do not overmix the pumpkin layer. Just whisk until everything is combined. Overmixing can incorporate too much air, which might cause the layer to puff up and then collapse. You want it dense and creamy, not fluffy.
- The butter distribution trick. Pour the melted butter in a zigzag pattern across the cake mix, then use a spoon to gently spread any dry patches. You want every bit of cake mix to have some butter contact. I learned this after my first attempt left a dry, powdery spot in the corner. Not ideal.
- Let it rest before serving. I mentioned this above, but it bears repeating. The cake needs a few minutes to set after coming out of the oven. If you scoop it too soon, it will be soupy. Give it 10-15 minutes. Use that time to scoop the ice cream and set out bowls.
- Make it ahead. You can assemble the whole thing (without baking) up to 24 hours in advance. Just cover and refrigerate. When you are ready to bake, add about 10 minutes to the baking time since you are starting from cold. This is a lifesaver for Thanksgiving or dinner parties.
My Biggest Failure: The first time I made this, I used a “butter recipe” yellow cake mix because it was on sale. The top came out greasy and heavy instead of light and crispy. Stick with the regular yellow cake mix. Some shortcuts are not worth it.
Variations & Adaptations
One of the best things about this Easy Pumpkin Dump Cake with Vanilla Ice Cream is how easy it is to customize. Here are some variations I have tried and loved:
- Spice It Up: Add 1/4 teaspoon of ground ginger or cardamom to the pumpkin layer for a more complex spice profile. I did this once when I ran out of pumpkin pie spice and it was honestly amazing.
- Chocolate Lover’s Version: Swap the yellow cake mix for a chocolate cake mix. The chocolate and pumpkin combination is surprisingly good. Top with chocolate ice cream for double the chocolate. My kids went absolutely wild for this version.
- Gluten-Free Adaptation: Use a gluten-free yellow cake mix. I have tested this with King Arthur’s gluten-free yellow cake mix and it worked beautifully. No one at the table even noticed the difference.
- Dairy-Free Version: Substitute the evaporated milk with full-fat canned coconut milk and use a plant-based butter. The coconut flavor is subtle but adds a nice tropical note that pairs well with the pumpkin spice.
- Add a Streusel Layer: For extra crunch, mix 1/2 cup brown sugar, 1/2 cup chopped pecans, and 2 tablespoons melted butter, then sprinkle it over the cake mix before baking. It creates a caramelized, crunchy top that is absolutely addictive.
- Pumpkin Cheesecake Style: Drop spoonfuls of cream cheese (softened and mixed with a little sugar) over the pumpkin layer before adding the cake mix. It creates creamy pockets of cheesecake throughout. Dangerous. In the best way.
Personal Favorite: I once made this with a spiced apple cake mix instead of yellow cake mix. It was fall on steroids. The apple and pumpkin flavors complemented each other beautifully. If you see a seasonal cake mix, grab it and experiment.
Serving & Storage Suggestions
This Easy Pumpkin Dump Cake with Vanilla Ice Cream is best served warm, but honestly, it is pretty amazing at room temperature too. Here is how to make the most of it:
Serving Temperature: Serve it warm, straight from the oven, with a generous scoop of vanilla ice cream. The contrast between the warm cake and cold ice cream is the whole point of this dessert. If you are serving a crowd, set out a bowl of whipped cream or caramel sauce for people to add themselves.
Complementary Pairings: A drizzle of salted caramel sauce or a sprinkle of cinnamon on top of the ice cream takes this to another level. I also love serving it with a cup of hot coffee or a mug of spiced apple cider. It is basically fall in a bowl.
Storage: Cover the baking dish tightly with foil or plastic wrap and store in the refrigerator for up to 4 days. The cake will soften over time, but the flavors actually meld together and get even better. I have been known to eat it cold, straight from the fridge, with a spoon. No regrets.
Reheating: To bring back that warm, fresh-from-the-oven experience, reheat individual servings in the microwave for 20-30 seconds. For a larger portion, reheat in a 300°F oven for 10-15 minutes. Add a fresh scoop of ice cream and it will taste almost as good as day one.
Freezer Instructions: This cake freezes beautifully. Let it cool completely, then cover tightly with plastic wrap and foil. Freeze for up to 3 months. Thaw overnight in the refrigerator and reheat as directed above. I always make a double batch and stash one in the freezer for emergency dessert situations.
Flavor Development: Honestly, this cake tastes even better the next day. The spices have time to mingle, the pumpkin layer sets up a bit more, and everything becomes wonderfully cohesive. If you can resist eating it all the first night, you are a stronger person than I am.
Nutritional Information & Benefits
Let’s be real—this is a dessert, not a health food. But it does have some redeeming qualities, especially compared to more complicated pumpkin desserts.
Estimated Nutritional Values (per serving, without ice cream):
- Calories: 380
- Fat: 18g
- Carbohydrates: 52g
- Protein: 6g
- Fiber: 3g
- Sugar: 34g
Health Highlights: Pumpkin is packed with vitamin A (great for eye health) and fiber (good for digestion). The spices—cinnamon, nutmeg, ginger—have anti-inflammatory properties. So, you know, it is practically a health food. Sort of.
Dietary Considerations: This recipe can be made gluten-free and dairy-free with simple substitutions (see variations above). It is naturally nut-free if you skip the pecans. Always check your cake mix label for potential allergens.
My Perspective: I believe in balance. This dessert is a treat, and treats are meant to be enjoyed without guilt. One serving with a scoop of ice cream is around 500 calories—perfectly reasonable for a special occasion or a cozy weekend indulgence. Life is too short to skip the ice cream.
Conclusion
This Easy Pumpkin Dump Cake with Vanilla Ice Cream is proof that simple can be spectacular. It requires minimal effort, uses ingredients you probably already have, and delivers a dessert that tastes like you spent hours in the kitchen. The warm, spiced pumpkin layer, the buttery golden topping, and that cold, creamy vanilla ice cream melting into every bite—it is fall perfection in a bowl.
I love this recipe because it reminds me that cooking does not have to be complicated to be wonderful. Sometimes the best things come from a napkin scribble and a willingness to try something easy. Whether you are making this for Thanksgiving, a potluck, or just a quiet Tuesday night, I hope it brings you as much joy as it has brought me.
Now I want to hear from you! Have you tried this Easy Pumpkin Dump Cake with Vanilla Ice Cream? Did you add your own twist? Drop a comment below and let me know how it turned out. And if you loved it, share this recipe with a friend who needs a little fall comfort in their life. Happy baking, friends!
Frequently Asked Questions
Can I use fresh pumpkin instead of canned?
Yes, you can! Just make sure to drain the fresh pumpkin puree well. Fresh pumpkin has more water content than canned, which can make the layer too thin. I recommend letting it sit in a fine-mesh strainer for about 30 minutes before using it.
Do I have to use yellow cake mix?
Not at all! Spice cake mix, butter pecan cake mix, or even chocolate cake mix all work beautifully. Each one gives the dessert a different flavor profile. Spice cake mix is my second favorite after yellow.
Can I make this in advance for a party?
Absolutely. You can assemble the entire dish (without baking) up to 24 hours ahead and keep it covered in the refrigerator. When you are ready to bake, add about 10 minutes to the baking time since you are starting from cold.
Why is my dump cake soupy in the middle?
This usually happens if the cake is underbaked or if the pumpkin layer had too much liquid. Make sure you bake it until the edges are bubbly and the center is set but still slightly jiggly. Also, let it rest for 10-15 minutes before serving—it will firm up as it cools.
Can I freeze leftover pumpkin dump cake?
Yes! Let the cake cool completely, then wrap it tightly in plastic wrap and foil. It will keep in the freezer for up to 3 months. Thaw overnight in the refrigerator and reheat individual servings in the microwave for 20-30 seconds.
Pin This Recipe!
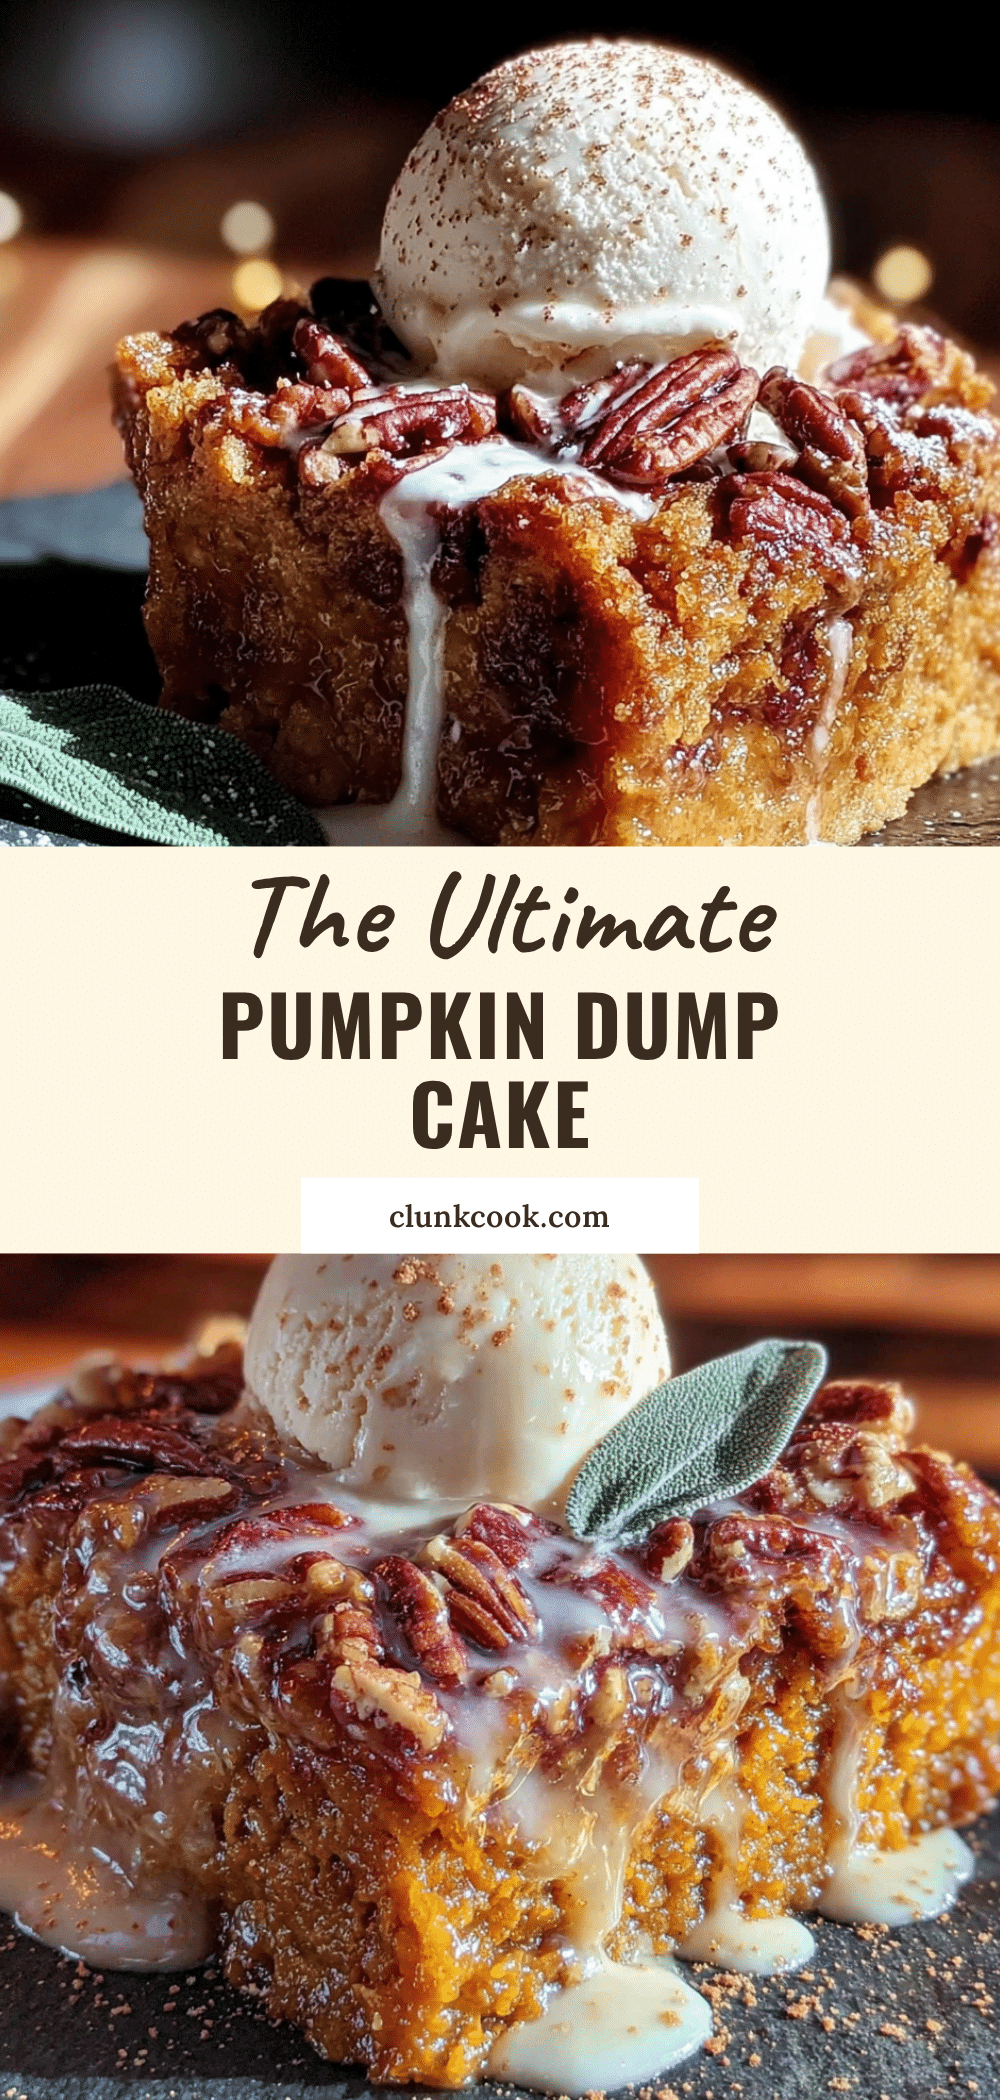
Easy Pumpkin Dump Cake with Vanilla Ice Cream
A ridiculously simple pumpkin dump cake with a buttery golden topping, served warm with vanilla ice cream. Perfect for fall gatherings and requires only 10 minutes of active prep.
- Prep Time: 10 minutes
- Cook Time: 45 minutes
- Total Time: 55 minutes
- Yield: 12 servings 1x
- Category: Dessert
- Cuisine: American
Ingredients
- 1 can (15 oz) pumpkin puree (not pumpkin pie filling)
- 1 can (12 oz) evaporated milk
- 3 large eggs, room temperature
- 1 cup granulated sugar
- 1 teaspoon vanilla extract
- 2 teaspoons pumpkin pie spice
- 1 teaspoon ground cinnamon
- 1/4 teaspoon salt
- 1 box (15.25 oz) yellow cake mix (not butter recipe or extra moist)
- 3/4 cup unsalted butter, melted
- 1 cup chopped pecans or walnuts (optional)
- Vanilla ice cream for serving
Instructions
- Preheat oven to 350°F (175°C). Lightly grease a 9×13-inch baking dish with butter or non-stick spray.
- In a large mixing bowl, combine pumpkin puree, evaporated milk, eggs, sugar, vanilla extract, pumpkin pie spice, cinnamon, and salt. Whisk until smooth and well combined.
- Pour the pumpkin mixture into the prepared baking dish and spread evenly.
- Sprinkle the dry cake mix evenly over the pumpkin mixture. Do not stir.
- Drizzle the melted butter as evenly as possible over the cake mix.
- Sprinkle with chopped pecans if using.
- Bake for 45-50 minutes, until the top is golden brown and the edges are bubbly. The center should be set but still slightly jiggly.
- Let cool for 10-15 minutes before serving.
- Serve warm with a generous scoop of vanilla ice cream.
Notes
For best results, use regular yellow cake mix (not butter recipe or extra moist). Let the cake rest 10-15 minutes before serving to allow layers to set. Can be assembled up to 24 hours in advance and refrigerated before baking.
Nutrition
- Serving Size: 1 serving (without i
- Calories: 380
- Sugar: 34
- Sodium: 320
- Fat: 18
- Saturated Fat: 9
- Carbohydrates: 52
- Fiber: 3
- Protein: 6
Keywords: pumpkin dump cake, easy pumpkin dessert, fall dessert, dump cake, pumpkin cake with ice cream


