Love this? Save it for later!
Share the inspiration with your friends
My neighbor Carol wasn’t trying to impress anyone when I walked into her kitchen last Tuesday. I’d stopped by to borrow a ladder—our gutters were overflowing from the storm the night before—and the smell of toasted walnuts and warm bananas hit me before I even made it past her screen door. She was standing there in her gardening shoes, flour dusted across her favorite old sweater, pulling a loaf pan out of the oven like it was the most ordinary thing in the world.
“It’s just banana bread,” she said when I asked what on earth smelled that good. “I had three brown bananas on the counter and figured I’d use them up before they got sad.” She didn’t even look up when she said it—she was too busy trying to find a clean spot on the counter to set the pan down. That’s when I noticed she was using a single mixing bowl, the same one she probably used for her morning oatmeal, and she hadn’t even bothered to pull out a mixer. She just stirred everything together with a wooden spoon like it was nothing.
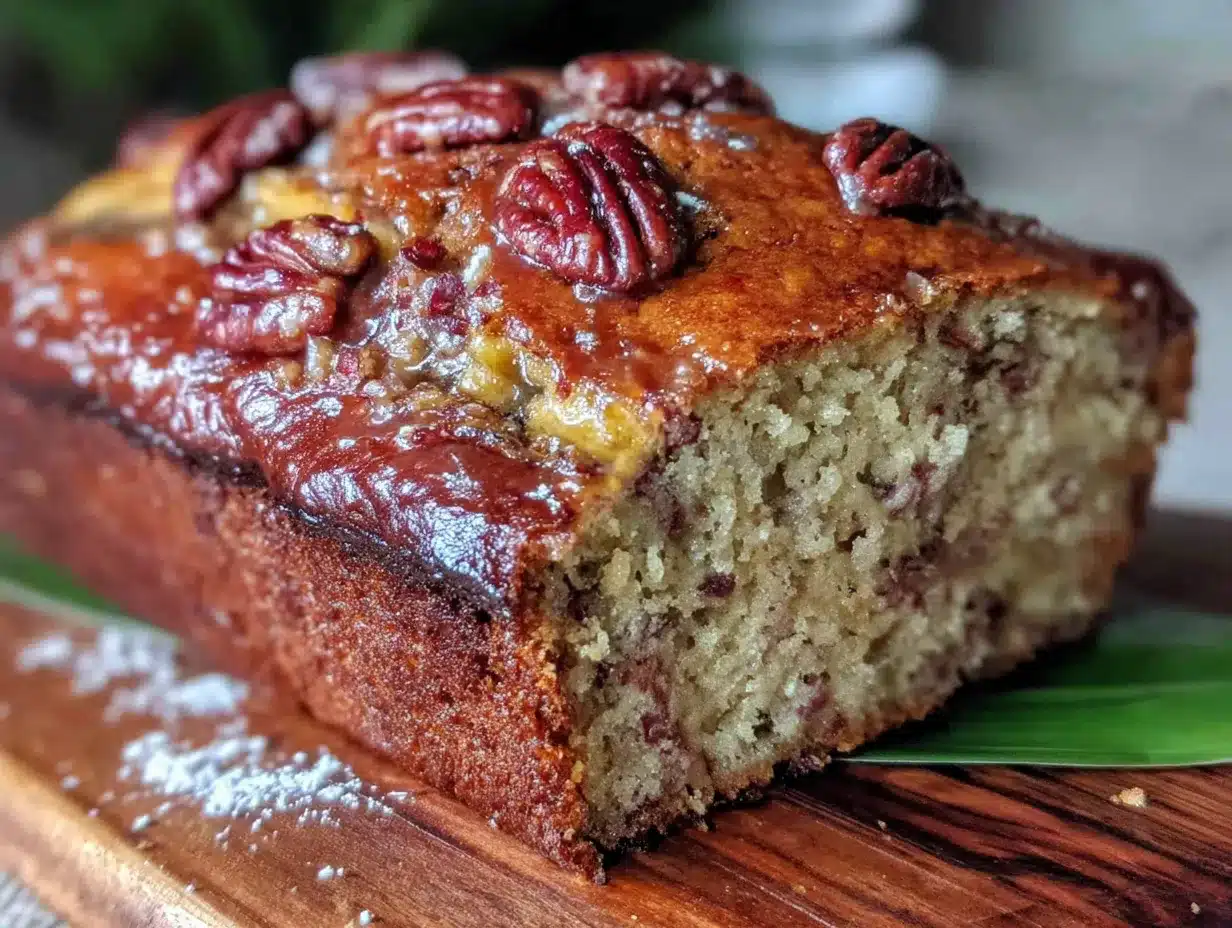
Let me tell you, that first slice was something else. The crust had this perfect crackly top—you know that shattery, sugary crunch that the best banana bread has?—and the inside was so tender it practically fell apart on the plate. The walnuts weren’t just sprinkled on top like an afterthought; they were folded right into the batter, so every single bite had that warm, toasty crunch against the soft, sweet crumb. I stood there eating it over her kitchen sink, not even caring that crumbs were falling everywhere.
Carol shrugged when I asked for the recipe. “It’s nothing special. One bowl, some butter, a few ripe bananas. You probably have everything already.” And honestly? She was right. But the way she made it—without fuss, without drama, just good ingredients treated with respect—that’s what made me ask for the exact measurements. Maybe you’ve been there too, standing in someone’s kitchen, watching them make something extraordinary look completely ordinary. That’s this banana bread. It’s the kind of recipe you’ll make on a Tuesday morning for no reason at all, and suddenly your whole kitchen feels like home.
Why You’ll Love This Recipe
I’ve tested this one-bowl banana walnut bread at least a dozen times since that morning at Carol’s house, and I can say with confidence—this is the version you’ll come back to again and again. Here’s why it stands out from every other banana bread recipe floating around the internet.
- One Bowl, No Fuss: You don’t need a stand mixer, a hand mixer, or even a whisk if you don’t want one. A single mixing bowl and a wooden spoon are all it takes. Fewer dishes mean more time enjoying that warm slice with your coffee.
- Simple Pantry Ingredients: Everything in this recipe is probably already in your kitchen. Butter, sugar, eggs, flour, baking soda, salt, bananas, and walnuts. No weird extracts, no specialty flours, no trips to three different stores.
- Perfect for Busy Mornings: From start to oven in about 15 minutes. While the bread bakes, you can shower, answer emails, or just sit there and enjoy the smell filling your house.
- That Crackly Top Everyone Loves: There’s a little trick I picked up from Carol—a sprinkle of turbinado sugar on top before baking—that gives the crust this gorgeous, crunchy, caramelized finish. It’s the first thing people notice, and they always ask how you did it.
- Walnuts in Every Bite: Instead of just scattering nuts on top where they can burn or fall off, this recipe folds them into the batter. Every slice gets that buttery crunch throughout.
- Foolproof for Beginners: I’ve made this with overripe bananas, barely ripe bananas, frozen and thawed bananas—it works every single time. The batter is forgiving, the baking time is generous, and even if you overmix it a little (which I definitely did the first time), it still comes out tender and delicious.
This isn’t just another banana bread recipe. It’s the one that makes you close your eyes after the first bite, the one that gets requested for every brunch and bake sale, the one that turns three sad brown bananas into something you actually look forward to. It’s comfort food at its simplest—no fancy techniques, no complicated steps, just honest, soul-soothing baking that tastes like a hug in loaf form.
What Ingredients You Will Need
This one-bowl banana walnut bread uses straightforward ingredients that work together to create something genuinely special. Let me walk you through each one so you know exactly what to look for and why it matters.
Wet Ingredients
- Unsalted butter, ½ cup (113g), melted and slightly cooled – I use unsalted so I can control the salt level myself. Melt it gently in the microwave or on the stovetop, then let it sit for a couple minutes so it doesn’t cook the eggs when you add them. Land O’Lakes or Kerrygold are my go-to brands for consistent results.
- Ripe bananas, 3 medium (about 1½ cups mashed, 340g) – The riper, the better. You want bananas with lots of brown spots—almost black is perfect. They’re sweeter, softer, and mash into the batter more smoothly. If your bananas aren’t ripe enough, you can bake them at 300°F for 15 minutes to soften and sweeten them up.
- Granulated sugar, ¾ cup (150g) – Regular white sugar gives the bread structure and sweetness. You can reduce it to ⅔ cup if your bananas are super ripe, but I wouldn’t go lower than that or the texture suffers.
- Large eggs, 2, at room temperature – Room temperature eggs mix into the melted butter more evenly, creating a smoother batter. If you forgot to set them out, place them in a bowl of warm water for 5 minutes before cracking them.
- Vanilla extract, 1 teaspoon – Pure vanilla extract makes a difference here. Imitation vanilla works in a pinch, but the real stuff adds a warmth and depth that complements the banana flavor beautifully.
- Plain yogurt or sour cream, ¼ cup (60g) – This is my secret ingredient. It adds moisture without making the bread greasy, and the acidity helps activate the baking soda for a better rise. Greek yogurt works great too—just use full-fat for the best texture.
Dry Ingredients
- All-purpose flour, 1½ cups (188g) – Spoon and level your flour for the most accurate measurement. Scooping directly from the bag can pack in too much flour, leading to dry, dense bread. Gold Medal or King Arthur Flour are my trusted brands.
- Baking soda, 1 teaspoon – Make sure your baking soda is fresh. Test it by dropping a little into vinegar—if it bubbles vigorously, it’s good to go. Old baking soda won’t give your bread the lift it needs.
- Salt, ½ teaspoon – Fine sea salt or table salt works perfectly. Salt balances the sweetness and enhances the banana and walnut flavors.
Mix-Ins and Topping
- Walnuts, 1 cup (120g), roughly chopped – Toast them first for the best flavor. Spread them on a baking sheet at 350°F for 5-7 minutes until they smell fragrant. Let them cool completely before folding them into the batter. I like to save a handful to sprinkle on top for a prettier presentation.
- Turbinado sugar, 1 tablespoon (for topping, optional but highly recommended) – This coarse sugar creates that signature crackly crust. Demerara sugar works too, or you can just use regular granulated sugar in a pinch.
Substitution Notes: If you’re out of yogurt or sour cream, you can use buttermilk or even milk with a teaspoon of lemon juice added. For a dairy-free version, use melted coconut oil instead of butter and a dairy-free yogurt. And if walnuts aren’t your thing, pecans or chocolate chips make excellent swaps.
Equipment Needed
The beauty of this one-bowl banana walnut bread is how little equipment it requires. You don’t need a fancy kitchen to pull this off—just a few basics that you probably already own.
- Large mixing bowl – Any bowl large enough to hold all the ingredients with room for stirring works. I use a standard 4-quart ceramic bowl, but glass or stainless steel are fine too.
- Wooden spoon or rubber spatula – A wooden spoon gives you good leverage for mixing, but a sturdy rubber spatula works beautifully too. The key is having something that can scrape the sides and bottom of the bowl.
- 9×5-inch loaf pan – This is the standard size for banana bread. If you only have an 8×4-inch pan, your bread will be taller and可能需要增加5-10分钟的烘烤时间。A 9×5 gives you that perfect domed top and even baking.
- Parchment paper – Not strictly necessary, but it makes lifting the finished bread out of the pan so much easier. I leave an overhang on two sides to create handles.
- Cooling rack – Letting the bread cool in the pan for 10 minutes, then transferring it to a wire rack, prevents the bottom from getting soggy. If you don’t have a cooling rack, you can use the inverted loaf pan lid or just let it cool completely in the pan.
- Fork or potato masher – For mashing the bananas. A fork works perfectly, but a potato masher makes quicker work of it if you have one.
- Measuring cups and spoons – Accurate measurements matter in baking. Use dry measuring cups for flour and sugar, and liquid measuring cups for the yogurt.
I’ve made this recipe using a plastic mixing bowl from the dollar store and a fork from my camping gear, and it still came out great. The only piece of equipment I’d recommend investing in is a good loaf pan—a heavier one distributes heat more evenly and gives you a nicer crust.
Preparation Method
Alright, let’s get to the fun part. This one-bowl banana walnut bread comes together in about 15 minutes of active work, then the oven does the rest. Follow these steps, and you’ll have a beautiful, fragrant loaf in no time.
Step 1: Preheat and Prepare Your Pan
Preheat your oven to 350°F (175°C). While it’s heating, grease your 9×5-inch loaf pan with butter or cooking spray. For extra insurance, line it with a strip of parchment paper that hangs over the two long sides—this makes lifting the finished bread out effortless. Set the pan aside.
Step 2: Toast the Walnuts
Spread the chopped walnuts on a baking sheet and toast them in the preheating oven for 5-7 minutes. You’ll know they’re done when they smell warm and nutty and have darkened slightly. Watch them carefully—walnuts can go from perfectly toasted to burnt in under a minute. Remove them from the oven and let them cool completely while you prepare the batter.
Step 3: Mash the Bananas
Peel the bananas and place them in your large mixing bowl. Mash them well with a fork or potato masher until they’re mostly smooth with a few small lumps remaining. You want some texture here—completely smooth banana puree can make the bread dense. You should have about 1½ cups of mashed banana.
Step 4: Add the Wet Ingredients
Pour the melted and slightly cooled butter into the bowl with the mashed bananas. Add the granulated sugar, room temperature eggs, vanilla extract, and yogurt or sour cream. Stir everything together with your wooden spoon or spatula until it’s well combined. Don’t worry if it looks a little lumpy—that’s normal. The mixture should be smooth and glossy when you’re done.
Step 5: Add the Dry Ingredients
Sprinkle the flour, baking soda, and salt evenly over the wet mixture. Here’s the important part: stir just until the flour disappears into the batter. Overmixing at this stage develops gluten, which can make your banana bread tough and rubbery. A few small streaks of flour are okay—they’ll disappear as the batter rests. The final batter should be thick but scoopable, like a very thick muffin batter.
Step 6: Fold in the Walnuts
Gently fold the cooled, toasted walnuts into the batter using a rubber spatula. Reserve about ¼ cup of walnuts to sprinkle on top if you want a prettier loaf. Fold just until the nuts are evenly distributed—about 5 or 6 strokes. The batter will look slightly lumpy from the walnuts, and that’s exactly what you want.
Step 7: Transfer to the Pan
Scrape the batter into your prepared loaf pan and spread it evenly with the spatula. If you reserved some walnuts, sprinkle them over the top now, gently pressing them into the batter so they stick. Sprinkle the turbinado sugar evenly over the top—this is what creates that gorgeous, crackly crust.
Step 8: Bake
Place the pan in the center of your preheated oven and bake for 55-65 minutes. At the 50-minute mark, start checking for doneness. The bread is done when a toothpick inserted into the center comes out clean or with just a few moist crumbs attached. The top should be deep golden brown and cracked beautifully. If the top is browning too quickly (after about 40 minutes), loosely tent the pan with aluminum foil.
Step 9: Cool
Let the bread cool in the pan on a wire rack for 10 minutes. Then, use the parchment paper handles to lift it out of the pan and transfer it directly to the wire rack. Let it cool completely before slicing—I know it’s tempting, but cutting into warm banana bread can make it crumble and fall apart. If you can wait at least an hour, you’ll get much cleaner slices.
Step 10: Slice and Serve
Use a serrated knife to cut the bread into 1-inch thick slices. A gentle sawing motion works best to avoid crushing the tender crumb. Serve warm or at room temperature with a pat of butter if you’re feeling indulgent.
Cooking Tips & Techniques
After making this one-bowl banana walnut bread more times than I can count, I’ve picked up a few tricks that make a real difference. Let me share what I’ve learned—including the mistakes I’ve made so you don’t have to repeat them.
Don’t Overmix the Batter
I learned this one the hard way. My first few loaves came out dense and tough, and I couldn’t figure out why. Turns out, I was stirring the flour in like I was trying to win an arm-wrestling match. Once the flour hits the wet ingredients, mix just until it disappears. A few streaks are fine. Overmixing develops gluten, and gluten makes bread tough. You want tender, not tough.
Use a Kitchen Scale for Accuracy
I know measuring by volume is easier, but flour is notoriously inconsistent when scooped with a cup. One person’s “cup of flour” can be 20% more than another’s. If you have a kitchen scale, use it—the gram measurements in this recipe are your best friend. If you don’t have a scale, spoon the flour into your measuring cup and level it off with a knife. Never scoop directly from the bag.
Toast Your Walnuts
This is non-negotiable in my kitchen now. Raw walnuts are fine, but toasted walnuts are spectacular. The heat brings out their natural oils and deepens their flavor in a way that transforms the entire loaf. Plus, toasting ensures they stay crunchy inside the bread rather than turning soft and mealy. Just don’t walk away while they’re toasting—they burn fast.
Check for Doneness Early
Every oven runs differently. My oven at home bakes this bread in exactly 58 minutes, but my friend’s oven takes a full 65 minutes. Start checking at 50 minutes with a toothpick, and don’t be afraid to bake longer if needed. A properly baked loaf will have a clean toothpick and a springy top when gently pressed. If the top is getting too dark before the center is done, tent it with foil.
Let It Cool Completely
I know, I know—warm banana bread with melty butter is practically a religious experience. But if you slice into it too soon, the structure hasn’t set yet, and you’ll end up with a crumbly mess. The bread continues to cook slightly from residual heat as it cools, and the starches need time to firm up. Trust me on this one—wait the full hour.
Room Temperature Ingredients Matter
Cold eggs and cold yogurt can seize the melted butter, creating a lumpy batter that doesn’t bake evenly. Take your eggs and yogurt out of the fridge about 30 minutes before you start. If you forgot, place the eggs in warm water for 5 minutes and microwave the yogurt for 10 seconds on low power.
Variations & Adaptations
One of the best things about this one-bowl banana walnut bread is how adaptable it is. I’ve tried several variations over the years, and they’ve all been delicious in their own way. Here are some of my favorites.
Chocolate Chip Banana Bread
Swap the walnuts for 1 cup of semi-sweet or dark chocolate chips. The combination of banana and chocolate is a classic for good reason. I like to use mini chocolate chips because they distribute more evenly and every bite gets a little chocolate. For an extra indulgent touch, swirl in ¼ cup of chocolate hazelnut spread before baking.
Gluten-Free Version
Replace the all-purpose flour with a good gluten-free flour blend that contains xanthan gum. My go-to is King Arthur Measure for Measure or Bob’s Red Mill 1-to-1. The texture will be slightly more tender and a bit more delicate, but it’s genuinely delicious. Add an extra tablespoon of yogurt to compensate for the drier gluten-free flour.
Vegan Banana Bread
Use melted coconut oil or vegetable oil instead of butter, replace the eggs with two flax eggs (2 tablespoons ground flaxseed mixed with 6 tablespoons water, let sit for 5 minutes), and use a dairy-free yogurt. The texture will be a bit denser, but the flavor is still fantastic. Coconut oil adds a subtle tropical note that pairs beautifully with banana.
Spiced Banana Bread
Add 1 teaspoon of cinnamon, ½ teaspoon of nutmeg, and ¼ teaspoon of ground ginger to the dry ingredients. This gives the bread a warm, cozy flavor that’s perfect for fall and winter. I sometimes add a pinch of cardamom too—it’s unexpected but wonderful.
Blueberry Banana Bread
Gently fold 1 cup of fresh or frozen blueberries into the batter along with the walnuts. If using frozen blueberries, toss them in a tablespoon of flour first to prevent them from sinking to the bottom. The burst of tart berry against the sweet banana is a beautiful contrast.
Lower Sugar Option
Reduce the granulated sugar to ½ cup and use very ripe, spotty bananas. The natural sweetness of the bananas will carry the flavor, and the turbinado sugar on top adds just enough crunch. This version is less sweet but still satisfying—perfect for breakfast or a snack.
Serving & Storage Suggestions
This one-bowl banana walnut bread is incredibly versatile when it comes to serving and storing. Here’s how to get the most out of every loaf.
How to Serve
This bread is wonderful at room temperature, but I personally love it slightly warm. Pop a slice in the microwave for 10-15 seconds, or toast it lightly in a toaster oven for about 2 minutes. The warmth softens the crumb and makes the banana flavor more pronounced. For a special treat, spread a thin layer of salted butter, cream cheese, or even a drizzle of honey on top.
What to Serve With It
A slice of this banana bread pairs beautifully with a hot cup of coffee or a cold glass of milk. For brunch, serve it alongside scrambled eggs and fresh fruit for a balanced meal. It also makes an excellent dessert—top a slice with a scoop of vanilla ice cream and a drizzle of caramel sauce for something truly decadent.
Storing at Room Temperature
Wrap the cooled loaf tightly in plastic wrap or aluminum foil and store it at room temperature for up to 4 days. I prefer to keep it in the loaf pan with a piece of foil pressed directly against the cut surface to prevent it from drying out. Do not refrigerate—the cold air actually speeds up staling and makes the bread dry.
Freezing for Later
This banana bread freezes beautifully. Let it cool completely, then wrap it tightly in plastic wrap, followed by a layer of aluminum foil. Freeze for up to 3 months. When you’re ready to enjoy it, thaw it overnight in the refrigerator or at room temperature for a few hours. You can also freeze individual slices—just wrap each one separately for easy grab-and-go breakfasts.
How the Flavor Develops
Here’s something interesting: this banana bread actually tastes better on the second day. The flavors have time to meld and mellow, and the texture becomes even more tender. If you can resist eating it all on day one, wrap it up and let it sit overnight. You’ll be rewarded with an even more delicious loaf the next morning.
Reheating Instructions
For a single slice, microwave for 10-15 seconds or toast in a toaster oven at 350°F for 3-4 minutes. For a whole loaf, wrap it in foil and warm it in a 300°F oven for 10-15 minutes. This is perfect if you’re serving it to guests and want that fresh-baked warmth.
Nutritional Information & Benefits
While this one-bowl banana walnut bread is certainly a treat, it also offers some surprising nutritional benefits—especially compared to store-bought versions that are loaded with preservatives and artificial ingredients.
Estimated Nutritional Values (per slice, based on 10 slices):
| Nutrient | Amount |
|---|---|
| Calories | 285 |
| Total Fat | 14g |
| Saturated Fat | 6g |
| Cholesterol | 55mg |
| Sodium | 220mg |
| Total Carbohydrates | 36g |
| Dietary Fiber | 2g |
| Sugars | 18g |
| Protein | 5g |
Health Benefits of Key Ingredients:
- Bananas – Rich in potassium, vitamin B6, and vitamin C. They also contain resistant starch, which acts as a prebiotic and supports gut health. The riper the banana, the higher the antioxidant content.
- Walnuts – Packed with omega-3 fatty acids, which are excellent for heart and brain health. They also provide protein, fiber, and magnesium. Toasting them doesn’t diminish their nutritional value.
- Yogurt or Sour Cream – Adds calcium and probiotics (if using yogurt with live cultures). These support bone health and digestion.
Dietary Considerations: This recipe is vegetarian and can be made dairy-free with simple substitutions. It’s not gluten-free in its standard form, but the gluten-free variation works beautifully. The walnuts add healthy fats, making this a more satisfying snack than plain banana bread.
Potential Allergens: This recipe contains wheat (gluten), dairy, eggs, and tree nuts (walnuts). If you need to avoid any of these, check the variations section for suitable substitutions.
I personally love that this bread feels indulgent but isn’t loaded with processed ingredients. It’s the kind of treat you can feel good about eating for breakfast or enjoying as an afternoon pick-me-up without the sugar crash that comes from store-bought pastries.
FAQs
Can I use frozen bananas for this recipe?
Absolutely! Frozen bananas work perfectly. Thaw them completely at room temperature, then drain off any excess liquid before mashing. The texture will be slightly softer, but the flavor is even more concentrated. This is actually my preferred method when bananas are on sale—I peel them, freeze them in a bag, and pull them out whenever I’m ready to bake.
Why did my banana bread sink in the middle?
A sunken center usually means the bread was underbaked or the oven temperature was too low. Make sure your oven is fully preheated to 350°F and bake until a toothpick comes out clean. Another common culprit is too much banana—stick to 3 medium bananas (about 1½ cups mashed) for the best structure.
Can I make this into muffins instead of a loaf?
Yes, and they’re fantastic! Divide the batter evenly among 12 greased or lined muffin cups. Bake at 350°F for 18-22 minutes, or until a toothpick inserted into the center of a muffin comes out clean. The baking time is much shorter, so start checking at 18 minutes. You’ll get perfectly domed, portable banana walnut muffins.
How do I know when my bananas are ripe enough?
Look for bananas with lots of brown spots or even completely black peels. They should feel soft when gently squeezed. If your bananas are still yellow with green tips, they’re not sweet enough yet. You can speed up the ripening process by placing them in a paper bag with an apple overnight, or bake them at 300°F for 15 minutes to soften and sweeten them.
Can I leave out the walnuts?
Of course! If you have a nut allergy or simply don’t enjoy walnuts, leave them out entirely. The bread will still be delicious—just a classic banana bread. You can also swap them for an equal amount of chocolate chips, dried fruit, or seeds like pepitas or sunflower seeds for a nut-free crunch.
Conclusion
This one-bowl banana walnut bread has become a staple in my kitchen for good reason. It’s the recipe I turn to when I need something reliable, something comforting, something that makes my whole house smell like home. It’s the recipe I bring to brunches, share with new neighbors, and make on lazy Sunday mornings when all I want is a warm slice and a quiet moment with my coffee.
What I love most about it is how forgiving it is. You don’t need to be a skilled baker to get beautiful results. You don’t need fancy equipment or hard-to-find ingredients. You just need three ripe bananas, a handful of walnuts, and about 15 minutes of your time. The oven does the rest.
I hope you’ll give this recipe a try, and I hope you’ll make it your own. Add chocolate chips if that’s your thing. Swap in pecans instead of walnuts. Sprinkle a little cinnamon on top. The beauty of a simple recipe is that it leaves room for your own creativity.
When you make it—and I really hope you do—come back and let me know how it turned out. Did you add your own twist? Did your family ask for the recipe? Did you eat half the loaf before it even cooled? (No judgment here—I’ve definitely been there.) Drop a comment below, tag me in your photos, or share your version on Pinterest. I can’t wait to see what you bake.
Happy baking, friends. Your kitchen is about to smell incredible.
Pin This Recipe!
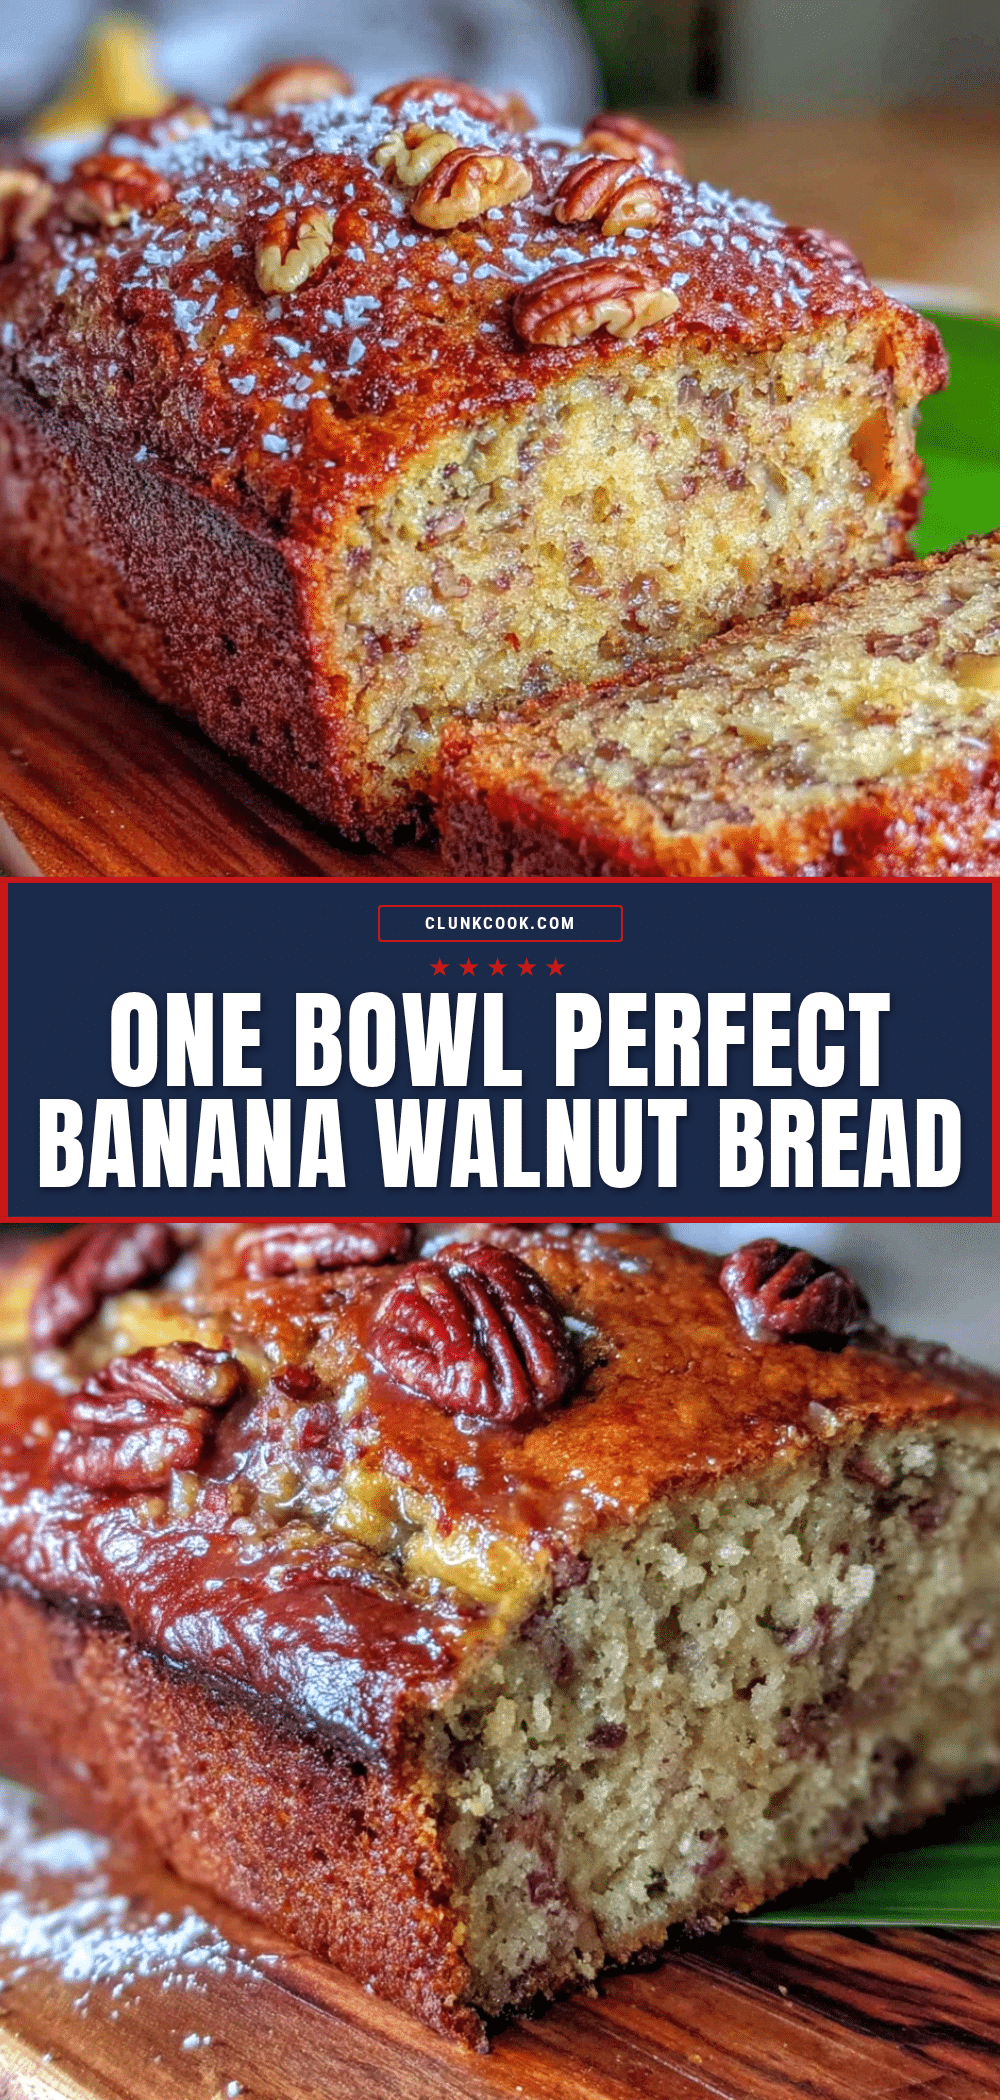
One-Bowl Banana Walnut Bread: Easy Homemade Recipe
This one-bowl banana walnut bread is a simple, foolproof recipe that yields a tender, flavorful loaf with a crackly top and walnuts in every bite. Perfect for using up ripe bananas, it comes together in minutes with basic pantry ingredients.
- Prep Time: 15 minutes
- Cook Time: 55-65 minutes
- Total Time: 1 hour 10 minutes - 1 hour 20 minutes
- Yield: 10 servings
- Category: Dessert
- Cuisine: American
Ingredients
- Unsalted butter, ½ cup (113g), melted and slightly cooled
- Ripe bananas, 3 medium (about 1½ cups mashed, 340g)
- Granulated sugar, ¾ cup (150g)
- Large eggs, 2, at room temperature
- Vanilla extract, 1 teaspoon
- Plain yogurt or sour cream, ¼ cup (60g)
- All-purpose flour, 1½ cups (188g)
- Baking soda, 1 teaspoon
- Salt, ½ teaspoon
- Walnuts, 1 cup (120g), roughly chopped
- Turbinado sugar, 1 tablespoon (for topping, optional)
Instructions
- Preheat your oven to 350°F (175°C). Grease a 9×5-inch loaf pan with butter or cooking spray and line with parchment paper, leaving overhang on two sides.
- Spread the chopped walnuts on a baking sheet and toast in the preheating oven for 5-7 minutes until fragrant. Let cool completely.
- Peel the bananas and mash them in a large mixing bowl with a fork or potato masher until mostly smooth with a few lumps.
- Add the melted butter, granulated sugar, eggs, vanilla extract, and yogurt or sour cream to the bowl. Stir until well combined and smooth.
- Sprinkle the flour, baking soda, and salt over the wet mixture. Stir just until the flour disappears—do not overmix. A few streaks of flour are okay.
- Gently fold in the toasted walnuts, reserving about ¼ cup for topping if desired. Fold until evenly distributed.
- Pour the batter into the prepared loaf pan and spread evenly. Sprinkle reserved walnuts and turbinado sugar on top.
- Bake for 55-65 minutes, or until a toothpick inserted into the center comes out clean or with a few moist crumbs. If the top browns too quickly, tent with foil after 40 minutes.
- Let the bread cool in the pan on a wire rack for 10 minutes, then lift it out using the parchment paper handles and transfer to the rack to cool completely.
- Slice with a serrated knife into 1-inch thick slices. Serve warm or at room temperature.
Notes
For best results, use very ripe bananas with brown spots. Toast walnuts before adding for deeper flavor. Let the bread cool completely before slicing to prevent crumbling. The bread tastes even better on the second day.
Nutrition
- Serving Size: 1 slice
- Calories: 285
- Sugar: 18
- Sodium: 220
- Fat: 14
- Saturated Fat: 6
- Carbohydrates: 36
- Fiber: 2
- Protein: 5
Keywords: banana bread, walnut bread, one-bowl recipe, easy banana bread, homemade banana bread, crackly top banana bread


