Love this? Save it for later!
Share the inspiration with your friends
This was supposed to be a layered angel food cake. I had the whole thing planned out—a classic strawberry shortcake situation with homemade whipped cream and a fancy piping bag situation. But the power went out halfway through my prep. There I was, standing in a dim kitchen at 8 PM, the cake I’d baked that morning sitting on the counter, and no mixer to whip the cream. I grabbed the wrong thing from the fridge—a tub of vanilla pudding instead of heavy cream—and I was already frustrated enough to just go with it. What came out was nothing like the plan. And better.
The layers fell differently. The pudding soaked into the cake in a way that was almost custard-like. I threw in some frozen blueberries because that’s what I had, and the color bled into the white layers like a watercolor painting. Honestly, I sat there eating it straight from the glass bowl, thinking, “This is actually kind of perfect.” Maybe you’ve been there—when a kitchen disaster turns into something you can’t stop thinking about. That’s this red, white, and blueberry trifle. It’s the dessert that came from a moment of chaos and ended up being the thing I make every single Fourth of July now.
I keep coming back to it because it’s forgiving. You don’t have to be precise. You don’t need a stand mixer or a pastry bag. You just need four ingredients, a clear glass dish, and the willingness to let things get a little messy. The trifle looks impressive—those red, white, and blue layers are genuinely stunning—but it’s the easiest thing you’ll make all summer. And the best part? It tastes like you spent hours on it. I mean, honestly, that’s my favorite kind of recipe.
Why You’ll Love This Recipe
This isn’t just another trifle recipe. After testing this about seven times (yes, seven—my neighbors were very happy about it), I can tell you this version is the one. It’s the sweet spot between impressive and easy, and it delivers every single time. Here’s why this red, white, and blueberry trifle stands out:
- Only 4 Ingredients: No fancy grocery trips needed. You likely already have everything in your kitchen—store-bought angel food cake, instant vanilla pudding, fresh berries, and whipped topping. That’s it.
- No-Bake & Ready in 20 Minutes: Perfect for hot summer days when turning on the oven feels like a punishment. This comes together in under 20 minutes, then chills in the fridge while you relax.
- Perfect for Patriotic Holidays: Whether it’s Memorial Day, Fourth of July, or Labor Day, those red, white, and blue layers are made for celebrations. It’s the centerpiece that gets all the “oohs” and “ahhs.”
- Crowd-Pleaser Status: I’ve brought this to three different cookouts now, and it’s the first dessert to disappear every time. Kids love the pudding layers, adults appreciate the fresh berries, and everyone goes back for seconds.
- Unbelievably Easy: Let’s face it—most layered desserts are a hassle. Not this one. You’re basically layering ingredients in a bowl. That’s the whole method. No baking, no complicated techniques, no stress.
What makes this different from other trifle recipes is the texture. The pudding mixture seeps into the angel food cake cubes just enough to soften them without turning them to mush. You get that perfect bite—soft cake, creamy pudding, and burst of fresh berries. It’s comfort food reimagined for summer, and honestly, it’s the kind of dessert that makes you close your eyes after the first bite.
What Ingredients You Will Need
This recipe uses simple, store-bought ingredients to create something that tastes completely homemade. The magic is in the layering and the chill time, not in complicated components. Here’s what you’ll need:
For the Trifle Base
- 1 store-bought angel food cake (about 10-12 ounces), cut into 1-inch cubes (I prefer the bakery section ones—they’re fluffier than the boxed kind)
- 2 (3.4-ounce) boxes instant vanilla pudding mix (Jell-O brand works great, but store brands work fine too—just make sure it’s instant, not cook-and-serve)
- 4 cups cold whole milk (2% works too, but whole milk gives that extra creamy texture; for dairy-free, use oat milk—it’s thick enough to set the pudding properly)
For the Berry Layers
- 2 cups fresh strawberries, hulled and sliced (look for bright red, firm berries—they hold their shape better in the layers)
- 2 cups fresh blueberries (wild blueberries are smaller and sweeter, but regular ones work perfectly too)
- 1 cup fresh raspberries (optional, but I love the extra pop of red and the slight tartness they bring)
For the Topping
- 1 (8-ounce) tub frozen whipped topping, thawed (Cool Whip is classic, but I’ve used homemade whipped cream too—just stabilize it with a tablespoon of powdered sugar)
- Extra berries for garnish (set aside a handful of the prettiest ones for the top)
Ingredient Tips from My Kitchen: I’ve tested this with homemade pudding from scratch, and honestly, the instant stuff works better here. It sets up firmer, which means cleaner layers when you scoop into the trifle. For the angel food cake, buy it the day you’re making the trifle—stale cake gets crumbly and doesn’t hold up as well. If you’re feeling ambitious, you can bake your own angel food cake, but I rarely do for this recipe. The store-bought version is consistent and saves you a lot of effort.
For a lighter version, use sugar-free pudding mix and light whipped topping. The texture stays the same, and honestly, most people won’t notice the difference. I’ve also swapped the milk for unsweetened almond milk in a pinch—it works, but the pudding won’t be quite as thick. Just let it set an extra 10 minutes before layering.
Equipment Needed
You don’t need fancy equipment for this trifle. That’s part of the beauty. Here’s what you’ll actually use:
- Large trifle dish or glass bowl (a 4-quart clear glass bowl works perfectly; I got mine at a thrift store for $4, and it’s my most-used serving dish for summer parties)
- Medium mixing bowl (for whisking the pudding)
- Whisk (a balloon whisk works best to get the lumps out of the pudding)
- Sharp knife (for cubing the angel food cake and slicing strawberries)
- Cutting board (use a separate one for fruit to avoid cross-contamination)
- Measuring cups (for the milk and berries)
- Spatula (for spreading the whipped topping evenly)
- Large spoon or ladle (for layering the pudding mixture)
No trifle dish? No problem. Use a large glass mixing bowl, a wide-mouth mason jar for individual servings, or even a clear plastic punch bowl. The key is seeing the layers—that’s what makes it so visually stunning. I’ve also made these in small 8-ounce mason jars for individual servings at parties. They’re adorable and portion-controlled. Just layer everything the same way and let them chill in the fridge.
Preparation Method
This method is straightforward, but I’ve included all the little details I learned from my seven test runs. Follow these steps, and you’ll get perfect layers every time.
- Prepare the pudding mixture. In a medium mixing bowl, whisk together both boxes of instant vanilla pudding mix with 4 cups of cold whole milk. Whisk vigorously for about 2 minutes until the mixture thickens. It will be thin at first—don’t panic. Let it sit for 5 minutes to fully set. You’ll know it’s ready when it holds a ribbon-like trail when you lift the whisk. Pro tip: Use cold milk straight from the fridge. Warm milk won’t let the pudding set properly.
- Cut the angel food cake. Using a sharp knife, cut the angel food cake into 1-inch cubes. Don’t worry about being perfect—irregular cubes create nice texture. You should end up with about 6-7 cups of cake cubes. Warning: Angel food cake is delicate. Use a serrated knife with a gentle sawing motion to avoid crushing it.
- Prep the berries. Rinse the strawberries and blueberries under cold water and pat them dry with paper towels. Hull the strawberries and slice them into even pieces—about ¼-inch thick. Keep the berries separate by type so you can layer them intentionally. Texture cue: The berries should be dry before layering. Wet berries will make the pudding watery and create messy layers.
- Start the first layer. Spread a thin layer of the prepared pudding on the bottom of your trifle dish—just enough to coat it. This prevents the cake from sticking and gives you a clean base. Then add a layer of angel food cake cubes, about 2 cups. Press them down gently so they’re in even contact with the pudding.
- Add the berry layers. Scatter about 1 cup of sliced strawberries over the cake cubes, followed by 1 cup of blueberries. Try to distribute them evenly so every bite gets some fruit. The colors should already be starting to look beautiful at this point.
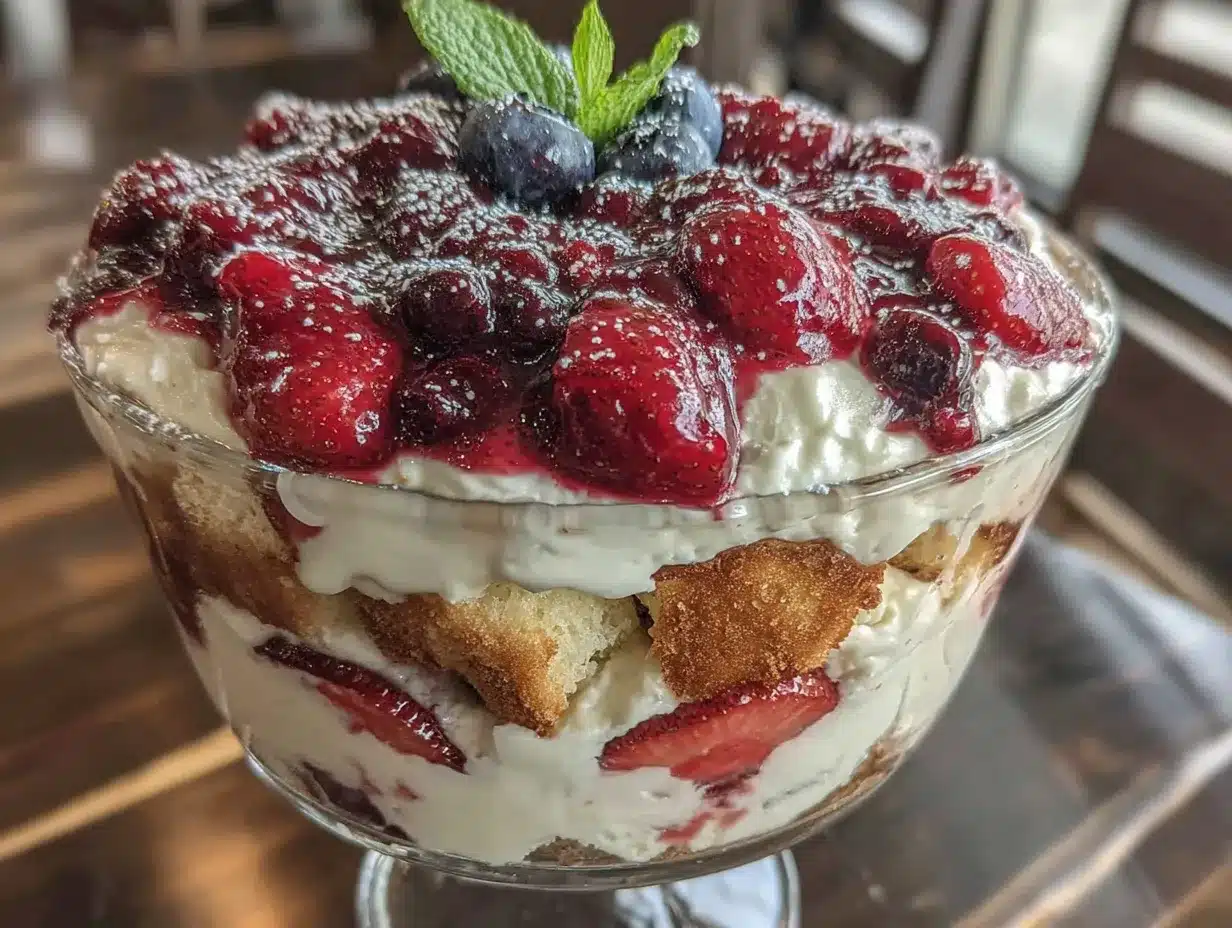
- Repeat the layers. Spoon another layer of pudding over the berries—about 1½ cups. Spread it gently with a spatula, being careful not to disturb the fruit underneath. Add another 2 cups of cake cubes, then the remaining berries. End with a final layer of pudding on top. Sensory cue: You should see distinct red, white, and blue stripes through the glass. If it looks messy, don’t stress—it will still taste amazing.
- Top with whipped topping. Spread the thawed whipped topping evenly over the top layer of pudding. Use a spatula to create gentle swirls or peaks—whatever looks pretty to you. Personal tip: I like to leave some of the top pudding layer exposed around the edges so you can see the colors peeking through.
- Garnish and chill. Arrange the reserved berries on top of the whipped topping in a pattern. I usually do a ring of blueberries around the edge and a cluster of strawberries in the center. Cover the dish with plastic wrap and refrigerate for at least 4 hours, or overnight. This is the most important step—the chill time lets the flavors meld and the cake absorb the pudding. Don’t skip it.
- Serve cold. Remove the trifle from the fridge about 10 minutes before serving. Use a large spoon to scoop deep into the layers, getting some of each component in every serving. The first spoonful should show all the colors.
Cooking Tips & Techniques
After making this trifle more times than I care to admit, I’ve collected a few lessons the hard way. Here’s what I wish someone had told me:
Don’t overmix the pudding. I know it’s tempting to keep whisking until it’s perfectly smooth, but overmixing can actually thin out the pudding. Whisk just until the powder is dissolved and the mixture starts to thicken, then stop. Let it rest, and it will set up on its own.
Patience with the chill time is non-negotiable. The first time I made this, I served it after only an hour in the fridge. The layers slid around, the cake was still dry in the middle, and the flavors hadn’t melded. It was fine, but it wasn’t great. Four hours minimum—I promise it’s worth the wait. Overnight is even better. The cake cubes soften into something almost like a pudding cake, and the berry juices bleed into the cream just enough to create that beautiful tie-dye effect.
Layer strategically for the best visual. If you want those perfect red, white, and blue stripes, press the cake cubes against the sides of the dish as you layer them. Use the back of a spoon to nudge them into place. And alternate the berries—don’t dump them all in one spot. I learned this after making a trifle that looked like a science experiment gone wrong.
One mistake I made early on: I used frozen berries without thawing and draining them first. The excess water made the pudding soupy, and the layers collapsed. Always use fresh berries, or if you’re using frozen, thaw them completely in a colander and pat them dry before layering.
Multitasking strategy: Make the pudding first and let it set while you cut the cake and prep the berries. That way everything is ready to go when you start layering, and you won’t have the pudding sitting too long and getting too thick.
Variations & Adaptations
This trifle is endlessly adaptable. Here are some variations I’ve tried and loved:
Mixed Berry Explosion: Swap out the strawberries and blueberries for any combination of fresh berries. Blackberries, raspberries, and sliced kiwi all work beautifully. For a tropical twist, add diced mango and toasted coconut flakes between the layers. I made this version for a summer barbecue, and it was gone in 20 minutes.
Chocolate Lover’s Trifle: Use chocolate instant pudding instead of vanilla, and add a layer of chocolate shavings or mini chocolate chips between the berry layers. The chocolate pairs surprisingly well with the strawberries. I tested this for a birthday party, and it was a hit with the kids (and the adults, if I’m being honest).
Lemon Blueberry Trifle: Add a tablespoon of lemon zest to the pudding mixture before whisking, and use lemon-flavored angel food cake if you can find it. The lemon brightens up the blueberries beautifully. This is my go-to version for spring brunches.
Dairy-Free Adaptation: Use oat milk or full-fat coconut milk for the pudding, and a dairy-free whipped topping like CocoWhip. The texture will be slightly different—coconut milk makes the pudding a bit richer—but it’s still delicious. I’ve served this to dairy-free guests who didn’t even notice the swap.
Individual Servings: Instead of one large trifle, layer everything in 8-ounce mason jars or small glass cups. These are perfect for parties—everyone gets their own, and there’s no scooping mess. Plus, they look adorable on a dessert table. Just layer the same way, but use about ¼ cup of each component per jar.
Shortcut Version: If you’re really short on time, use pre-made pudding cups (vanilla flavor) and skip the mixing step entirely. Just layer the pudding straight from the cup with the cake and berries. It’s not quite as creamy, but it works in a pinch. I’ve done this for last-minute cookouts, and no one complained.
Serving & Storage Suggestions
This trifle is best served cold, straight from the fridge. The chilled pudding and fresh berries are incredibly refreshing on a hot summer day. I like to set it out about 10-15 minutes before serving so it loses a bit of the chill—the flavors seem to open up more at a slightly cooler-than-room-temperature state.
What to serve with it: This trifle is rich enough to stand alone, but it pairs beautifully with a scoop of vanilla ice cream or a drizzle of warm berry compote. For a complete summer spread, serve it alongside grilled chicken or burgers—the lightness of the dessert balances the heaviness of barbecue food. I also love it with a cup of hot coffee or iced tea.
Storage: Cover the trifle dish tightly with plastic wrap and store it in the refrigerator for up to 3 days. The flavors actually get better on day two as the cake absorbs more of the pudding. However, the berries will start to release their juices after about 24 hours, so the layers might get a little softer. That’s fine by me—I actually prefer it when the cake is almost pudding-like.
Freezing: I don’t recommend freezing this trifle. The pudding and whipped topping don’t thaw well, and the cake turns into a soggy mess. If you have leftovers, just keep them in the fridge and enjoy them within a few days.
Reheating: Don’t. Seriously, this is a cold dessert through and through. If you want a warm dessert, make a cobbler instead.
How flavors develop: The first day, the layers are distinct—you taste the cake, then the pudding, then the berries. By day two, everything has melded together into one cohesive, creamy, fruity dessert. The cake cubes soften into something almost like a bread pudding. It’s a completely different experience, and honestly, I sometimes prefer day-two trifle. Just saying.
Nutritional Information & Benefits
Here’s the approximate nutritional breakdown per serving (based on 12 servings):
| Nutrient | Amount per Serving |
|---|---|
| Calories | 285 |
| Total Fat | 8g |
| Saturated Fat | 5g |
| Cholesterol | 10mg |
| Sodium | 420mg |
| Total Carbohydrates | 48g |
| Dietary Fiber | 2g |
| Sugars | 32g |
| Protein | 4g |
This dessert isn’t health food, but it does have some redeeming qualities. The blueberries and strawberries are packed with antioxidants, vitamin C, and fiber. Blueberries are particularly high in anthocyanins, which support heart health and brain function. The angel food cake is lower in fat than most cakes, and using skim milk and light whipped topping can cut the calories significantly.
For a lighter version, use sugar-free pudding mix, skim milk, and fat-free whipped topping. You’ll save about 80 calories per serving. I’ve made it this way for a friend who was watching her sugar intake, and she couldn’t tell the difference. The berries provide natural sweetness, so the sugar reduction isn’t as noticeable as you’d think.
Dietary Considerations: This recipe contains gluten (from the angel food cake) and dairy (from the milk and whipped topping). For gluten-free, use a gluten-free angel food cake or pound cake. For dairy-free, use oat milk and dairy-free whipped topping. The recipe is egg-free if you use a store-bought angel food cake that’s made without eggs (most are).
Conclusion
This red, white, and blueberry trifle is more than just a pretty dessert—it’s the kind of recipe that makes you look like a hero with almost no effort. Four ingredients, 20 minutes of hands-on time, and a few hours in the fridge is all it takes to create something that looks like it came from a fancy bakery. I’ve made this for Memorial Day barbecues, Fourth of July parties, and casual summer dinners, and it never fails to impress.
What I love most about this recipe is how forgiving it is. You can use whatever berries you have on hand. You can swap the pudding flavor. You can make it in a fancy trifle dish or a simple glass bowl. It always works. And honestly, that’s the kind of recipe I want in my summer rotation—something reliable, beautiful, and delicious that doesn’t stress me out.
I’d love to hear how yours turns out! Leave a comment below and let me know what variations you tried. Did you add lemon zest? Use chocolate pudding? Make individual jars? Share your version—I’m always looking for new ideas. And if you loved this recipe, please share it with a friend who needs an easy summer dessert. Happy layering!
Frequently Asked Questions
Can I make this trifle the night before?
Absolutely! In fact, I recommend it. Making it the night before gives the flavors more time to meld and the cake to soften. Just cover it tightly with plastic wrap and refrigerate overnight. The layers will be even more cohesive and delicious the next day.
Can I use frozen berries instead of fresh?
You can, but you need to thaw them first and pat them dry very thoroughly. Frozen berries release a lot of liquid as they thaw, which can make the pudding watery and cause the layers to slide around. If you’re in a pinch, thaw them in a colander, then gently press with paper towels to remove excess moisture.
How do I get clean, distinct layers?
The key is patience. Spread each layer evenly and gently press the cake cubes against the sides of the dish with the back of a spoon. Let the trifle chill for at least 4 hours before serving—this allows the layers to set and firm up, making them easier to scoop without everything collapsing.
Can I use homemade whipped cream instead of Cool Whip?
Yes, but you’ll need to stabilize it. Whip 1 cup of heavy cream with 2 tablespoons of powdered sugar until stiff peaks form. The powdered sugar helps stabilize the cream so it holds its shape in the layers. Homemade whipped cream is less stable than store-bought whipped topping, so it might soften the layers a bit more.
What other fruits can I use in this trifle?
Almost any soft fruit works well. Sliced peaches, raspberries, blackberries, diced mango, and even sliced bananas are all great options. Just avoid fruits that brown quickly (like apples or pears) or fruits that release too much water (like watermelon). Stick with berries and stone fruits for the best results.
Pin This Recipe!
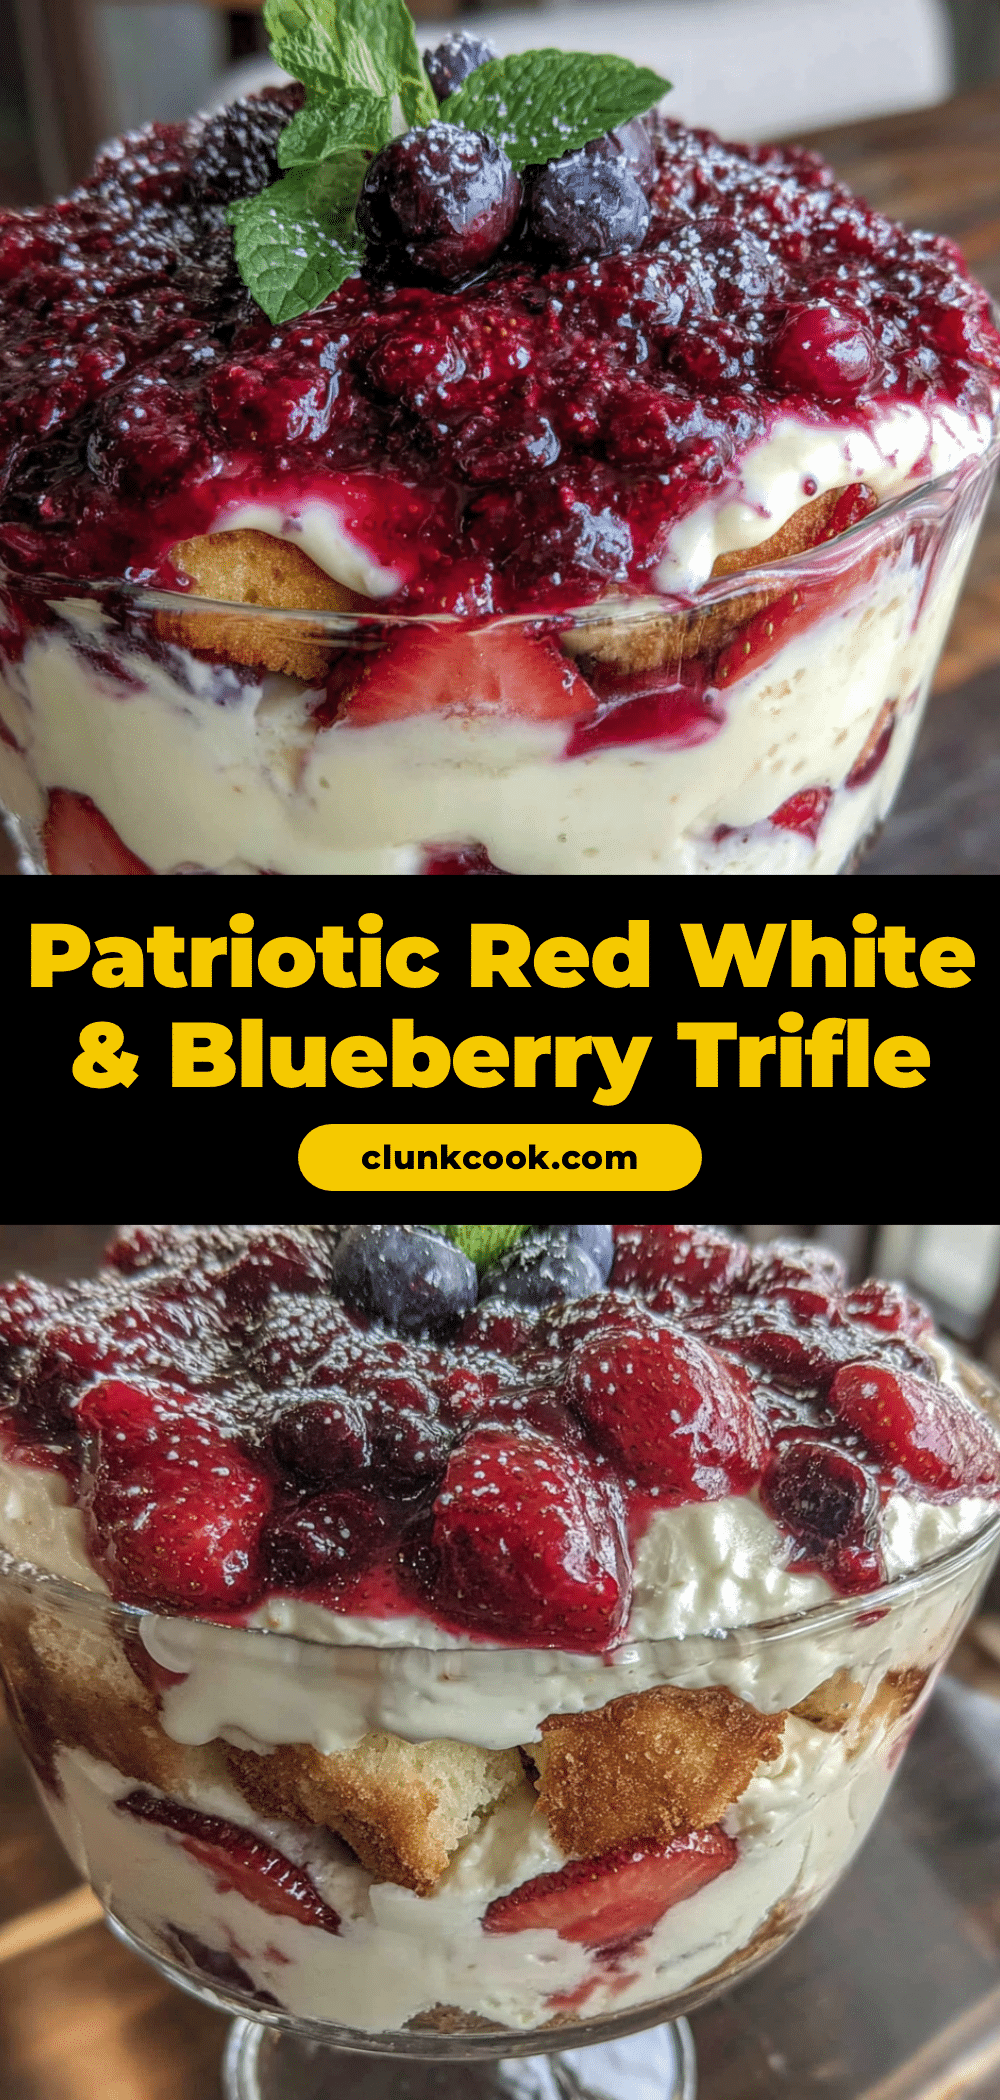
Best Red White & Blueberry Trifle – 4-Ingredient Easy Dessert

This red, white, and blueberry trifle is a no-bake, 4-ingredient dessert that comes together in 20 minutes. Layers of angel food cake, vanilla pudding, and fresh berries create a stunning patriotic treat perfect for summer celebrations.
- Prep Time: 20 minutes
- Cook Time: 0 minutes
- Total Time: 4 hours 20 minutes (includes chilling)
- Yield: 12 servings 1x
- Category: Dessert
- Cuisine: American
Ingredients
- 1 store-bought angel food cake (about 10–12 ounces), cut into 1-inch cubes
- 2 (3.4-ounce) boxes instant vanilla pudding mix
- 4 cups cold whole milk
- 2 cups fresh strawberries, hulled and sliced
- 2 cups fresh blueberries
- 1 cup fresh raspberries (optional)
- 1 (8-ounce) tub frozen whipped topping, thawed
- Extra berries for garnish
Instructions
- Prepare the pudding mixture: In a medium mixing bowl, whisk together both boxes of instant vanilla pudding mix with 4 cups of cold whole milk. Whisk vigorously for about 2 minutes until the mixture thickens. Let it sit for 5 minutes to fully set.
- Cut the angel food cake into 1-inch cubes using a sharp knife. You should end up with about 6-7 cups of cake cubes.
- Prep the berries: Rinse the strawberries and blueberries under cold water and pat them dry. Hull the strawberries and slice them into even pieces, about ¼-inch thick.
- Start the first layer: Spread a thin layer of the prepared pudding on the bottom of your trifle dish. Then add a layer of angel food cake cubes, about 2 cups. Press them down gently.
- Add the berry layers: Scatter about 1 cup of sliced strawberries over the cake cubes, followed by 1 cup of blueberries.
- Repeat the layers: Spoon another layer of pudding over the berries—about 1½ cups. Add another 2 cups of cake cubes, then the remaining berries. End with a final layer of pudding on top.
- Top with whipped topping: Spread the thawed whipped topping evenly over the top layer of pudding. Use a spatula to create gentle swirls or peaks.
- Garnish and chill: Arrange the reserved berries on top of the whipped topping in a pattern. Cover the dish with plastic wrap and refrigerate for at least 4 hours, or overnight.
- Serve cold: Remove the trifle from the fridge about 10 minutes before serving. Use a large spoon to scoop deep into the layers.
Notes
For best results, use cold milk straight from the fridge. Pat berries dry before layering to avoid watery pudding. Chill for at least 4 hours (overnight is better) to allow flavors to meld. For a lighter version, use sugar-free pudding mix and light whipped topping. For dairy-free, use oat milk and dairy-free whipped topping.
Nutrition
- Serving Size: 1 serving (1/12 of r
- Calories: 285
- Sugar: 32
- Sodium: 420
- Fat: 8
- Saturated Fat: 5
- Carbohydrates: 48
- Fiber: 2
- Protein: 4
Keywords: trifle, red white and blue, 4th of July, Memorial Day, no-bake dessert, angel food cake, berry dessert, patriotic dessert


