Love this? Save it for later!
Share the inspiration with your friends
The school bake sale was in twelve hours and I’d completely forgotten. Not just a little forgot—the kind where you’re scrolling through your phone at 9 PM and suddenly sit bolt upright in bed. Everyone else would be bringing Pinterest-perfect cupcakes with buttercream rosettes or those fancy cake pops that look like tiny works of art. I had a half-empty jar of peanut butter, some rolled oats that were probably older than I wanted to admit, and a bag of chocolate chips I’d stashed for emergency cookie situations.
My first thought was pure panic. My second thought was, okay, what can I actually make right now without a trip to the store? That’s when I remembered this no-bake granola bar recipe my college roommate used to throw together during finals week. She called them “desperation bars” but honestly? They were the best thing in our dorm kitchen. I adapted her version that night, crossing my fingers that the PB would hold everything together. Let me tell you, I was scraping honey off the counter at midnight, wondering if I’d lost my mind.
The next morning, I walked into that bake sale with a container of these Easy No-Bake Peanut Butter Granola Lunchbox Bars, feeling like I was bringing a peanut butter sandwich to a potluck. But here’s the thing—they were gone in twenty minutes. People kept coming back to the table asking for more. One mom asked if I could share the recipe because her kids “hated everything” and actually ate three of them. I mean, that’s the kind of win you don’t forget.
These bars became my go-to for every last-minute thing after that. School events, road trips, Tuesday afternoons when the snack drawer is empty and everyone’s hangry. They’re the recipe that makes you look like you planned ahead when you absolutely did not. And honestly? That’s my favorite kind of recipe.
Why You’ll Love This Recipe
Let me tell you why these no-bake peanut butter granola bars are about to become your new best friend in the kitchen. I’ve made these at least thirty times now, tweaking the ratios until they hit that perfect sweet-salty-crunchy spot. They’ve been tested by picky toddlers, skeptical husbands, and that one friend who claims they “don’t like granola bars.” Guess what? Everyone comes back for seconds.
- Quick & Easy: These come together in about 15 minutes of active time. No oven required, no complicated techniques. If you can stir, you can make these.
- Simple Ingredients: You probably have everything in your pantry right now. Oats, peanut butter, honey, chocolate chips—that’s basically it. No fancy health food store run needed.
- Perfect for Lunchboxes: These bars are sturdy enough to survive a backpack toss and delicious enough that kids actually eat them instead of trading them away.
- Crowd-Pleaser: I’ve brought these to playdates, office potlucks, and holiday cookie exchanges. They disappear every single time.
- No-Bake Magic: This is huge during summer when turning on the oven feels like a punishment. Plus, less cleanup means more time for actually enjoying your day.
What makes these different from every other granola bar recipe out there? It’s the texture. The secret is in how you press them into the pan—firm enough to hold together but with that satisfying chew that store-bought bars just can’t match. I use a specific ratio of wet to dry ingredients that took me several batches to perfect. Too much peanut butter and they’re greasy. Too little and they crumble into sad little pieces. This version? It’s just right.
These aren’t just good “for a healthy snack.” They’re genuinely delicious. The kind of bar you’d actually choose over a cookie. And when you can feel that good about feeding something to your family, that’s a win-win situation right there.
What Ingredients You Will Need
This recipe uses simple, wholesome ingredients that work together to create bars with the perfect balance of sweetness, saltiness, and crunch. Most of these are pantry staples, which makes these bars perfect for those “I need a snack right now” moments.
- Rolled Oats – 2 cups (180g). Use old-fashioned rolled oats, not quick oats. The texture is completely different—rolled oats give you that nice chewy bite while quick oats turn into mush. I prefer Bob’s Red Mill or Quaker Old Fashioned.
- Creamy Peanut Butter – 1 cup (240g). Natural peanut butter works but you’ll need to stir it really well and it might make the bars slightly more crumbly. I actually prefer Skippy or Jif for this recipe because the stabilizers help the bars hold together better. Don’t use the “natural” kind that separates unless you’re okay with a slightly different texture.
- Honey – 1/2 cup (170g). This is what binds everything together and adds sweetness. Local honey is lovely if you have it, but any honey works. For a vegan version, use maple syrup—just note that the bars will be slightly softer.
- Chocolate Chips – 1/2 cup (90g). Semi-sweet is my go-to because it balances the salty peanut butter perfectly. Milk chocolate works too if you prefer things sweeter. Dark chocolate chips add a nice grown-up touch. I like Ghirardelli 60% cacao chips for the best melt and flavor.
- Unsalted Butter – 2 tablespoons (28g). This adds richness and helps the bars set up firmly. You can substitute coconut oil for a dairy-free version—just use refined coconut oil so you don’t get a coconut flavor.
- Vanilla Extract – 1 teaspoon. Pure vanilla extract makes a difference here. Imitation works in a pinch but the flavor won’t be as warm and rich.
- Salt – 1/4 teaspoon. Even if your peanut butter is salted, add this. It heightens all the flavors and makes the sweetness pop. Trust me on this one.
- Optional Mix-Ins – 1/4 cup each of dried cranberries, chopped nuts, shredded coconut, or mini pretzel pieces. These are totally optional but fun for variation.
Ingredient Selection Tips: For the best texture, make sure your peanut butter is at room temperature. Cold peanut butter is harder to mix and might not incorporate evenly. Also, check your oats—if they’ve been sitting in your pantry for over a year, they might have absorbed moisture and won’t give you that fresh, toasty flavor.
Equipment Needed
You don’t need a fancy kitchen to make these bars, which is honestly one of my favorite things about this recipe. Here’s what you’ll need:
- 8×8 Inch Baking Pan – This is the perfect size for bars that are thick enough to be satisfying but not so thick they fall apart. A 9×9 pan works too, but your bars will be thinner.
- Parchment Paper – Non-negotiable for easy removal. I’ve tried greasing the pan and it’s just not the same. The parchment creates little handles that let you lift the whole block out cleanly.
- Medium Saucepan – For melting the peanut butter mixture. Any saucepan works, just make sure it’s not too thin or the mixture might scorch.
- Large Mixing Bowl – To combine your dry ingredients. Glass or stainless steel works great.
- Rubber Spatula – For scraping every last bit of that peanut butter mixture into the oats. You don’t want to waste any of that goodness.
- Measuring Cups and Spoons – Accuracy matters here, especially with the peanut butter and honey.
- Sharp Knife – For cutting clean bars. A dull knife will crush them.
Budget-Friendly Tip: If you don’t have an 8×8 pan, use a loaf pan and make thicker bars, or a 9×13 pan for thinner, wider bars. Just adjust your expectations on thickness. And if you’re parchment paper is all out, wax paper works in a pinch for the lining—just don’t put it in the microwave.
Preparation Method
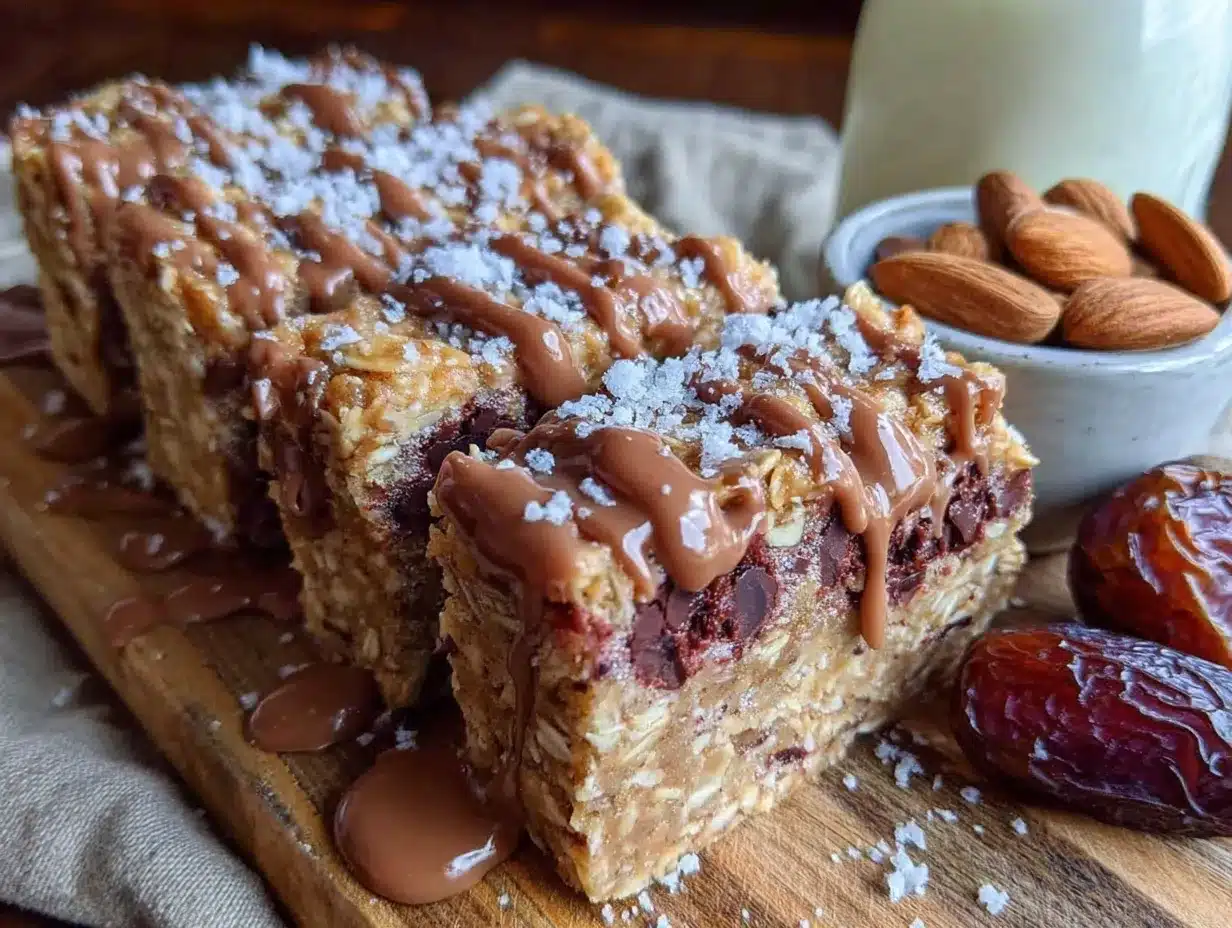
Alright, let’s make these bars. I promise this is easier than you think. Here’s exactly how I do it every time:
- Prep your pan. Line your 8×8 baking pan with parchment paper, leaving about 2 inches of overhang on two opposite sides. These are your “handles” for lifting the bars out later. Set the pan aside.
- Combine dry ingredients. In your large mixing bowl, add 2 cups (180g) rolled oats and 1/4 teaspoon salt. If you’re using any mix-ins like dried cranberries or chopped nuts, add them now. Give everything a quick stir with your spatula. Set this bowl aside while you work on the wet mixture.
- Melt the wet ingredients. In your medium saucepan over low heat, combine 1 cup (240g) peanut butter, 1/2 cup (170g) honey, and 2 tablespoons (28g) unsalted butter. Stir constantly with your rubber spatula. You want everything to melt together into a smooth, glossy mixture. This usually takes about 3-4 minutes. Don’t walk away—peanut butter can burn quickly if you’re not paying attention.
- Add vanilla. Once the mixture is smooth and fully combined, remove it from the heat. Stir in 1 teaspoon vanilla extract. You’ll notice the mixture becomes a bit more liquid and smells amazing.
- Combine wet and dry. Pour the warm peanut butter mixture over your oats. Use your rubber spatula to fold everything together. Make sure every oat is coated. This takes some elbow grease—the mixture is thick and sticky. Keep folding until you don’t see any dry oats anymore. The mixture should look uniform and slightly glossy.
- Press into pan. Transfer the mixture to your prepared pan. Here’s the important part: press it down firmly and evenly. I use the back of a measuring cup or a flat-bottomed glass to really compact it. You want it tight and level. If you skip this step, your bars will fall apart. Spend a good minute pressing it down. I mean it.
- Add chocolate chips. While the mixture is still warm, sprinkle 1/2 cup (90g) chocolate chips over the top. Use your spatula or the back of a spoon to gently press them into the surface. They’ll melt slightly from the warmth of the bars, which helps them stick.
- Chill. Place the pan in the refrigerator for at least 2 hours. I know, waiting is the hardest part. But this is crucial for the bars to set properly. If you’re in a rush, 1 hour in the freezer works too—just watch that they don’t freeze solid.
- Cut and serve. Once the bars are firm, use the parchment handles to lift the whole block out of the pan. Place it on a cutting board. Use a sharp knife to cut into 12-16 bars, depending on how big you want them. Wipe the knife clean between cuts for neater edges.
Sensory Cues: When you’re mixing the wet ingredients, you’re looking for a smooth, shiny consistency that coats the back of your spoon. When you combine wet and dry, the mixture should look like a cohesive, slightly sticky dough—not dry and crumbly, not greasy and separated. When you press it into the pan, it should feel dense and compact under your fingers.
Cooking Tips & Techniques
After making these bars more times than I can count, I’ve learned a few things the hard way. Here’s what I wish someone had told me:
Don’t overheat the peanut butter mixture. I made this mistake once when I was rushing. I turned the heat up to medium-high, thinking it would speed things up. Instead, the peanut butter seized up and became grainy. Low and slow is the way to go. You want everything melted, not cooked.
Press firmly, then press again. This is the number one mistake people make with no-bake bars. They gently pat the mixture down and wonder why everything falls apart. You need to really compact it. I put my full body weight into it sometimes. No joke. The tighter the pack, the better the bars hold together.
Let them chill completely. I know you’re hungry. I know the kitchen smells amazing. But cutting these too early is a disaster. The bars need time for the peanut butter and honey to set into a solid structure. If you cut them while they’re still warm, you’ll get a crumbly mess. Patience, my friend.
Use room temperature ingredients. Cold peanut butter is harder to melt evenly. Cold honey is thick and stubborn. Let everything sit out for 15 minutes before you start. It makes the melting process smoother and more consistent.
Line your pan properly. I once forgot to leave overhang on the parchment paper. Getting those bars out was a nightmare. I ended up digging them out with a spatula and they looked terrible. Learn from my mistake—those parchment handles are your friends.
Timing tip: Make these the night before you need them. They need at least 2 hours to set, but overnight is even better. The flavors meld together and the texture becomes perfectly firm but still chewy. Plus, it’s one less thing to do in the morning.
Variations & Adaptations
One of the best things about this recipe is how flexible it is. I’ve tried all sorts of variations, and here are my favorites:
- Chocolate Peanut Butter Dream: Add 2 tablespoons of cocoa powder to the dry oats before mixing. The chocolate and peanut butter combination is basically dessert for breakfast. My kids go crazy for this version.
- Trail Mix Bars: Add 1/4 cup each of dried cranberries, chopped almonds, and sunflower seeds to the oat mixture. It adds texture and makes these feel more like a hearty snack. I bring these on hiking trips and they hold up beautifully.
- Vegan Version: Substitute the honey with maple syrup and use coconut oil instead of butter. The bars will be slightly softer, so you might want to add an extra 1/4 cup of oats to firm them up. They’re still delicious though.
- Gluten-Free Option: Use certified gluten-free rolled oats. Everything else in the recipe is naturally gluten-free. Just double-check your chocolate chips—some brands use wheat-based additives.
- Crunchy Peanut Butter Swap: If you love texture, use crunchy peanut butter instead of creamy. The little peanut pieces add a nice surprise in every bite. I do this when I want something a bit more substantial.
My Personal Favorite Variation: I once added a handful of crushed pretzels to the mix and it was a game-changer. The salty crunch against the sweet peanut butter and chocolate is incredible. Just crush them into small pieces—not dust—and fold them in with the oats. Trust me on this one.
Serving & Storage Suggestions
These bars are incredibly versatile when it comes to serving. Here’s how I handle them:
Serving Temperature: These are best served cold or at room temperature. Straight from the fridge, they’re firm and satisfying. If you let them sit out for 5-10 minutes, they soften slightly and become more chewy. Either way works—it’s a matter of preference.
Presentation: For lunchboxes, I wrap individual bars in parchment paper or store them in reusable snack bags. For parties, I arrange them on a platter with a little tag that says “No-Bake Peanut Butter Granola Bars.” They look impressive without any effort.
Storage: Store these bars in an airtight container in the refrigerator for up to 2 weeks. They actually get better after a day or two as the flavors meld together. You can also store them at room temperature for up to 5 days, but they’ll be softer and might not hold together as well.
Freezing: These freeze beautifully. Wrap individual bars in plastic wrap, then place them in a freezer bag. They’ll keep for up to 3 months. To eat, just let them thaw in the fridge overnight or at room temperature for about 30 minutes. Perfect for make-ahead lunches.
Reheating: Honestly, I don’t recommend reheating these. They’re meant to be eaten cold or at room temperature. If you really want a warm treat, microwave one bar for about 10 seconds—just enough to soften the chocolate chips slightly.
Flavor Development: Here’s something interesting—these bars taste even better the next day. The oats absorb some of the moisture from the peanut butter mixture, making them more cohesive and chewy. So don’t worry if they seem a bit soft right after you make them. Give them overnight in the fridge and they’ll be perfect.
Nutritional Information & Benefits
Let’s talk about what’s actually in these bars. I’m not a nutritionist, but I’ve done my research and here’s what I know:
Estimated Nutritional Values (per bar, based on 12 bars):
- Calories: 285
- Fat: 16g
- Carbohydrates: 30g
- Fiber: 3g
- Sugar: 18g
- Protein: 8g
Health Benefits: Rolled oats are a great source of soluble fiber, which helps keep you full and supports heart health. Peanut butter provides healthy fats and plant-based protein—perfect for sustaining energy through a busy afternoon. Honey offers natural sweetness with antioxidants, though it’s still sugar so moderation is key.
Dietary Considerations: These bars are vegetarian-friendly. For gluten-free, use certified GF oats. For vegan, swap honey for maple syrup and butter for coconut oil. They’re naturally dairy-free if you use dairy-free chocolate chips. Not suitable for nut allergies due to the peanut butter, but you could try sunflower seed butter as a substitute—just note the texture will be different.
Potential Allergens: Peanuts, oats (gluten), dairy (if using butter and regular chocolate chips). Always check labels if you’re serving someone with allergies.
My Personal Take: I love that these bars give my kids sustained energy without the crash you get from processed snacks. They’re not health food, but they’re a whole lot better than anything you’d buy in a wrapper. And since I control the ingredients, I feel good about putting them in lunchboxes.
Conclusion
These Easy No-Bake Peanut Butter Granola Lunchbox Bars are the kind of recipe that saves your day, your snack drawer, and your sanity. They’re quick enough for a last-minute bake sale, sturdy enough for lunchboxes, and delicious enough that everyone asks for the recipe. Honestly, I don’t know why you wouldn’t make them.
I love that this recipe is forgiving. You can tweak it based on what you have in your pantry. You can make it your own. That’s what cooking should be—flexible, fun, and full of small victories. Whether you’re a seasoned baker or someone who’s never made anything from scratch, you can nail these bars on your first try.
Go ahead and give them a shot. Make a batch tonight, stash them in the fridge, and thank me tomorrow when your morning is ten times easier. And when you do make them, I’d love to hear how they turned out. Drop a comment below and tell me your favorite mix-in combination. Did you add pretzels? Coconut? Did your kids actually eat them? I want to know everything. Happy snacking!
Frequently Asked Questions
Can I use quick oats instead of rolled oats?
You can, but I don’t recommend it. Quick oats are more finely processed and will absorb moisture differently. Your bars will be softer and less chewy, almost like a soft granola cluster rather than a firm bar. If that’s what you’re going for, go ahead, but rolled oats give you that classic granola bar texture.
Why did my bars fall apart?
This usually happens for one of three reasons: you didn’t press the mixture firmly enough into the pan, you cut them before they were fully chilled, or your peanut butter mixture was too dry. Make sure you compact the mixture really well, chill for at least 2 hours, and use the right ratio of wet to dry ingredients.
Can I make these without chocolate chips?
Absolutely. The chocolate chips are optional. You can leave them out entirely, or replace them with dried fruit, seeds, or chopped nuts. The bars will still be delicious without them. Sometimes I make a batch without chocolate for a less sweet option and they’re still a hit.
How long do these bars last?
In the refrigerator, they’ll stay fresh for up to 2 weeks in an airtight container. At room temperature, about 5 days. In the freezer, up to 3 months. I’ve never had them last that long though—they always disappear way before then.
Can I use almond butter or sunflower seed butter instead of peanut butter?
Yes, but expect different results. Almond butter is thinner and might make the bars softer. Sunflower seed butter works well but can turn green when combined with baking soda (not an issue here since we’re not baking). The flavor will change significantly. If you’re avoiding peanuts, I’d recommend trying almond butter first and adding an extra 2 tablespoons of oats to compensate for the thinner consistency.
Pin This Recipe!
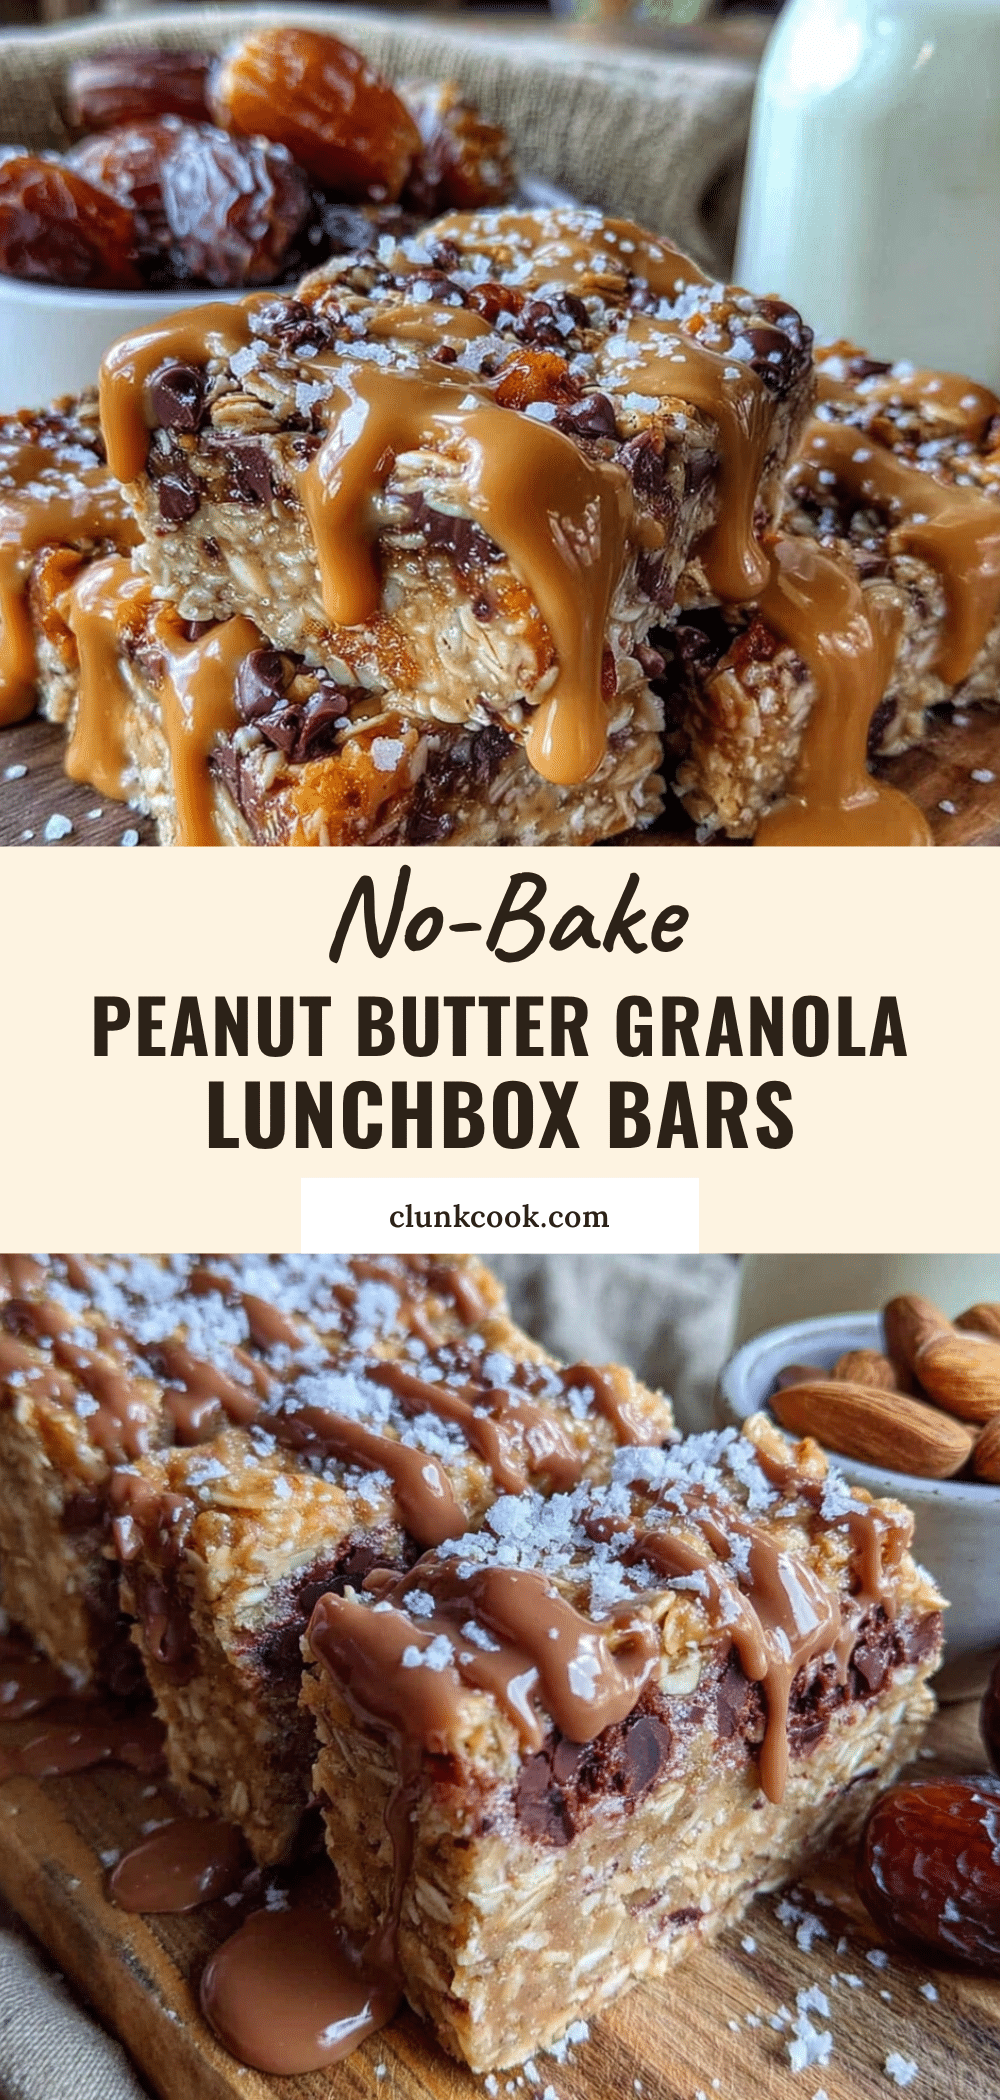
Easy No-Bake Peanut Butter Granola Lunchbox Bars (Best Snack)
These no-bake peanut butter granola bars are the perfect last-minute snack, lunchbox treat, or bake sale hero. Made with simple pantry ingredients like oats, peanut butter, honey, and chocolate chips, they come together in 15 minutes and require no oven. Sturdy, chewy, and absolutely delicious, they’re a crowd-pleaser that makes you look like you planned ahead when you absolutely did not.
- Prep Time: 15 minutes
- Cook Time: 5 minutes
- Total Time: 2 hours 20 minutes (includes chilling time)
- Yield: 12-16 bars 1x
- Category: Snack
- Cuisine: American
Ingredients
- 2 cups (180g) rolled oats
- 1 cup (240g) creamy peanut butter (like Skippy or Jif)
- 1/2 cup (170g) honey
- 1/2 cup (90g) semi-sweet chocolate chips
- 2 tablespoons (28g) unsalted butter
- 1 teaspoon vanilla extract
- 1/4 teaspoon salt
- Optional mix-ins: 1/4 cup each dried cranberries, chopped nuts, shredded coconut, or mini pretzel pieces
Instructions
- Line an 8×8 inch baking pan with parchment paper, leaving about 2 inches of overhang on two opposite sides for easy removal. Set aside.
- In a large mixing bowl, combine 2 cups rolled oats and 1/4 teaspoon salt. Add any optional mix-ins if using. Stir to combine and set aside.
- In a medium saucepan over low heat, combine 1 cup peanut butter, 1/2 cup honey, and 2 tablespoons unsalted butter. Stir constantly with a rubber spatula until smooth and glossy, about 3-4 minutes. Do not overheat.
- Remove from heat and stir in 1 teaspoon vanilla extract.
- Pour the warm peanut butter mixture over the oat mixture. Fold together with a rubber spatula until every oat is coated and the mixture is uniform and slightly glossy.
- Transfer the mixture to the prepared pan. Press down firmly and evenly using the back of a measuring cup or a flat-bottomed glass. Compact the mixture well to ensure bars hold together.
- While still warm, sprinkle 1/2 cup chocolate chips over the top. Gently press them into the surface with a spatula or spoon.
- Refrigerate for at least 2 hours (or 1 hour in the freezer) until firm.
- Once firm, use the parchment handles to lift the block out of the pan. Place on a cutting board and cut into 12-16 bars with a sharp knife, wiping the knife clean between cuts.
Notes
For best results, use room temperature peanut butter and honey. Press the mixture very firmly into the pan to prevent crumbling. Chill completely before cutting. Bars can be stored in an airtight container in the refrigerator for up to 2 weeks, at room temperature for up to 5 days, or frozen for up to 3 months. For a vegan version, substitute honey with maple syrup and butter with coconut oil. For gluten-free, use certified gluten-free rolled oats.
Nutrition
- Serving Size: 1 bar
- Calories: 285
- Sugar: 18
- Sodium: 120
- Fat: 16
- Saturated Fat: 5
- Carbohydrates: 30
- Fiber: 3
- Protein: 8
Keywords: no-bake granola bars, peanut butter granola bars, lunchbox snacks, easy snack recipe, no-bake dessert, healthy snack, kid-friendly snack, make-ahead snack


