Love this? Save it for later!
Share the inspiration with your friends
This was supposed to be a pumpkin cheesecake. A tall, crack-free, springform-pan-requiring showstopper for a Friendsgiving I was hosting. I had the recipe memorized, the ingredients prepped, and a very specific vision of slicing into a pristine, two-layered beauty. But then, my neighbor’s dog started barking, the timer for the crust went off, and in my rush, I grabbed the wrong pan—an 8×8 inch square instead of the round one. I realized my mistake only after the crust was pressed in. I stood there, staring at the too-small pan, with a bowl of cheesecake filling and a can of pumpkin puree on the counter, and let me tell you, I was this close to just making a single pumpkin pie. Honestly, I almost cried a little. But I didn’t want to waste the ingredients, so I just poured everything in, swirled it around with a butter knife, and hoped for the best. What came out was nothing like the plan—and better. The bars were dense, creamy, and had this perfect ratio of tangy cheesecake to spiced pumpkin in every single bite. That happy accident turned into the recipe I now bring to every fall gathering. Maybe you’ve been there—a kitchen mishap that ends up being a total win. That’s exactly how these Perfect Pumpkin Cheesecake Swirl Bars were born.
Why You’ll Love This Recipe
Let me be real with you—I’ve tested a lot of pumpkin cheesecake recipes over the years. Some were too dense, some were too sweet, and others just didn’t have that swirl factor that makes a dessert look impressive without any actual effort. These bars are the Goldilocks of fall desserts. They hit every single note just right.
- Quick & Easy: No water bath, no springform pan, no fuss. These come together in about 20 minutes of active prep time. Perfect for a busy weeknight when you need a dessert for tomorrow’s potluck.
- Simple Ingredients: You likely already have the cream cheese, eggs, and sugar in your fridge. The pumpkin puree and spices are the only “special” items, and honestly, if it’s fall, you probably have those too.
- Perfect for Fall Gatherings: Great for Thanksgiving, Friendsgiving, Halloween parties, or just a cozy Sunday baking session. They travel well and slice cleanly, which is more than I can say for some of my other pie disasters.
- Crowd-Pleaser: I’ve brought these to three different events this year alone, and every single time, someone asks for the recipe. Kids love the bar format, and adults appreciate the sophisticated flavor.
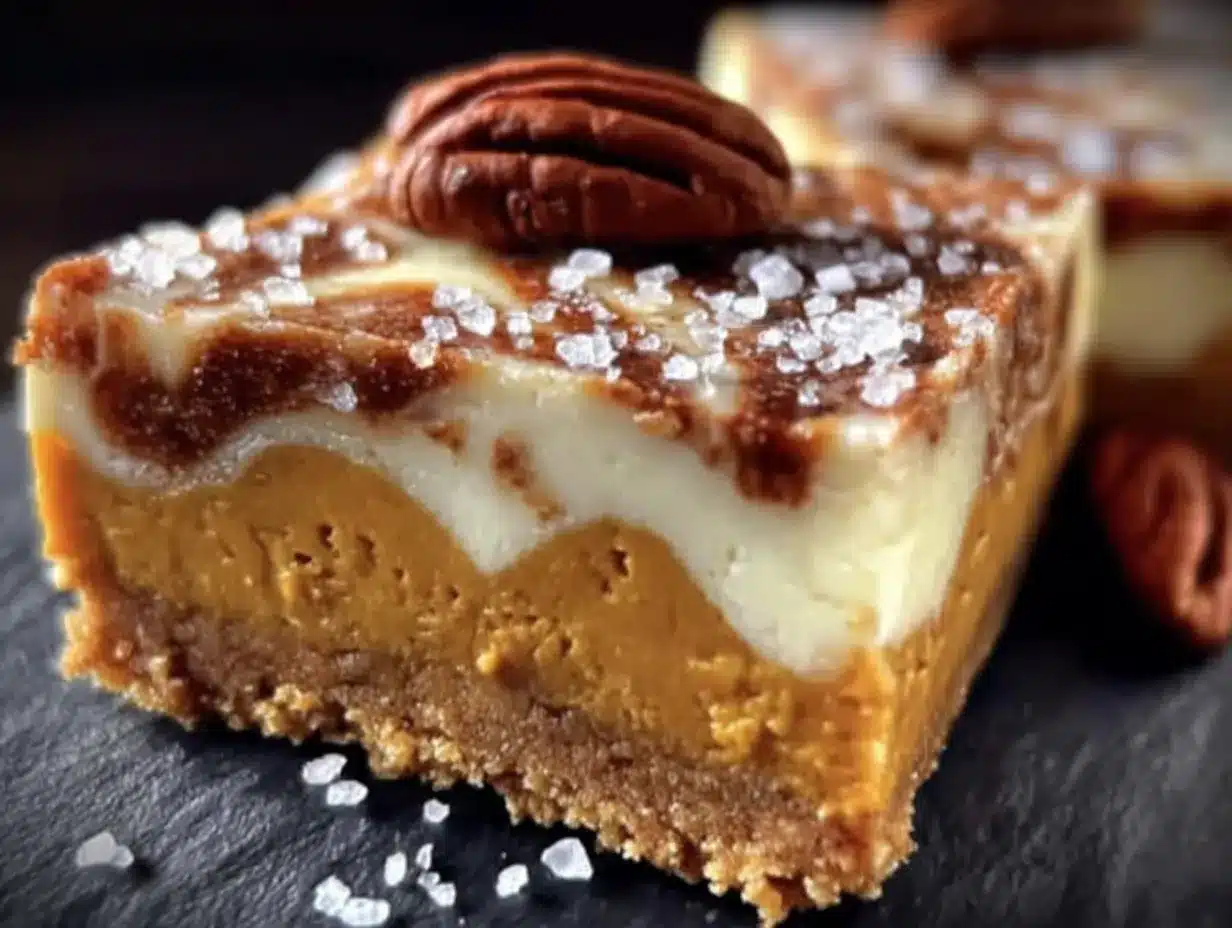
- Unbelievably Delicious: The texture is what gets me. The cheesecake layer is silky and rich, the pumpkin layer is warm and spiced, and that buttery graham cracker crust holds it all together without getting soggy. It’s comfort food reimagined—faster, easier, but with the same soul-soothing satisfaction.
This isn’t just another pumpkin cheesecake recipe. The trick is using room-temperature ingredients and a gentle hand when swirling. No overmixing, no curdled cream cheese, no stress. It’s the kind of dessert that makes you close your eyes after the first bite.
What Ingredients You Will Need
This recipe uses simple, wholesome ingredients to deliver that perfect balance of tangy cheesecake and spiced pumpkin. Most of these are pantry staples, especially if you’re a fall baking fanatic like me.
For the Crust
- 1 ½ cups graham cracker crumbs (about 12 full sheets, crushed finely)
- ¼ cup granulated sugar
- 6 tablespoons unsalted butter, melted (I prefer Kerrygold for the richness)
- Pinch of salt
For the Cheesecake Layer
- 16 oz (two blocks) cream cheese, softened to room temperature (very important—cold cream cheese = lumpy filling)
- ½ cup granulated sugar
- 2 large eggs, room temperature
- 1 teaspoon vanilla extract
- ¼ cup sour cream (adds a lovely tang and silky texture)
For the Pumpkin Layer
- 1 cup pumpkin puree (not pumpkin pie filling—just 100% pure pumpkin)
- ¼ cup brown sugar, packed
- 1 large egg, room temperature
- 1 teaspoon vanilla extract
- 1 ½ teaspoons pumpkin pie spice (or 1 tsp cinnamon, ½ tsp ginger, ¼ tsp nutmeg, ¼ tsp cloves)
- 2 tablespoons all-purpose flour (helps thicken the layer so it doesn’t sink into the cheesecake)
One thing I’ve learned the hard way: always use full-fat cream cheese for the best texture. Low-fat versions have more water content and can make your bars runny. Also, if you can find small-curd sour cream, it blends more evenly. For the pumpkin puree, I’m loyal to Libby’s—it’s consistently thick and not watery. In a pinch, you can swap the graham crackers for crushed ginger snaps for a spicier crust. Just reduce the sugar to 2 tablespoons since ginger snaps are already sweet.
Equipment Needed
You don’t need a fancy bakery setup for these bars. Here’s what you’ll need:
- 8×8 inch square baking pan (glass or metal—both work fine)
- Parchment paper (for easy lifting—don’t skip this unless you want to fight with stuck bars)
- Large mixing bowls (two or three—one for crust, one for cheesecake, one for pumpkin)
- Hand mixer or stand mixer (a handheld one is totally fine; I use my trusty KitchenAid hand mixer)
- Rubber spatula (for scraping every last bit of filling)
- Butter knife or skewer (for the swirling action—a chopstick works great too)
- Measuring cups and spoons
- Food processor or zip-top bag and rolling pin (for crushing graham crackers; I prefer the bag method because it’s oddly satisfying)
If you don’t have an 8×8 pan, you can use a 9×9, but the bars will be slightly thinner and may need 5 fewer minutes of baking. Also, if you’re using a glass pan, reduce the oven temperature by 25°F to prevent over-browning. I learned that one after a slightly burnt crust incident last Thanksgiving.
Preparation Method
Alright, let’s get baking. Take a deep breath—this is easier than a full cheesecake, I promise.
- Preheat and Prep (5 minutes): Preheat your oven to 325°F (163°C). Line your 8×8 pan with parchment paper, leaving a 2-inch overhang on two opposite sides. This creates “handles” for lifting the bars out later. Spray the parchment lightly with non-stick spray for extra insurance.
- Make the Crust (10 minutes): In a medium bowl, mix the graham cracker crumbs, sugar, and salt. Pour in the melted butter and stir with a fork until the mixture looks like wet sand. Press this firmly into the bottom of your prepared pan. I use the bottom of a measuring cup to really pack it down—this prevents a crumbly mess later. Bake for 10 minutes, then set aside to cool slightly while you make the fillings.
- Make the Cheesecake Layer (10 minutes): In a large bowl, beat the softened cream cheese with a hand mixer on medium speed until smooth and creamy—about 2 minutes. Scrape down the sides. Add the sugar and beat for another minute. Add the eggs one at a time, beating on low after each just until combined. Overmixing at this stage adds too much air, which can cause cracks. Stir in the vanilla and sour cream until just smooth. Set aside.
- Make the Pumpkin Layer (5 minutes): In a separate bowl, whisk together the pumpkin puree, brown sugar, egg, vanilla, pumpkin pie spice, and flour until smooth. The flour is the secret to keeping this layer from sinking into the cheesecake—don’t skip it!
- Assemble the Layers (5 minutes): Pour the cheesecake batter over the warm crust and spread it evenly. Drop spoonfuls of the pumpkin mixture on top—about 6 to 8 dollops. Now for the fun part: take a butter knife or skewer and gently drag it through the two layers in a figure-eight pattern. Don’t over-swirl, or you’ll lose the distinct layers. Just 5 to 6 passes is plenty.
- Bake (40-45 minutes): Bake at 325°F for 40 to 45 minutes. The edges should look set, but the center will still have a slight jiggle—like Jell-O, not like soup. If you see it wobbling like a wave, give it 5 more minutes. A toothpick inserted 2 inches from the center should come out mostly clean.
- Cool Completely (2 hours minimum): This is the hardest part. Let the bars cool on a wire rack for 1 hour, then transfer to the refrigerator to chill for at least 2 hours (overnight is best). I know, I know—you want to dig in. But warm cheesecake bars are a sad, runny mess. Patience pays off here.
- Slice and Serve (5 minutes): Once fully chilled, use the parchment handles to lift the entire block out of the pan. Place on a cutting board and use a sharp knife to slice into 16 squares. For clean cuts, wipe the knife between slices with a damp paper towel.
Cooking Tips & Techniques
After making these bars about a dozen times (my neighbors are very happy), I’ve collected a few hard-won tips.
Room temperature is non-negotiable. I cannot stress this enough. Cold cream cheese creates lumps that no amount of beating will fix. Leave your cream cheese and eggs on the counter for at least 30 minutes before starting. If you’re in a rush, you can cut the cream cheese into cubes and microwave it in 10-second bursts until it’s soft to the touch—but be careful not to melt it.
Don’t overmix the cheesecake batter. I used to beat the living daylights out of my cream cheese mixtures, thinking smoother was better. Nope. Overmixing incorporates too much air, which expands in the oven and then collapses, leaving you with cracks. Mix on low speed once the eggs go in, and stop as soon as the streaks disappear.
The water bath alternative. I don’t use a water bath for these bars because the shallow pan makes it tricky. Instead, I place a shallow pan of hot water on the oven rack below the bars. The steam keeps the oven moist and prevents the cheesecake from drying out. Works like a charm.
Swirl with confidence, but don’t get carried away. I once swirled my pumpkin into the cheesecake so thoroughly that it looked like a muddy mess. The beauty of these bars is the distinct marbled pattern. Five or six figure-eight motions is all you need. Less is more.
Patience with chilling. I tried to rush this step once—I put the bars in the freezer for 30 minutes instead of the fridge for 2 hours. The result? A gummy, sticky mess that fell apart when I tried to slice it. The cheesecake needs time to fully set. Overnight chilling gives you the cleanest slices and the best texture.
Variations & Adaptations
One of the best things about this recipe is how flexible it is. Here are some variations I’ve tried and loved:
- Gluten-Free Version: Use gluten-free graham crackers or crushed gluten-free ginger snaps for the crust. The filling itself is naturally gluten-free if you use a gluten-free all-purpose flour (or even cornstarch) in the pumpkin layer.
- Dairy-Free Adaptation: Swap the cream cheese for a high-quality dairy-free version (I like Miyoko’s or Kite Hill). Use coconut cream instead of sour cream, and vegan butter for the crust. The texture will be slightly less firm, but it’s still delicious.
- Spice It Up: For a chai-spiced version, add 1 teaspoon of ground cardamom and ½ teaspoon of black pepper to the pumpkin layer. It gives the bars a warm, aromatic kick that’s perfect with a cup of coffee.
- Chocolate Swirl: Melt ½ cup of semi-sweet chocolate chips and drizzle it over the cheesecake layer before adding the pumpkin. Swirl everything together for a pumpkin-chocolate marbled effect. My kids go crazy for this version.
- Pecan Praline Topping: After the bars are baked and cooled, drizzle them with a simple caramel sauce and sprinkle with toasted pecans. It turns these humble bars into a showstopping dessert.
Serving & Storage Suggestions
These bars are best served cold, straight from the fridge. The texture is firm and creamy, and the flavors are more pronounced when they’re chilled. I like to let them sit at room temperature for about 10 minutes before serving—just enough to take the chill off without making them soft.
For presentation, I arrange the bars on a white platter and dust them lightly with cinnamon or powdered sugar. A dollop of whipped cream on top never hurts, especially if you’re serving them as a Thanksgiving dessert. They pair beautifully with a hot cup of spiced chai or a bold coffee.
Storage: Store the bars in an airtight container in the refrigerator for up to 5 days. I actually think they taste better on day two—the flavors meld together beautifully. You can also freeze them for up to 3 months. Wrap individual bars tightly in plastic wrap, then place them in a freezer-safe bag. To thaw, transfer to the fridge overnight. Do not microwave to thaw—it ruins the texture.
One thing to note: if you’re making these a day ahead for an event, wait to slice them until just before serving. The cut edges can dry out slightly in the fridge. A fresh cut reveals that beautiful creamy interior.
Nutritional Information & Benefits
Let’s be honest—this is a dessert, not a health food. But there are a few surprising benefits hidden in these bars.
Estimated per bar (based on 16 servings): 220 calories, 14g fat, 22g carbohydrates, 5g protein, 16g sugar, 1g fiber.
Pumpkin is packed with vitamin A (great for eye health) and fiber, which helps with digestion. The cream cheese provides a decent amount of calcium and protein. And while there’s sugar in here, it’s not as overwhelming as some other fall desserts—the tanginess of the cream cheese balances the sweetness nicely.
If you’re watching your sugar intake, you can reduce the granulated sugar in the cheesecake layer to ⅓ cup without affecting the texture too much. The brown sugar in the pumpkin layer adds a deeper flavor, so I wouldn’t reduce that one. For a lower-carb option, use a sugar substitute like allulose in both layers, but note that the texture may be slightly less creamy.
Potential allergens: dairy, eggs, gluten (if using traditional graham crackers). Always check your ingredient labels if you’re serving guests with allergies.
Conclusion
These Perfect Pumpkin Cheesecake Swirl Bars are the dessert that keeps on giving. They’re forgiving enough for a beginner baker, impressive enough for a holiday table, and delicious enough to make you forget that they started as a total kitchen disaster. I love how they capture the essence of fall—warm spices, creamy texture, and that unmistakable pumpkin flavor—without requiring a full afternoon of fussing.
I hope you give them a try and make them your own. Maybe you’ll add extra spice, or swap in a different crust, or drizzle them with caramel. Whatever you do, let me know how it goes. Drop a comment below with your favorite variation, or tag me in your photos on Pinterest—I love seeing your kitchen wins.
Happy baking, friend. Here’s to happy accidents and really good bars.
Frequently Asked Questions
Can I use canned pumpkin pie filling instead of pure pumpkin?
No, I really don’t recommend it. Pumpkin pie filling is pre-sweetened and spiced, which will throw off the balance of this recipe. Stick with 100% pure pumpkin puree for the best results.
Why did my cheesecake layer crack?
Cracks usually happen from overmixing the batter or overbaking. Make sure your cream cheese is at room temperature, mix on low speed once the eggs are added, and pull the bars out of the oven while the center still has a slight jiggle.
Can I make these bars in a different pan size?
Yes! A 9×9 pan will work, but the bars will be thinner. Reduce the baking time by about 5 minutes and keep an eye on them. A 9×13 pan would make them very thin, so I don’t recommend that unless you double the recipe.
How do I get clean slices without the bars sticking to the knife?
Use a sharp knife and wipe it clean with a damp paper towel between each cut. For extra clean slices, run the knife under hot water and dry it off before slicing. The heat helps the knife glide through the cheesecake.
Can I freeze these bars for later?
Absolutely. Wrap individual bars tightly in plastic wrap, then place them in a freezer-safe bag or container. They’ll keep for up to 3 months. Thaw in the refrigerator overnight before serving.
Pin This Recipe!
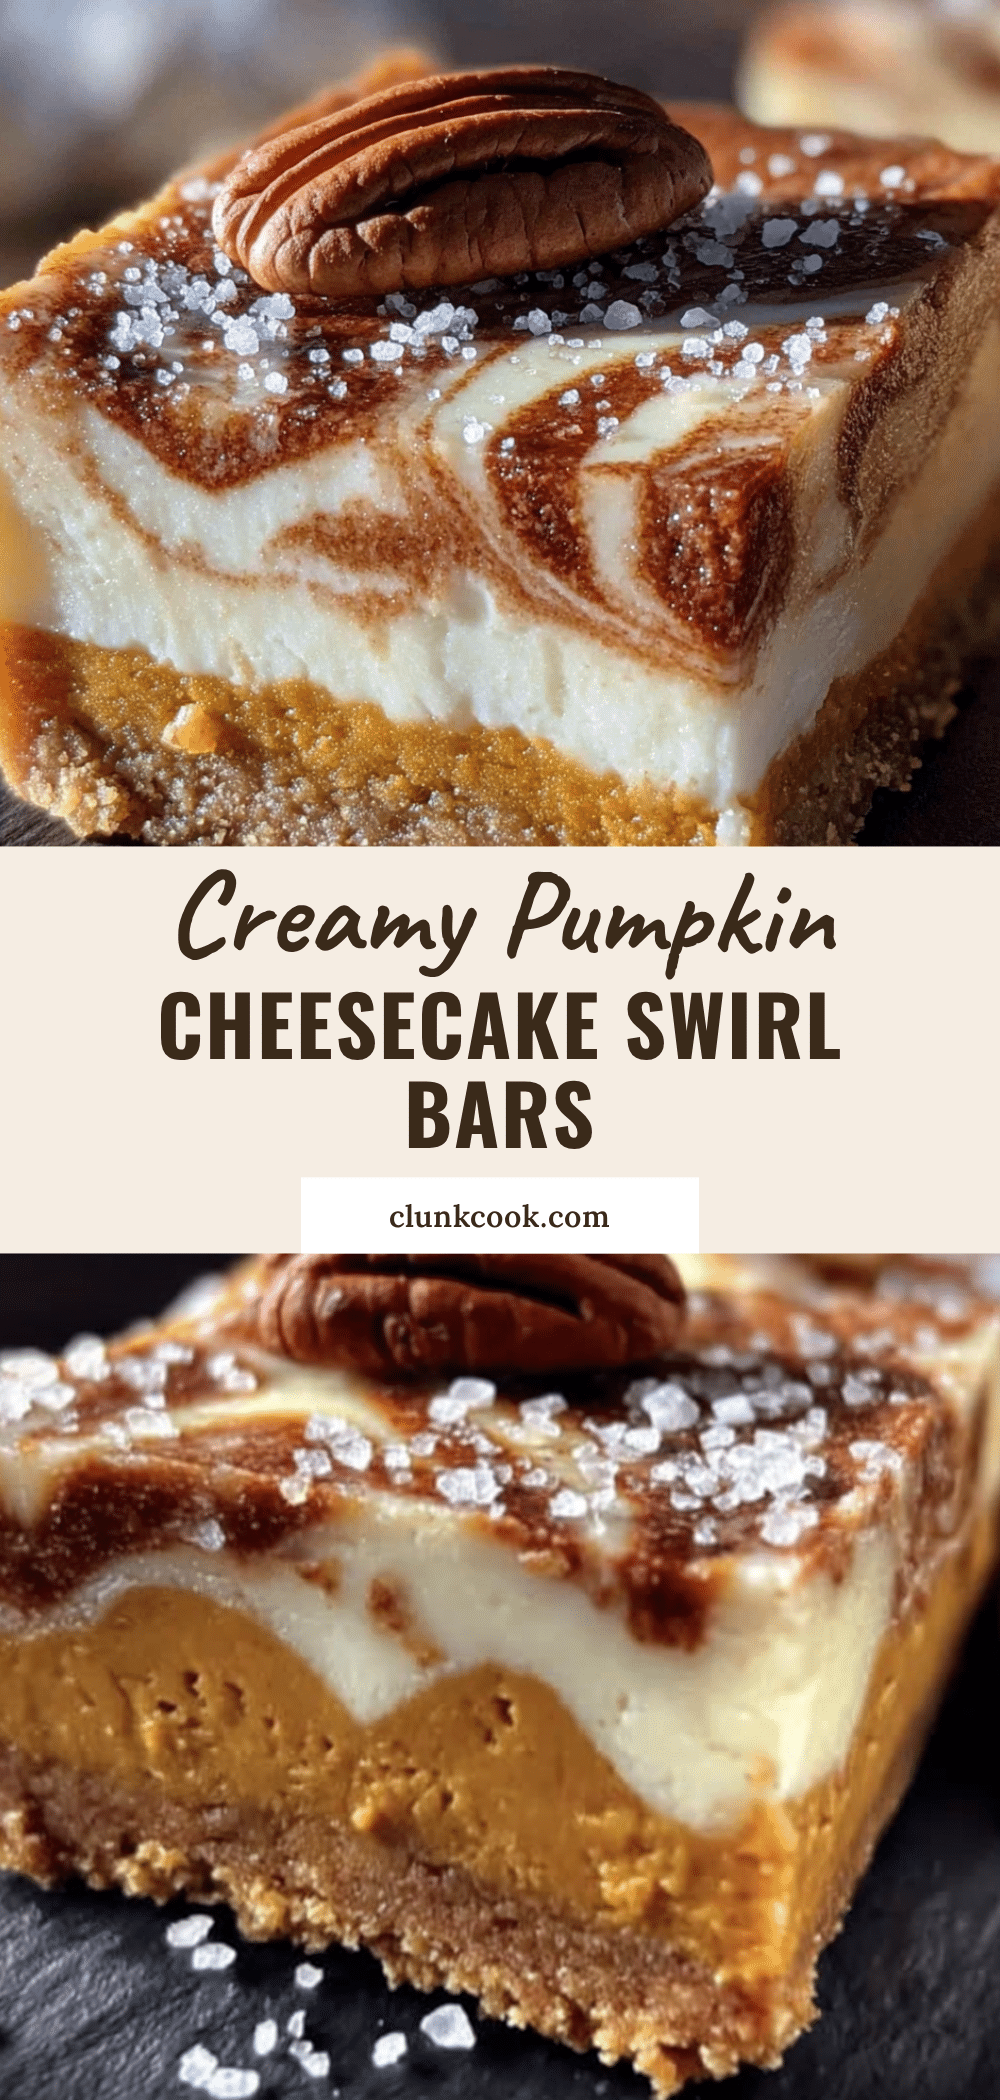
Perfect Pumpkin Cheesecake Swirl Bars: Easy Fall Dessert
These dense, creamy pumpkin cheesecake swirl bars have the perfect ratio of tangy cheesecake to spiced pumpkin in every bite. They’re quick, easy, and made with simple ingredients—no water bath or springform pan required.
- Prep Time: 20 minutes
- Cook Time: 45 minutes
- Total Time: 3 hours 5 minutes (includes chilling)
- Yield: 16 servings 1x
- Category: Dessert
- Cuisine: American
Ingredients
- 1 ½ cups graham cracker crumbs (about 12 full sheets, crushed finely)
- ¼ cup granulated sugar
- 6 tablespoons unsalted butter, melted
- Pinch of salt
- 16 oz (two blocks) cream cheese, softened to room temperature
- ½ cup granulated sugar
- 2 large eggs, room temperature
- 1 teaspoon vanilla extract
- ¼ cup sour cream
- 1 cup pumpkin puree (not pumpkin pie filling)
- ¼ cup brown sugar, packed
- 1 large egg, room temperature
- 1 teaspoon vanilla extract
- 1 ½ teaspoons pumpkin pie spice (or 1 tsp cinnamon, ½ tsp ginger, ¼ tsp nutmeg, ¼ tsp cloves)
- 2 tablespoons all-purpose flour
Instructions
- Preheat your oven to 325°F (163°C). Line an 8×8 inch square baking pan with parchment paper, leaving a 2-inch overhang on two opposite sides. Spray the parchment lightly with non-stick spray.
- In a medium bowl, mix the graham cracker crumbs, ¼ cup granulated sugar, and salt. Pour in the melted butter and stir with a fork until the mixture looks like wet sand. Press firmly into the bottom of the prepared pan. Bake for 10 minutes, then set aside to cool slightly.
- In a large bowl, beat the softened cream cheese with a hand mixer on medium speed until smooth and creamy—about 2 minutes. Scrape down the sides. Add ½ cup granulated sugar and beat for another minute. Add the eggs one at a time, beating on low after each just until combined. Stir in 1 teaspoon vanilla extract and sour cream until just smooth. Set aside.
- In a separate bowl, whisk together the pumpkin puree, brown sugar, 1 egg, 1 teaspoon vanilla extract, pumpkin pie spice, and flour until smooth.
- Pour the cheesecake batter over the warm crust and spread it evenly. Drop spoonfuls of the pumpkin mixture on top—about 6 to 8 dollops. Take a butter knife or skewer and gently drag it through the two layers in a figure-eight pattern, making 5 to 6 passes.
- Bake at 325°F for 40 to 45 minutes. The edges should look set, but the center will still have a slight jiggle. A toothpick inserted 2 inches from the center should come out mostly clean.
- Let the bars cool on a wire rack for 1 hour, then transfer to the refrigerator to chill for at least 2 hours (overnight is best).
- Once fully chilled, use the parchment handles to lift the entire block out of the pan. Place on a cutting board and slice into 16 squares using a sharp knife, wiping the knife clean between cuts.
Notes
Room temperature ingredients are crucial for a smooth texture. Do not overmix the cheesecake batter to avoid cracks. For a water bath alternative, place a shallow pan of hot water on the oven rack below the bars. Chill overnight for the cleanest slices. Store in an airtight container in the refrigerator for up to 5 days or freeze for up to 3 months.
Nutrition
- Serving Size: 1 bar
- Calories: 220
- Sugar: 16
- Sodium: 180
- Fat: 14
- Saturated Fat: 8
- Carbohydrates: 22
- Fiber: 1
- Protein: 5
Keywords: pumpkin cheesecake bars, fall dessert, easy cheesecake, pumpkin swirl bars, Thanksgiving dessert, graham cracker crust


