Love this? Save it for later!
Share the inspiration with your friends
The checkout line at the hardware store was moving slower than molasses in January. I was balancing a bag of lightbulbs and a new paintbrush, mentally running through my to-do list, when the man behind me—the one with the kind eyes and a faded flannel shirt—started talking about Halloween treats. I didn’t catch his name, but I caught every word about how he’d been making these spooky snacks for his grandkids for over twenty years. He described them with such pride, like they were the crown jewels of his holiday baking. I honestly forgot about the lightbulbs. All I could think about was getting home to try this witch finger pretzel rod idea myself.
You know that feeling when a recipe idea just clicks? That was this one. Simple, clever, and just the right amount of creepy. These Easy Witch Finger Pretzel Rods with White Chocolate are exactly what you need for a Halloween party or a fun afternoon project with the kids. They look like gnarled, witchy fingers—complete with an almond nail and a little “blood” drizzle—but they taste like sweet, salty, crunchy perfection. I mean, what’s not to love about that combination?
The first batch I made was a glorious mess. I got white chocolate on the counter, the almond “fingernails” kept sliding off, and I may have snapped a pretzel rod in frustration. But that second batch? That was the one. The one where everything came together, and I knew this recipe was a keeper. It’s the kind of treat that makes people do a double-take, then laugh, then grab three more. Maybe you’ve been there—looking for a Halloween recipe that’s impressive without being impossible. This is it.
Why You’ll Love This Recipe
Let me tell you why these little monsters have become my go-to Halloween recipe. I’ve tested this more times than I care to admit, and I can say with confidence that it works every single time.
- Quick & Easy: You can have these ready in under 30 minutes. Seriously. From start to finish, it’s a breeze. Perfect for those last-minute Halloween party invites or a spontaneous spooky snack attack.
- Simple Ingredients: You probably already have most of these in your pantry. No need to hunt down obscure candy or specialty baking supplies. Just pretzel rods, white chocolate, and a few decorations.
- Perfect for Halloween: These are the star of any Halloween spread. They look creepy, they’re fun to make, and everyone—from kids to adults—gets a kick out of them. They’re great for classroom parties, office potlucks, or just a cozy night in.
- Crowd-Pleaser: I’ve yet to meet someone who doesn’t love these. The salty pretzel with the sweet white chocolate is a classic combo that never fails. Plus, the “finger” shape is just plain fun.
- Unbelievably Delicious: The texture is what gets me. That satisfying crunch of the pretzel, the smooth melt of the chocolate, and the little snap of the almond “nail.” It’s next-level snacking.
What makes this recipe different from all the other witch finger pretzels out there? It’s the technique. I figured out the best way to get the chocolate to stick without making a mess, and how to position the almond so it actually looks like a fingernail. It’s not just another version—it’s the best version. Trust me on this one.
This recipe isn’t just good—it’s the kind that makes you close your eyes after the first bite. It’s Halloween fun reimagined: simple, delicious, and with the same soul-soothing satisfaction as your favorite childhood treat. Perfect for impressing guests without any stress, or turning a simple snack into something truly memorable.
What Ingredients You Will Need
This recipe uses simple, everyday ingredients to create something that looks way more complicated than it actually is. Here’s what you’ll need to gather. Most of these are pantry staples, which is one of the reasons I love this recipe so much.
- Pretzel rods: 12 ounces (about 24 rods). Look for thick, sturdy pretzel rods. I recommend the Utz brand for their consistent size and crunch. They hold up well to the chocolate coating without breaking.
- White chocolate melting wafers: 12 ounces. I prefer Ghirardelli or Wilton brand melting wafers. They melt smoothly and set with a nice, glossy finish. Avoid white chocolate chips, as they don’t melt as evenly.
- Sliced almonds: ¼ cup (about 24 slices). These will be the “fingernails.” Look for whole, unbroken slices for the best effect. You want them to look like a real nail, not a crumb.
- Red gel food coloring: A few drops. This is for the “blood” effect at the base of the nail. I use Wilton brand gel coloring—it’s concentrated and gives a nice, vibrant red without thinning the chocolate.
- Green gel food coloring (optional): A few drops. If you want to tint the white chocolate to look more like witch skin, this is your ticket. I sometimes skip it, but it does add a fun, extra layer of creepiness.
- Coconut oil (optional): 1 teaspoon. This helps thin the melted chocolate for a smoother coating. Only use it if your chocolate seems too thick.
A few notes on ingredient selection. For the pretzel rods, try to find ones that are relatively straight. You’ll be dipping them, and a curved rod can be a bit tricky. If you’re using almond slices, pick through them and choose the ones that are most “nail-shaped”—a little curved and pointed at one end. It makes a big difference in the final look.
If you need to make substitutions, here are some options. You can use dark chocolate or milk chocolate instead of white chocolate, but the “blood” effect won’t show up as well. For a dairy-free version, use dairy-free white chocolate chips and a splash of coconut oil. The almond nails can be swapped for slivered pistachios or even small candy corn pieces, but the almond really does look the most like a real fingernail.
Equipment Needed
You don’t need a fancy kitchen to pull these off. Here’s what you’ll need, plus a few tips from my own experience.
- Baking sheet: A standard half-sheet pan works perfectly. Line it with parchment paper or a silicone baking mat for easy cleanup. I’ve used both, and the silicone mat keeps the pretzels from sliding around.
- Microwave-safe bowl: For melting the white chocolate. I use a glass measuring cup—it’s deep enough to dip the pretzels without making a huge mess.
- Spatula or spoon: For stirring the chocolate and helping to coat the pretzels. A small offset spatula is my secret weapon for smooth coating.
- Toothpicks: These are lifesavers for positioning the almond “nails” and for adding the red “blood” details. Keep a few handy.
- Piping bag or small zip-top bag: For drizzling the red chocolate. A zip-top bag with the corner snipped off works just as well as a piping bag.
- Small bowl: For melting a tiny bit of red-tinted chocolate for the blood effect.
If you don’t have a microwave, you can melt the white chocolate in a double boiler on the stove. Just be careful not to get any water in the chocolate, or it will seize up. I learned that the hard way. Also, if you’re using a piping bag, a small round tip gives you more control, but it’s not necessary. A zip-top bag works just fine.
Preparation Method
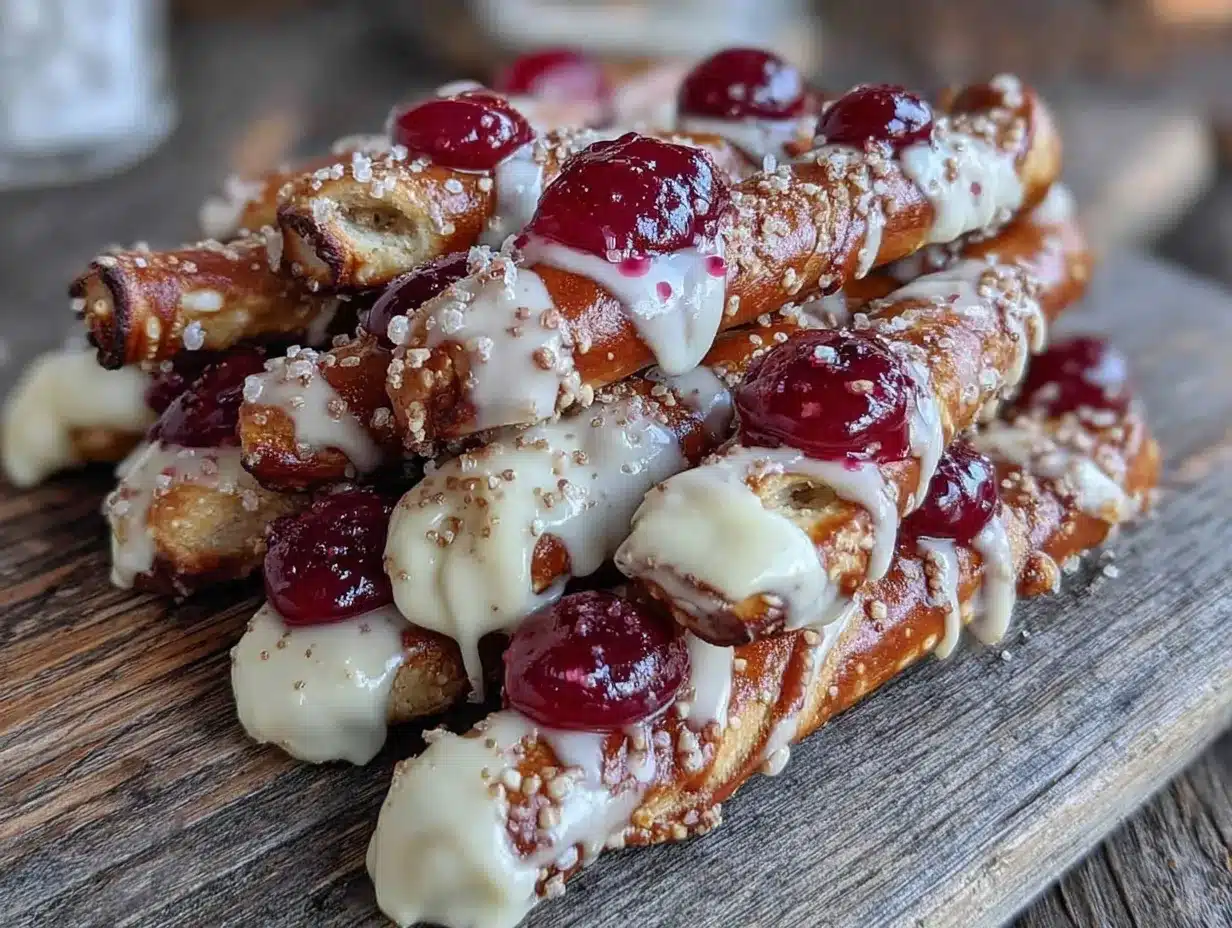
Alright, let’s get to the fun part. Follow these steps, and you’ll have a batch of creepy witch fingers in no time. I’ve included all the little details that I wish someone had told me the first time.
- Prepare your workspace: Line a baking sheet with parchment paper or a silicone mat. This is where your finished pretzels will set. Make sure you have enough space to work—you’ll be moving quickly once the chocolate is melted.
- Melt the white chocolate: Place the white chocolate melting wafers in a microwave-safe bowl. Microwave in 30-second intervals, stirring well after each, until the chocolate is completely smooth and melted. This usually takes about 1.5 to 2 minutes. Be careful not to overheat it—white chocolate can burn easily and become grainy. If it seems too thick, stir in 1 teaspoon of coconut oil.
- Optional: tint the chocolate: If you want green witch fingers, add a few drops of green gel food coloring to the melted white chocolate. Stir until the color is evenly distributed. I like a pale, sickly green—it looks more authentically witchy. Start with just one drop and add more if needed.
- Dip the pretzels: Hold a pretzel rod by one end and dip it into the melted white chocolate, leaving about an inch uncoated at the top (this will be the “finger” base). Gently twist and tap the pretzel against the side of the bowl to remove excess chocolate. Let any drips fall back into the bowl. Place the coated pretzel on the prepared baking sheet.
- Add the fingernail: While the chocolate is still wet, place a sliced almond on the tip of the pretzel rod, pressing gently so it sticks. Position it so the pointed end of the almond extends slightly past the end of the pretzel, like a real fingernail. This is where a toothpick comes in handy—you can use it to nudge the almond into the perfect position without getting chocolate all over your fingers.
- Create the knuckle wrinkles: Use a toothpick to gently drag a few lines across the chocolate coating near the “nail” to create the illusion of knuckle wrinkles. You can also add a few lines further down the pretzel to look like finger joints. Don’t overthink it—just a few subtle lines will do the trick.
- Make the “blood”: Take a small amount of the remaining melted white chocolate (about 2 tablespoons) and stir in a few drops of red gel food coloring until you get a deep, blood-red color. Transfer this to a small piping bag or a zip-top bag with a tiny corner snipped off.
- Add the bloody details: Pipe a small amount of red chocolate at the base of the almond “nail,” letting it drip down slightly. This is the “blood” effect. You can also add a few tiny dots or lines for extra gore. Remember, less is more—you want it to look creepy, not like a crime scene.
- Let them set: Allow the pretzels to set completely at room temperature. This takes about 15-20 minutes. Don’t put them in the refrigerator, as condensation can make the chocolate look dull. If you’re in a hurry, you can pop them in the fridge for 5 minutes, but let them come to room temperature before serving.
- Repeat: Continue with the remaining pretzel rods and chocolate. You can work in batches if needed. The melted chocolate may start to thicken as it cools—just pop it back in the microwave for 10-15 seconds to loosen it up.
A few troubleshooting tips. If your almond “nails” keep sliding off, you’re probably using too much chocolate on the pretzel. Tap off the excess before adding the almond. If the chocolate seems too thick for dipping, add a tiny bit of coconut oil. And if the red “blood” is too runny, let it cool for a minute before piping. It should be thick enough to hold its shape but thin enough to drip.
Cooking Tips & Techniques
I’ve made these enough times to know what works and what doesn’t. Here are my best tips for perfect witch finger pretzels every time.
Don’t overheat the chocolate. This is the number one mistake I see. White chocolate is delicate. If you overheat it, it will seize up and become a grainy, unusable mess. Always microwave in short bursts and stir well. If it does seize, you can try adding a teaspoon of vegetable oil and stirring vigorously, but it’s often easier to just start over with fresh chocolate.
Work in small batches. Melt only what you need for a few pretzels at a time. If you melt all the chocolate at once, it will start to thicken and become difficult to work with. I usually melt about 4 ounces at a time, which is enough for 8-10 pretzels.
Use a deep, narrow bowl for dipping. A wide bowl means you’ll use more chocolate and have a harder time getting an even coating. A tall, narrow glass measuring cup is perfect—it allows you to dip the pretzel straight down and get a smooth, even layer.
Let the chocolate set completely before moving. I know it’s tempting to check on them, but if you try to move them before they’re fully set, you’ll end up with fingerprints in the chocolate (which, I guess, is kind of on-theme for witch fingers, but not what we’re going for). Be patient.
Keep your hands clean. This sounds obvious, but melted white chocolate gets everywhere. Keep a damp paper towel nearby to wipe your fingers. Also, if you’re using toothpicks to position the almonds, you’ll save yourself a lot of sticky mess.
I once made a batch where I forgot to add the green food coloring, and they still looked great. I’ve also had batches where the “blood” dripped too much and looked more like a horror movie than a Halloween treat. Honestly, both were still delicious. The point is, these are forgiving. Even your “mistakes” will be tasty.
Variations & Adaptations
One of the best things about this recipe is how easy it is to customize. Here are a few variations I’ve tried and loved.
Dark Chocolate Witch Fingers: Swap the white chocolate for dark or milk chocolate. The effect is a little less “witchy” and a bit more “chocolatey,” but it’s just as delicious. Use white chocolate for the “blood” effect instead of red—it creates a cool, ghostly contrast.
Gluten-Free Version: Use gluten-free pretzel rods. They can be a bit more fragile, so handle them gently. The rest of the ingredients are naturally gluten-free, so this is an easy swap.
Vegan Witch Fingers: Use dairy-free white chocolate and vegan pretzel rods. Most dark chocolate is vegan, so that’s another option. The almond “nails” are already plant-based, so no changes needed there.
Spider Web Design: Instead of the “blood” effect, drizzle the finished pretzels with dark chocolate in a spider web pattern. Use a toothpick to drag the dark chocolate through the white chocolate to create the web effect. It’s a little more time-consuming but looks incredible.
Monster Mummies: Skip the almond nails and wrap the coated pretzels with thin strips of white chocolate to look like mummy bandages. Add two tiny dots of dark chocolate for eyes. These are perfect if you want a less gory option for younger kids.
I once made a batch with crushed graham crackers sprinkled on top instead of the “blood” effect. They looked like witch fingers that had been digging in the dirt. It was a hit with the kids, who thought it was hilarious. Don’t be afraid to experiment—half the fun is seeing what you can come up with.
Serving & Storage Suggestions
These witch finger pretzels are best served at room temperature. The chocolate should be firm but not hard, and the pretzel should be perfectly crunchy. Arrange them on a platter with some spooky decorations—I like to use fake spider webs and plastic spiders for maximum effect.
They pair wonderfully with other Halloween treats. Try serving them alongside a bowl of creamy pumpkin dip for a sweet and savory combo. A glass of cold milk or a warm mug of apple cider is the perfect beverage to wash them down.
For storage, place the finished pretzels in an airtight container at room temperature. They will stay fresh for up to 5 days. Do not refrigerate them, as the chocolate can develop condensation and become sticky. If you need to store them longer, you can freeze them for up to 2 months. Place them in a single layer in a freezer-safe container, with parchment paper between layers to prevent sticking.
When you’re ready to serve frozen pretzels, let them thaw at room temperature for about 15 minutes. The chocolate will be perfectly set, and the pretzel will still have that satisfying crunch. I’ve also found that the flavors actually meld together a bit after a day or two, making them even more delicious. So don’t be afraid to make them ahead of time.
Nutritional Information & Benefits
This recipe makes about 24 witch finger pretzels. The nutritional information below is an estimate and will vary based on the specific brands and ingredients you use.
| Nutrient | Amount Per Serving (1 pretzel) |
|---|---|
| Calories | 120 |
| Total Fat | 6g |
| Saturated Fat | 3.5g |
| Cholesterol | 5mg |
| Sodium | 180mg |
| Total Carbohydrates | 16g |
| Dietary Fiber | 0g |
| Sugars | 10g |
| Protein | 2g |
While these are definitely a treat, there are a few small benefits. Almonds are a good source of vitamin E and healthy fats. Pretzels provide a quick source of energy. And let’s be honest, the joy of making and sharing these with loved ones is good for the soul. If you’re watching your sugar intake, you can use sugar-free white chocolate. For a lower-carb option, try using dark chocolate with a high cocoa content.
Please note that this recipe contains dairy, gluten, and tree nuts (almonds). If you have allergies, be sure to check all ingredient labels carefully.
Conclusion
So there you have it—the best Easy Witch Finger Pretzel Rods with White Chocolate recipe. They’re fun, they’re spooky, and they’re absolutely delicious. I honestly can’t think of a better way to celebrate Halloween. Whether you’re making them for a party, a classroom treat, or just a cozy night in, they’re guaranteed to bring a smile to everyone’s face.
I hope you give this recipe a try and make it your own. Maybe you’ll add a different color, try a new design, or come up with a variation I haven’t even thought of. That’s the beauty of cooking—it’s all about experimenting and having fun. And if you do make them, I’d love to hear about it. Leave a comment below and let me know how they turned out. Share a photo on Pinterest or Instagram and tag me. Your feedback and creativity are what keep this community so wonderful.
Happy Halloween, my friend. Now go make some magic in your kitchen. You’ve got this.
Frequently Asked Questions
Can I use chocolate chips instead of melting wafers?
You can, but I don’t recommend it. Chocolate chips contain stabilizers that help them hold their shape, which means they don’t melt as smoothly. Melting wafers are formulated to melt evenly and set with a nice shine. If you only have chocolate chips, add a teaspoon of coconut oil to help them melt more smoothly.
How do I prevent the white chocolate from cracking?
White chocolate can crack if it’s too cold or if it’s been overheated. Make sure you’re not overheating the chocolate when melting it. Also, let the finished pretzels set at room temperature, not in the refrigerator. The gradual cooling helps prevent cracking.
Can I make these ahead of time?
Absolutely! These are perfect for making ahead. Store them in an airtight container at room temperature for up to 5 days. They also freeze well for up to 2 months. Just make sure they’re completely set before storing.
My almond nails keep falling off. What am I doing wrong?
This usually happens when there’s too much chocolate on the pretzel. Make sure to tap off the excess chocolate before adding the almond. Also, press the almond gently but firmly into the chocolate. If it’s still sliding, try using a toothpick to apply a tiny dab of chocolate to the back of the almond before placing it on the pretzel.
Can I use a different nut for the fingernails?
Sure! Slivered pistachios work well and give a greenish tint to the “nails.” You can also use cashew pieces or even candy corn for a sweeter option. Just make sure whatever you use is roughly the same size and shape as a fingernail for the best effect.
Pin This Recipe!

Best Easy Witch Finger Pretzel Rods Recipe

These Easy Witch Finger Pretzel Rods with White Chocolate are exactly what you need for a Halloween party or a fun afternoon project with the kids. They look like gnarled, witchy fingers—complete with an almond nail and a little ‘blood’ drizzle—but they taste like sweet, salty, crunchy perfection.
- Prep Time: 10 minutes
- Cook Time: 5 minutes
- Total Time: 25 minutes
- Yield: 24 servings 1x
- Category: Dessert
- Cuisine: American
Ingredients
- 12 ounces pretzel rods (about 24 rods)
- 12 ounces white chocolate melting wafers
- ¼ cup sliced almonds (about 24 slices)
- A few drops red gel food coloring
- A few drops green gel food coloring (optional)
- 1 teaspoon coconut oil (optional)
Instructions
- Prepare your workspace: Line a baking sheet with parchment paper or a silicone mat.
- Melt the white chocolate: Place the white chocolate melting wafers in a microwave-safe bowl. Microwave in 30-second intervals, stirring well after each, until the chocolate is completely smooth and melted (about 1.5 to 2 minutes). If too thick, stir in 1 teaspoon of coconut oil.
- Optional: tint the chocolate: Add a few drops of green gel food coloring to the melted white chocolate and stir until evenly distributed.
- Dip the pretzels: Hold a pretzel rod by one end and dip it into the melted white chocolate, leaving about an inch uncoated at the top. Gently twist and tap the pretzel against the side of the bowl to remove excess chocolate. Place on the prepared baking sheet.
- Add the fingernail: While the chocolate is still wet, place a sliced almond on the tip of the pretzel rod, pressing gently so it sticks. Position the pointed end of the almond slightly past the end of the pretzel.
- Create the knuckle wrinkles: Use a toothpick to gently drag a few lines across the chocolate coating near the ‘nail’ to create knuckle wrinkles.
- Make the ‘blood’: Take about 2 tablespoons of remaining melted white chocolate and stir in a few drops of red gel food coloring until deep red. Transfer to a small piping bag or zip-top bag with a tiny corner snipped off.
- Add the bloody details: Pipe a small amount of red chocolate at the base of the almond ‘nail,’ letting it drip down slightly.
- Let them set: Allow the pretzels to set completely at room temperature for about 15-20 minutes. Do not refrigerate.
- Repeat: Continue with the remaining pretzel rods and chocolate. If chocolate thickens, microwave for 10-15 seconds to loosen.
Notes
Don’t overheat the white chocolate; it can burn easily. Work in small batches to keep chocolate from thickening. Use a deep, narrow bowl for dipping for even coating. Let chocolate set completely at room temperature to avoid condensation. Almonds can be substituted with slivered pistachios or candy corn.
Nutrition
- Serving Size: 1 pretzel rod
- Calories: 120
- Sugar: 10
- Sodium: 180
- Fat: 6
- Saturated Fat: 3.5
- Carbohydrates: 16
- Protein: 2
Keywords: Halloween treats, witch finger pretzels, white chocolate pretzels, spooky snacks, easy Halloween recipe


