Love this? Save it for later!
Share the inspiration with your friends
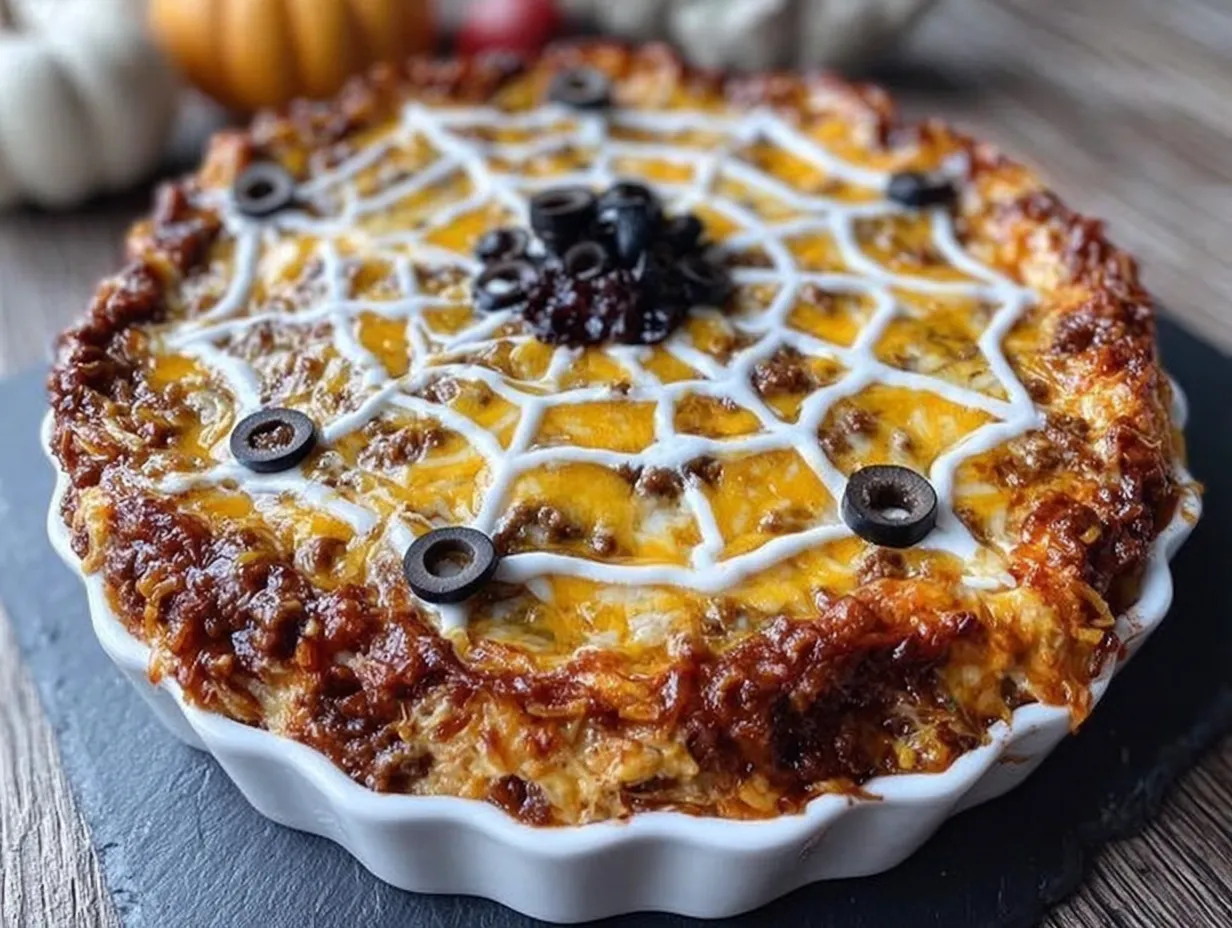
This was supposed to be a layered taco dip for a casual Friday night. Nothing fancy, just the usual refried beans, sour cream, and salsa situation I’ve made a hundred times. But I got distracted by a Halloween decoration catalog that landed in my mailbox, and before I knew it, I’d squeezed the sour cream into a weird spiral pattern instead of just spreading it flat. My husband walked in, saw the mess, and said, “That looks like a spiderweb.” Honestly, I was about to scrape it off and start over. But something made me stop. I grabbed a toothpick, dragged a few lines from the center outward, and suddenly this ordinary dip looked like it belonged at a Halloween party.
I didn’t plan it. I mean, who plans a spiderweb out of taco dip? But there it was, sitting on my counter, looking all spooky and festive. I served it anyway, and everyone who came over that weekend asked for the recipe. Not because it was complicated — it’s actually the easiest thing you’ll make all season — but because it looked like I’d spent hours on it. The best part? The whole thing took maybe fifteen minutes. You know that feeling when you accidentally make something way better than what you’d planned? That’s this dip. It’s become my go-to for every Halloween gathering since, and I honestly don’t think I’ll ever go back to plain layered dip again.
Why You’ll Love This Recipe
Let me tell you why this Spooky Spiderweb Taco Dip has earned a permanent spot in my Halloween rotation. I’ve tested it at three different parties now, and every single time, the bowl comes back empty. That’s not an exaggeration — I had to make a second batch for the last gathering because people kept going back for more.
- Ready in 15 Minutes: No baking, no complicated steps. You can throw this together while the kids are sorting their candy or right before guests arrive.
- Simple Ingredients: Everything comes from a regular grocery store. No specialty Halloween items, no weird ingredients you’ll never use again.
- Perfect for Parties: This dip feeds a crowd, travels well, and sits out beautifully on a buffet table. It’s sturdy enough to hold up for hours.
- Crowd-Pleaser: Even people who “don’t like spicy food” go back for seconds. The flavors are familiar but the presentation makes it special.
- Unbelievably Easy: The spiderweb design looks fancy, but honestly, it’s just sour cream and a toothpick. I’ll show you exactly how to do it.
What makes this dip different from every other taco dip out there? It’s the presentation, plain and simple. The spiderweb pattern turns a regular appetizer into a conversation starter. Plus, I’ve tweaked the seasoning blend over several batches to get that perfect balance — not too spicy, not too mild, just right for a crowd. This isn’t just another dip recipe. It’s the one that makes people say, “Wait, you made this? It looks store-bought!”
What Ingredients You Will Need
This recipe uses simple, everyday ingredients that work together to create that classic taco dip flavor with a spooky twist. Most of these are probably already in your kitchen, which makes this perfect for last-minute party planning.
- Refried Beans (16 oz can) — The base layer. I prefer Rosarita brand for their smooth texture, but any brand works. Look for vegetarian refried beans if you’re serving a mixed crowd.
- Sour Cream (16 oz container) — This is your web material, so get a full-fat version for best results. Low-fat works too, but the web holds up better with regular sour cream.
- Taco Seasoning (1 packet or 3 tbsp homemade) — I use McCormick original, but feel free to use your favorite. For a less salty option, make your own with chili powder, cumin, garlic powder, and onion powder.
- Salsa (1 cup) — Pick your heat level. Medium works for most people. Drain it slightly if it’s watery, or your dip might get runny.
- Shredded Lettuce (1 cup) — Iceberg or romaine, finely chopped. Adds that fresh crunch on top.
- Shredded Cheddar Cheese (1 cup) — Sharp cheddar gives the best flavor. Pre-shredded works in a pinch, but freshly shredded melts better into the layers.
- Black Olives (1/2 cup, sliced) — These become your “spiders.” Get the canned sliced ones for convenience.
- Roma Tomatoes (2 medium, diced) — Seeded and diced small so they don’t make the dip soggy.
- Green Onions (3-4, sliced) — For color and a mild onion kick.
- Tortilla Chips (1 large bag) — Go with sturdy scoop-style chips. Thin chips will break when you try to scoop through the layers.
For the spiderweb design, you’ll also need a toothpick or a wooden skewer. That’s it. Nothing fancy required.
Ingredient Substitutions: Use dairy-free sour cream and vegan cheese for a plant-based version. Ground beef or taco meat can be added as an extra layer if you want it heartier. For a spicier kick, mix some chopped jalapeños into the salsa layer or use hot salsa.
Equipment Needed
You don’t need much for this recipe, which is part of why I love it. Here’s what you’ll need:
- Large Serving Platter or Pie Dish — A round dish works best for the spiderweb design. A 10-inch glass pie plate is perfect. I’ve also used a large dinner plate with a slight rim.
- Spatula or Butter Knife — For spreading the refried beans evenly across the bottom.
- Small Bowl — For mixing the sour cream and taco seasoning.
- Toothpick or Wooden Skewer — This is your spiderweb tool. A toothpick works great for a small dish, while a skewer is better for larger platters.
- Piping Bag or Ziploc Bag — For the sour cream web. A gallon-sized ziploc bag works perfectly. Just snip a small corner off the bottom.
- Cutting Board and Knife — For chopping lettuce, tomatoes, and green onions.
If you don’t have a piping bag, don’t worry. I’ve used a regular spoon to drizzle the sour cream before, and then shaped it with a toothpick. It’s not as clean, but it still works. The key is having something to create that spiral pattern.
Preparation Method
- Spread the Bean Layer (2 minutes): Open your can of refried beans and spread them evenly across the bottom of your serving dish. Use a spatula or the back of a spoon to get a smooth, even layer. Don’t leave any gaps — this is your foundation.
- Mix the Sour Cream (1 minute): In a small bowl, combine the sour cream with half the taco seasoning packet. Stir until the seasoning is fully incorporated. Taste it — you want it flavorful but not overpowering. Set aside about 1/4 cup of this mixture for the spiderweb design later.
- Layer the Salsa (1 minute): Spoon the salsa over the refried beans. Spread it gently, but try not to mix it into the beans. You want distinct layers. If your salsa is watery, drain off the excess liquid first.
- Add the Seasoned Sour Cream (2 minutes): Spread the remaining sour cream mixture (the part not reserved for the web) over the salsa layer. Use a spatula to get it as even as possible. This creates a smooth surface for your toppings.
- Top with Cheese and Veggies (3 minutes): Sprinkle the shredded cheddar cheese evenly over the sour cream layer. Follow with the shredded lettuce, diced tomatoes, sliced black olives, and green onions. Leave a small border around the edge so the layers are visible.
- Create the Spiderweb (5 minutes): This is the fun part. Spoon the reserved sour cream mixture into a ziploc bag. Snip a tiny corner off the bottom — I mean tiny, like 1/8 inch. Starting from the center of the dip, pipe a spiral of sour cream all the way to the outer edge. Don’t worry if it’s not perfect; you’re going to fix it in the next step. Take a toothpick and gently drag lines from the center outward, like spokes on a wheel. Space them about an inch apart. Then, drag lines from the outside inward between each spoke. This creates the classic spiderweb pattern. Wipe the toothpick clean between each drag for the cleanest lines.
- Add the Spider Garnish (2 minutes): Place a whole black olive in the center of the web for the spider’s body. Use sliced olives for the legs — arrange 4 on each side. If you’re feeling extra creative, use a small plastic spider from the Halloween store as a garnish. It gets a laugh every time.
- Chill and Serve (10-30 minutes): Refrigerate the dip for at least 10 minutes before serving. This helps the layers set and makes it easier to scoop. Serve with sturdy tortilla chips.
Pro Tip: If your sour cream is too thick to pipe easily, stir in a tablespoon of milk to thin it slightly. You want it to flow smoothly but not be runny. The web should hold its shape, not melt into the other layers.
Cooking Tips & Techniques
After making this dip about a dozen times, I’ve picked up a few tricks that make a real difference. Let me share them so you don’t have to learn the hard way.
Layer Order Matters: Don’t skip the refried bean base. It acts as a barrier that prevents the salsa from making everything soggy. I learned this the hard way when I tried to save time and just spread sour cream directly on the dish. The whole thing turned into a soupy mess within an hour.
Temperature Check: This dip is best served cold, but not straight-from-the-fridge cold. Let it sit out for 10-15 minutes before serving. The flavors come through better at room temperature. If you’re making it ahead, pull it out of the fridge about 20 minutes before guests arrive.
Toothpick Technique: The most common mistake I see is dragging the toothpick too fast. Slow down. Start from the center and pull outward gently. If you rush, the sour cream smears instead of creating clean lines. Also, wipe the toothpick on a paper towel after each drag. This keeps your lines sharp.
Don’t Overload the Toppings: It’s tempting to pile on extra cheese and lettuce, but too much will hide your spiderweb. Keep the toppings layer relatively thin — about 1/4 inch max. You want that web to be the star of the show.
Make Ahead Strategy: You can assemble the entire dip except for the spiderweb design up to 24 hours in advance. Cover and refrigerate. Add the sour cream web and spider garnish right before serving. The web will look fresher, and the toppings won’t get soggy.
Variations & Adaptations
One of the best things about this recipe is how easy it is to customize. Here are some variations I’ve tried and loved:
- Spicy Southwest Version: Add a layer of seasoned ground beef or shredded chicken between the beans and salsa. Mix some chopped jalapeños into the salsa for extra heat. Top with pickled jalapeño slices for a kick.
- Veggie-Packed Version: Add a layer of guacamole between the refried beans and salsa. Top with extra veggies like diced bell peppers, corn kernels, and sliced radishes. The green and red colors look great against the white spiderweb.
- Buffalo Chicken Version: Swap the taco seasoning for buffalo wing sauce. Mix shredded cooked chicken with cream cheese and buffalo sauce for a creamy, spicy layer. Use blue cheese crumbles instead of cheddar. The spiderweb still works perfectly with this flavor profile.
- Mini Spiderweb Cups: For individual servings, layer the ingredients in small clear plastic cups. Pipe a tiny spiderweb on top of each cup. This is perfect for parties where people are standing and mingling. Plus, it eliminates double-dipping concerns.
- Black Bean and Corn Version: Add a layer of seasoned black beans and corn between the refried beans and salsa. This adds texture and makes the dip more filling. I did this for a potluck last year, and it was a hit with the vegetarian crowd.
Serving & Storage Suggestions
This dip is best served the day you make it, but leftovers can be stored in the refrigerator for up to 2 days. Here’s how to handle both situations:
Serving Temperature: Serve cold or at room temperature. I prefer letting it sit out for 15 minutes before serving so the flavors have a chance to meld. If you’re serving it at a party, place the dish on a bed of ice to keep it cool without making it too cold.
What to Serve With It: Sturdy tortilla chips are the classic choice, but this dip also works great with cucumber slices, bell pepper strips, or celery sticks for a lower-carb option. For a heartier spread, serve it alongside mini tacos or quesadillas.
Drink Pairings: A cold Mexican lager like Corona or Modelo pairs beautifully with this dip. For non-alcoholic options, try a spicy Bloody Mary mix or a citrusy sparkling water. Margaritas are always a crowd-pleaser too.
Storage: Cover the dish tightly with plastic wrap or transfer leftovers to an airtight container. The dip will keep in the refrigerator for up to 2 days, but the lettuce will get soggy. If you’re planning on leftovers, consider storing the toppings separately and adding them fresh when you’re ready to serve again.
Reheating: This dip is meant to be served cold, so reheating isn’t recommended. If you have leftover dip that’s been sitting out, it’s best to discard it after 2 hours at room temperature. Food safety first!
Nutritional Information & Benefits
While this is definitely a party dip and not a health food, here’s a rough breakdown per serving (based on 12 servings):
- Calories: Approximately 280 per serving
- Protein: 8 grams
- Carbohydrates: 22 grams
- Fat: 18 grams
- Fiber: 4 grams
- Sodium: 620 mg
Health Highlights: The refried beans provide a good source of fiber and plant-based protein. The tomatoes and lettuce add a small amount of vitamins A and C. The sour cream and cheese provide calcium, though they’re also the main source of fat and calories.
Dietary Considerations: This recipe can be made gluten-free by using certified gluten-free taco seasoning and chips. For a lower-calorie version, use reduced-fat sour cream and cheese, and load up on extra veggies. If you’re watching your sodium, make your own taco seasoning blend to control the salt content.
Allergen Note: This recipe contains dairy from the sour cream and cheese. For a dairy-free version, use plant-based sour cream and cheese alternatives. Always check labels on packaged ingredients for potential allergens.
Conclusion
This Spooky Spiderweb Taco Dip has become my most-requested Halloween recipe, and for good reason. It’s the perfect combination of impressive presentation and effortless preparation. You get all the credit for making something that looks like it took hours, when really, you just spread some beans and drew a web with sour cream. I love that about this recipe — it lets you be the hero of the party without breaking a sweat.
I hope you give this dip a try at your next Halloween gathering. Play around with the toppings, make it your own, and don’t stress about the spiderweb being perfect. Honestly, the slightly imperfect ones look even more authentic — like a real spider made it. If you make it, I’d love to hear how it turned out. Drop a comment below and let me know if your guests were impressed, or if you came up with a fun variation I haven’t tried yet. Happy Halloween, and happy dipping!
Frequently Asked Questions
Can I make this dip the night before a party?
Yes, you can assemble the entire dip except for the spiderweb design up to 24 hours in advance. Cover it tightly and refrigerate. Add the sour cream web and spider garnish right before serving for the freshest look.
What if I don’t have a piping bag for the sour cream?
No problem at all. Use a ziploc bag with a tiny corner snipped off. If you don’t have that either, you can use a spoon to drizzle the sour cream in a spiral pattern, then use a toothpick to shape it into a web. It works perfectly fine.
How do I keep the dip from getting watery?
The key is draining your salsa before adding it. If your salsa is particularly watery, let it sit in a fine-mesh strainer for a few minutes while you prep the other ingredients. Also, make sure your lettuce is thoroughly dried after washing — wet lettuce will make everything soggy.
Can I use Greek yogurt instead of sour cream?
Absolutely. Greek yogurt works great as a substitute. It’s slightly tangier than sour cream, which actually pairs well with the taco seasoning. Just make sure you’re using full-fat Greek yogurt for the best texture — nonfat versions can be too thin for the spiderweb design.
How long can this dip sit out at a party?
For food safety, this dip should not sit out at room temperature for more than 2 hours. If you’re serving it at a longer event, place the dish on a bed of ice to keep it cool. After 2 hours, any leftovers that have been sitting out should be discarded.
Pin This Recipe!

Spooky Spiderweb Taco Dip: Easy Halloween Party Appetizer

This Spooky Spiderweb Taco Dip is the perfect Halloween party appetizer that looks impressive but takes only 15 minutes to make. A classic layered taco dip transformed into a festive spiderweb design that will be the star of any gathering.
- Prep Time: 15 minutes
- Cook Time: 0 minutes
- Total Time: 15 minutes
- Yield: 12 servings 1x
- Category: Appetizer
- Cuisine: Mexican-American
Ingredients
- 16 oz can refried beans
- 16 oz container sour cream
- 1 packet (3 tbsp) taco seasoning
- 1 cup salsa
- 1 cup shredded lettuce
- 1 cup shredded cheddar cheese
- 1/2 cup sliced black olives
- 2 medium Roma tomatoes, diced
- 3–4 green onions, sliced
- 1 large bag tortilla chips
Instructions
- Spread the refried beans evenly across the bottom of your serving dish using a spatula or the back of a spoon.
- In a small bowl, combine the sour cream with half the taco seasoning packet. Stir until fully incorporated. Set aside about 1/4 cup of this mixture for the spiderweb design.
- Spoon the salsa over the refried beans and spread gently without mixing into the beans.
- Spread the remaining sour cream mixture (not reserved for the web) over the salsa layer using a spatula.
- Sprinkle the shredded cheddar cheese evenly over the sour cream layer, followed by shredded lettuce, diced tomatoes, sliced black olives, and green onions. Leave a small border around the edge.
- Spoon the reserved sour cream mixture into a ziploc bag and snip a tiny corner off the bottom. Starting from the center, pipe a spiral of sour cream to the outer edge. Take a toothpick and gently drag lines from the center outward like spokes, then drag lines from the outside inward between each spoke to create the spiderweb pattern. Wipe the toothpick clean between each drag.
- Place a whole black olive in the center of the web for the spider’s body and use sliced olives for legs, arranging 4 on each side.
- Refrigerate for at least 10 minutes before serving with sturdy tortilla chips.
Notes
For best results, use full-fat sour cream for the spiderweb design. Drain salsa if watery to prevent runny dip. The dip can be assembled up to 24 hours in advance without the spiderweb design; add the web and garnish just before serving. For a dairy-free version, use plant-based sour cream and cheese. Let dip sit out for 10-15 minutes before serving for best flavor.
Nutrition
- Serving Size: 1 serving
- Calories: 280
- Sugar: 3
- Sodium: 620
- Fat: 18
- Saturated Fat: 8
- Carbohydrates: 22
- Fiber: 4
- Protein: 8
Keywords: Halloween appetizer, spiderweb dip, taco dip, easy party dip, spooky dip, Halloween recipe, layered dip


