Love this? Save it for later!
Share the inspiration with your friends
My teenage neighbor, Leo, asked why I couldn’t just dump everything in a bowl and freeze it. I had been explaining the “proper” way to make ice cream—the tempering eggs, the constant stirring, the ice bath. I started to explain why that wouldn’t work—then stopped. Honestly, I had no good reason. I just assumed it wouldn’t be as good.
So I tried it. I poured heavy cream, sweetened condensed milk, and a homemade salted caramel sauce into a bowl, whisked it until soft peaks formed, and stuck it in the freezer. The result was so creamy, so rich, and so ridiculously easy that I felt a little embarrassed. I mean, I’d been making ice cream the hard way for years. Leo just shrugged and said, “Told you.”
This Creamy No-Churn Salted Caramel Ice Cream is now my go-to. It is the kind of dessert that makes you close your eyes after the first bite—the caramel is deep and buttery, the salt balances the sweetness perfectly, and the texture is so smooth you won’t believe there are no eggs or machines involved. Maybe you’ve been there, overcomplicating something that really didn’t need to be complicated. Let me tell you, this recipe changed my kitchen life.
Why You’ll Love This Recipe
This isn’t just another ice cream recipe—it is the one that will make you toss your ice cream maker. I have tested this method at least a dozen times, tweaking the caramel temperature and the whipping time to get it just right. Here is why it works every single time:
- No Machine Needed: You don’t need an ice cream maker, a churn, or any fancy gadget. Just a bowl, a whisk (or mixer), and a freezer.
- Simple Ingredients: You likely have everything in your kitchen right now—heavy cream, sweetened condensed milk, sugar, butter, vanilla, and salt. No eggs, no custard base, no stress.
- Perfect for Summer: This is the ultimate hot-weather dessert. It comes together in about 20 minutes of active time, then the freezer does the rest.
- Crowd-Pleaser: Every time I bring this to a barbecue or dinner party, people ask for the recipe. It gets rave reviews from both kids and adults—the salted caramel hits that sweet-and-savory spot everyone loves.
- Unbelievably Creamy: The texture is the real magic. Because you whip the cream before folding in the caramel, the ice cream stays soft and scoopable, even after days in the freezer.
What makes this recipe different from the rest is the caramel. I cook it to a deep amber color—not just golden, but almost mahogany—for a richer, more complex flavor. Then I add a generous pinch of flaky sea salt at the end. It is comfort food reimagined: faster, simpler, but with the same soul-soothing satisfaction of a classic sundae.
What Ingredients You Will Need
This recipe uses simple, everyday ingredients to deliver bold flavor and a silky texture. Here is what you need and why each one matters:
- Heavy Cream (2 cups / 480 ml): This is the base of your no-churn ice cream. It needs to be cold—straight from the fridge—so it whips up light and fluffy. I recommend using a brand like Horizon Organic or Organic Valley for the best flavor and stability.
- Sweetened Condensed Milk (14 ounces / 397 grams): This is the secret to the creamy texture without an ice cream maker. It adds sweetness and body, and it prevents ice crystals from forming. One can is exactly the right amount.
- Granulated Sugar (1 cup / 200 grams): For the caramel. You will cook this down with butter and cream to make the sauce.
- Unsalted Butter (4 tablespoons / 56 grams): Adds richness and helps the caramel come together smoothly. Use unsalted so you can control the salt level.
- Heavy Cream (for caramel) (1/2 cup / 120 ml): This gets added to the caramel at the end. It makes the sauce silky and pourable.
- Vanilla Extract (2 teaspoons): Enhances the caramel flavor. Use pure vanilla extract, not imitation, for the best taste.
- Flaky Sea Salt (1 teaspoon, plus more for topping): This is non-negotiable. The salt cuts through the sweetness and makes the caramel sing. I use Maldon sea salt flakes—they dissolve beautifully and add little crunchy bursts of saltiness.
Substitution Tips: If you need a dairy-free version, use full-fat coconut cream (chilled) instead of heavy cream, and use a dairy-free sweetened condensed coconut milk. The texture will be slightly different—a bit more coconut flavor—but still delicious. For a lower-sugar option, you can use a sugar-free sweetened condensed milk, but note that the caramel may not set as firmly.
Equipment Needed
You do not need much for this recipe, which is part of its charm. Here is what you will want on hand:
- Large Mixing Bowl: For whipping the cream. A metal or glass bowl works best—plastic can retain grease and prevent the cream from whipping properly.
- Hand Mixer or Stand Mixer: You can whisk by hand, but it will take a solid 8-10 minutes of arm work. A hand mixer cuts that down to 3-4 minutes. I use my trusty KitchenAid hand mixer for this.
- Medium Saucepan: For making the caramel. A light-colored pan is ideal so you can see the color change as the sugar cooks.
- Rubber Spatula: For folding the caramel into the whipped cream. A flexible spatula helps you incorporate everything gently without deflating the cream.
- Loaf Pan or Freezer-Safe Container: For freezing the ice cream. A standard 9×5-inch loaf pan works perfectly. You can also use a round cake pan or a quart-sized deli container.
- Parchment Paper or Plastic Wrap: To cover the surface of the ice cream before freezing. This prevents freezer burn and keeps the texture smooth.
Budget-Friendly Tip: If you don’t have a hand mixer, you can absolutely whip the cream by hand. Just chill the bowl and beaters first, and take breaks if your arm gets tired. It is a great arm workout!
Preparation Method
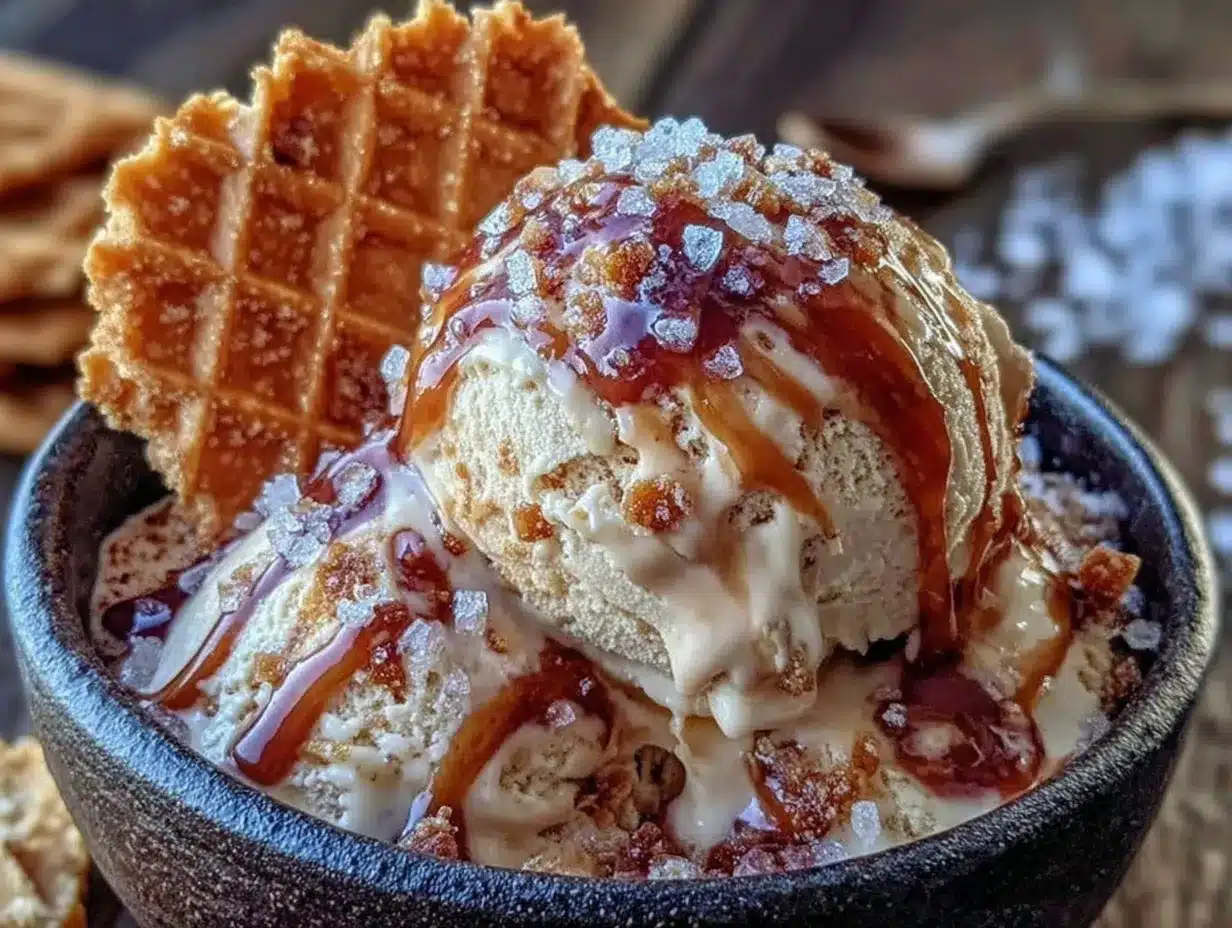
Let me walk you through this step by step. The key is to work quickly once the caramel is ready, so everything stays at the right temperature.
- Make the Caramel Sauce (10 minutes): In a medium saucepan over medium heat, melt 1 cup of granulated sugar. Do not stir it—just let it melt, swirling the pan occasionally. It will start to clump, then turn into a golden liquid. Cook until it reaches a deep amber color, about 6-8 minutes. Watch it closely; it can go from perfect to burnt in seconds.
- Add the Butter (1 minute): Once the sugar is deep amber, add 4 tablespoons of unsalted butter, cut into pieces. The mixture will bubble up—this is normal. Stir constantly with a wooden spoon or heatproof spatula until the butter is fully melted and incorporated.
- Add the Cream (2 minutes): Slowly pour in 1/2 cup of heavy cream while stirring. The mixture will bubble again. Keep stirring until smooth. Remove from heat and stir in 2 teaspoons of vanilla extract and 1 teaspoon of flaky sea salt. Let the caramel cool for 10-15 minutes—it should be warm but not hot when you fold it into the cream.
- Whip the Cream (3-4 minutes): In a large mixing bowl, pour 2 cups of cold heavy cream. Using a hand mixer or stand mixer with the whisk attachment, beat on medium-high speed until soft peaks form. You want the cream to hold its shape but still be soft and billowy—not stiff. This usually takes about 3-4 minutes.
- Fold in the Condensed Milk (1 minute): Gently fold in the entire can of sweetened condensed milk using a rubber spatula. Do not stir vigorously—you want to keep the air you whipped into the cream. Fold until no white streaks remain.
- Add the Caramel (2 minutes): Drizzle about 3/4 of the caramel sauce over the cream mixture. Reserve the rest for swirling on top. Gently fold the caramel into the cream with 3-4 broad strokes—you want ribbons of caramel throughout, not a fully mixed color. Overmixing will make the ice cream dense.
- Transfer to Pan (1 minute): Pour the mixture into a loaf pan or freezer-safe container. Smooth the top with your spatula. Drizzle the remaining caramel sauce over the top, then use a knife or skewer to swirl it in. Sprinkle a little extra flaky sea salt on top.
- Freeze (6 hours or overnight): Cover the surface with parchment paper or plastic wrap, pressing it directly onto the ice cream to prevent ice crystals. Freeze for at least 6 hours, or overnight for best results. The ice cream will be scoopable straight from the freezer—no need to let it sit out.
Cooking Tips & Techniques
I have made this recipe more times than I can count, and I have learned a few things the hard way. Here are my best tips:
- Don’t Rush the Caramel: The biggest mistake is pulling the caramel off the heat too early. It should be a deep amber—think the color of an old penny. If it is too light, the flavor will be one-dimensional and overly sweet. If it gets too dark and smells burnt, start over. It happens to everyone at least once.
- Use Cold Cream for Whipping: Warm cream will not whip properly. Stick your bowl and beaters in the fridge for 10 minutes before you start if your kitchen is warm. This makes a big difference in volume and texture.
- Fold, Don’t Stir: When combining the whipped cream with the caramel, use a gentle folding motion. Cut through the center, scrape the bottom, and turn the mixture over. This keeps the air bubbles intact, which is what makes the ice cream light and creamy instead of dense and icy.
- Temperature Matters: The caramel should be warm but not hot when you add it to the cream. If it is too hot, it will melt the whipped cream and deflate the mixture. Let it cool for at least 10 minutes, but don’t let it get cold—cold caramel is too thick to swirl.
- Patience with Freezing: I know it is tempting to dig in after 3 hours, but the texture will be much better if you wait the full 6 hours. Overnight is ideal. The ice cream needs time to set properly so it scoops smoothly.
Variations & Adaptations
This recipe is incredibly flexible. Here are some ways to make it your own:
- Chocolate Salted Caramel: Melt 1/2 cup of dark chocolate chips and drizzle it into the cream mixture along with the caramel. The chocolate and caramel together are divine—like a fancy candy bar in a bowl.
- Vegan Version: Use full-fat coconut cream (chilled) instead of heavy cream, and use a dairy-free sweetened condensed coconut milk. The caramel can be made with coconut oil instead of butter. The texture will be slightly icier, but the flavor is still amazing.
- Nutty Twist: Fold in 1/2 cup of toasted pecans or walnuts after swirling in the caramel. The crunch adds a lovely contrast to the creamy ice cream. I tried this last summer and it was a huge hit at a family barbecue.
- Espresso Salted Caramel: Add 1 teaspoon of instant espresso powder to the caramel when you add the cream. The coffee flavor deepens the caramel and makes it taste even more complex. It is perfect for an after-dinner treat.
- Lower-Sugar Option: Use a sugar-free sweetened condensed milk and reduce the sugar in the caramel to 3/4 cup. The texture will be slightly softer, but the flavor is still rich and satisfying.
Serving & Storage Suggestions
This ice cream is best served straight from the freezer—no need to let it soften. Scoop it into bowls or cones and enjoy immediately. For a fun presentation, drizzle a little extra caramel sauce and sprinkle more flaky sea salt on top. It pairs beautifully with warm brownies, a slice of apple pie, or just on its own.
Storage: Keep the ice cream in an airtight container with a piece of parchment paper pressed directly onto the surface. This prevents ice crystals from forming. It will stay fresh for up to 2 weeks in the freezer, but honestly, it never lasts that long in my house.
Reheating the Caramel: If the leftover caramel sauce thickens in the fridge, microwave it for 10-15 seconds and stir until smooth before drizzling. Do not overheat it or it will separate.
Flavor Development: The flavors actually deepen after a day or two in the freezer. The salt mellows a bit, and the caramel becomes more buttery. I actually prefer it on day two—the texture is perfectly scoopable and the flavor is more balanced.
Nutritional Information & Benefits
Per serving (about 1/2 cup): Approximately 320 calories, 18g fat, 38g carbohydrates, 3g protein. This is a treat, so enjoy it in moderation. The heavy cream provides a good dose of vitamin A, and the sweetened condensed milk adds calcium. The flaky sea salt provides trace minerals, though the main benefit is flavor.
Dietary Considerations: This recipe is naturally vegetarian and can be made gluten-free (check your vanilla extract). It is not suitable for vegans as written, but the vegan variation above works well. The caramel contains dairy and sugar, so it is not low-carb or keto-friendly. For a lower-calorie option, you can reduce the caramel by half.
From a wellness perspective, I believe in balance. This ice cream is a celebration—something to share on a hot day or after a good meal. It is made with real ingredients, no artificial stabilizers, and a lot of love. That counts for something.
Conclusion
This Creamy No-Churn Salted Caramel Ice Cream is proof that you don’t need fancy equipment or complicated techniques to make something truly special. It is rich, creamy, and perfectly balanced between sweet and salty. Whether you are a seasoned cook or a total beginner, you can make this recipe and feel like a pro.
I love this recipe because it reminds me that sometimes the simplest methods are the best. Leo was right—all you need is a bowl, a whisk, and a little patience. And honestly, the look on people’s faces when they taste it and realize you made it from scratch? That is the best part.
I would love to hear how yours turns out. Did you add a twist? Did it disappear faster than expected? Drop a comment below and share your experience. And if you loved it, share this recipe with a friend who needs a little summer sweetness in their life. Happy scooping!
Frequently Asked Questions
Can I use store-bought caramel sauce instead of making it from scratch?
You can, but the flavor will not be as rich. Homemade caramel has a deeper, more complex taste that really makes this recipe shine. If you are short on time, look for a high-quality caramel sauce with real butter and cream.
Why did my ice cream turn out icy instead of creamy?
Icy ice cream usually means the cream was over-whipped or the mixture was not folded gently enough. Make sure you stop whipping at soft peaks and fold the caramel in with a light hand. Also, pressing parchment paper onto the surface before freezing helps prevent ice crystals.
Can I make this recipe without a hand mixer?
Absolutely! You can whip the cream by hand with a whisk. It takes about 8-10 minutes of steady whisking, but it is a great arm workout. Chill the bowl and whisk first for best results.
How long does this ice cream keep in the freezer?
It stays fresh for up to 2 weeks if stored properly. Keep it in an airtight container with parchment paper pressed onto the surface. After that, it may start to develop ice crystals and lose its creamy texture.
Can I reduce the sugar in this recipe?
You can reduce the sugar in the caramel to 3/4 cup, but do not reduce the sweetened condensed milk—it is essential for the creamy texture. For a lower-sugar option, use a sugar-free sweetened condensed milk. The texture will be slightly softer, but the flavor will still be great.
Pin This Recipe!
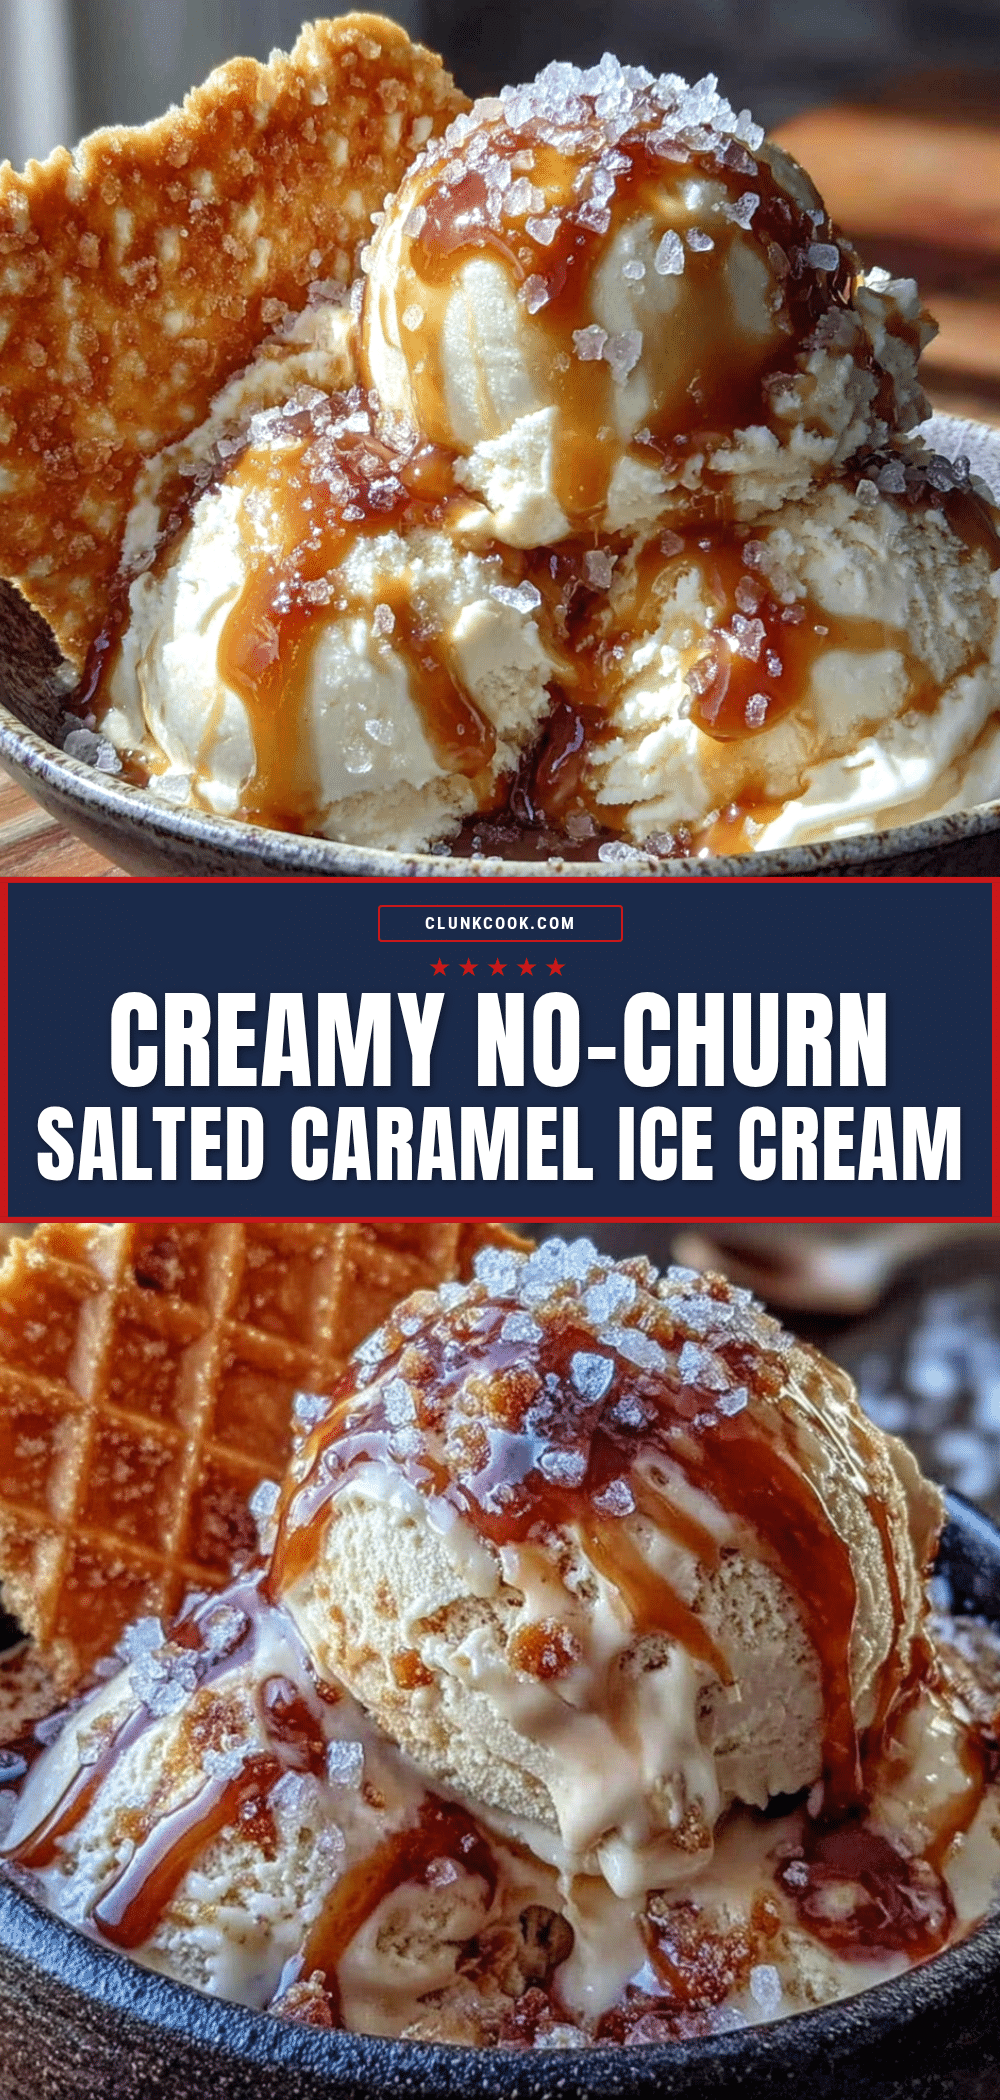
Creamy No-Churn Salted Caramel Ice Cream
This incredibly creamy no-churn salted caramel ice cream requires no ice cream maker and comes together in just 20 minutes of active time. The deep amber caramel, balanced with flaky sea salt, creates a rich and perfectly sweet-savory dessert that will become your go-to summer treat.
- Prep Time: 20 minutes
- Cook Time: 10 minutes
- Total Time: 6 hours 30 minutes (including freezing)
- Yield: 8 servings 1x
- Category: Dessert
- Cuisine: American
Ingredients
- 2 cups (480 ml) heavy cream, cold
- 14 ounces (397 grams) sweetened condensed milk
- 1 cup (200 grams) granulated sugar
- 4 tablespoons (56 grams) unsalted butter, cut into pieces
- 1/2 cup (120 ml) heavy cream (for caramel)
- 2 teaspoons vanilla extract
- 1 teaspoon flaky sea salt, plus more for topping
Instructions
- Make the Caramel Sauce: In a medium saucepan over medium heat, melt 1 cup of granulated sugar. Do not stir; just let it melt, swirling the pan occasionally. Cook until it reaches a deep amber color, about 6-8 minutes.
- Add the Butter: Once the sugar is deep amber, add 4 tablespoons of unsalted butter, cut into pieces. The mixture will bubble up. Stir constantly until the butter is fully melted and incorporated.
- Add the Cream: Slowly pour in 1/2 cup of heavy cream while stirring. The mixture will bubble again. Keep stirring until smooth. Remove from heat and stir in 2 teaspoons of vanilla extract and 1 teaspoon of flaky sea salt. Let the caramel cool for 10-15 minutes until warm but not hot.
- Whip the Cream: In a large mixing bowl, pour 2 cups of cold heavy cream. Using a hand mixer or stand mixer with the whisk attachment, beat on medium-high speed until soft peaks form, about 3-4 minutes.
- Fold in the Condensed Milk: Gently fold in the entire can of sweetened condensed milk using a rubber spatula. Fold until no white streaks remain.
- Add the Caramel: Drizzle about 3/4 of the caramel sauce over the cream mixture. Reserve the rest for swirling on top. Gently fold the caramel into the cream with 3-4 broad strokes to create ribbons.
- Transfer to Pan: Pour the mixture into a loaf pan or freezer-safe container. Smooth the top. Drizzle the remaining caramel sauce over the top, then use a knife or skewer to swirl it in. Sprinkle a little extra flaky sea salt on top.
- Freeze: Cover the surface with parchment paper or plastic wrap, pressing it directly onto the ice cream. Freeze for at least 6 hours, or overnight for best results.
Notes
Don’t rush the caramel; it should be a deep amber color for best flavor. Use cold cream for whipping. Fold gently to keep air bubbles intact. Let caramel cool to warm before adding to cream. Freeze overnight for best texture. Store with parchment pressed onto surface to prevent ice crystals.
Nutrition
- Serving Size: 1/2 cup
- Calories: 320
- Sugar: 36
- Sodium: 180
- Fat: 18
- Saturated Fat: 11
- Carbohydrates: 38
- Protein: 3
Keywords: no-churn ice cream, salted caramel, easy ice cream, no machine, summer dessert, homemade ice cream