Love this? Save it for later!
Share the inspiration with your friends
My neighbor, Mrs. Gable, watched me struggle with a collapsed cheesecake and didn’t say anything at first. Then she handed me a tin of shortbread cookies and pointed to the fridge. I was trying to make a standard New York-style cheesecake for a church potluck, but my springform pan had sprung a leak, and the whole thing was sliding into disaster. She didn’t laugh, even though I was standing there with a spatula full of ruined cream cheese. Instead, she just told me to stop fighting the texture and start embracing the bar format. That afternoon, she showed me how to press her grandmother’s shortbread crust into a square pan instead of a round one. The recipe arrived through the relationship, not through a formal lesson.
I remember the smell of brown butter filling the kitchen as she melted the butter for the crust. It was a rainy Tuesday in November, and the contrast between the storm outside and the warm, cozy baking inside felt like a secret world we had created together. I had forgotten to bring a mixing bowl, so we used her vintage copper bowls that were a bit tarnished. It added a bit of history to the process, honestly. We chopped the apples while the oven preheated, talking about how apples change texture when baked. She insisted on using a mix of Granny Smith and Honeycrisp for the perfect balance of tart and sweet.
This creamy apple cheesecake bars with shortbread crust became my go-to whenever I needed to impress without the stress of a fragile cake. The shortbread base holds up so much better than a graham cracker crust, especially when you are cutting squares and passing them around. It’s sturdy, buttery, and just rich enough to make you close your eyes. I kept making it because it reminded me that cooking isn’t about perfection; it’s about connection and making something delicious with the tools you have. Maybe you’ve been there, standing over a broken dessert, feeling like you failed. This recipe saves the day every time. It’s the kind of bake that brings people together, just like Mrs. Gable did for me.
Why You’ll Love This Recipe
There is a specific kind of magic that happens when you combine the tangy richness of cheesecake with the buttery crunch of shortbread. I have tested dozens of variations over the years, and this one remains undefeated. It’s not just another apple dessert; it is a masterclass in texture contrast. The crust doesn’t get soggy, which is the number one enemy of bar cookies. You know that feeling when your crust turns into mush after sitting for an hour? That never happens here. The shortbread acts as a barrier, keeping the creamy filling intact and crisp.
Here is why this recipe stands out in my collection:
- Quick & Easy Assembly: Unlike traditional cheesecakes that require water baths and hours of chilling, these bars come together in under 45 minutes of active prep time. They are perfect for busy weeknights or last-minute dinner parties where you need something impressive but don’t have all day.
- Simple Ingredients: No fancy grocery trips needed. You likely already have butter, flour, sugar, cream cheese, and apples in your kitchen. It relies on pantry staples to deliver bold flavor without the fuss.
- Perfect for Potlucks: Square bars are infinitely more portable than slices of cake. They don’t slide around on plates, and they are easy to grab and eat while standing. Great for holiday gatherings or office celebrations.
- Crowd-Pleaser: I have served these at bake sales, funerals, and birthday parties. They always get rave reviews from kids who love the sweetness and adults who appreciate the sophisticated shortbread base.
- Unbelievably Delicious: The texture and flavor combo is next-level comfort food. The apples caramelize slightly in the oven, adding a depth of flavor that raw apples just can’t match.
What makes this recipe different is the technique used for the crust. Most people use graham crackers, but shortbread provides a superior, melt-in-your-mouth quality. I recommend using high-quality European-style butter for the crust. It has a higher fat content, which creates a richer, more tender base. This isn’t just a version; it is my best version. It’s the kind that makes you want to make a double batch because one pan never lasts long.
What Ingredients You Will Need
This recipe uses simple, wholesome ingredients to deliver bold flavor and satisfying texture without the fuss. The beauty of this dessert lies in the quality of a few key components rather than a long list of exotic items. You want ingredients that are fresh and at the right temperature to ensure the best emulsion and texture.
For the Shortbread Crust:
- All-purpose flour: 1 1/2 cups (about 190g). This forms the structural base. Don’t substitute with almond flour unless you want a denser, nuttier result.
- Unsalted butter: 1/2 cup (115g), softened. I recommend using a brand like Kerrygold or Plugrá for their consistent water content and rich flavor. Softened butter incorporates easier than melted butter, creating a crumblier, more tender crust.
- Granulated sugar: 1/4 cup (50g). Just enough to sweeten the crust without making it cake-like.
- Salt: 1/4 teaspoon. This is crucial to balance the sweetness and enhance the buttery flavor.
For the Creamy Apple Filling:
- Full-fat cream cheese: 16 oz (450g), softened. This is non-negotiable. Low-fat versions contain more water and stabilizers, which can lead to a grainy texture. Let it sit on the counter for an hour before starting.
- Granulated sugar: 1 cup (200g). Provides sweetness and helps with the smoothness of the filling.
- Large eggs: 3, room temperature. Cold eggs can cause the cream cheese to seize up. Room temperature ingredients blend into a silky, uniform batter.
- Sour cream: 1/2 cup (120g). Adds tang and moisture. I use full-fat sour cream for the best richness, but Greek yogurt works if you want a slightly tangier profile.
- Vanilla extract: 1 teaspoon. Use a pure vanilla extract, not imitation, for that authentic aromatic flavor.
- All-purpose flour: 2 tablespoons (16g). This acts as a stabilizer to help the cheesecake set properly.
For the Apple Topping:
- Apples: 2 medium apples (about 300g peeled and diced). I use a mix of Granny Smith for tartness and Honeycrisp for sweetness. Look for firm apples that hold their shape when cooked.
- Butter: 2 tablespoons (28g). For sautéing the apples.
- Cinnamon: 1/2 teaspoon. Ground cinnamon adds warmth.
- Lemon juice: 1 teaspoon. Prevents browning and adds brightness.
- Optional Topping: 1/4 cup powdered sugar for dusting.
Why are my apples not softening?
Make sure you dice them into small, uniform pieces, about 1/2 inch. Larger chunks take longer to cook and may remain crunchy in the center.
Can I use frozen apples?
Fresh apples are best for texture. If you must use frozen, thaw them completely and drain the excess liquid to avoid a watery filling.
Equipment Needed
You don’t need a fancy kitchen to make these bars, but having the right tools makes a huge difference in the outcome. The most important piece of equipment is a 9×13 inch baking pan. I prefer a metal pan over glass or ceramic because metal conducts heat more evenly, ensuring the crust bakes through without burning the edges. If you only have glass, reduce the oven temperature by 25 degrees Fahrenheit to prevent over-browning.
Line your pan with parchment paper, leaving an overhang on the long sides. This creates “handles” that allow you to lift the entire block of bars out of the pan once they are chilled. This is a game-changer for clean cuts. Without this step, you will be digging for the last piece with a spatula, and nothing is more frustrating than a stuck cheesecake bar.
You will need an electric hand mixer or a stand mixer with a paddle attachment. Mixing the cream cheese by hand is possible, but it takes much longer and often leaves lumps. A mixer ensures a smooth, lump-free batter. A fine-mesh sieve is helpful for sifting the flour into the filling to prevent clumps.
For the apple topping, a small non-stick skillet is ideal. It prevents sticking and allows for even sautéing. If you don’t have one, a small saucepan works too. Finally, have a cooling rack ready. Transferring the hot pan to a rack stops the cooking process immediately, preventing the residual heat from overcooking the center. I once left my pan on the stovetop, and the bottom became too firm. Lesson learned!
Preparation Method
Step 1: Prepare the Crust (10 minutes)
Preheat your oven to 350°F (175°C). Line a 9×13 inch baking pan with parchment paper, ensuring the paper extends over the edges. In a medium bowl, combine the flour, sugar, and salt. Add the softened butter and mix with a fork or your fingers until the mixture resembles coarse sand. Press this mixture firmly and evenly into the bottom of the prepared pan. Use the bottom of a measuring cup to pack it down tightly. Bake the crust for 12-15 minutes until it is lightly golden. Remove from the oven and set aside, but do not turn off the oven.
Step 2: Make the Apple Filling (10 minutes)
While the crust bakes, prepare the apples. Peel, core, and dice the apples into 1/2-inch cubes. In a small skillet over medium heat, melt the 2 tablespoons of butter. Add the diced apples, cinnamon, and lemon juice. Sauté for 5-7 minutes until the apples are tender but still hold their shape. Do not mush them up. Remove from heat and let cool slightly. This step concentrates the apple flavor and removes excess moisture that could make the cheesecake watery.
Step 3: Create the Cheesecake Batter (10 minutes)
In a large mixing bowl, beat the softened cream cheese and sugar on medium speed until smooth and creamy, about 2-3 minutes. Scrape down the sides of the bowl to ensure no lumps remain. Add the eggs one at a time, mixing on low speed just until incorporated. Overmixing at this stage can incorporate too much air, which leads to cracking. Stir in the sour cream and vanilla extract. Finally, add the 2 tablespoons of flour and mix gently until just combined. The batter should be thick and glossy.
Step 4: Assemble and Bake (45-50 minutes)
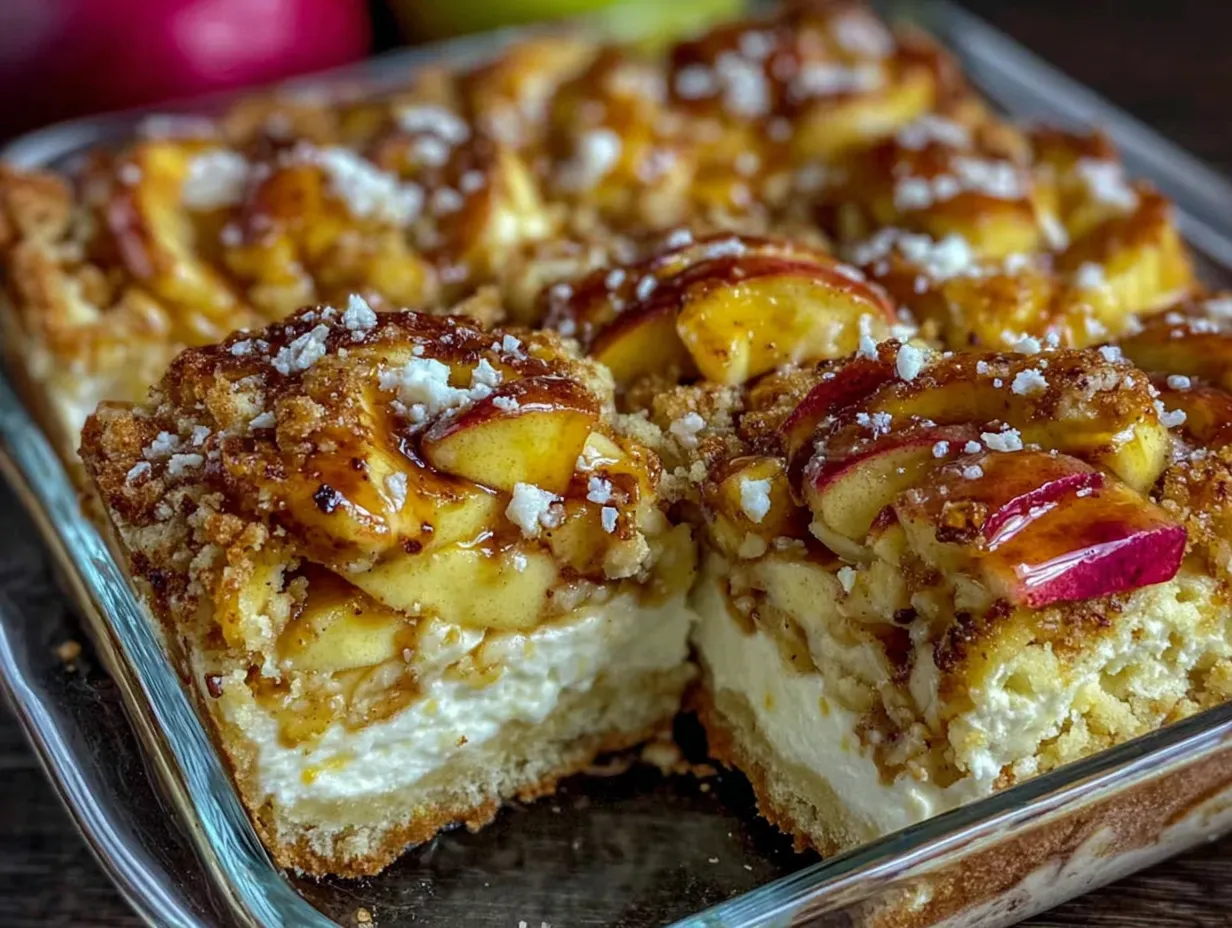
Pour the cheesecake batter over the hot crust. Smooth the top with a spatula. Spoon the sautéed apple mixture evenly over the batter. You can arrange them in a single layer or cluster them slightly for a rustic look. Place the pan back in the oven and bake for 45-50 minutes. The edges should be set, but the center should still have a slight jiggle when you gently shake the pan. It will firm up as it cools. If the edges are browning too quickly, tent the pan with aluminum foil.
Step 5: Cool and Chill (4 hours)
Remove the pan from the oven and place it on a wire cooling rack. Let it cool at room temperature for 1 hour. This gradual cooling helps prevent cracking. Once cooled, cover the pan with plastic wrap and refrigerate for at least 4 hours, or overnight. Chilling is essential for the bars to set properly and for the flavors to meld. Before cutting, use the parchment overhang to lift the entire block out of the pan. Use a sharp knife dipped in hot water to cut clean squares. Wipe the knife between cuts for the neatest presentation.
How do I know when the cheesecake is done?
The center should look set but still wobble slightly like Jell-O. If it looks liquid, it needs more time. If it is completely firm, it might be overbaked.
Why did my cheesecake crack?
Cracks usually result from overmixing the batter or cooling too quickly. Always mix on low speed after adding eggs, and cool gradually at room temperature.
Cooking Tips & Techniques
Getting the texture right is all about temperature control. I learned this the hard way after a disastrous first attempt where my crust was pale and my filling was curdled. The key is ensuring all dairy ingredients are at room temperature. Cold cream cheese creates lumps that are nearly impossible to beat out, even with a mixer. Plan ahead and take your ingredients out of the fridge at least an hour before you start baking.
Another common mistake is overbaking. Cheesecake continues to cook from residual heat after it is removed from the oven. If you wait until the center is completely firm in the pan, it will be dry and crumbly once chilled. Aim for that slight jiggle. It feels counterintuitive to pull it out when it looks undercooked, but trust the process.
When pressing the crust, be generous with your effort. A loose crust will fall apart when you cut the bars. Press it firmly into every corner. If you find it difficult to press, you can add a tablespoon of melted butter to help it bind, but usually, softened butter is sufficient.
For the apple topping, don’t skip the sautéing step. Raw apples release a lot of water as they bake, which can make the cheesecake layer soggy. Sautéing evaporates that moisture and caramelizes the natural sugars, intensifying the apple flavor. It also ensures the apples are tender throughout, rather than having a raw center in the final bar.
If you are making these ahead of time, they keep well in the refrigerator for up to 5 days. In fact, the flavors often improve after the second day as the apples soften slightly into the filling. Just make sure to store them in an airtight container to prevent them from absorbing other odors from your fridge.
Variations & Adaptations
While the classic apple and cinnamon combination is timeless, this recipe is versatile enough to accommodate different tastes and dietary needs. Here are a few variations I have tried and loved.
Cherry Almond: Swap the apples for fresh or frozen cherries. Add 1/2 teaspoon of almond extract to the cheesecake batter for a sophisticated flavor profile. This variation pairs beautifully with a dusting of sliced almonds on top before baking.
Pumpkin Spice: In the fall, replace the apples with canned pumpkin puree. Add 1 teaspoon of pumpkin pie spice to the cheesecake batter. Reduce the sugar slightly if you prefer a less sweet bar. This is a great way to use up leftover pumpkin puree.
Gluten-Free Option: To make this recipe gluten-free, substitute the all-purpose flour in the crust with a 1:1 gluten-free baking flour blend. For the filling, ensure your cream cheese and sour cream are certified gluten-free, as some brands may contain starch additives. The texture may be slightly more delicate, so handle with care when cutting.
Vegan Adaptation: Use vegan cream cheese blocks (not spreadable) and vegan butter for the crust. For the apples, the sautéing step remains the same. Note that vegan cheesecake often requires a cornstarch slurry to set properly, so add 1 tablespoon of cornstarch to the batter.
I once tried adding a layer of dulce de leche between the crust and the filling. It was rich and decadent, but it made the bars quite sweet. If you go this route, reduce the sugar in the filling by 2 tablespoons to balance the sweetness.
Serving & Storage Suggestions
These bars are best served chilled. The cold temperature enhances the creamy texture of the cheesecake and provides a nice contrast to the crisp crust. I recommend dusting them with powdered sugar just before serving for an elegant finish. A sprig of fresh mint or a few thin apple slices on top can add a pop of color that makes them look professional.
For storage, keep the bars in an airtight container in the refrigerator. They will stay fresh for up to 5 days. If you need to make them further in advance, you can freeze them. Wrap the entire block of bars tightly in plastic wrap and then in aluminum foil. They can be frozen for up to 2 months. Thaw them in the refrigerator overnight before serving. Do not thaw at room temperature, as this can cause condensation and make the crust soggy.
To reheat, you can warm individual bars in the microwave for 10-15 seconds. This softens the cheesecake slightly and makes the butter in the crust more aromatic. However, most people prefer them cold, so reheating is optional.
The flavors develop over time, so these bars often taste better on the second or third day. The apples continue to release their juices, which are absorbed by the cheesecake, creating a more cohesive flavor profile. If you notice the bars becoming too soft after a few days, you can briefly chill them again to firm them up.
Nutritional Information & Benefits
While these bars are a decadent treat, they do offer some nutritional benefits. Apples are a good source of fiber and vitamin C, and they contain antioxidants that support overall health. The shortbread crust provides energy from carbohydrates and fats, but using real butter adds a touch of vitamin A.
Each bar (approximately 1/12 of the pan) contains roughly 280 calories, 18g of fat, 28g of carbohydrates, and 4g of protein. These values are estimates and will vary based on the specific brands of ingredients used and the size of the cut. For a lighter option, you can reduce the sugar in the filling by 25% without significantly affecting the texture.
If you have dietary restrictions, be mindful of the dairy content. This recipe contains significant amounts of milk products. For those with lactose intolerance, lactose-free cream cheese and sour cream can be used, though the flavor may be slightly different.
From a wellness perspective, I enjoy these bars as a special occasion dessert rather than an everyday snack. They satisfy sweet cravings and provide comfort, which is important for mental well-being. Moderation is key, and sharing them with friends and family adds to the nutritional value of social connection.
Conclusion
Creamy Apple Cheesecake Bars with Shortbread Crust are more than just a dessert; they are a testament to the joy of baking with friends and learning from others. Mrs. Gable’s advice saved my potluck, and this recipe has since saved many others. It is easy to make, impressive to serve, and absolutely delicious. I encourage you to try this recipe and make it your own. Experiment with different apple varieties or add a drizzle of caramel if you want extra indulgence.
I would love to hear how your bars turn out. Did you stick to the classic apple and cinnamon, or did you try a variation? Share your experiences in the comments below, and don’t forget to tag me on social media if you post a photo. Your feedback helps me improve and inspires other bakers. Thank you for reading, and happy baking!
FAQs
Can I use a different type of apple?
Yes, you can use any apple that holds its shape when baked. Braeburn, Pink Lady, and Jonagold are good alternatives. Avoid apples like Red Delicious, which become mushy when cooked.
Why is my cheesecake filling grainy?
Grainy texture usually results from under-mixed cream cheese or using low-fat cream cheese. Ensure your cream cheese is fully softened and beaten until smooth before adding other ingredients.
Can I make these bars in a different pan size?
You can use a 9×9 inch pan for thicker bars, but you will need to increase the baking time by 10-15 minutes. Keep an eye on the edges to prevent burning.
How do I store leftover cheesecake bars?
Store them in an airtight container in the refrigerator for up to 5 days. For longer storage, freeze them wrapped tightly in plastic and foil for up to 2 months.
Can I prepare the crust ahead of time?
Yes, you can press the crust into the pan and refrigerate it for up to 24 hours before adding the filling. This can help streamline the baking day.
Pin This Recipe!
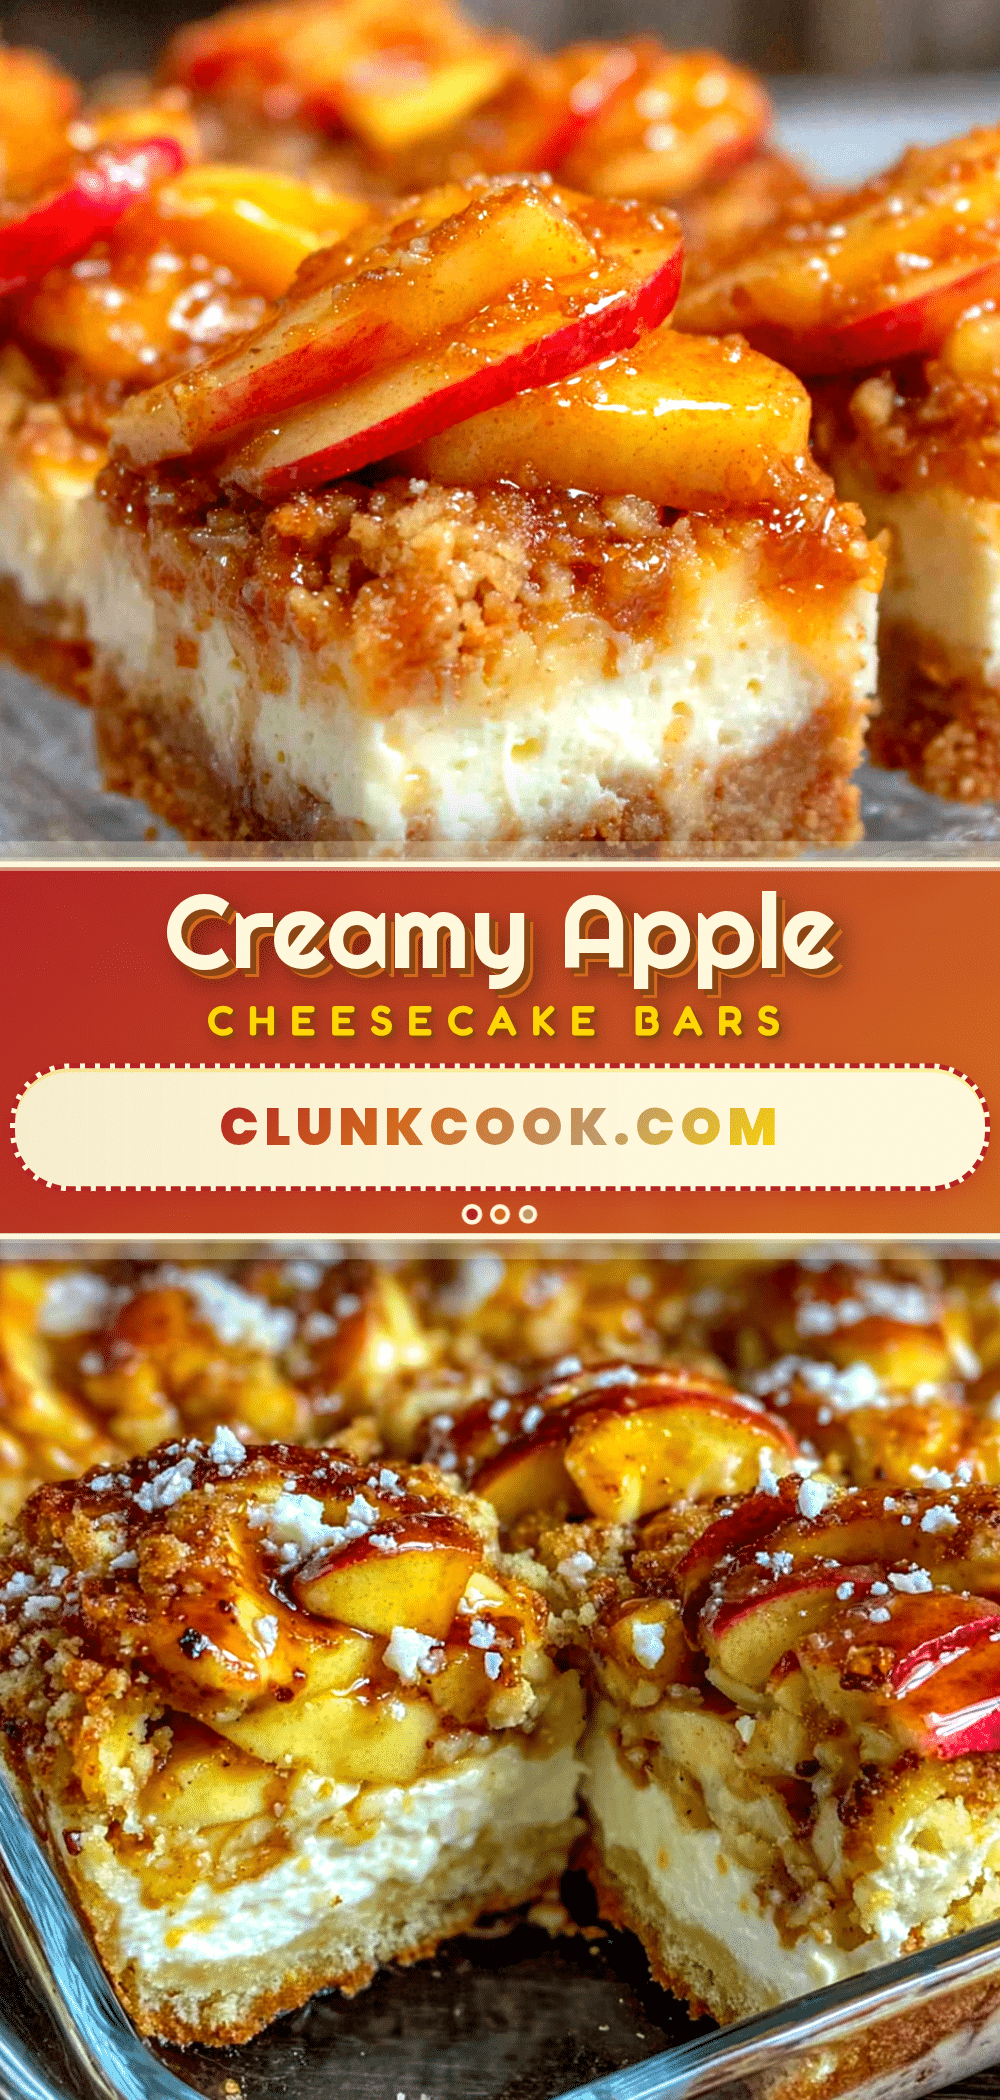
Creamy Apple Cheesecake Bars: Best Shortbread Crust Recipe
These creamy apple cheesecake bars feature a sturdy, buttery shortbread crust that prevents sogginess, topped with a rich cheesecake filling and sautéed apples. They are easy to assemble, perfect for potlucks, and offer a superior texture compared to traditional cheesecakes.
- Prep Time: 45 minutes
- Cook Time: 60 minutes
- Total Time: 4 hours 45 minutes
- Yield: 12 servings 1x
- Category: Dessert
- Cuisine: American
Ingredients
- For the Shortbread Crust:
- 1 1/2 cups all-purpose flour
- 1/2 cup unsalted butter, softened
- 1/4 cup granulated sugar
- 1/4 teaspoon salt
- For the Creamy Apple Filling:
- 16 oz full-fat cream cheese, softened
- 1 cup granulated sugar
- 3 large eggs, room temperature
- 1/2 cup sour cream
- 1 teaspoon vanilla extract
- 2 tablespoons all-purpose flour
- For the Apple Topping:
- 2 medium apples (Granny Smith and Honeycrisp mix), peeled and diced
- 2 tablespoons butter
- 1/2 teaspoon ground cinnamon
- 1 teaspoon lemon juice
- 1/4 cup powdered sugar (optional, for dusting)
Instructions
- Preheat oven to 350°F (175°C). Line a 9×13 inch baking pan with parchment paper, leaving an overhang on the long sides.
- In a medium bowl, combine flour, sugar, and salt for the crust. Add softened butter and mix until the mixture resembles coarse sand.
- Press the crust mixture firmly and evenly into the bottom of the prepared pan. Bake for 12-15 minutes until lightly golden. Remove from oven but do not turn it off.
- While the crust bakes, melt 2 tablespoons of butter in a small skillet over medium heat. Add diced apples, cinnamon, and lemon juice. Sauté for 5-7 minutes until tender but holding shape. Remove from heat and let cool slightly.
- In a large mixing bowl, beat softened cream cheese and sugar on medium speed until smooth (2-3 minutes). Scrape down sides.
- Add eggs one at a time, mixing on low speed just until incorporated. Avoid overmixing to prevent cracking.
- Stir in sour cream and vanilla extract. Add 2 tablespoons of flour and mix gently until just combined.
- Pour the cheesecake batter over the hot crust and smooth the top. Spoon the sautéed apple mixture evenly over the batter.
- Bake for 45-50 minutes. The edges should be set, but the center should have a slight jiggle. Tent with foil if edges brown too quickly.
- Remove from oven and place on a wire cooling rack. Cool at room temperature for 1 hour.
- Cover and refrigerate for at least 4 hours or overnight until fully set.
- Lift the bars out of the pan using the parchment overhang. Cut into squares using a sharp knife dipped in hot water.
Notes
Ensure all dairy ingredients are at room temperature to prevent lumps. Do not overmix the batter after adding eggs to avoid cracking. Sautéing the apples removes excess moisture and concentrates flavor. Bars taste better on the second or third day as flavors meld. Store in an airtight container in the refrigerator for up to 5 days or freeze for up to 2 months.
Nutrition
- Serving Size: 1 bar (approx. 1/12
- Calories: 280
- Sugar: 22
- Sodium: 120
- Fat: 18
- Saturated Fat: 10
- Carbohydrates: 28
- Fiber: 1
- Protein: 4
Keywords: apple cheesecake, shortbread crust, cheesecake bars, dessert recipe, potluck dessert, fall baking, easy cheesecake


