Love this? Save it for later!
Share the inspiration with your friends
Three winters ago, I stopped by my neighbor Martha’s house to borrow a cup of sugar. I wasn’t trying to impress anyone, and Martha certainly wasn’t trying to impress me. She was just in her cardigan, humming softly, with the windows cracked open against the chill. The smell hit me before I even got inside—warm cinnamon, toasted almond, and that distinct, buttery scent of shortbread baking. It wasn’t a fancy holiday setup or a special occasion. It was just a Tuesday.
Martha wasn’t making a big deal of it. She was rolling dough on her floured counter like it was the most normal thing in the world. But when she pulled the tray out of the oven, I stopped cold. They looked exactly like tiny, spooky fingers. The almond nails were perfect, slightly browned at the tips. She handed me a warm one, laughing at my wide-eyed expression. “They’re just cookies,” she said, completely unbothered by the macabre shape. “But they sell out at the church bake sale every October.”
I mean, honestly, who does that? Who makes cookie dough look like a Halloween prop and serves it with a shrug? That casualness is the whole point. Martha treated these Witch Finger Cookies with Almond Nails like they were no big deal, but let me tell you, they were extraordinary. I took the recipe home and tried to replicate it, but I kept messing up the shape. My fingers looked more like sausages than witch digits. I forgot to chill the dough once and ended up with a greasy mess. You know that feeling when you’re trying to recapture magic and it just doesn’t work?
But after a few attempts, I got it. The secret isn’t in fancy techniques; it’s in the patience. It’s in the way you pinch the dough to create that wrinkled, knobby texture. It’s in the precise placement of the almond sliver. I’ve made these for every Halloween since. They stay with you because they’re simple, yet they always get a reaction. Kids scream (in a good way), and adults love the nostalgia. It’s a recipe that feels like a secret passed down in a quiet kitchen, now yours to keep.
Why You’ll Love This Recipe
Let’s be real for a second. Halloween treats are usually a gamble. You either get something overly sweet that sticks to your teeth, or something so dry it crumbles into dust before it hits your mouth. This recipe is different. I’ve tested dozens of shortbread variations, and this one hits that sweet spot—literally and figuratively. It’s not just a cookie; it’s an experience. Here is why these witch fingers have earned a permanent spot in my rotation:
- Quick & Easy: Despite their spooky appearance, these come together in under 30 minutes of active prep time. The dough comes together in one bowl, and shaping them is surprisingly therapeutic. Perfect for busy weeknights or when you need a last-minute treat for a party.
- Simple Ingredients: No fancy grocery trips needed. You likely already have butter, flour, sugar, and slivered almonds in your kitchen. It’s pantry-friendly comfort food that doesn’t require a specialty store run.
- Perfect for Halloween: Whether it’s a classroom party, a trick-or-treat host gift, or a cozy movie night snack, these fit the bill perfectly. They are festive without being childish.
- Crowd-Pleaser: I’ve served these to picky eaters and professional bakers alike. The shape gets the laughs, but the flavor keeps them coming back. Kids love the “gross” factor, and adults appreciate the buttery taste.
- Unbelievably Delicious: The texture is crisp on the outside and slightly tender on the inside. The almond nail adds a subtle crunch and nutty aroma that elevates the simple shortbread base. It’s next-level comfort food.
What makes this recipe different from the rest? It’s the ratio. Many recipes use too much flour, making them dry. I use a higher butter-to-flour ratio for that melt-in-your-mouth quality. Plus, the visual trick of the almond nail is executed simply but effectively. It’s not just another version—it’s the best version. This recipe isn’t just good; it’s the kind that makes you close your eyes after the first bite and smile. It’s comfort food reimagined for the spookiest holiday of the year.
What Ingredients You Will Need
This recipe relies on high-quality, simple ingredients to deliver bold flavor and satisfying texture. Because the ingredient list is short, each component plays a crucial role. You want unsalted butter for control over the saltiness, and fresh slivered almonds for that authentic “nail” look. Here is what you need to gather:
For the Dough
- Unsalted Butter: 1 cup (226g), softened to room temperature. (I recommend Kerrygold or Plugra for their superior flavor and color. Avoid margarine; it won’t give you that rich texture.)
- Granulated Sugar: ¾ cup (150g). White sugar helps keep the cookies crisp. Brown sugar can make them too soft.
- Egg Yolk: 1 large egg yolk, room temperature. (We only use the yolk for richness and color without adding too much liquid, which can make the dough tough.)
- Vanilla Extract: 1 teaspoon. Use pure vanilla, not imitation. It adds warmth that complements the almond.
- All-Purpose Flour: 2 cups (250g). Spoon and level method for accuracy. Don’t pack it down.
- Baking Powder: ½ teaspoon. Just a little bit to help them hold their shape slightly.
- Salt: ½ teaspoon. Essential to balance the sweetness.
For the “Nails” and Decoration
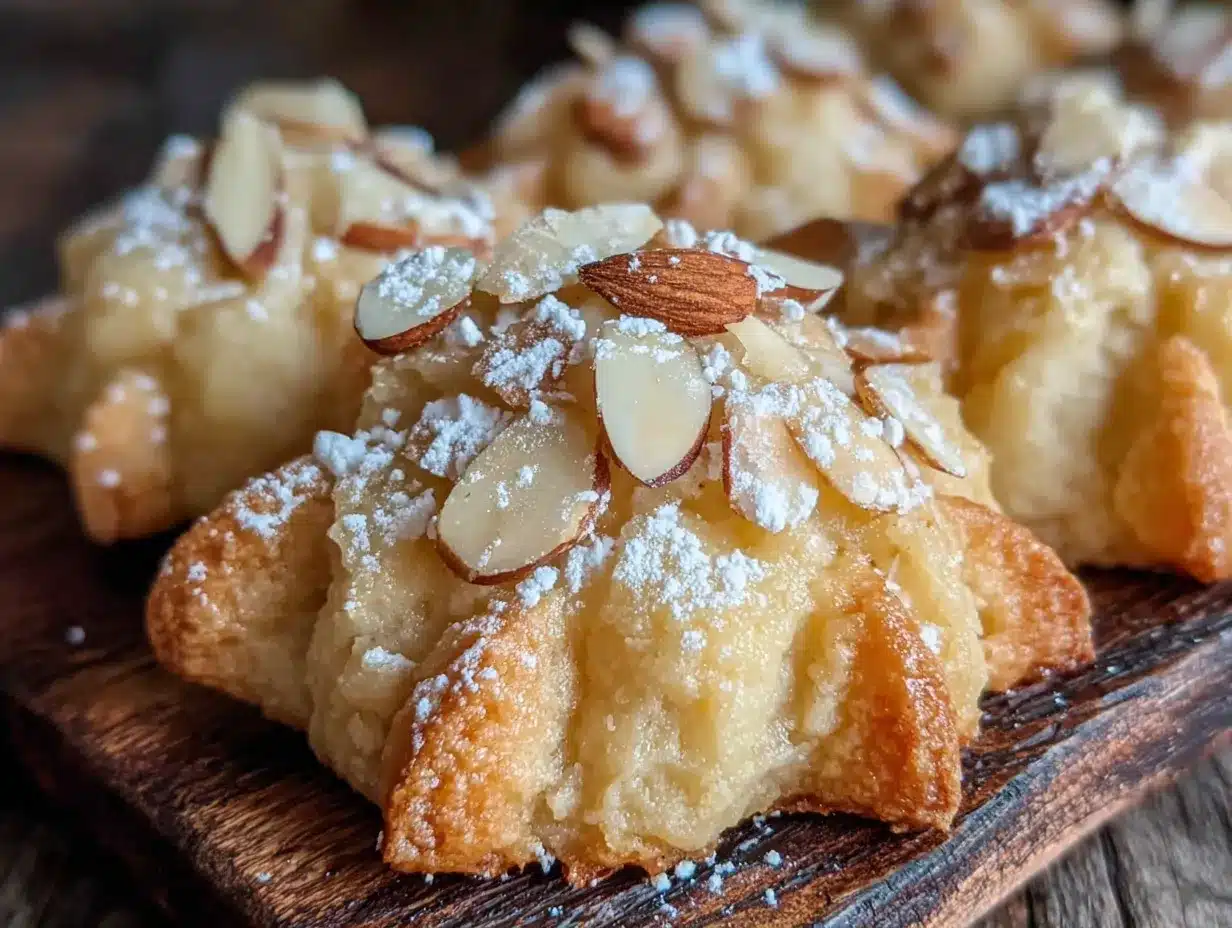
- Slivered Almonds: 1 package (about 1-2 cups). Look for raw, slivered almonds, not toasted. You want them to bake into the dough. (If you can’t find slivered, you can pulse whole almonds in a food processor, but be careful not to make almond butter.)
- Extra Almond Slivers: For garnish if needed.
Substitution Tips: If you need a gluten-free option, you can swap the all-purpose flour for a 1:1 gluten-free baking blend. The texture might be slightly more crumbly, so handle the dough gently. For a dairy-free version, use a high-quality plant-based butter stick, but note that the spread might be different. In summer, if your kitchen is very warm, you might need to chill the dough longer before shaping.
Equipment Needed
You don’t need a fancy kitchen to make these cookies. Here is the essential gear:
- Mixing Bowls: One large bowl for mixing the dough. A medium bowl for the egg yolk if you prefer to separate it first.
- Electric Mixer or Wooden Spoon: A stand mixer or hand mixer makes creaming the butter and sugar much easier. However, I actually prefer a wooden spoon for the final flour incorporation to avoid overmixing.
- Baking Sheets: Two large sheet pans. Light-colored aluminum pans are best for even baking. Dark pans can cause the bottoms to burn.
- Parchment Paper: Line your baking sheets. This prevents sticking and makes cleanup a breeze. It also helps the cookies bake evenly.
- Cooling Rack: Essential for letting the cookies cool completely so they firm up.
- Small Pastry Brush (Optional): For lightly brushing water on the dough if the almonds don’t stick initially.
Budget-Friendly Tip: You don’t need expensive silicone mats. Parchment paper is cheap and effective. If you reuse parchment, make sure it’s not too greasy. Also, a simple wooden spoon works just as well as a mixer if you don’t own one. Just be prepared to do a little arm work!
Preparation Method
Let’s get into the nitty-gritty. Making Witch Finger Cookies with Almond Nails is straightforward, but precision matters. Follow these steps carefully.
- Preheat and Prep (5 minutes): Preheat your oven to 350°F (175°C). Line two baking sheets with parchment paper. This ensures your cookies won’t stick and bake evenly.
- Cream the Butter and Sugar (3 minutes): In a large mixing bowl, combine the softened unsalted butter and granulated sugar. Beat on medium speed until the mixture is light, fluffy, and pale in color. This step incorporates air, which helps the cookies have a tender texture. If using a hand mixer, this takes about 2-3 minutes. Scrape down the sides of the bowl with a spatula.
- Add Wet Ingredients (1 minute): Add the egg yolk and vanilla extract to the butter mixture. Mix until just combined. Be careful not to overmix here. The mixture should look smooth and creamy.
- Combine Dry Ingredients (2 minutes): In a separate small bowl, whisk together the all-purpose flour, baking powder, and salt. Gradually add the dry ingredients to the wet mixture. If using a mixer, switch to low speed. If mixing by hand, use a wooden spoon. Mix until the dough just comes together. It will look crumbly at first, then form a ball. Stop mixing as soon as no dry flour is visible. Overmixing develops gluten, which makes cookies tough.
- Chill the Dough (30 minutes): This is the most critical step. Divide the dough in half. Flatten each half into a disk, wrap tightly in plastic wrap, and refrigerate for at least 30 minutes. Chilled dough is easier to shape and holds its form better in the oven. If you skip this, your “fingers” might spread into flat discs.
- Shape the Fingers (15 minutes): Remove one disk of dough from the fridge. Cut it in half again, so you have four portions. Roll one portion into a long rope, about 1 inch thick and 6-8 inches long. It doesn’t need to be perfect. Pinch one end of the rope to create a “knuckle” or joint. You can pinch twice to create a more detailed finger look. Place the shaped dough on the prepared baking sheet, leaving 2 inches between each finger.
- Add the Almond Nails (2 minutes): Take a slivered almond and press it gently into the tip of the “finger.” The pointed end should face outward. Press it in just enough so it stays during baking. If it feels loose, brush a tiny drop of water on the dough first. Repeat with all fingers.
- Bake (12-15 minutes): Bake in the preheated oven for 12-15 minutes. You want the edges to be lightly golden brown, especially the almond tips. The centers should still look slightly soft. Do not overbake, or they will become hard as rocks.
- Cool Completely (20 minutes): Remove the baking sheets from the oven. Let the cookies sit on the pan for 5 minutes to set, then transfer them to a wire cooling rack. Let them cool completely before handling. They will crisp up as they cool.
Cooking Tips & Techniques
I’ve made these cookies enough times to know where things can go wrong. Here are some pro tips to ensure success:
- Butter Temperature Matters: Your butter should be soft enough to leave an indent when you press it, but not melted. If it’s too warm, the cookies will spread. If it’s too cold, you can’t cream it properly. Leave it out for 30-45 minutes before starting.
- Don’t Skip the Chill: I know it’s tempting to bake them right away. Resist the urge. Warm dough spreads too much, and you’ll lose the finger shape. The chill firms up the fat, which slows down spreading in the oven.
- Pinch with Purpose: When shaping the fingers, don’t be afraid to pinch the dough. Create wrinkles and bumps. A perfectly smooth cylinder looks like a sausage. A wrinkled, slightly irregular cylinder looks like a finger. The more character, the better.
- Watch the Oven: Ovens vary. Start checking at 12 minutes. The almond tips should be golden, not burnt. If they are browning too fast, cover the pan loosely with foil.
- Batch Consistency: Try to make your fingers the same size so they bake evenly. If one is much larger, it will take longer to cook.
Common Mistake: Using too much flour. If you scoop the flour directly from the bag, you might pack it in. Always spoon the flour into the measuring cup and level it off with a knife. Too much flour leads to dry, crumbly cookies.
Variations & Adaptations
While the classic almond nail is iconic, here are some ways to twist the recipe:
- Chocolate Dipped: After the cookies cool completely, dip the “tip” (the part without the almond) in melted dark chocolate. It looks like a bloody nail or just adds a rich chocolate flavor. Let the chocolate set on parchment paper.
- Gluten-Free: Swap the all-purpose flour for a 1:1 gluten-free flour blend. Add a pinch of xanthan gum if your blend doesn’t include it, to help the dough hold together. The texture might be slightly more delicate.
- Dairy-Free: Use a high-quality plant-based butter stick. Note that some vegan butters have higher water content, so you might need to chill the dough a bit longer.
- Spiced Version: Add ½ teaspoon of ground ginger or cinnamon to the dry ingredients for a warmer, autumnal flavor profile.
- Nut-Free: For school-safe treats, omit the almonds. You can use a small piece of white chocolate or a sprinkle of coarse sugar on the tip instead. It won’t look exactly like a nail, but it’s still cute.
My Personal Twist: I sometimes add a tiny pinch of poppy seeds to the dough for a speckled, aged look. It’s subtle but adds visual interest. Also, I love dipping the tips in white chocolate for a “bone” look, which is less scary and more cute.
Serving & Storage Suggestions
These cookies are best served at room temperature. They pair wonderfully with a cold glass of milk or a hot cup of coffee. For a Halloween party, arrange them on a platter with a little “dirt” (crushed chocolate cookies) or fake spiderwebs for presentation.
Storage: Store the cooled cookies in an airtight container at room temperature for up to one week. If your kitchen is humid, they might soften, so keep them in a cool, dry place. They can also be frozen. Place the unbaked shaped cookies on a baking sheet in the freezer. Once solid, transfer them to a freezer bag. Bake from frozen, adding 1-2 minutes to the baking time.
Reheating: If the cookies lose their crispness, you can refresh them in a 300°F oven for 3-5 minutes. They will crisp right back up. The flavor doesn’t change much over time, but the texture is best when fresh.
Nutritional Information & Benefits
Here is an estimated nutritional breakdown per cookie (makes approx. 24 cookies):
- Calories: ~120 kcal
- Fat: 7g (primarily from butter)
- Carbohydrates: 14g
- Protein: 1g
- Fiber: 0.5g
While these are a treat, they are relatively simple in composition. The almonds add a small amount of healthy fats and protein. For a lighter option, you can reduce the sugar slightly, though it may affect the texture. These cookies are not naturally gluten-free or dairy-free, so be mindful of dietary restrictions. They are a fun, indulgent treat for special occasions rather than an everyday snack.
Conclusion
Making Witch Finger Cookies with Almond Nails is more than just baking; it’s about capturing a moment of whimsy. These cookies are easy to make, incredibly delicious, and always a hit. I love them because they bring out the inner child in everyone, from kids to grandparents. They are spooky without being scary, and sweet without being overwhelming.
I encourage you to try this recipe and make it your own. Experiment with different dips or spices. Share them with neighbors, friends, or classmates. The joy of baking is in the sharing. If you make these, I’d love to hear how they turned out. Leave a comment below with your tips or photos. Happy baking, and may your Halloween be sweet and spooky!
FAQs
Can I make the dough ahead of time?
Yes! You can wrap the dough disks tightly in plastic wrap and refrigerate them for up to 3 days. You can also freeze the dough for up to 3 months. Thaw in the refrigerator overnight before shaping and baking.
Why did my cookies spread too much?
This usually happens if the butter was too warm or if the dough wasn’t chilled long enough. Make sure your butter is soft but not melted, and chill the dough for at least 30 minutes. Also, ensure you are using the correct amount of flour.
Can I use whole almonds instead of slivered?
Slivered almonds are best because they fit the shape of a fingernail. If you only have whole almonds, you can pulse them in a food processor until they are broken into thin strips. Be careful not to over-process them into almond butter.
Are these cookies crunchy or soft?
These are shortbread cookies, so they are crisp on the outside and slightly tender on the inside. They will firm up as they cool. If you prefer a crunchier cookie, bake them for an extra 1-2 minutes, but watch closely so they don’t burn.
Can I substitute the egg yolk?
The egg yolk adds richness and color. If you want to avoid eggs, you can try using a tablespoon of heavy cream or milk, but the texture will be slightly different. The recipe is designed to work best with the yolk for that classic shortbread texture.
Pin This Recipe!
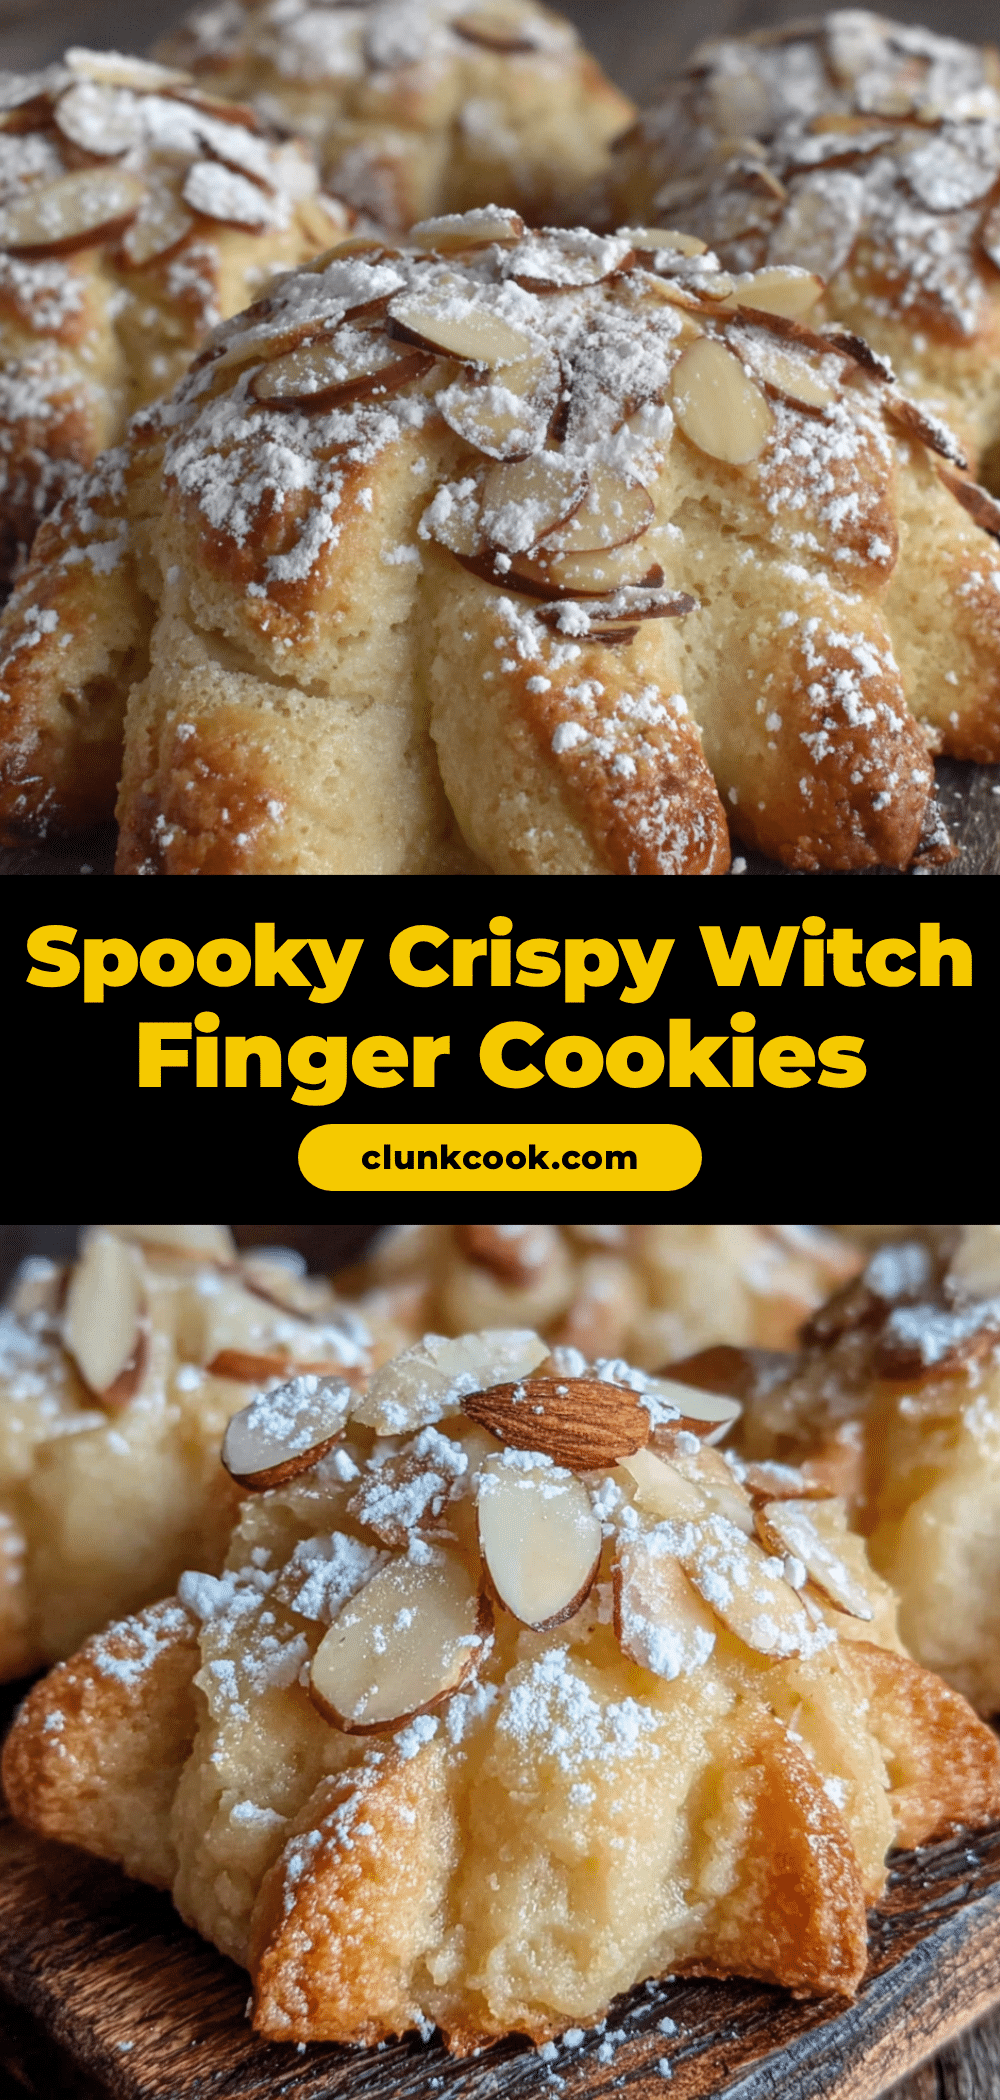
Best Witch Finger Cookies with Almond Nails: Easy Halloween Treat
These spooky yet delicious shortbread cookies are shaped like witch fingers with almond nails. They are easy to make, require simple pantry ingredients, and are perfect for Halloween parties or treats.
- Prep Time: 30 minutes
- Cook Time: 15 minutes
- Total Time: 45 minutes
- Yield: 24 cookies 1x
- Category: Dessert
- Cuisine: American
Ingredients
- 1 cup (226g) unsalted butter, softened to room temperature
- ¾ cup (150g) granulated sugar
- 1 large egg yolk, room temperature
- 1 teaspoon pure vanilla extract
- 2 cups (250g) all-purpose flour
- ½ teaspoon baking powder
- ½ teaspoon salt
- 1 package (about 1–2 cups) raw slivered almonds
Instructions
- Preheat oven to 350°F (175°C). Line two baking sheets with parchment paper.
- In a large mixing bowl, cream the softened butter and granulated sugar on medium speed until light, fluffy, and pale in color (about 2-3 minutes). Scrape down the sides of the bowl.
- Add the egg yolk and vanilla extract to the butter mixture. Mix until just combined and smooth.
- In a separate small bowl, whisk together the flour, baking powder, and salt. Gradually add the dry ingredients to the wet mixture. Mix on low speed or with a wooden spoon until the dough just comes together. Do not overmix.
- Divide the dough in half. Flatten each half into a disk, wrap tightly in plastic wrap, and refrigerate for at least 30 minutes.
- Remove one disk from the fridge and cut it in half again to create four portions. Roll one portion into a long rope about 1 inch thick and 6-8 inches long.
- Pinch one end of the rope to create a knuckle or joint, creating a wrinkled, irregular shape to resemble a finger.
- Place the shaped dough on the prepared baking sheet, leaving 2 inches between each finger.
- Press a slivered almond gently into the tip of the finger so the pointed end faces outward. Repeat with all fingers.
- Bake for 12-15 minutes until the edges are lightly golden brown, especially the almond tips. The centers should still look slightly soft.
- Let the cookies sit on the pan for 5 minutes to set, then transfer to a wire cooling rack to cool completely.
Notes
Ensure butter is softened but not melted to prevent spreading. Chilling the dough is critical to maintain the finger shape. If the kitchen is warm, chill the dough longer. For gluten-free versions, use a 1:1 gluten-free flour blend. For dairy-free, use plant-based butter. Store in an airtight container at room temperature for up to one week.
Nutrition
- Serving Size: 1 cookie
- Calories: 120
- Sugar: 8
- Sodium: 60
- Fat: 7
- Saturated Fat: 4
- Carbohydrates: 14
- Fiber: 0.5
- Protein: 1
Keywords: Halloween cookies, witch finger cookies, shortbread, almond nails, easy Halloween treats, spooky baking, holiday desserts


