Love this? Save it for later!
Share the inspiration with your friends
My sister asked why I couldn’t just mix the pumpkin puree straight into the dry oats instead of cooking it into a separate compote first. I started to explain why that wouldn’t work—then stopped. Honestly, I had no good reason. I’d just always done it that way because a recipe blog told me to. So I shrugged, handed her the spatula, and let her dump everything into one bowl.
The bars came out of the oven looking a little too rustic for my liking—lumpy, uneven, nothing like the pristine photos in my head. But then I cut one, and the texture was exactly right. Soft, slightly chewy, held together without being dense. My sister took a bite and just raised her eyebrows at me. She didn’t say “I told you so,” but she didn’t have to. I’d been overcomplicating pumpkin oat bars for years, and all it took was someone who didn’t know the “rules” to show me a simpler path.
That Tuesday night, standing in my messy kitchen with oat flour dusted across the counter, I realized something. The best recipes aren’t the ones with the fanciest techniques. They’re the ones you can actually make on a Tuesday. These pumpkin oat breakfast bars became my weeknight redemption story. No separate bowls, no extra steps, just honest ingredients that taste like fall in bar form. Maybe you’ve been there—staring at a recipe that promises to be “easy” but still requires three pots and a food processor. This isn’t that recipe. Let me show you what I finally learned.
Why You’ll Love This Recipe
These are not your average breakfast bars. I’ve tested this recipe at least a dozen times across different ovens, different pumpkin brands, and different levels of my own patience. Here’s why they work when you need them most.
- Ready in 30 Minutes: From pantry to plate in half an hour. That’s less time than arguing about what to eat for breakfast.
- Simple Ingredients: You probably have oats, pumpkin, and maple syrup in your kitchen right now. No weird health food store items required.
- Perfect for Meal Prep: Make them Sunday night, grab them all week. They actually taste better on day three—the flavors settle into something cozy.
- Kid-Approved, Parent-Approved: My niece calls them “pumpkin cookies for breakfast.” I call them a win.
- Actually Filling: The oats and pumpkin keep you full until lunch. No mid-morning crash.
What makes these different from every other pumpkin oat bar out there? It’s the ratio. Most recipes use too much liquid, making bars that fall apart or turn mushy. I spent three weekends tweaking the oat-to-pumpkin balance until I got that perfect bar texture—firm enough to hold, soft enough to enjoy. Plus, I swapped refined sugar for maple syrup, which adds a warmth that granulated sugar just can’t match. This isn’t just another version. It’s the version I wish I had three years ago.
There’s something about that first bite—the way the pumpkin and cinnamon hit your tongue, the slight chew from the oats, the tiny burst of sweetness from the maple. It’s comfort food that doesn’t weigh you down. Perfect for chaotic mornings when you’re packing lunches and finding socks and somehow need to eat something that isn’t a granola bar wrapper.
What Ingredients You Will Need
This recipe keeps things simple. You don’t need a specialty grocery run or a dozen obscure items. Every ingredient earns its place, and I’ll tell you exactly why each one matters.
For the Bars
- Rolled oats, 2 cups (180g): Not quick oats. Rolled oats give the bars structure and that satisfying chewy texture. I prefer Bob’s Red Mill or Quaker old-fashioned. If you only have quick oats, reduce the liquid slightly—they absorb faster and can make the bars mushy.
- Pumpkin puree, 1 cup (245g): Make sure it’s 100% pumpkin, not pumpkin pie filling. Libby’s is my go-to because it’s consistently thick. If your puree looks watery, blot it with a paper towel before mixing. This step alone prevents soggy bars.
- Maple syrup, 1/3 cup (80ml): Real maple syrup, not pancake syrup. The flavor is deeper and less cloying. If you’re out, honey works but makes the bars slightly denser.
- Eggs, 2 large: They bind everything together. For a vegan version, use 2 flax eggs (2 tablespoons ground flax mixed with 6 tablespoons water, rested for 5 minutes).
- Coconut oil, 3 tablespoons (45ml), melted: Adds moisture without making things greasy. Unsalted butter works too, but coconut oil keeps the pumpkin flavor cleaner.
- Vanilla extract, 1 teaspoon: A little goes a long way. It rounds out the pumpkin spice notes.
- Pumpkin pie spice, 2 teaspoons: If you don’t have a blend, mix 1 teaspoon cinnamon, 1/2 teaspoon ginger, 1/4 teaspoon nutmeg, and 1/4 teaspoon cloves. I make my own batch every September and keep it in a labeled jar.
- Cinnamon, 1 teaspoon: Extra cinnamon because pumpkin and cinnamon are a non-negotiable pair.
- Baking powder, 1 teaspoon: Gives the bars a slight lift so they aren’t hockey pucks.
- Salt, 1/4 teaspoon: Don’t skip it. Salt makes the sweetness taste sweeter and the pumpkin taste more pumpkin-y.
Optional Add-Ins
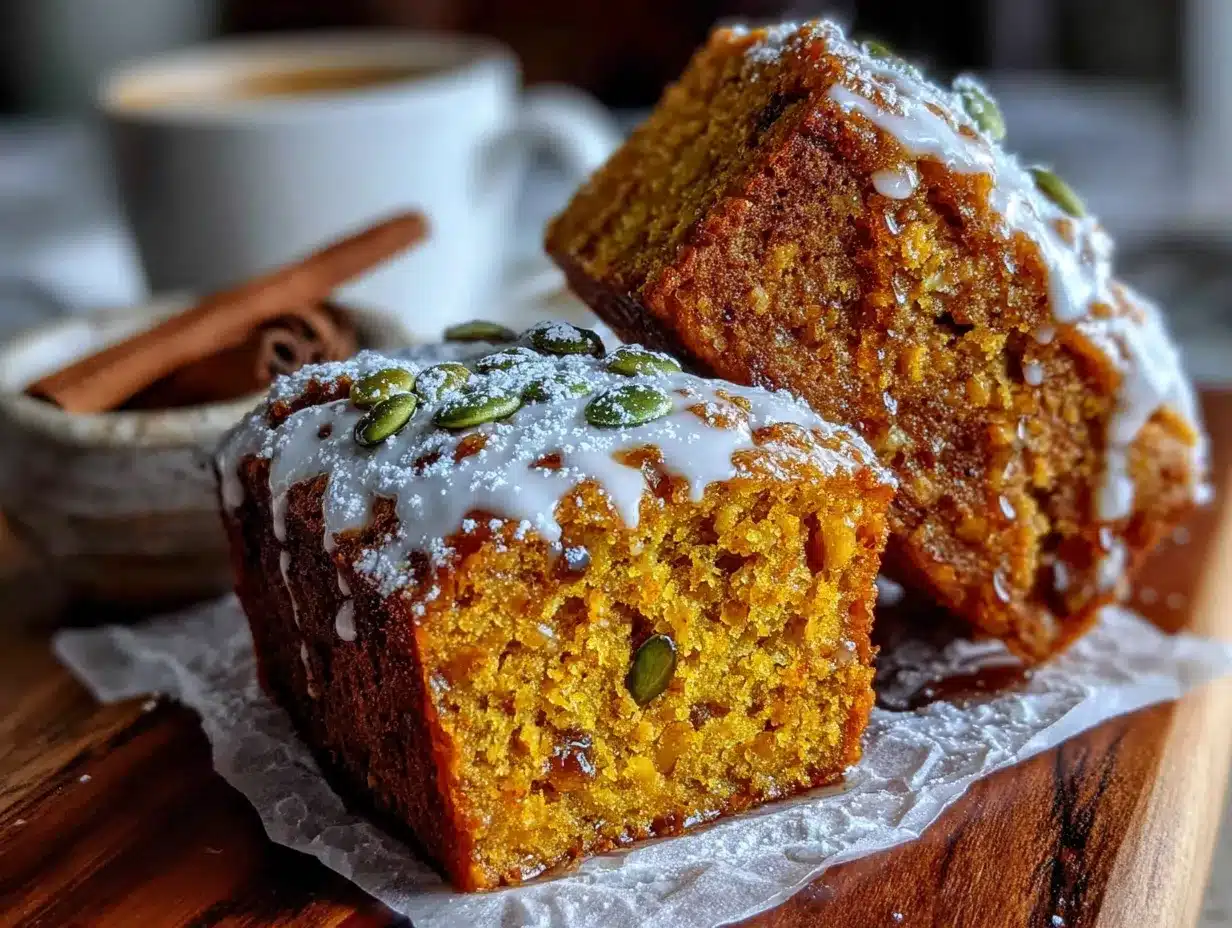
- Chocolate chips, 1/2 cup (90g): Because pumpkin and chocolate are an underrated duo. Use dark chocolate chips for less sugar.
- Chopped pecans or walnuts, 1/2 cup (60g): Adds crunch. Toast them first for extra flavor.
- Dried cranberries, 1/4 cup (40g): A tart pop that cuts through the sweetness.
- Shredded coconut, 1/4 cup (20g): For texture and a subtle tropical note.
One thing I learned the hard way: don’t overmix the batter. Stir just until everything comes together. Overmixing makes the bars tough, and nobody wants a tough breakfast bar.
Equipment Needed
You don’t need a fancy kitchen for these bars. Here’s what you’ll actually use.
- 8×8 inch baking pan: The perfect size for thick bars. A 9×9 works but your bars will be thinner and bake faster. A metal pan gives better browning than glass.
- Parchment paper: Non-negotiable. It makes lifting the bars out so much easier than scraping them out. Leave overhang on two sides for handles.
- Large mixing bowl: Any bowl works. I use a ceramic one because it doesn’t slide around.
- Whisk and spatula: Whisk the wet ingredients, fold in the dry. A wooden spoon works fine too.
- Measuring cups and spoons: For accuracy. Pumpkin is forgiving, but baking powder isn’t.
- Cooling rack: Helps the bars cool evenly so the bottoms don’t get soggy. If you don’t have one, slide the bars onto a cutting board after 10 minutes.
If you’re on a budget, skip the cooling rack and just flip the bars out onto a clean towel after they’ve set. I did that for years and never noticed a difference.
Preparation Method
Let’s make these bars. I’ll walk you through every step, including what to look for so you know you’re on track.
- Preheat your oven to 350°F (175°C). Line your 8×8 pan with parchment paper, leaving overhang on two opposite sides. This creates handles for lifting the bars out later. Spray the parchment lightly with cooking spray if you’re paranoid about sticking.
- Mix the wet ingredients. In your large bowl, whisk together the pumpkin puree, maple syrup, eggs, melted coconut oil, and vanilla extract. Whisk until smooth and uniform. It should look like a thick, glossy orange sauce. If your coconut oil solidifies on contact with cold eggs, don’t panic—just whisk a little harder or let the bowl sit for a minute.
- Add the dry ingredients. Add the rolled oats, pumpkin pie spice, cinnamon, baking powder, and salt directly to the wet mixture. Stir with your spatula until just combined. You want to see no dry patches, but a few lumps are fine. Overmixing at this stage makes the bars dense.
- Fold in your add-ins. If you’re using chocolate chips, nuts, or dried fruit, fold them in gently now. Reserve a handful to sprinkle on top for a prettier finish.
- Transfer to the pan. Pour the batter into your prepared pan. Spread it evenly with your spatula—it will be thick and slightly sticky. Press it into the corners. Sprinkle any reserved toppings over the surface.
- Bake for 22-25 minutes. Place the pan on the middle rack. At 22 minutes, check for doneness: the edges should be golden brown and pulling away from the parchment slightly. The center should feel firm when pressed gently. A toothpick inserted in the center should come out clean or with a few moist crumbs—not wet batter.
- Cool completely in the pan. This is the hardest step. Set the pan on a cooling rack and walk away for at least 30 minutes. If you cut them warm, they’ll crumble. I know because I’ve done it. Patience pays off here.
- Lift and cut. Use the parchment handles to lift the entire block of bars out of the pan. Transfer to a cutting board. Use a sharp knife to cut into 9 squares (3×3 grid). Wipe the knife clean between cuts for neater edges.
Your kitchen will smell like a pumpkin spice candle factory. That’s normal. Enjoy it.
Cooking Tips & Techniques
I’ve made these bars enough times to know where things go wrong. Here’s what I’ve learned so you don’t have to.
Don’t skip the parchment paper. I tried greasing the pan once. Once. The bars stuck so badly I had to eat them out of the pan with a spoon. Not my finest moment. Parchment paper with overhang is your friend.
Check your pumpkin puree consistency. Different brands have different water content. If your puree looks watery or separates when you open the can, spoon it onto a paper towel-lined plate for a few minutes. Blot the top gently. This extra step prevents soggy bars that fall apart.
Use room temperature eggs. Cold eggs can cause the coconut oil to clump. If you forgot to take them out ahead of time, place them in a bowl of warm water for 5 minutes. Problem solved.
Bake until the edges pull away. The center might still look slightly soft, but if the edges are golden and pulling from the pan, you’re done. Overbaking dries them out. Underbaking makes them fall apart. That golden edge is your visual cue.
Let them cool completely. I cannot stress this enough. The bars continue setting as they cool. Cutting too early is like cutting a cake that’s still in the pan—you’ll get a mess. Walk away. Fold laundry. Do anything else for 30 minutes.
For cleaner cuts, chill them. After cooling, pop the pan in the fridge for 15 minutes. The bars firm up beautifully and cut into perfect squares. This is my secret for Instagram-worthy photos.
Variations & Adaptations
One recipe, endless possibilities. Here are my favorite ways to change things up depending on what I have or how I’m feeling.
Vegan Version: Replace the eggs with flax eggs (2 tablespoons ground flaxseed + 6 tablespoons water, rested for 5 minutes). Use maple syrup as is. The bars will be slightly more tender but just as delicious. My vegan friend Sarah couldn’t tell the difference.
Gluten-Free Option: Use certified gluten-free rolled oats. That’s it. Oats are naturally gluten-free, but cross-contamination happens, so check the label. Bob’s Red Mill makes a reliable gluten-free oat.
Lower Sugar: Reduce maple syrup to 1/4 cup. Add 1/2 mashed banana for natural sweetness. The banana flavor is subtle but adds moisture. I do this when I’m trying to cut back on sugar without sacrificing taste.
Protein Boost: Add 1 scoop vanilla protein powder (about 30g). Reduce oats by 1/4 cup to compensate. Add an extra tablespoon of milk or water if the batter seems too dry. These post-workout bars are my go-to after morning runs.
Savory-Sweet Twist: Skip the chocolate chips. Add 1/4 cup chopped fresh rosemary and 1/3 cup dried cherries. The rosemary with pumpkin is unexpectedly good. I discovered this by accident when I grabbed the wrong jar, and now it’s my favorite fall variation.
Pumpkin Seed Crunch: Sprinkle pepitas (pumpkin seeds) on top before baking. They toast in the oven and add a nutty crunch that complements the pumpkin flavor beautifully.
Serving & Storage Suggestions
These bars are versatile. Here’s how to serve and store them for maximum enjoyment.
Serving: Serve at room temperature or slightly warmed. To reheat, pop a bar in the microwave for 10-15 seconds. It softens the oats and makes the pumpkin flavor more pronounced. For a treat, spread a thin layer of almond butter or cream cheese on top. My favorite breakfast is one bar warmed with a drizzle of extra maple syrup and a side of black coffee.
Storage: Store bars in an airtight container at room temperature for up to 3 days. For longer storage, refrigerate for up to a week. The bars actually get better on day two—the flavors meld together. I usually make a batch on Sunday and grab one each morning.
Freezing: These freeze beautifully. Wrap each bar individually in plastic wrap, then place in a freezer bag. They keep for up to 3 months. To thaw, leave one at room temperature for 30 minutes or microwave for 20 seconds. I keep a stash in the freezer for busy mornings when I don’t have time to think.
Packing for Lunch: These bars travel well. Wrap one in parchment paper and toss it in a lunchbox. They don’t get soggy or fall apart. My husband takes one to work almost every day.
Gifting: Stack 4-6 bars in a decorative box or mason jar lined with parchment paper. Tie with a ribbon and add a tag with the ingredients. They make thoughtful homemade gifts for neighbors, teachers, or coworkers during the fall season.
Nutritional Information & Benefits
Per serving (1 bar, based on 9 servings, without add-ins):
- Calories: 195
- Protein: 5g
- Carbohydrates: 28g
- Fiber: 4g
- Sugar: 10g
- Fat: 8g
- Saturated Fat: 5g
- Sodium: 115mg
These numbers are estimates. Actual values depend on your specific ingredients and add-ins.
Pumpkin is a nutritional powerhouse. It’s packed with vitamin A (over 200% of your daily needs per cup), which supports eye health and immune function. The fiber from oats and pumpkin keeps your digestion regular and helps you feel full longer. Oats contain beta-glucan, a type of soluble fiber that can help lower cholesterol levels. The maple syrup provides a natural sweetness with a lower glycemic impact than refined sugar, though it’s still sugar, so moderation matters.
These bars are dairy-free as written (using coconut oil) and can easily be made vegan or gluten-free. They’re naturally sweetened with maple syrup and contain no refined sugars. If you’re watching your sugar intake, the lower-sugar variation with banana is a great option.
I’m not a nutritionist, but I’ve learned to pay attention to how food makes me feel. These bars give me steady energy without the crash that comes from processed breakfast bars. That’s worth more than any number on a label.
Conclusion
These easy healthy pumpkin oat breakfast bars are proof that good food doesn’t need to be complicated. They came together in my kitchen on a regular Tuesday, born from a moment of letting go of control and letting someone else’s instinct lead the way. Every time I make them, I remember that lesson—sometimes the simplest path is the right one.
I hope you make these bars your own. Add chocolate chips if that’s your thing. Skip the nuts if you’re not a fan. Double the cinnamon because why not. The recipe is a starting point, not a rulebook. Your kitchen, your rules.
When you make them—and I really hope you do—come back and tell me how they turned out. Did you try a variation I didn’t mention? Did your kids devour them? Did you eat three in one sitting? (No judgment here.) Leave a comment below or tag me in your photos. I love seeing your creations almost as much as I love eating these bars.
Here’s to Tuesday nights, simple ingredients, and the joy of being wrong about something delicious.
Frequently Asked Questions
Can I use steel-cut oats instead of rolled oats?
I wouldn’t recommend it. Steel-cut oats are much harder and won’t soften enough during the short baking time. You’ll end up with crunchy, undercooked bars. Stick with rolled oats for the best texture.
Can I make these bars nut-free?
Absolutely. The base recipe is nut-free as written. Just skip any nut-based add-ins like pecans or walnuts. If you want crunch, use pumpkin seeds or sunflower seeds instead.
Why did my bars turn out dry?
Two possible reasons: you overbaked them, or your pumpkin puree was too thick. Check your oven temperature with an oven thermometer—they’re often off by 25 degrees. Next time, pull the bars out at 22 minutes and test with a toothpick.
Can I double this recipe?
Yes. Double all ingredients and bake in a 9×13 inch pan. Increase baking time to 30-35 minutes. Check for doneness the same way—golden edges and a firm center.
How do I make these bars more like a dessert?
Add 1/2 cup chocolate chips and drizzle with melted white chocolate after cooling. You can also swirl in 2 tablespoons of peanut butter before baking for a richer flavor. They’re still healthier than most desserts, but they’ll satisfy any sweet tooth.
Pin This Recipe!
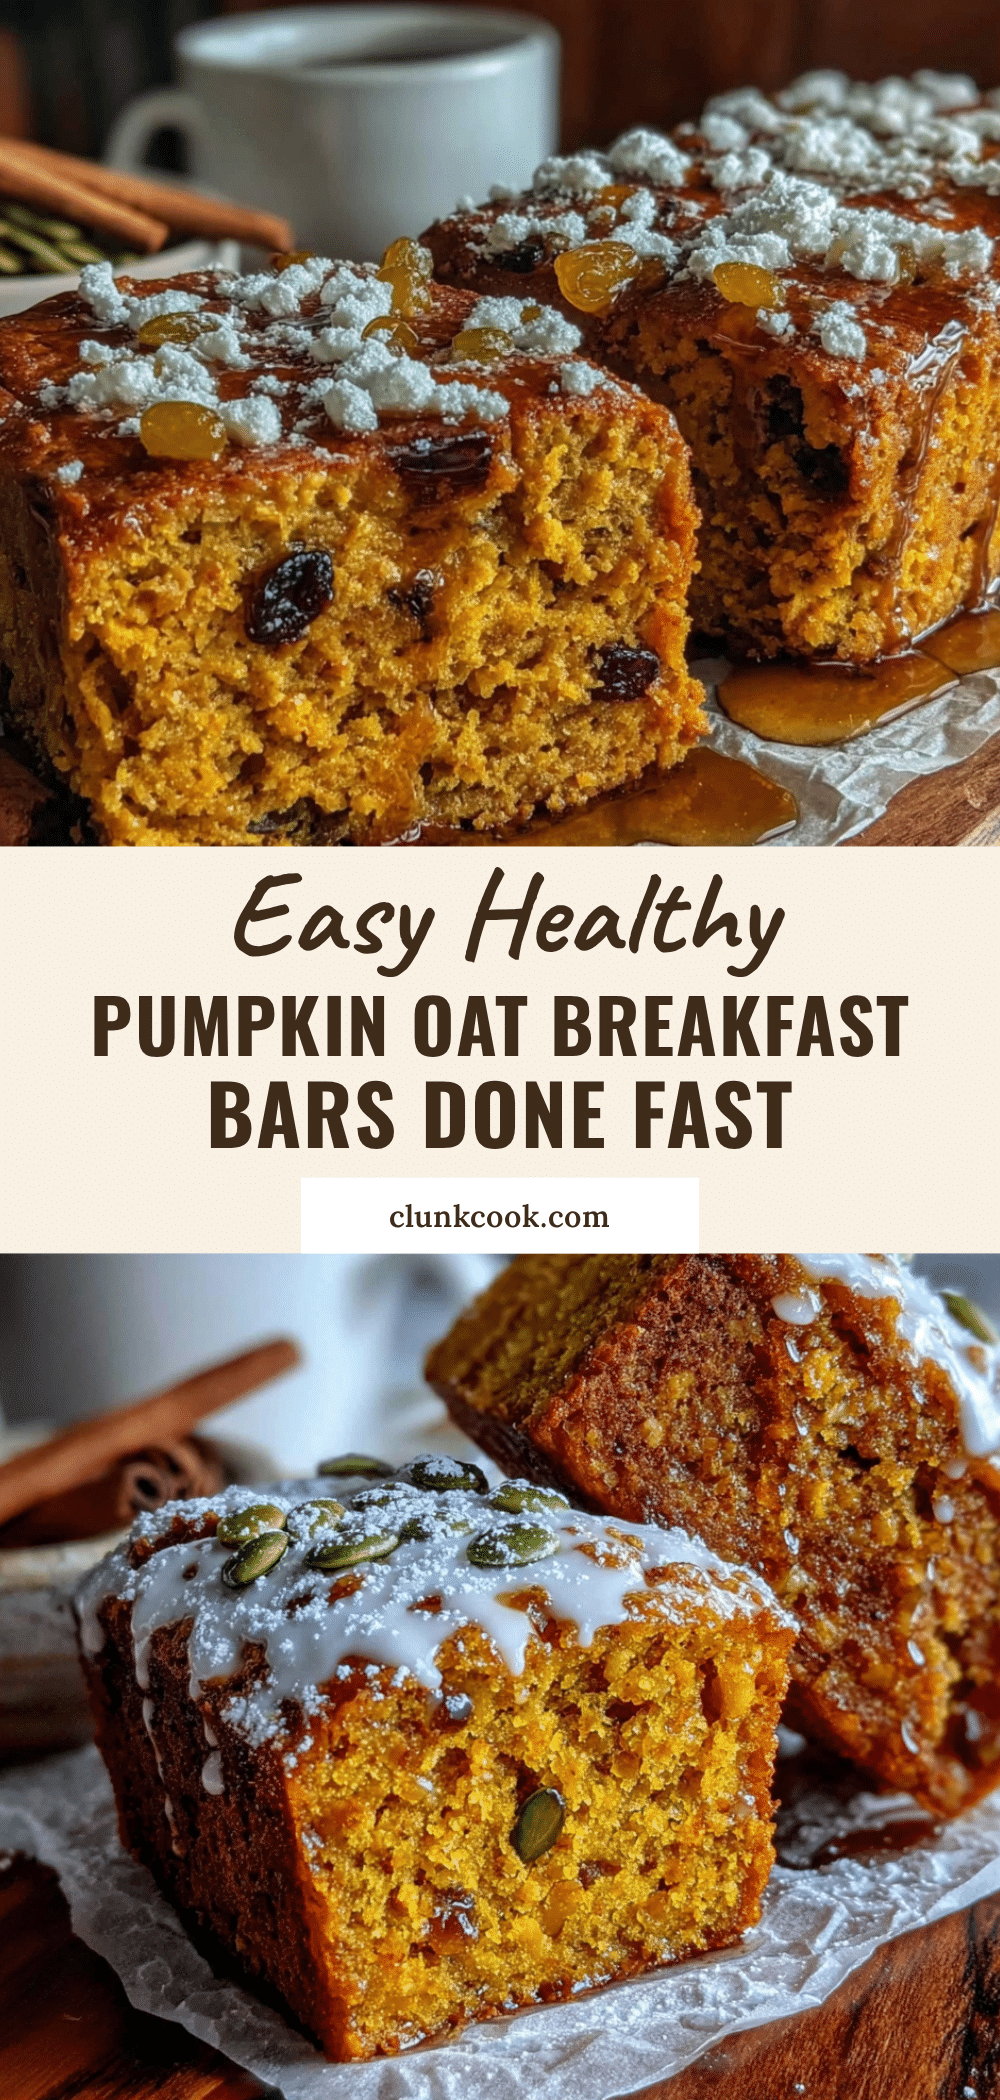
Easy Healthy Pumpkin Oat Breakfast Bars (Best 30-Minute Meal Prep)
These pumpkin oat breakfast bars are the perfect weeknight redemption story—no separate bowls, no extra steps, just honest ingredients that taste like fall in bar form. Ready in 30 minutes with simple ingredients, they’re perfect for meal prep and actually taste better on day three.
- Prep Time: 10 minutes
- Cook Time: 22-25 minutes
- Total Time: 30 minutes
- Yield: 9 servings
- Category: Breakfast
- Cuisine: American
Ingredients
- Rolled oats, 2 cups (180g)
- Pumpkin puree, 1 cup (245g)
- Maple syrup, 1/3 cup (80ml)
- Eggs, 2 large
- Coconut oil, 3 tablespoons (45ml), melted
- Vanilla extract, 1 teaspoon
- Pumpkin pie spice, 2 teaspoons
- Cinnamon, 1 teaspoon
- Baking powder, 1 teaspoon
- Salt, 1/4 teaspoon
- Chocolate chips, 1/2 cup (90g) (optional)
- Chopped pecans or walnuts, 1/2 cup (60g) (optional)
- Dried cranberries, 1/4 cup (40g) (optional)
- Shredded coconut, 1/4 cup (20g) (optional)
Instructions
- Preheat your oven to 350°F (175°C). Line your 8×8 pan with parchment paper, leaving overhang on two opposite sides. Spray the parchment lightly with cooking spray if desired.
- Mix the wet ingredients. In your large bowl, whisk together the pumpkin puree, maple syrup, eggs, melted coconut oil, and vanilla extract until smooth and uniform.
- Add the dry ingredients. Add the rolled oats, pumpkin pie spice, cinnamon, baking powder, and salt directly to the wet mixture. Stir with your spatula until just combined. Do not overmix.
- Fold in your add-ins. If using chocolate chips, nuts, or dried fruit, fold them in gently now. Reserve a handful to sprinkle on top for a prettier finish.
- Transfer to the pan. Pour the batter into your prepared pan. Spread it evenly with your spatula—it will be thick and slightly sticky. Press it into the corners. Sprinkle any reserved toppings over the surface.
- Bake for 22-25 minutes. Place the pan on the middle rack. At 22 minutes, check for doneness: the edges should be golden brown and pulling away from the parchment slightly. The center should feel firm when pressed gently. A toothpick inserted in the center should come out clean or with a few moist crumbs.
- Cool completely in the pan. Set the pan on a cooling rack and let it cool for at least 30 minutes before cutting.
- Lift and cut. Use the parchment handles to lift the entire block of bars out of the pan. Transfer to a cutting board. Use a sharp knife to cut into 9 squares (3×3 grid). Wipe the knife clean between cuts for neater edges.
Notes
Don’t skip the parchment paper. Check your pumpkin puree consistency—blot if watery. Use room temperature eggs. Bake until edges pull away. Let cool completely before cutting. For cleaner cuts, chill in fridge for 15 minutes after cooling. Store in airtight container at room temperature for up to 3 days, refrigerate for up to a week, or freeze for up to 3 months.
Nutrition
- Serving Size: 1 bar
- Calories: 195
- Sugar: 10
- Sodium: 115
- Fat: 8
- Saturated Fat: 5
- Carbohydrates: 28
- Fiber: 4
- Protein: 5
Keywords: pumpkin oat bars, breakfast bars, healthy breakfast, meal prep, pumpkin recipes, fall breakfast, easy breakfast bars


