Love this? Save it for later!
Share the inspiration with your friends
My neighbor Sarah asked why I couldn’t just use a mini muffin tin instead of fussing with those tiny springform pans. I opened my mouth to explain the whole thing about even baking and proper crust distribution — then stopped. Honestly? I had no good reason. I’d just assumed you needed the fancy equipment because that’s what every recipe said. So I tried it her way that afternoon, fully expecting a crumbly mess. The power went out halfway through preheating — classic — and I had to finish them in a borrowed toaster oven. They came out perfect. Better than perfect. The crust held together, the filling set with that signature crack-free top, and they popped out of the tin like little golden dreams. I stood there in my dim kitchen, eating one straight from the pan, and realized I’d been overcomplicating this for years.
That’s the thing about these Perfect Mini Pumpkin Cheesecake Bites. They don’t need special equipment or three hours of your time. They need a standard muffin tin, a handful of fall ingredients, and maybe twenty minutes of hands-on work. The rest is just oven time and patience — which, let me tell you, is the hard part when your kitchen starts smelling like cinnamon and brown sugar.
I’ve made these for Thanksgiving, Halloween parties, and random Tuesday nights when I needed something that felt special but didn’t require a whole production. Every single time, someone asks for the recipe. And every single time, I get to tell them the story about Sarah and her mini muffin tin. Maybe you’ve been there — following complicated instructions because you assumed the pros knew better, only to discover that simpler actually works. That’s this recipe in a nutshell.
Why You’ll Love These Mini Pumpkin Cheesecake Bites
Let me be honest with you — I’ve tested this recipe at least eight times to get it exactly right. The first batch was too dense. The second had a soggy crust. The third, well, we don’t talk about the third. But finally, I landed on a version that checks every box for a crowd-pleasing party dessert.
- Quick & Easy : Comes together in under 30 minutes of active prep, then the oven does the rest. Perfect for busy holiday hosting or last-minute dinner party cravings.
- Simple Ingredients : No fancy grocery trips needed. Canned pumpkin, cream cheese, graham crackers — you probably have most of this in your pantry right now.
- Perfect for Gatherings : These are bite-sized, which means guests can grab one (or three) without committing to a full slice of cheesecake. Great for potlucks, Thanksgiving dessert tables, or cocktail parties.
- Crowd-Pleaser : I’ve served these to kids, grandparents, and that one friend who claims they don’t like pumpkin. Every single person went back for seconds.
- Unbelievably Delicious : The texture is this perfect balance — creamy filling, crunchy crust, with warm fall spices that hit just right.
What makes these different from every other pumpkin cheesecake recipe out there? It’s the technique. Instead of a water bath or complicated temperature control, I use room-temperature ingredients and a specific mixing order that prevents cracks without any fuss. Plus, the ratio of pumpkin to cream cheese is dialed in so you get that unmistakable pumpkin flavor without it tasting like pumpkin pie filling. It’s pumpkin cheesecake, not pumpkin pie pretending to be cheesecake.
These little bites are the kind of dessert that makes you close your eyes after the first bite. The kind where someone at the party says, “Wait, you made these?” and you get to nod proudly. They’re comfort food reimagined — familiar enough to feel nostalgic, but special enough to feel like an occasion.
What Ingredients You Will Need
This recipe uses simple, wholesome ingredients that come together to create something genuinely impressive. Most of these are pantry staples for fall baking, which means you can whip up a batch whenever the craving hits.
- Graham cracker crumbs — 1 ½ cups (about 12 full sheets, crushed). You can buy pre-crushed crumbs, but I prefer crushing my own for better texture. Pulse them in a food processor or seal them in a bag and go to town with a rolling pin — honestly, the latter is more satisfying.
- Unsalted butter — 5 tablespoons, melted. Salted butter works in a pinch, just reduce any added salt in the crust. I use Land O’Lakes for consistent results.
- Granulated sugar — ¼ cup for the crust, plus ⅔ cup for the filling. Regular white sugar works best here — brown sugar makes the crust too soft.
- Ground cinnamon — 1 teaspoon for the crust, 1 teaspoon for the filling. I recommend McCormick or simply organic for the best flavor. Fresh spices make a noticeable difference.
- Ground ginger — ½ teaspoon. This adds warmth without overpowering. Skip it if you’re not a ginger fan, but you’ll miss that subtle kick.
- Ground nutmeg — ¼ teaspoon. Freshly grated if you have it, but pre-ground works fine.
- Salt — ¼ teaspoon for the crust, a pinch for the filling. Balances the sweetness and brings out the pumpkin flavor.
- Cream cheese — 16 ounces (two 8-ounce blocks), softened to room temperature. This is non-negotiable — cold cream cheese creates lumps that no amount of mixing will fix. I use Philadelphia full-fat for the creamiest texture.
- Pumpkin purée — 1 cup (not pumpkin pie filling). Libby’s is my go-to brand. Look for 100% pure pumpkin with no added spices or sugar.
- Large eggs — 2, room temperature. Set them out with the cream cheese about an hour before you start.
- Vanilla extract — 1 teaspoon. Pure vanilla extract, not imitation, if you can swing it. The flavor difference is subtle but real.
- Heavy cream — 2 tablespoons. This adds richness and helps prevent cracks. You can substitute sour cream or Greek yogurt in a pinch.
- Pumpkin pie spice — 1 teaspoon. If you don’t have a blend, use ½ teaspoon cinnamon, ¼ teaspoon ginger, ⅛ teaspoon nutmeg, and a pinch of cloves.
For the topping (optional but highly recommended):
- Whipped cream — 1 cup heavy cream whipped with 2 tablespoons powdered sugar and ½ teaspoon vanilla. Or use store-bought if you’re short on time — no judgment here.
- Caramel sauce — store-bought or homemade, for drizzling.
- Additional cinnamon — for dusting.
Equipment Needed
You don’t need a fancy kitchen to make these mini pumpkin cheesecake bites. Here’s what you’ll actually use:
- Mini muffin tin — 24-cup size. This is the whole trick Sarah taught me. Standard mini muffin tins work perfectly. I use a non-stick Wilton pan, but any brand works.
- Mixing bowls — one medium for the crust, one large for the filling. Glass or stainless steel is ideal.
- Electric hand mixer or stand mixer — a hand mixer is easier for this small batch. You can mix by hand if you’re patient, but the texture won’t be as smooth.
- Measuring cups and spoons — standard set. For accuracy, spoon and level your dry ingredients.
- Rubber spatula — for scraping the bowl and smoothing the filling.
- Small cookie scoop or teaspoon — for portioning the filling evenly. A #60 scoop (about 1 tablespoon) works perfectly.
- Cooling rack — for letting the cheesecakes cool gradually. This helps prevent cracking.
Budget-friendly tip: If you don’t have a mini muffin tin, use a regular 12-cup muffin tin with paper liners. You’ll get 12 larger cheesecakes instead of 24 minis — just bake for 18-22 minutes instead of 15-18.
Preparation Method
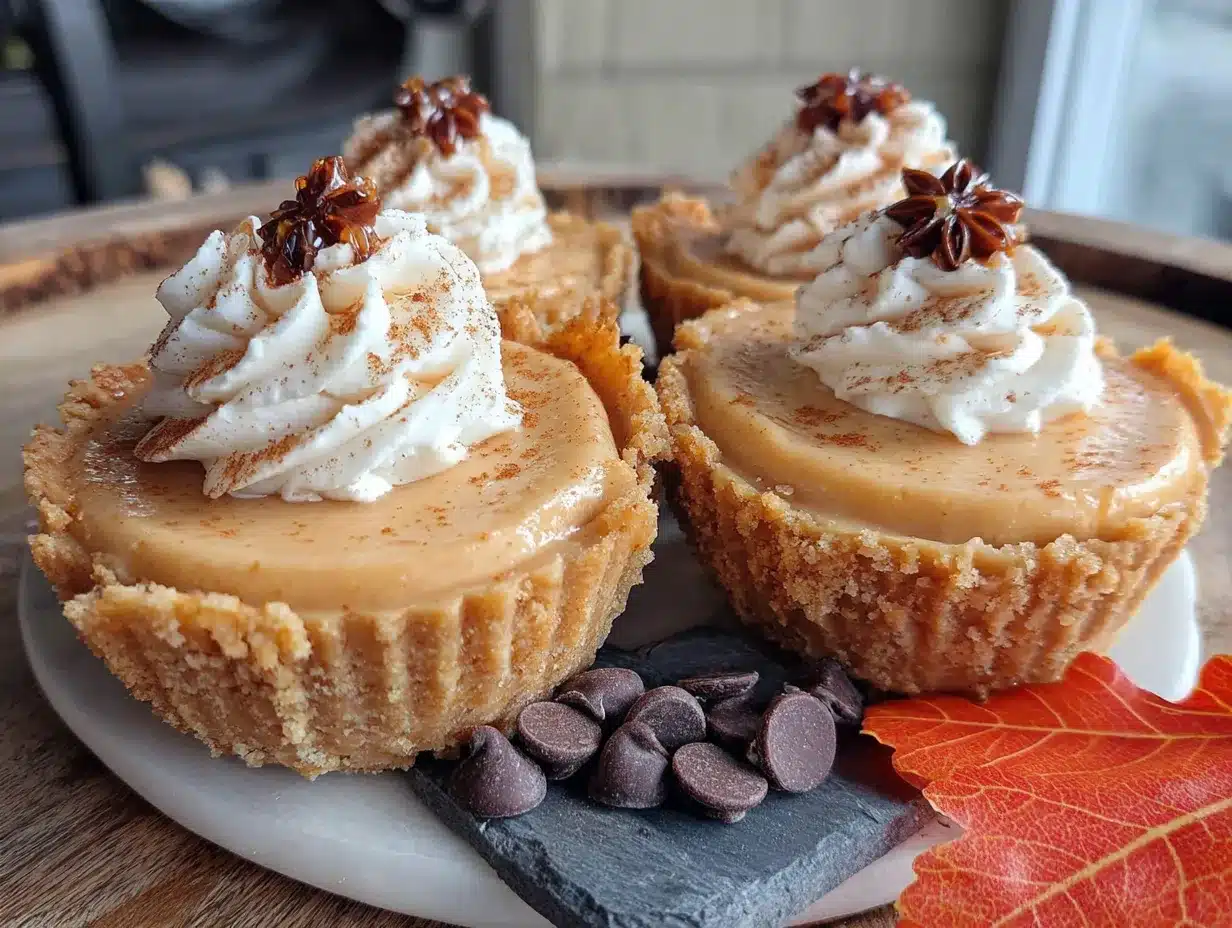
Preheat your oven to 325°F (165°C). Line your mini muffin tin with paper liners — this makes removal so much easier, and honestly, the liners look cute for serving.
Step 1: Make the crust. In a medium bowl, combine 1 ½ cups graham cracker crumbs, ¼ cup granulated sugar, 1 teaspoon cinnamon, and ¼ teaspoon salt. Pour in 5 tablespoons melted butter and stir with a fork until the mixture looks like wet sand. Every crumb should be coated — if it’s too dry, add another tablespoon of melted butter. Press about 1 tablespoon of the mixture into each mini muffin cup. Use the bottom of a shot glass or a small measuring cup to press it down firmly. This is important — a loose crust will fall apart when you remove the cheesecakes. Bake the crusts for 5 minutes, then remove and let them cool while you make the filling.
Step 2: Make the filling. In a large bowl, beat 16 ounces of softened cream cheese with ⅔ cup granulated sugar until smooth. Scrape the bowl halfway through — cream cheese loves to hide on the sides. Add 1 teaspoon vanilla extract and beat again. Add the eggs one at a time, mixing on low speed after each just until combined. Overmixing at this stage incorporates too much air, which leads to cracks. Add 1 cup pumpkin purée, 1 teaspoon cinnamon, 1 teaspoon pumpkin pie spice, ½ teaspoon ginger, ¼ teaspoon nutmeg, a pinch of salt, and 2 tablespoons heavy cream. Mix on low until everything is combined and the filling is a uniform orange color. The texture should be silky, not thick or lumpy.
Step 3: Fill the cups. Spoon or scoop the filling into the prepared crusts, filling each cup almost to the top — leave about ⅛ inch of space. A small cookie scoop makes this step fast and mess-free. The filling won’t rise much, so you can fill them generously. Tap the pan gently on the counter a few times to release any air bubbles.
Step 4: Bake. Bake at 325°F (165°C) for 15-18 minutes. The edges should look set and slightly puffed, but the centers will still jiggle slightly when you shake the pan. This is the sweet spot — overbaking leads to dry, cracked cheesecake. Remove from the oven and let the pan cool on a wire rack for 15 minutes. The residual heat will finish setting the centers.
Step 5: Chill. After 15 minutes, transfer the pan to the refrigerator and chill for at least 2 hours, or overnight. This is the hardest step — I know you want to eat them now. But trust me, the texture improves dramatically as they chill. The flavors meld, the filling firms up, and the crust sets completely. Cold cheesecake is happy cheesecake.
Step 6: Remove and serve. Once fully chilled, gently lift the cheesecakes out of the pan by the paper liners. If you didn’t use liners, run a thin knife around the edge of each cup and pop them out carefully. Top with whipped cream, a drizzle of caramel sauce, and a light dusting of cinnamon right before serving.
Cooking Tips & Techniques
Let me save you from the mistakes I made during those first eight tests. The biggest issue people run into with mini cheesecakes is cracks — those little fissures that make them look less than perfect. Here’s the thing: cracks happen when the cheesecake goes through drastic temperature changes. So let them cool gradually — first on the counter, then in the fridge. No shortcuts.
Another common mistake is overmixing the filling. I know it’s tempting to keep beating until everything is perfectly smooth, but that incorporates air bubbles that expand during baking and cause cracks. Mix just until the ingredients come together, then stop. Lumps? A few small ones are fine — they’ll disappear during baking.
Room temperature ingredients are not a suggestion — they’re a requirement. Cold cream cheese creates lumps that no amount of mixing will fix. Cold eggs seize the batter. Set everything out on the counter an hour before you start. I learned this the hard way when I tried to rush through a batch before a party and ended up with lumpy filling that never smoothed out.
For consistent results, use a kitchen scale for the crust ingredients. Graham cracker crumbs can vary wildly depending on how finely you crush them, and weight measurements eliminate that variable. 150 grams of crumbs, 70 grams of butter — perfect every time.
If you’re making these for a party, here’s a timing strategy: make the crusts and filling the night before, bake them, and let them chill overnight. The next day, all you have to do is add toppings and arrange them on a platter. Your future self will thank you.
Variations & Adaptations
One of the best things about this recipe is how adaptable it is. Here are some variations I’ve tried and loved:
Gluten-Free Version : Swap the graham cracker crumbs for gluten-free graham crackers or crushed gluten-free shortbread cookies. I’ve used both, and honestly, the shortbread version might be even better — it’s buttery and rich. Just reduce the melted butter to 4 tablespoons since shortbread already has more fat.
Vegan Option : Use vegan cream cheese (Tofutti or Kite Hill work well), a flax egg (1 tablespoon ground flaxseed mixed with 3 tablespoons water, per egg), and coconut cream instead of heavy cream. The texture is slightly less dense but still delicious. I tested this for a friend’s vegan birthday party and got zero complaints.
Flavor Twists : Add ½ cup miniature chocolate chips to the filling for a pumpkin-chocolate combo that’s absolutely addictive. Or swirl in 2 tablespoons of caramel sauce before baking for a marbled effect. For a chai-spiced version, replace the pumpkin pie spice with 1 teaspoon chai tea blend and add ¼ teaspoon cardamom.
Different Crusts : Use crushed ginger snaps for a spicier kick, vanilla wafers for a sweeter base, or even crushed pretzels for a salty-sweet contrast. Each changes the character of the cheesecake in a fun way. The ginger snap version is my personal favorite for fall.
Topping Variations : Skip the whipped cream and top each cheesecake with a candied pecan, a sprinkle of toasted pumpkin seeds, or a small piece of dark chocolate. For a more decadent option, drizzle with white chocolate ganache.
Serving & Storage Suggestions
These mini pumpkin cheesecake bites are best served cold — straight from the fridge. The texture is firmer, the flavors are more pronounced, and they hold their shape beautifully on a serving platter. If you’re hosting a party, arrange them on a large platter or cake stand, grouped together for visual impact. Add fresh rosemary sprigs or small cinnamon sticks for a rustic fall look.
They pair beautifully with hot apple cider, spiced chai lattes, or a bold cup of coffee. For a dessert spread, serve them alongside classic pumpkin pie and warm apple crisp for a complete fall dessert table. The contrast between the creamy cheesecake and the crisp, fruity crisp is perfection.
For storage, keep them in an airtight container in the refrigerator for up to 5 days. Layer them with parchment paper between layers to prevent sticking. The flavor actually improves after a day or two as the spices meld with the cream cheese.
Freezing is also an option — freeze the cheesecakes (without toppings) on a baking sheet until solid, then transfer to a freezer bag. They’ll keep for up to 3 months. Thaw overnight in the refrigerator before serving, then add toppings. I’ve done this for holiday prep and it works like a charm.
Reheating? Don’t. These are meant to be served cold. If you want a warm dessert, try my pumpkin crumble instead — it’s designed for that purpose.
Nutritional Information & Benefits
Each mini cheesecake bite (without toppings) contains approximately:
| Nutrient | Amount per serving |
|---|---|
| Calories | 145 |
| Total Fat | 9g |
| Saturated Fat | 5g |
| Cholesterol | 35mg |
| Sodium | 115mg |
| Total Carbohydrates | 14g |
| Dietary Fiber | 1g |
| Sugars | 10g |
| Protein | 3g |
| Vitamin A | 45% DV |
These little bites pack more nutritional value than your average dessert. Pumpkin is loaded with vitamin A (great for eye health and immune function), fiber, and antioxidants. The cream cheese adds calcium and protein. And because they’re mini, portion control is built right in — you can enjoy two or three without guilt.
For dietary considerations: This recipe contains dairy, gluten, and eggs. For gluten-free, use the variation above. For dairy-free, use vegan cream cheese and coconut cream. The recipe is naturally vegetarian.
Conclusion
These Perfect Mini Pumpkin Cheesecake Bites have become my go-to party dessert for a reason. They’re easy enough for a Tuesday night, impressive enough for Thanksgiving, and adaptable enough to fit almost any dietary need. Every time I make them, I think about Sarah and her mini muffin tin suggestion — and I smile at how wrong I was about needing fancy equipment.
I hope you’ll try them and make them your own. Maybe you’ll add chocolate chips, or swap the crust for ginger snaps, or skip the topping entirely. That’s the beauty of a simple, reliable recipe — it becomes a canvas for your creativity. And when you bring a platter of these to your next gathering, watch how fast they disappear. That’s the real test, and these pass every single time.
Have you tried this recipe? I’d love to hear about your variations or see your photos! Drop a comment below or tag me in your posts. And if you’re looking for more crowd-pleasing desserts, check out my no-bake pumpkin lasagna — it’s another fall favorite that disappears fast.
Frequently Asked Questions
Can I use pumpkin pie filling instead of pumpkin purée?
No, I wouldn’t recommend it. Pumpkin pie filling already has sugar and spices added, which would throw off the balance of this recipe. Stick with 100% pure pumpkin purée for the best results.
Why did my cheesecake bites crack on top?
Cracks usually happen from overmixing the filling, overbaking, or drastic temperature changes. Make sure your ingredients are room temperature, mix on low speed just until combined, and let the cheesecakes cool gradually on the counter before refrigerating.
Can I make these ahead of time for a party?
Absolutely! In fact, I recommend it. Make them a day or two ahead, keep them refrigerated, and add the toppings just before serving. The flavor actually improves after a day in the fridge.
How do I get the cheesecakes out of the pan without them breaking?
Use paper liners — they make removal effortless. If you didn’t use liners, run a thin knife around the edge of each cup and gently pry them out. Chilling them completely first makes this much easier.
Can I double this recipe?
Yes, easily. Double all the ingredients and bake in batches if you only have one mini muffin tin. The recipe scales perfectly for larger gatherings — I’ve made 96 of these for a wedding reception before.
Pin This Recipe!
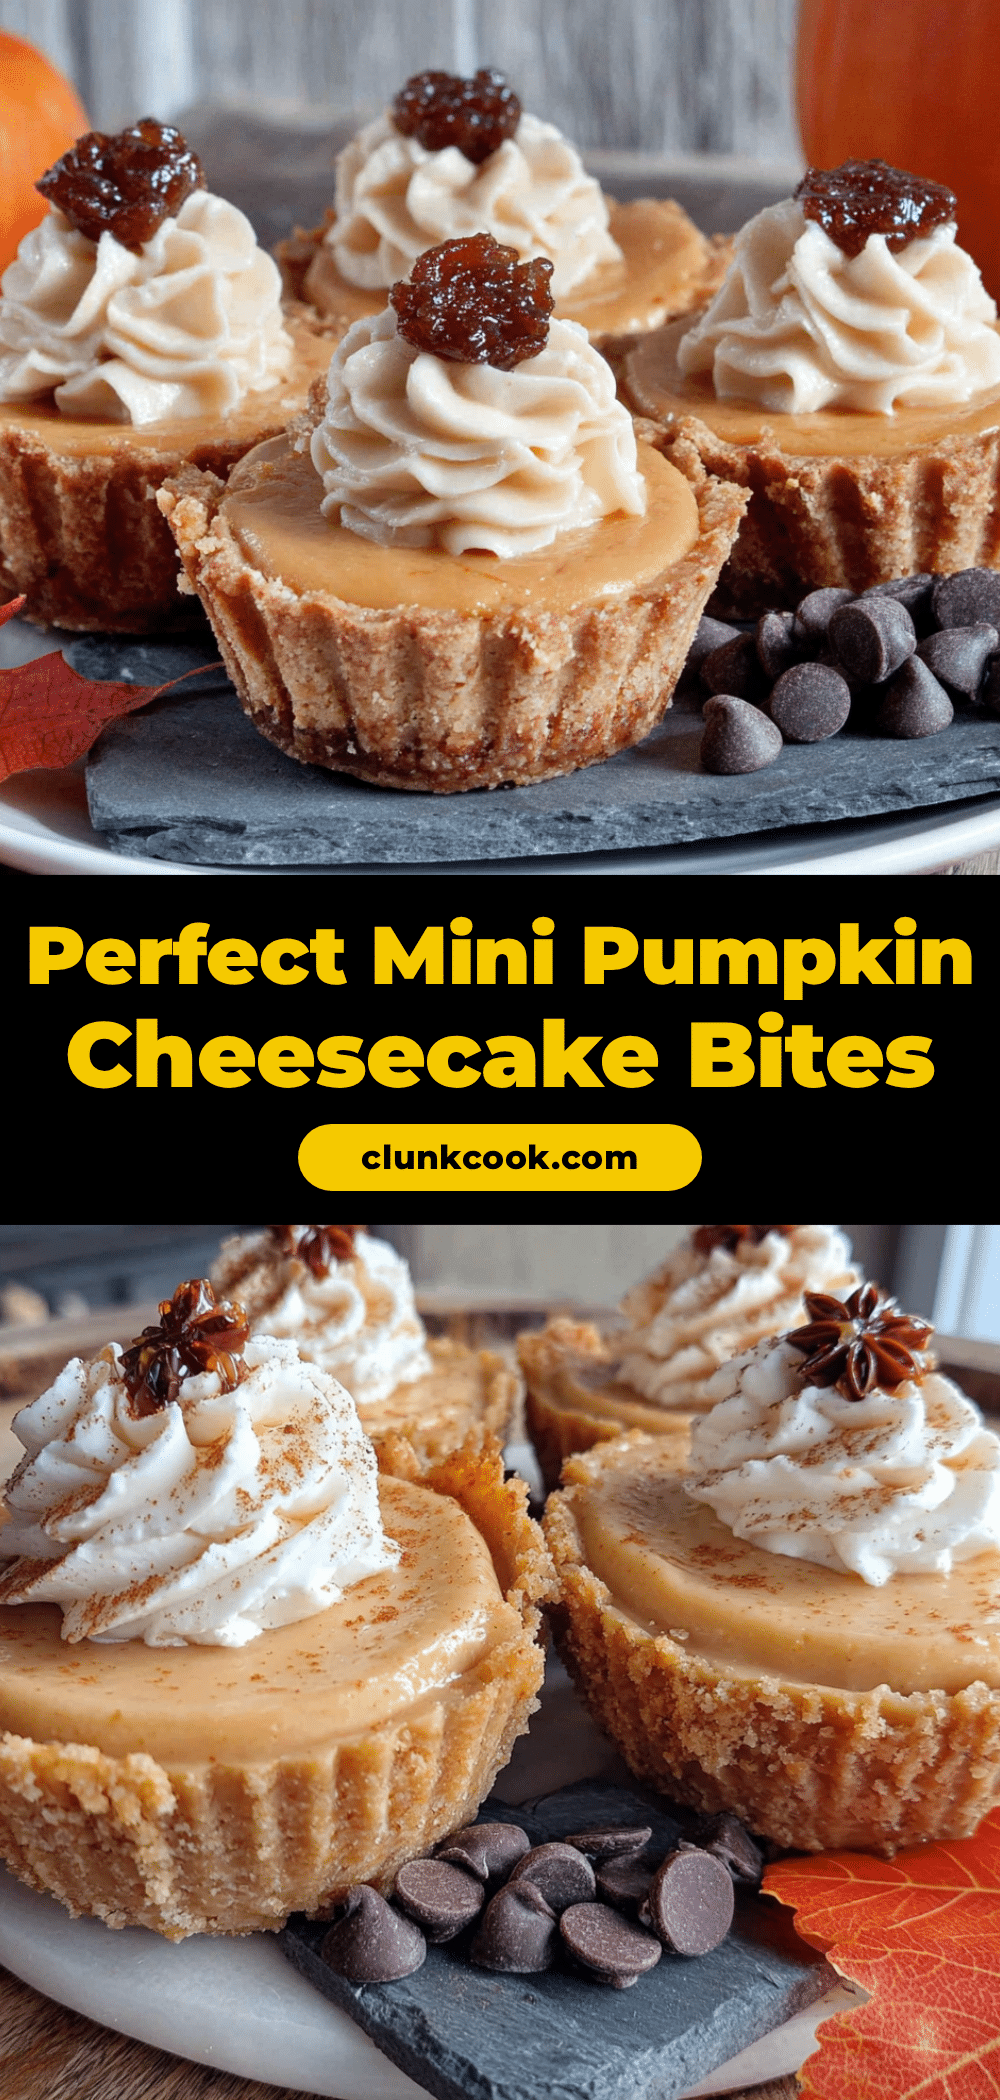
Perfect Mini Pumpkin Cheesecake Bites: Easy Party Dessert
These mini pumpkin cheesecake bites are a quick and easy party dessert that comes together in under 30 minutes of active prep. With a creamy pumpkin filling, crunchy graham cracker crust, and warm fall spices, they’re perfect for Thanksgiving, Halloween, or any gathering.
- Prep Time: 20 minutes
- Cook Time: 18 minutes
- Total Time: 2 hours 38 minutes (includes chilling)
- Yield: 24 servings 1x
- Category: Dessert
- Cuisine: American
Ingredients
- 1 ½ cups graham cracker crumbs (about 12 full sheets, crushed)
- 5 tablespoons unsalted butter, melted
- ¼ cup granulated sugar (for crust)
- ⅔ cup granulated sugar (for filling)
- 1 teaspoon ground cinnamon (for crust)
- 1 teaspoon ground cinnamon (for filling)
- ½ teaspoon ground ginger
- ¼ teaspoon ground nutmeg
- ¼ teaspoon salt (for crust)
- Pinch of salt (for filling)
- 16 ounces cream cheese (two 8-ounce blocks), softened to room temperature
- 1 cup pumpkin purée (not pumpkin pie filling)
- 2 large eggs, room temperature
- 1 teaspoon vanilla extract
- 2 tablespoons heavy cream
- 1 teaspoon pumpkin pie spice
- For the topping (optional): 1 cup heavy cream, 2 tablespoons powdered sugar, ½ teaspoon vanilla extract, caramel sauce, additional cinnamon
Instructions
- Preheat oven to 325°F (165°C). Line a 24-cup mini muffin tin with paper liners.
- Make the crust: In a medium bowl, combine graham cracker crumbs, ¼ cup granulated sugar, 1 teaspoon cinnamon, and ¼ teaspoon salt. Pour in melted butter and stir until mixture resembles wet sand. Press about 1 tablespoon into each muffin cup firmly. Bake for 5 minutes, then let cool.
- Make the filling: In a large bowl, beat softened cream cheese with ⅔ cup granulated sugar until smooth. Add vanilla extract and beat. Add eggs one at a time, mixing on low just until combined. Add pumpkin purée, 1 teaspoon cinnamon, pumpkin pie spice, ginger, nutmeg, pinch of salt, and heavy cream. Mix on low until uniform and silky.
- Fill the cups: Spoon or scoop filling into prepared crusts, filling almost to the top (leave about ⅛ inch space). Tap pan gently to release air bubbles.
- Bake at 325°F (165°C) for 15-18 minutes, until edges are set but centers still jiggle slightly. Cool pan on wire rack for 15 minutes.
- Chill in refrigerator for at least 2 hours or overnight.
- Remove from pan by lifting paper liners. Top with whipped cream, caramel sauce, and cinnamon before serving.
Notes
Use room temperature ingredients for best results. Avoid overmixing to prevent cracks. Let cheesecakes cool gradually before refrigerating. For gluten-free, use gluten-free graham crackers or shortbread cookies. For vegan, use vegan cream cheese, flax eggs, and coconut cream.
Nutrition
- Serving Size: 1 mini cheesecake bi
- Calories: 145
- Sugar: 10
- Sodium: 115
- Fat: 9
- Saturated Fat: 5
- Carbohydrates: 14
- Fiber: 1
- Protein: 3
Keywords: mini pumpkin cheesecake bites, pumpkin cheesecake, mini cheesecake, fall dessert, party dessert, Thanksgiving dessert, easy cheesecake recipe


