Love this? Save it for later!
Share the inspiration with your friends
My sister claimed she hated squash for thirty-seven years. Thirty-seven years of pushing butternut around her plate, of politely declining pumpkin soup at Thanksgiving, of making that face we all make when something we don’t like shows up uninvited. Then last October, I made this honeynut squash with brown butter and sage “just for myself” on a random Tuesday night, and I found her standing at my kitchen counter, fork in hand, scraping the last bits out of the baking dish. She didn’t even say anything. Just ate it. Caught red-handed, or rather, brown-butter-handed.
Honestly, I get the skepticism. Regular winter squash can be watery, stringy, bland—the kind of vegetable you eat because you’re supposed to, not because you want to. But honeynut squash is different. It’s like someone took everything good about butternut squash and made it smaller, sweeter, and way more practical. No massive knife fights trying to cut through a rock-hard squash. No peeling involved. Just halve, scoop, roast, and suddenly you’ve got this deeply caramelized, almost candy-like vegetable that makes you wonder why you’ve been bothering with regular squash all these years.
The first time I made this, I forgot to toast the sage leaves separately and they ended up a little too dark in the pan. My kitchen smelled amazing anyway, and that imperfection taught me something important: this recipe forgives mistakes. It wants you to succeed. The brown butter does most of the heavy lifting, the sage adds that earthy, almost floral note, and the squash itself just sits there looking gorgeous and tasting like autumn in a bite-sized package. Maybe you’ve been there too—standing in the grocery store, staring at these cute little striped squashes, wondering if they’re worth the hype. They are. Let me tell you why this one stuck with me.
Why You’ll Love This Recipe
Look, I know you’re busy. It’s a Tuesday night, you’ve got approximately fifteen minutes of actual cooking energy left, and the last thing you need is a recipe that requires seventeen steps and a trip to three different stores. This honeynut squash with brown butter and sage is not that recipe. It’s the opposite of that recipe.
- Quick & Easy: From fridge to table in about 45 minutes, and most of that is hands-off roasting time. You can literally set a timer and forget it.
- Simple Ingredients: Four main ingredients. That’s it. Honeynut squash, butter, fresh sage, and salt. Maybe some pepper if you’re feeling fancy. No grocery store scavenger hunt required.
- Perfect for Weeknights: This works as a side dish for roasted chicken, pork chops, or even a simple weeknight pasta. It’s fancy enough for company but easy enough for a Wednesday.
- Crowd-Pleaser: I’ve served this to self-proclaimed squash haters (see above) and watched them go back for seconds. It’s the vegetable equivalent of a Trojan horse—they don’t know they’re eating something healthy.
- Unbelievably Delicious: The brown butter brings this nutty, toasty richness that coats every bite. The sage crisps up like little flavor bombs. And the squash itself? Roasted until the edges caramelize and the inside turns silky and sweet. It’s comfort food that happens to be good for you.
What makes this version different from every other roasted squash recipe out there? It’s the technique. Most recipes tell you to toss everything together and hope for the best. I’ve learned that roasting the squash cut-side down first, then flipping and adding the brown butter halfway through, gives you that perfect texture—tender but not mushy, caramelized but not burnt. It’s a small tweak that makes a huge difference.
This isn’t just good squash. It’s the kind of dish that makes you close your eyes after the first bite. It’s autumn on a plate, ready in under an hour, and it will make you feel like you actually have your life together even if your sink is full of dishes and you’re wearing sweatpants.
What Ingredients You Will Need
This recipe keeps things refreshingly simple. You don’t need a dozen obscure ingredients or a trip to a specialty store. Here’s what you’ll need to make this honeynut squash with brown butter and sage come to life:
For the Squash
- 4 medium honeynut squashes (about 1 to 1.5 pounds total) — Look for squashes that feel heavy for their size with firm, unblemished skin. They should be about the size of a large sweet potato. If you can’t find honeynut squash, you can substitute butternut squash cut into similar-sized pieces, but the cooking time will vary slightly.
- 2 tablespoons olive oil — Use a good quality extra virgin olive oil here. It helps the squash roast evenly and adds a subtle fruity note that complements the brown butter.
- ½ teaspoon kosher salt — I prefer Diamond Crystal kosher salt for its clean taste and easy pinchability. If using table salt, reduce to ¼ teaspoon.
- ¼ teaspoon black pepper — Freshly ground is always better, but pre-ground works in a pinch.
For the Brown Butter and Sage

- 4 tablespoons unsalted butter (½ stick) — Unsalted gives you control over the salt level. I recommend Kerrygold or Plugrà for their higher butterfat content, which browns more beautifully and adds deeper flavor.
- 12-15 fresh sage leaves — Look for sage leaves that are bright green and fragrant, without any brown spots or wilting. Fresh is non-negotiable here—dried sage won’t give you the same texture or flavor.
- Flaky sea salt for finishing (optional but highly recommended) — Maldon or Fleur de Sel. That final sprinkle adds a satisfying crunch and a burst of salt that contrasts beautifully with the sweet squash.
- Parmesan cheese for serving (optional) — A microplane-grated shower of Parm adds umami and makes this feel even more indulgent.
Ingredient Selection Tips
When choosing honeynut squash, look for ones that are uniformly tan-orange with green stripes. Avoid any that have soft spots or cracks. The skin should feel firm and slightly waxy. If you’re shopping at a farmers’ market in the fall, you’ll often find the best quality there. Grocery stores are starting to carry them more regularly, but they’re still a bit of a seasonal treasure—typically available from September through December.
Substitution Guidance
If you’re dairy-free, you can substitute the butter with a high-quality vegan butter or even coconut oil, though the flavor will be different. For a nuttier flavor without dairy, try using ghee, which has the milk solids removed and browns beautifully. If sage isn’t your thing (are we still friends?), try fresh thyme or rosemary instead—they bring a different but equally delicious herbal note. And if you absolutely cannot find honeynut squash, use the smallest butternut squash you can find and cut it into 2-inch chunks. The cooking time will be about the same, but you’ll miss that adorable mini-squash presentation.
Equipment Needed
You don’t need a professional kitchen to nail this recipe. Here’s what you’ll actually use:
- Sharp chef’s knife — A good 8-inch chef’s knife makes halving the squashes safe and easy. Dull knives are actually more dangerous because they slip. Trust me on this one—I learned the hard way.
- Cutting board — Preferably a large wooden or plastic board with a non-slip grip underneath.
- Large rimmed baking sheet — Half-sheet pans (18×13 inches) are my go-to. They give the squash enough room to roast without steaming. If your baking sheet is too small, the squash will crowd and steam instead of caramelizing.
- Parchment paper or aluminum foil — For easy cleanup. Because who wants to scrub caramelized squash off a baking sheet?
- Small saucepan — For browning the butter. A light-colored pan (stainless steel or enameled) helps you see the color change clearly.
- Rubber spatula — For scraping every last drop of that liquid gold brown butter onto the squash.
- Tongs — For flipping the hot squash halves without burning your fingers.
- Microplane or fine grater — For that optional Parmesan shower at the end.
If you don’t have a microplane, a vegetable peeler can create thin Parmesan shavings instead. And if you’re really in a pinch, you can skip the Parmesan altogether—the brown butter and sage carry this dish all on their own.
Preparation Method
Alright, let’s get cooking. This whole process takes about 45 minutes, but most of that is hands-off oven time. Here’s exactly how to make this honeynut squash with brown butter and sage:
-
Preheat your oven to 400°F (200°C). Position a rack in the middle of the oven. While it’s heating up, line a large rimmed baking sheet with parchment paper or foil for easy cleanup.
-
Prepare the squashes. Using your sharp chef’s knife, carefully cut each honeynut squash in half lengthwise. Start at the stem end and cut straight through to the tip. Be careful—these little guys are dense. If you’re struggling, microwave the whole squashes for 1-2 minutes to soften them slightly. Use a spoon to scoop out the seeds and stringy bits from the center. Don’t worry about getting every last fiber—a little bit left adds character.
-
Season the squash. Place the squash halves cut-side up on the prepared baking sheet. Drizzle with the olive oil, then sprinkle with kosher salt and black pepper. Use your hands (or a brush) to rub the oil and seasoning all over the cut surfaces and the skin. Flip the squash halves so they’re cut-side down on the baking sheet. This is the secret step—roasting them cut-side down first allows the flesh to steam and soften before it gets exposed to direct heat.
-
Roast for 20 minutes. Place the baking sheet in the preheated oven and roast for 20 minutes. The squash should be starting to soften and the skin should look slightly wrinkled. Don’t skip this step—it’s what gives you that perfect tender texture.
-
Make the brown butter. While the squash roasts, place the unsalted butter in a small saucepan over medium heat. Let it melt completely, then continue cooking, swirling the pan occasionally. The butter will foam up, then the foam will subside, and you’ll start to see brown specks forming at the bottom of the pan. This is the milk solids toasting—that’s where all the flavor lives. Once the butter turns a golden-amber color and smells nutty and rich (about 4-5 minutes total), immediately remove it from the heat. Add the fresh sage leaves to the hot butter—they’ll sizzle and crisp up in about 30 seconds. Be careful not to burn them; they go from perfect to acrid very quickly.
-
Flip and baste. After 20 minutes, remove the baking sheet from the oven. Using tongs, carefully flip each squash half so they’re cut-side up. Pour or brush the brown butter mixture evenly over the cut surfaces, making sure each half gets some of those crispy sage leaves. Reserve a tablespoon or two of the brown butter for drizzling at the end if you want extra richness.
-
Roast for another 15-20 minutes. Return the baking sheet to the oven and continue roasting until the squash is tender and caramelized. You’ll know it’s done when a fork slides easily into the thickest part of the squash and the edges are golden-brown and slightly crispy. The total roasting time should be 35-40 minutes.
-
Finish and serve. Remove from the oven and let the squash rest for 2-3 minutes. Transfer to a serving platter, drizzle with any remaining brown butter from the pan, and sprinkle with flaky sea salt and freshly grated Parmesan cheese if using. Serve hot or warm.
Prep Note: If you’re making this for a crowd, you can double or triple the recipe easily. Just use multiple baking sheets and rotate them halfway through cooking. The brown butter can be made ahead and stored in the fridge for up to a week—just reheat gently before using.
Cooking Tips & Techniques
I’ve made this honeynut squash with brown butter and sage more times than I can count, and I’ve definitely learned a few things the hard way. Here are my best tips for getting it right every time:
Don’t overcrowd the pan. This is probably the most common mistake I see. If the squash halves are touching each other on the baking sheet, they’ll steam instead of roast. Give them space. If you need to use two baking sheets, do it. The caramelization is worth the extra pan.
Watch the brown butter like a hawk. I cannot stress this enough. Brown butter goes from perfect to burnt in about 30 seconds. The first time I made this, I got distracted by my phone and ended up with butter that looked more like coffee than caramel. It still tasted okay, but it had a bitter edge that wasn’t ideal. Stay at the stove, swirl the pan, and trust your nose. When it smells nutty and looks like liquid gold, it’s ready.
Toast the sage leaves separately if you want them extra crispy. Sometimes I’ll fry the sage leaves in a separate small pan with a tablespoon of butter while the squash is finishing in the oven. This gives me more control over the crispiness and prevents them from getting soggy on the squash. Plus, it looks gorgeous scattered on top at the end.
Use a metal spatula to flip. Tongs work, but a thin metal spatula is gentler on the tender squash. If you’re using tongs, grip gently—these little guys get soft and can break apart if you’re too aggressive.
Salt at the right time. The initial salt goes on before roasting, but that flaky sea salt at the end? That’s non-negotiable. It adds texture and a burst of saltiness that makes the sweetness of the squash and the richness of the brown butter sing. Don’t skip it.
Plan your timing. This dish is perfect for multitasking. While the squash roasts, you can prepare a protein (like pan-seared chicken or pork chops) and a simple green salad. Everything comes together at the same time, and you look like a kitchen wizard.
Variations & Adaptations
One of the best things about this honeynut squash with brown butter and sage is how adaptable it is. Here are some ways to switch it up:
Maple-Balsamic Version
Add 1 tablespoon of maple syrup and 1 teaspoon of balsamic vinegar to the brown butter before drizzling over the squash. The acidity of the vinegar cuts through the richness, and the maple syrup enhances the natural sweetness. I tried this last Thanksgiving and it was the first dish to disappear from the table.
Spicy Honey Variation
Stir 1 tablespoon of honey and a pinch of red pepper flakes into the brown butter. The heat from the pepper flakes balances the sweetness beautifully. This version is amazing served alongside roasted pork tenderloin or grilled chicken thighs.
Vegan Adaptation
Substitute the butter with 3 tablespoons of coconut oil or a high-quality vegan butter. For the sage, toast the leaves in the oil until crispy. Add a squeeze of lemon juice at the end for brightness. It won’t have quite the same nutty depth, but it’s still incredibly delicious.
Herb Swap
If sage isn’t your favorite herb, try fresh thyme sprigs or rosemary needles instead. Thyme adds an earthy, almost lemony note, while rosemary brings a pine-like fragrance that pairs beautifully with roasted squash. Just add them to the butter the same way you would the sage.
Cheesy Upgrade
After the final flip, sprinkle each squash half with a tablespoon of grated Parmesan or pecorino romano. Return to the oven for the last 5 minutes of roasting. The cheese melts and forms a golden, crispy crust that’s absolutely addictive.
Serving & Storage Suggestions
This honeynut squash with brown butter and sage is incredibly versatile when it comes to serving. Here’s how to make the most of it:
Serving Temperature: Serve it hot or warm, straight from the oven. The brown butter should be glossy and the sage leaves should still have a bit of crunch. If it sits too long, the sage will soften, so eat it right away for the best texture.
Presentation: Arrange the squash halves on a large platter, cut-side up. Drizzle any remaining brown butter from the pan over the top. Sprinkle with flaky sea salt, fresh cracked pepper, and a shower of microplaned Parmesan. Garnish with a few extra crispy sage leaves if you have them. It’s rustic but elegant—perfect for a dinner party or a quiet weeknight.
What to Serve With It: This squash pairs beautifully with roasted chicken, pan-seared pork chops, grilled steak, or even a simple lentil salad for a vegetarian meal. It also works as a side dish for Thanksgiving or any fall gathering. For a complete weeknight dinner, serve it alongside a simple green salad with lemon vinaigrette and some crusty bread to soak up the brown butter.
Storage: Leftover squash can be stored in an airtight container in the refrigerator for up to 4 days. The texture will soften slightly, but the flavor will actually deepen as it sits. To reheat, place the squash halves on a baking sheet and warm in a 350°F oven for 8-10 minutes, or microwave for 1-2 minutes if you’re in a hurry.
Freezing: You can freeze the roasted squash for up to 3 months. Let it cool completely, then place in a freezer-safe bag or container. To serve, thaw overnight in the refrigerator and reheat in the oven. The brown butter and sage are best added fresh after reheating.
Flavor Development: If you’re making this ahead, roast the squash plain and make the brown butter separately. Store them separately and combine just before serving. The squash will reheat beautifully, and the brown butter will taste freshly made.
Nutritional Information & Benefits
This honeynut squash with brown butter and sage isn’t just delicious—it’s actually pretty good for you too. Here’s what you’re getting in each serving (based on 4 servings, one squash half each):
| Nutrient | Amount Per Serving |
|---|---|
| Calories | 185 |
| Total Fat | 14g |
| Saturated Fat | 7g |
| Carbohydrates | 16g |
| Fiber | 3g |
| Sugar | 6g |
| Protein | 2g |
| Vitamin A | 210% DV |
| Vitamin C | 25% DV |
| Potassium | 12% DV |
Honeynut squash is packed with beta-carotene, which your body converts to vitamin A for healthy vision and immune function. It’s also a good source of vitamin C, fiber, and potassium. The brown butter adds healthy fats that help your body absorb the fat-soluble vitamins in the squash. This dish is naturally gluten-free and can be made dairy-free with a simple substitution. The only potential allergen is dairy from the butter and optional Parmesan.
From a wellness perspective, this is exactly the kind of recipe I love—it feels indulgent but is actually nutrient-dense. You’re getting a serving of vegetables that tastes like dessert. That’s a win in my book.
Conclusion
Look, I know I’m biased, but this honeynut squash with brown butter and sage has earned a permanent spot in my fall rotation. It’s the recipe I turn to when I want to impress without stress, when I need a vegetable side that actually feels special, and when I want to convert another squash skeptic into a true believer. My sister now buys honeynut squash every week, and she makes this recipe for her own dinner parties. That’s the kind of impact this dish has.
I want you to make this your own. Maybe you’ll add extra sage, or a drizzle of honey, or a sprinkle of red pepper flakes. Maybe you’ll serve it alongside your favorite weeknight protein, or make it the star of a vegetarian dinner. The beauty of this recipe is that it’s forgiving, flexible, and always delicious. Don’t be afraid to experiment—that’s how the best recipes are born.
If you make this honeynut squash with brown butter and sage, I’d love to hear about it. Leave a comment below and tell me how it turned out, what you served it with, or any twists you added. Share your photos on Pinterest and tag me—I want to see your beautiful squash creations. And if you have a squash skeptic in your life, make this for them. Trust me on this one.
Now go get yourself some honeynut squash. Your taste buds will thank you.
Frequently Asked Questions
Can I use butternut squash instead of honeynut squash?
Yes, absolutely. If you can’t find honeynut squash, use a small butternut squash and cut it into 2-inch chunks. The cooking time will be similar, but you’ll miss that adorable individual-serving presentation. Just keep an eye on it toward the end—chunks might cook slightly faster than whole halves.
How do I know when the brown butter is done?
Watch for the butter to turn a golden-amber color and smell nutty and toasty. You’ll see brown specks forming at the bottom of the pan—those are the milk solids toasting. Once it reaches that color and smell, remove it from the heat immediately. It goes from perfect to burnt in about 30 seconds, so stay close.
Can I make this recipe ahead of time?
You can roast the squash and make the brown butter separately up to 2 days ahead. Store them in the refrigerator and reheat the squash in a 350°F oven for 8-10 minutes, then drizzle with the reheated brown butter and sage just before serving. The sage leaves are best added fresh, so consider making extra for topping.
Is this recipe gluten-free?
Yes, this honeynut squash with brown butter and sage is naturally gluten-free. Just make sure your kosher salt and any optional Parmesan cheese are certified gluten-free if that’s a concern for you. All the main ingredients are naturally free of gluten.
How do I store leftovers and reheat them?
Store leftover squash in an airtight container in the refrigerator for up to 4 days. To reheat, place on a baking sheet in a 350°F oven for 8-10 minutes, or microwave for 1-2 minutes. The texture will soften slightly upon reheating, but the flavor will still be amazing. You can also eat the leftovers cold in a salad—just chop them up and toss with greens, nuts, and a simple vinaigrette.
Pin This Recipe!
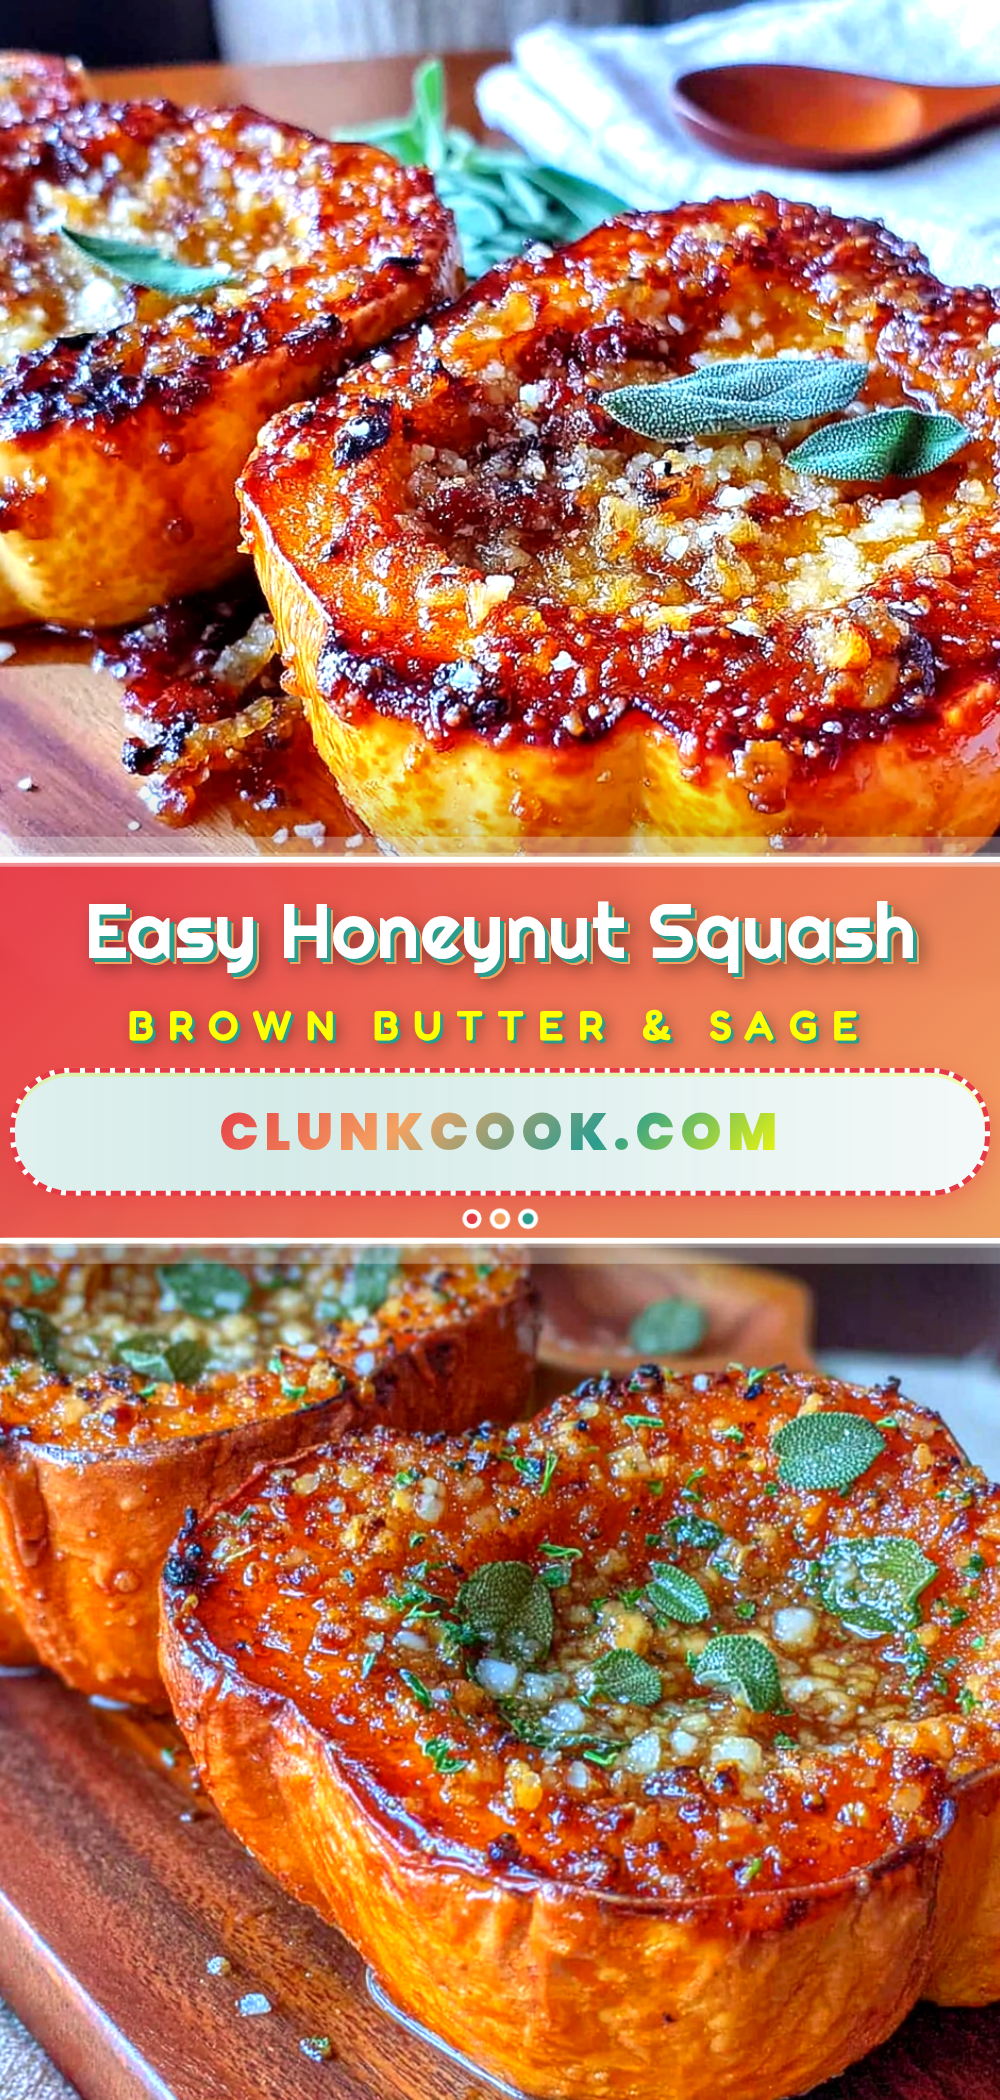
Easy Honeynut Squash with Brown Butter Sage

This easy honeynut squash with brown butter and sage is a quick, delicious side dish that converts even the most stubborn squash skeptics. Roasted until tender and caramelized, then drizzled with nutty brown butter and crispy sage, it’s the perfect fall recipe for weeknights or holiday gatherings.
- Prep Time: 10 minutes
- Cook Time: 35 minutes
- Total Time: 45 minutes
- Yield: 4 servings 1x
- Category: Side Dish
- Cuisine: American
Ingredients
- 4 medium honeynut squashes (about 1 to 1.5 pounds total)
- 2 tablespoons olive oil
- ½ teaspoon kosher salt
- ¼ teaspoon black pepper
- 4 tablespoons unsalted butter (½ stick)
- 12–15 fresh sage leaves
- Flaky sea salt for finishing (optional)
- Parmesan cheese for serving (optional)
Instructions
- Preheat your oven to 400°F (200°C). Position a rack in the middle of the oven. Line a large rimmed baking sheet with parchment paper or foil.
- Using a sharp chef’s knife, carefully cut each honeynut squash in half lengthwise. Scoop out the seeds and stringy bits with a spoon.
- Place the squash halves cut-side up on the prepared baking sheet. Drizzle with olive oil, then sprinkle with kosher salt and black pepper. Rub the oil and seasoning all over the cut surfaces and skin. Flip the squash halves so they are cut-side down.
- Roast for 20 minutes. The squash should be starting to soften and the skin should look slightly wrinkled.
- While the squash roasts, make the brown butter: Place the unsalted butter in a small saucepan over medium heat. Melt completely, then continue cooking, swirling occasionally, until the butter turns a golden-amber color and smells nutty (about 4-5 minutes). Immediately remove from heat. Add the fresh sage leaves to the hot butter; they will sizzle and crisp in about 30 seconds.
- After 20 minutes, remove the baking sheet from the oven. Using tongs, carefully flip each squash half cut-side up. Pour or brush the brown butter mixture evenly over the cut surfaces, making sure each half gets some crispy sage leaves. Reserve a tablespoon or two for drizzling at the end if desired.
- Return the baking sheet to the oven and roast for another 15-20 minutes, until the squash is tender and caramelized (a fork slides in easily and edges are golden-brown).
- Remove from the oven and let rest 2-3 minutes. Transfer to a serving platter, drizzle with any remaining brown butter, and sprinkle with flaky sea salt and freshly grated Parmesan if using. Serve hot or warm.
Notes
Don’t overcrowd the pan; give squash space to caramelize. Watch brown butter closely—it goes from perfect to burnt in 30 seconds. For extra crispy sage, fry leaves separately. Use a metal spatula to flip tender squash. Don’t skip the flaky sea salt at the end.
Nutrition
- Serving Size: 1 squash half
- Calories: 185
- Sugar: 6
- Sodium: 300
- Fat: 14
- Saturated Fat: 7
- Carbohydrates: 16
- Fiber: 3
- Protein: 2
Keywords: honeynut squash, brown butter, sage, roasted squash, fall side dish, easy recipe, vegetarian, gluten-free


