Love this? Save it for later!
Share the inspiration with your friends
Introduction
“You smell that?” my neighbor asked, nodding toward the faint waft of smoky barbecue drifting through the air one late summer afternoon. I was standing in my own backyard, flipping burgers, when suddenly the unmistakable scent of slow-cooked ribs pulled me over the fence. It turned out that old Mr. Jenkins—known around the block for his quiet demeanor—was firing up his grill for a casual weekend cookout. Watching him work, I realized this wasn’t just any ribs recipe; it was the kind of dish that held decades of memories and secret touches. I mean, who would’ve thought the guy with the rusty red truck and dusty garden shed could be the master of the juiciest, most tender ribs I’d ever tasted?
That day, I forgot to grab the sauce for the burgers, got distracted by his stories, and ended up with a plate piled high with these mouthwatering ribs instead. Honestly, it was a game changer. There’s something about the way Grandpa Jenkins—no relation but a title he earned—slow-smokes those ribs, seasoning every bite with nostalgia and a bit of magic. Maybe you’ve been there, standing in someone else’s backyard, tasting a recipe that sticks with you long after the sun sets.
So here’s my take on what I call Classic Grandpa’s Backyard BBQ Ribs, a recipe that’s all about tenderness, juicy perfection, and that smoky backyard charm. It’s simple enough to make any weekend feel special, yet packs enough flavor to impress even the toughest barbecue critics.
Why You’ll Love This Recipe
After countless weekends testing and tweaking, this recipe has become my go-to for ribs. It’s not just about the taste—it’s the whole experience, the ritual, the way it brings people together. Here’s why you’ll find yourself making these ribs again and again:
- Quick & Easy: While it looks fancy, the prep comes together in under 30 minutes, giving you more time to enjoy your company.
- Simple Ingredients: No obscure spices or hard-to-find sauces—just pantry staples and a few fresh touches.
- Perfect for Backyard Gatherings: Whether it’s a casual family dinner or a weekend hangout, these ribs steal the show every time.
- Crowd-Pleaser: Kids, adults, picky eaters—you name it, everyone asks for seconds.
- Unbelievably Delicious: The secret low-and-slow cooking method locks in moisture, creating tender, fall-off-the-bone ribs bursting with flavor.
This isn’t just another barbecue ribs recipe. The secret lies in the balance of a rich, smoky rub combined with a sweet-and-tangy glaze that caramelizes just right. I’ve tried countless rubs, but this blend brings out the rib’s natural flavor without overpowering it. Plus, the slow cooking means you get that melt-in-your-mouth texture every time.
Honestly, after making these ribs, you might find yourself closing your eyes mid-bite, savoring the perfect harmony of spice and smoke. It’s a little slice of backyard heaven, right on your plate.
What Ingredients You Will Need
This recipe relies on straightforward, wholesome ingredients that come together to create bold flavor and satisfying texture without fuss. Most are staples, so you probably have them on hand already.
- For the Ribs:
- 2 racks of pork baby back ribs (about 2 to 2.5 pounds / 900 to 1100 grams each)
- 1 tablespoon yellow mustard (helps the rub adhere)
- For the Dry Rub:
- 2 tablespoons brown sugar (light or dark, depending on preference)
- 1 tablespoon smoked paprika (adds authentic smoky depth)
- 1 tablespoon kosher salt
- 1 teaspoon black pepper (freshly ground preferred)
- 1 teaspoon garlic powder
- 1 teaspoon onion powder
- ½ teaspoon cayenne pepper (optional, for a hint of heat)
- For the BBQ Glaze:
- ½ cup your favorite BBQ sauce (I like Sweet Baby Ray’s for its balance of sweet and tangy)
- 2 tablespoons honey (for natural sweetness and shine)
- 1 tablespoon apple cider vinegar (brightens the glaze)
If you want to swap ingredients, no problem! Use maple syrup instead of honey for a subtle twist, or chipotle powder instead of cayenne for smoky heat. For a gluten-free option, double-check your BBQ sauce label or make your own simple sauce with tomato paste and spices.
Equipment Needed
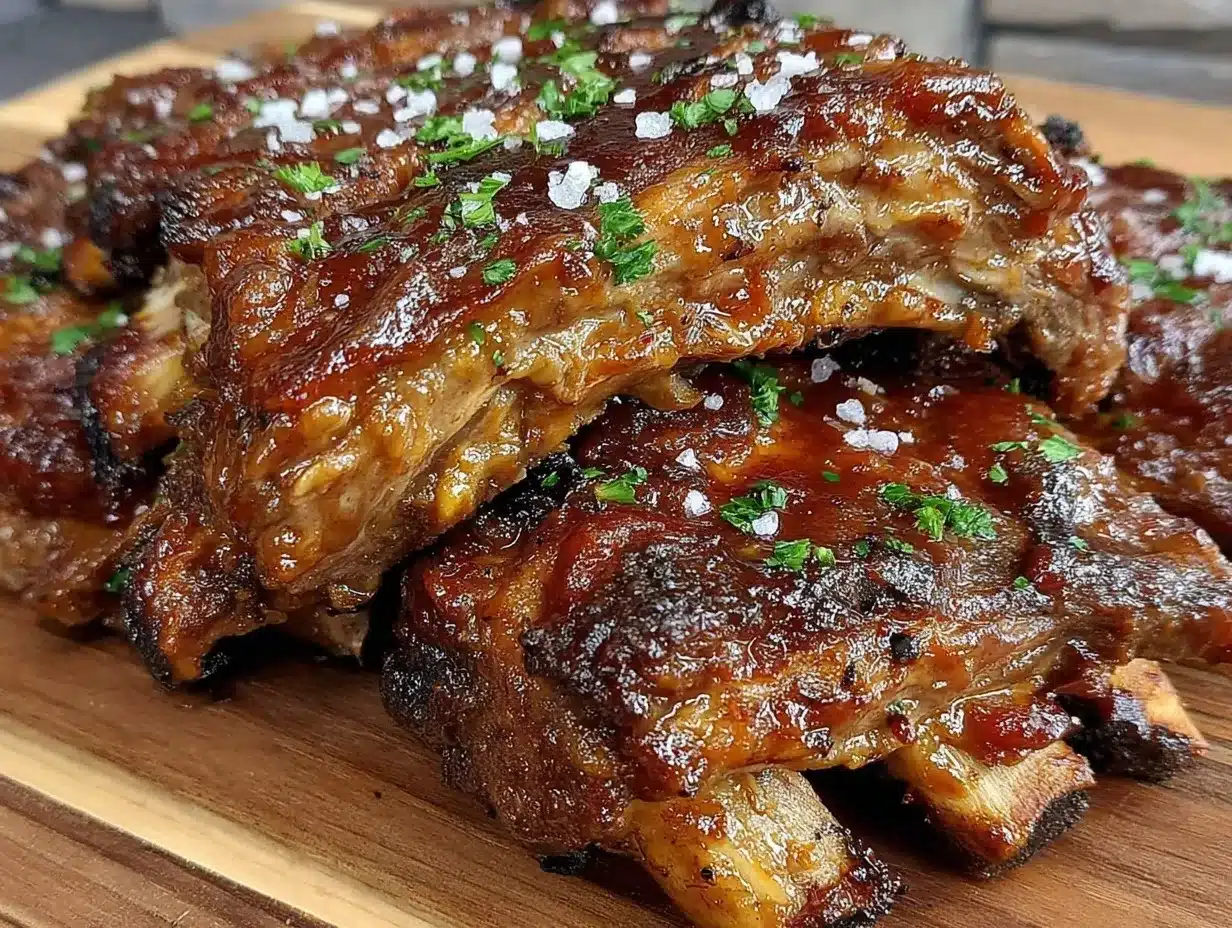
To make Classic Grandpa’s Backyard BBQ Ribs just right, a few kitchen tools come in handy. Don’t worry if you don’t have everything—I’ve included some budget-friendly alternatives too.
- Grill or Smoker: A charcoal or gas grill works great. If you don’t have a smoker, no worries—low and slow on a covered grill does the trick.
- Aluminum Foil: Essential for wrapping the ribs to keep them moist during cooking.
- Basting Brush: For applying the BBQ glaze evenly.
- Sharp Knife: To trim excess fat and cut the ribs into portions.
- Meat Thermometer (optional): Handy for checking doneness but not required if you watch for tenderness cues.
I’ve found that a sturdy grill brush is a lifesaver for cleaning after cooking. Also, investing in a good pair of tongs (like the ones from OXO) makes flipping ribs safer and easier. If you’re on a budget, heavy-duty foil and a silicone brush from the dollar store will work just fine!
Preparation Method
- Prep the Ribs (10 minutes): Remove the silver skin membrane from the back of the ribs. It’s a thin, tough layer that can prevent seasonings from soaking in. Slide a knife under the membrane at one end and gently peel it off—it might take a little patience, but it’s worth it for tenderness.
- Apply Mustard and Dry Rub (5 minutes): Lightly coat both sides of the ribs with yellow mustard. This isn’t for flavor but helps the rub stick. Mix all dry rub ingredients in a bowl and generously sprinkle over both sides of the ribs, pressing the rub in with your fingers.
- Preheat the Grill (10 minutes): Set up your grill for indirect heat at about 250°F (120°C). If using charcoal, bank the coals to one side; for gas, turn on burners on only one side. Place a drip pan filled with water on the cooler side to keep the environment moist.
- Cook the Ribs (2.5 to 3 hours): Place ribs meat side up on the cool side of the grill. Close the lid and cook low and slow. Resist peeking too often—every time you open the lid, heat escapes, and cooking time stretches. After about 1.5 hours, check for tenderness by gently poking with a toothpick or tongs; the meat should feel tender but not falling apart yet.
- Wrap and Continue Cooking (1 hour): Wrap ribs tightly in aluminum foil, sealing the edges. Return to the grill, still on indirect heat, to steam and tenderize. This step is key to juicy, fall-off-the-bone goodness.
- Glaze and Finish (15 minutes): Carefully remove ribs from foil and place back on the grill over direct heat. Brush your BBQ glaze evenly on both sides. Grill for 10 to 15 minutes, turning once and basting again, until the glaze sets and caramelizes. Watch closely to avoid burning.
- Rest and Serve (10 minutes): Let ribs rest off the heat for a few minutes before slicing between the bones. This keeps juices locked in and the meat tender.
Pro tip: If the ribs aren’t tender enough when unwrapped, wrap and cook for another 30 minutes. It’s better to be patient than rush it.
Cooking Tips & Techniques
Making ribs that are tender and juicy isn’t rocket science, but a few tricks can make all the difference. Here’s what I’ve learned through many backyard sessions:
- Low and Slow Wins: Cooking at a low temperature for a longer time breaks down collagen in the meat, making it tender. Don’t rush it by cranking up the heat.
- Don’t Skip the Membrane Removal: It’s a bit fiddly but crucial. Leaving it on can result in chewy ribs.
- Use Indirect Heat: Placing ribs away from direct flames prevents flare-ups and burnt edges.
- Wrap Midway: The foil wrap traps steam and keeps ribs moist. This step is non-negotiable in my book.
- Glaze at the End: Apply BBQ sauce only in the last 10-15 minutes to avoid burning the sugars.
- Rest Before Slicing: Letting ribs rest helps redistribute juices for moist bites.
Once, I got distracted and flipped the ribs too early. The crust didn’t form properly, and the texture was off. Lesson learned: patience is a rib cook’s best friend. Also, juggling other dishes while minding the grill is easier when you set timers and prep ingredients beforehand.
Variations & Adaptations
If you want to switch things up or cater to different dietary needs, here are a few ideas I’ve tried or heard from friends:
- Spicy Kick: Add chipotle powder or cayenne to the rub for a smoky heat.
- Sweet & Fruity: Swap out honey in the glaze for maple syrup or use a fruit-based BBQ sauce like peach or pineapple.
- Smokeless Oven Version: If you don’t have a grill, bake ribs in the oven at 275°F (135°C) wrapped in foil for about 3 hours, then glaze and broil to finish.
- Gluten-Free: Use gluten-free BBQ sauce and make sure your rub ingredients have no hidden gluten additives.
- Herb-Infused: Add dried rosemary or thyme to the rub for an earthy note.
I once tried a coffee-infused rub that added a deep, rich flavor—definitely worth a try if you want to impress guests with something a little different.
Serving & Storage Suggestions
These ribs taste best warm, straight off the grill, with juices still glistening. Serve them piled high on a rustic platter with simple sides like coleslaw, cornbread, or grilled veggies for a classic backyard feast.
Leftovers? No problem. Wrap ribs tightly in foil or plastic wrap and store in the refrigerator for up to 3 days. For longer storage, freeze wrapped ribs for up to 3 months.
To reheat, I like to gently warm them in a low oven (around 275°F / 135°C) wrapped in foil to keep them moist. You can also reapply a light brush of BBQ sauce before reheating to refresh the glaze.
Fun fact: The flavors actually deepen after a day or two in the fridge, making leftovers even tastier.
Nutritional Information & Benefits
Each serving of these ribs (about 1/2 rack) provides approximately 450-550 calories, depending on the sauce and rub quantities. They’re a good source of protein and iron, important for muscle repair and energy.
The spices in the rub, like paprika and garlic powder, have antioxidant properties, while the apple cider vinegar in the glaze aids digestion. For those watching carbs, this recipe is naturally low-carb, especially if you choose a sugar-free BBQ sauce.
Keep in mind the ribs contain pork and common allergens like mustard and honey, so adjust accordingly if needed.
Conclusion
Classic Grandpa’s Backyard BBQ Ribs are more than just a meal—they’re a tradition wrapped up in smoky, tender, juicy perfection. Whether you’re feeding a crowd or enjoying a quiet weekend treat, this recipe brings that unmistakable backyard magic to your table.
Feel free to tweak the spices or cooking method to match your tastes, but trust me, the basics here are foolproof and delicious. I’ve made these ribs countless times, and each time they remind me why simple, well-done food wins hearts every time.
Give them a try, share your rib stories, and let me know how your backyard BBQ adventures go. Happy grilling!
FAQs about Classic Grandpa’s Backyard BBQ Ribs
- Q: How do I know when ribs are done and tender?
A: The meat should be tender enough to pull apart easily with a fork but not so soft it falls off immediately. A toothpick should slide in with little resistance. - Q: Can I use baby back ribs if I only have spare ribs?
A: Yes! Spare ribs take a bit longer to cook (up to 4 hours) but the technique is the same. - Q: What if I don’t have a grill?
A: You can bake ribs in the oven at 275°F (135°C), wrapped in foil, for about 3 hours, then broil with glaze at the end for caramelization. - Q: How do I store leftover ribs?
A: Wrap tightly and refrigerate for up to 3 days, or freeze for up to 3 months. Reheat gently to keep them juicy. - Q: Can I make this recipe ahead of time?
A: Absolutely! You can prep the rubbed ribs a day in advance and store them wrapped in the fridge. Just bring to room temp before cooking.
For more recipes that bring backyard flavors to your table, you might enjoy my crispy garlic chicken or the ever-popular smoky grilled vegetables. These pair wonderfully with ribs for a full summer feast.
Pin This Recipe!
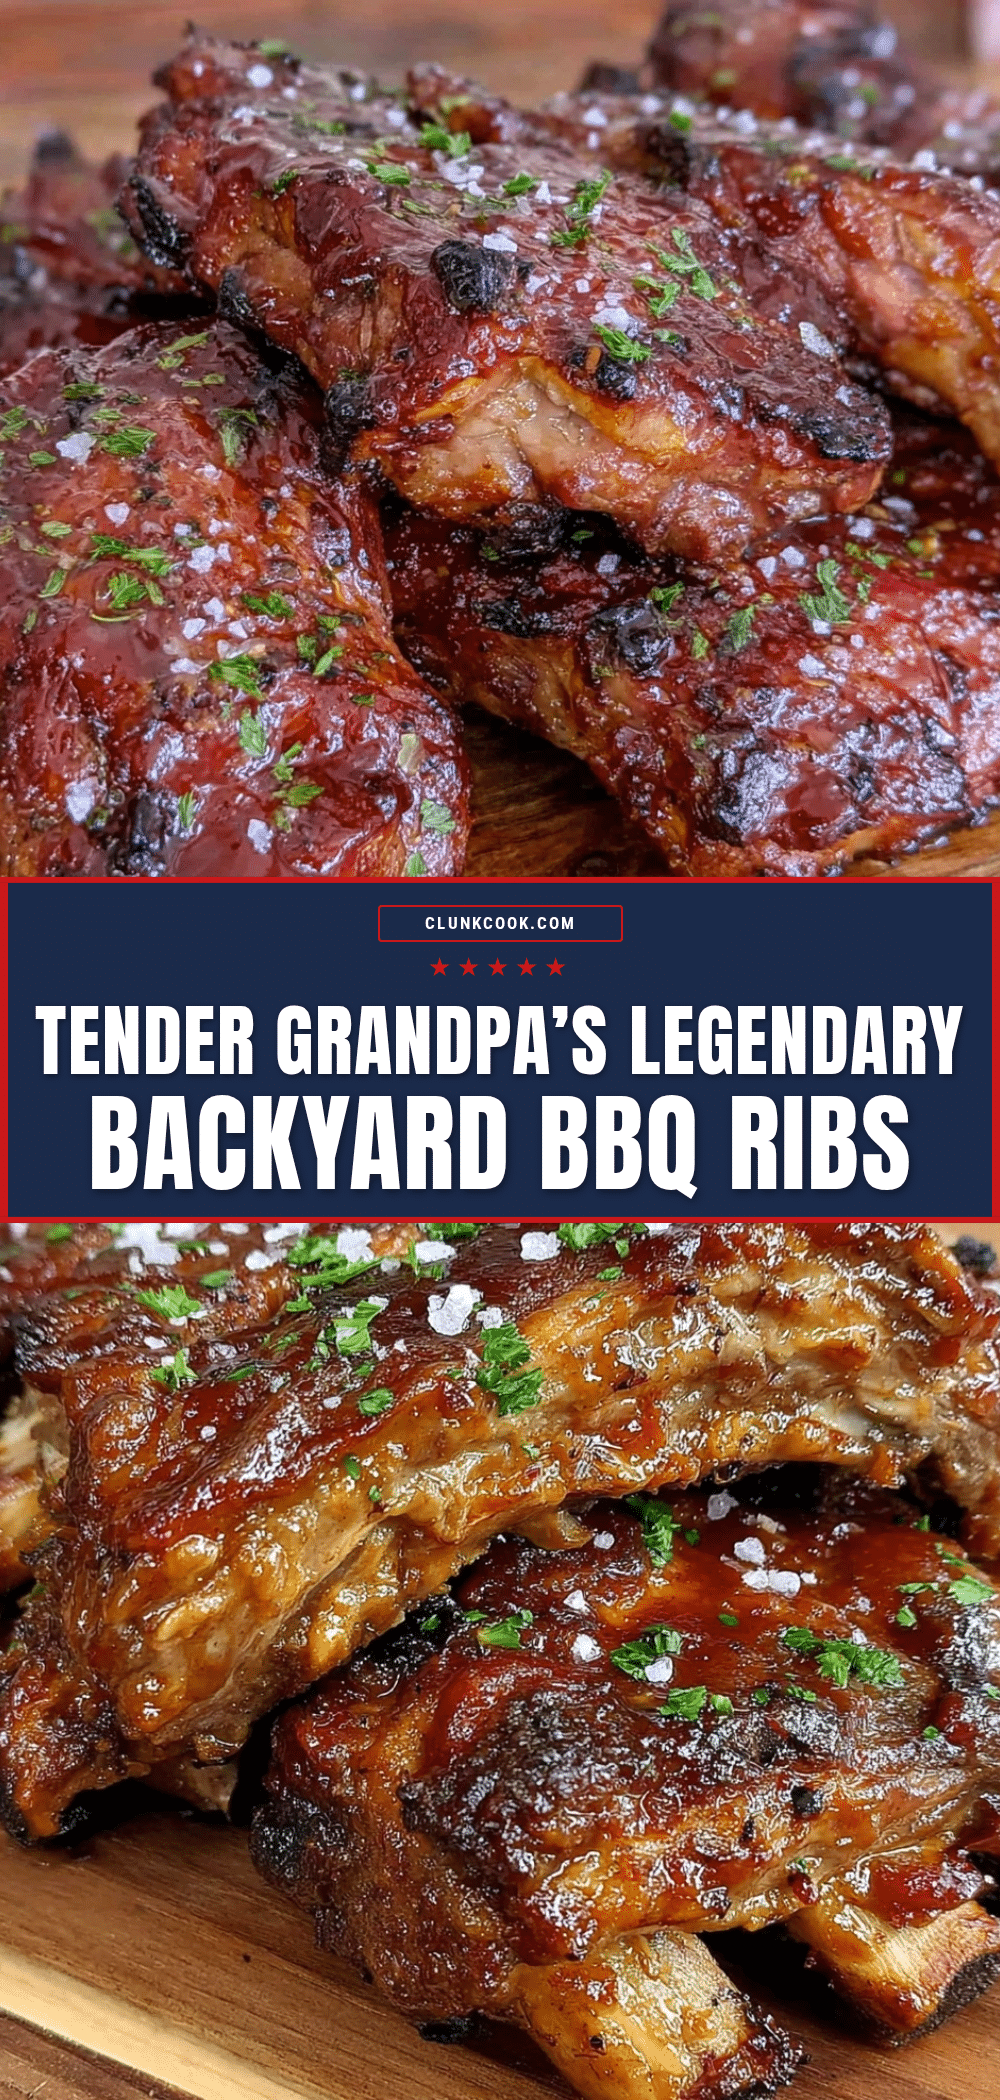
Classic Grandpa’s Backyard BBQ Ribs
A tender, juicy, and smoky ribs recipe inspired by backyard BBQ traditions, featuring a flavorful dry rub and a sweet-tangy glaze for perfect fall-off-the-bone ribs.
- Prep Time: 15 minutes
- Cook Time: 4 hours
- Total Time: 4 hours 15 minutes
- Yield: 4 servings 1x
- Category: Main Course
- Cuisine: American
Ingredients
- 2 racks of pork baby back ribs (about 2 to 2.5 pounds / 900 to 1100 grams each)
- 1 tablespoon yellow mustard
- 2 tablespoons brown sugar (light or dark)
- 1 tablespoon smoked paprika
- 1 tablespoon kosher salt
- 1 teaspoon black pepper (freshly ground preferred)
- 1 teaspoon garlic powder
- 1 teaspoon onion powder
- ½ teaspoon cayenne pepper (optional)
- ½ cup BBQ sauce (e.g., Sweet Baby Ray’s)
- 2 tablespoons honey
- 1 tablespoon apple cider vinegar
Instructions
- Remove the silver skin membrane from the back of the ribs by sliding a knife under it and peeling it off.
- Lightly coat both sides of the ribs with yellow mustard to help the rub adhere.
- Mix all dry rub ingredients in a bowl and generously sprinkle over both sides of the ribs, pressing the rub in with your fingers.
- Preheat the grill for indirect heat at about 250°F (120°C). For charcoal, bank coals to one side; for gas, turn on burners on only one side. Place a drip pan filled with water on the cooler side.
- Place ribs meat side up on the cool side of the grill. Close the lid and cook low and slow for 2.5 to 3 hours. After about 1.5 hours, check for tenderness by gently poking with a toothpick or tongs.
- Wrap ribs tightly in aluminum foil and return to the grill on indirect heat for 1 hour to steam and tenderize.
- Remove ribs from foil and place back on the grill over direct heat. Brush BBQ glaze evenly on both sides. Grill for 10 to 15 minutes, turning once and basting again, until glaze sets and caramelizes.
- Let ribs rest off the heat for 10 minutes before slicing between the bones and serving.
Notes
Remove the silver skin membrane for tenderness. Cook ribs low and slow at 250°F to break down collagen. Wrap ribs in foil midway to keep moist. Apply BBQ glaze only in the last 10-15 minutes to avoid burning. Let ribs rest before slicing. For oven cooking, bake at 275°F wrapped in foil for about 3 hours, then broil with glaze.
Nutrition
- Serving Size: About 1/2 rack of ri
- Calories: 500
- Sugar: 15
- Sodium: 900
- Fat: 30
- Saturated Fat: 10
- Carbohydrates: 20
- Fiber: 1
- Protein: 40
Keywords: BBQ ribs, backyard ribs, smoked ribs, tender ribs, juicy ribs, pork ribs, barbecue, grilling, dry rub, BBQ glaze


