Love this? Save it for later!
Share the inspiration with your friends
I was standing in my neighbor Carol’s driveway last August, helping her unload a ridiculous amount of corn from the back of her minivan. Like, truly absurd amounts. She’d hit up a farm stand on the way home from her sister’s place and somehow ended up with six dozen ears. “What am I going to do with all this?” she laughed, handing me another armful. And honestly, I had the same problem myself — my own fridge was already bursting with a batch I’d picked up two days earlier. That’s when it hit me. There had to be a better way to save summer corn without spending an afternoon blanching and shocking and drying. I mean, who has time for that? So I went home, stared at my mountain of corn, and decided to just toss a few ears in the freezer, completely unprocessed, to see what would happen. Spoiler alert: it worked. And it worked so well that I haven’t blanched a single ear of corn since. You know that feeling when you find a shortcut that actually delivers better results? That’s this.
Why You’ll Love This Recipe
Let me be real with you — freezing corn without blanching sounds like something that shouldn’t work. I thought the same thing. But after testing this method across three different corn seasons (and yes, accidentally ruining a batch or two along the way), I can confidently say this is the only way I’ll ever freeze corn again.
- No Boiling, No Mess : You don’t need a single pot of water. No blanching, no ice baths, no draining. Just corn, a knife, and a freezer bag.
- Maximum Freshness : Blanching can actually dull that bright, sweet corn flavor. Skipping it means you lock in the taste of fresh-picked corn, not cooked corn.
- Perfect for Busy Weeknights : Frozen corn goes straight from the freezer to the pan or pot. No thawing required. Dinner just got ten minutes faster.
- Simple Ingredients : You literally need one ingredient — corn. That’s it. No added sugar, no salt, no preservatives.
- Crowd-Pleaser : I’ve served this to corn snobs who swore they could taste the difference between fresh and frozen. They couldn’t. Not even a little.
What makes this method different from every other corn freezing tutorial out there is the preparation technique. Most people will tell you to blanch for exactly 4 minutes, then shock in ice water, then pat dry. But here’s the thing — that process changes the corn’s texture. It becomes slightly softer, slightly less snappy. By skipping the heat entirely, you preserve that crisp pop that makes summer corn so special. This isn’t just another version of frozen corn. It’s the version that tastes like you picked it five minutes ago, even in the dead of January.
What Ingredients You Will Need
This recipe uses the simplest ingredient list imaginable — which is exactly the point. You don’t need a shopping list for this one. You just need good corn and maybe some freezer bags if you’re running low.
- Fresh corn on the cob , husks removed — Look for ears with tight, green husks and plump kernels that feel firm when you gently squeeze them. The silk should be brown and slightly sticky, not dried out. I personally prefer bi-color or yellow corn for freezing because they tend to hold their sweetness longer, but any variety works.
- Sharp knife — Not technically an ingredient, but you need a good chef’s knife or a corn stripper tool to get clean cuts. A dull knife will mash the kernels instead of slicing them.
- Freezer-safe bags or containers — I recommend using quart-sized freezer bags with a double seal. They lay flat in the freezer and stack beautifully. You can also use rigid plastic containers if you prefer.
- Optional: Butter or oil — Some people like to toss the kernels in a tiny bit of melted butter or oil before freezing to prevent clumping. I’ve tested it both ways and honestly, I skip it. The corn doesn’t clump badly if you freeze it flat and break it apart before cooking.
When selecting corn for freezing, freshness matters more than variety. Corn starts converting its sugar to starch the moment it’s picked, so the sooner you freeze it, the sweeter it will be. I’ve had great results with corn from farmers markets, roadside stands, and even grocery store bins — as long as it was harvested within the last day or two. If you’re unsure, bite a raw kernel. It should taste sweet and milky, not starchy or bland.
For the best texture, avoid corn that feels lightweight or has kernels that look shriveled. Those ears are past their prime and won’t freeze well. And don’t worry about a few imperfections on the husk — just peel them off and check the kernels underneath. Sometimes the ugliest ears hide the sweetest corn.
Equipment Needed
You don’t need much for this method, which is honestly my favorite part. Here’s what you’ll want to have on hand:
- Chef’s knife — A sharp 8-inch chef’s knife makes quick work of cutting kernels off the cob. I’ve been using the same Victorinox knife for years and it’s never let me down.
- Cutting board — Use a large, sturdy cutting board. A rimmed baking sheet placed underneath catches stray kernels and makes cleanup a breeze.
- Large bowl — To hold the cut kernels before bagging.
- Freezer bags — Quart-sized bags are ideal for meal-sized portions. I like Ziploc freezer bags with the double zipper seal.
- Straw or vacuum sealer (optional) — For removing excess air from bags. A simple drinking straw works surprisingly well for manual air removal.
- Permanent marker — Trust me, label your bags. Frozen corn all looks the same, and you will forget which batch is from July versus August.
If you don’t have a sharp knife, a corn stripper tool is a worthwhile investment — they’re usually under ten dollars and make the job go faster. I bought one on a whim and now I use it every corn season.
Preparation Method
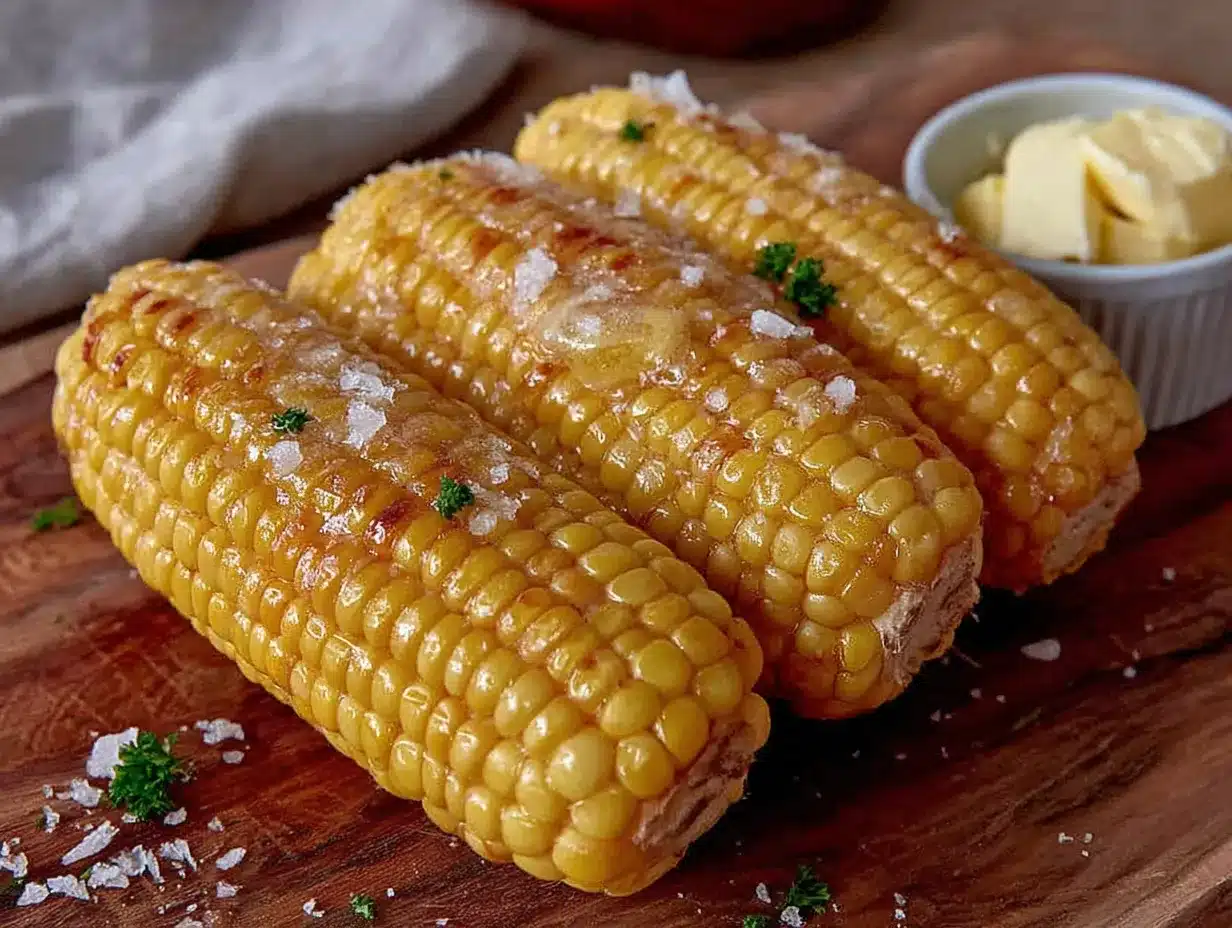
- Husk and clean the corn. Remove all the husks and silk from each ear of corn. Run your hands over the kernels to feel for any stray silks and pick them off. Rinse the ears under cool water to remove any remaining debris. Pat them dry with a clean kitchen towel — you don’t want excess water freezing into ice crystals.
- Set up your workstation. Place a large bowl on your cutting board. If you’re worried about kernels flying everywhere (they will), set the cutting board inside a rimmed baking sheet. This catches the mess and makes cleanup almost nonexistent.
- Cut the kernels off the cob. Hold one ear of corn vertically with the flat end resting on the cutting board. Using a sharp chef’s knife, carefully slice downward, cutting the kernels away from the cob. Rotate the ear as you go until all the kernels are removed. Don’t cut too deep — you want just the kernels, not the tough cob base. Work in sections, about 3 to 4 cuts per ear.
- Optional: Scrape the cobs. After cutting the kernels, run the back of your knife down each cob to scrape out the remaining milky liquid. This adds extra sweetness and creaminess to your frozen corn. I always do this step — it’s like getting free flavor.
- Portion the corn. Decide how much corn you typically use in a meal. For me, that’s about 2 cups per bag, which is roughly the yield from 4 to 5 ears of corn. Scoop the kernels into your freezer bags, leaving about an inch of headspace at the top.
- Remove the air. Seal the bag almost completely, leaving a small opening. Insert a drinking straw into the opening and suck out as much air as possible. Quickly seal the bag the rest of the way while the straw is still inside, then remove the straw. This creates a near-vacuum seal that prevents freezer burn.
- Flatten and freeze. Lay the bags flat on a baking sheet and place them in the freezer. Once they’re frozen solid (usually after 4 to 6 hours), you can stack them vertically or horizontally to save space. Flattening them makes them stack like books — so efficient.
- Label everything. Before you forget, write the date and quantity on each bag with a permanent marker. “July 2024 Corn — 2 cups” will save you from guessing next winter.
Your corn will keep in the freezer for up to 12 months without significant quality loss. I’ve used corn that was frozen for 14 months and it was still perfectly good — just slightly less sweet than fresh-frozen batches.
Cooking Tips & Techniques
Here’s where experience really pays off. I’ve made plenty of mistakes with frozen corn, and I’m sharing them so you don’t have to.
Don’t thaw it first. This is the number one mistake people make. If you thaw frozen corn before cooking, it turns mushy and releases too much water. Cook it straight from frozen for the best texture. Just toss it into a hot pan or pot and let the magic happen.
Use high heat for sautéing. When I want frozen corn that tastes like it came off the grill, I heat a cast iron skillet until it’s smoking hot, add a pat of butter, and dump in the frozen kernels. They sizzle immediately and develop those beautiful charred spots in about 3 to 4 minutes. Add salt and pepper at the very end to avoid drawing out too much moisture.
For soups and chowders, add it at the end. If you’re making corn chowder or adding corn to soup, stir in the frozen kernels during the last 5 minutes of cooking. They’ll heat through without becoming overcooked and rubbery. I learned this the hard way after making a batch of chowder where the corn had completely disintegrated into sad little husks.
Roasting works beautifully. Spread frozen kernels on a baking sheet, drizzle with olive oil, and roast at 425°F for 15 to 20 minutes. They’ll caramelize and concentrate in flavor, almost like roasted corn from a street vendor. Toss halfway through for even browning.
Season wisely. Frozen corn can be a little less sweet than fresh, so I like to add a pinch of sugar or a drizzle of honey when I’m cooking it. A squeeze of lime juice and a sprinkle of chili powder also works wonders for perking up the flavor.
Variations & Adaptations
This method is incredibly flexible, and I’ve experimented with several variations over the years.
Mexican Street Corn Style : Before freezing, toss the kernels with a little lime juice, chili powder, and crumbled cotija cheese. Freeze in single-serving bags. When you’re ready to eat, sauté straight from frozen and finish with a drizzle of crema. It’s like elote in a bowl and takes about 5 minutes.
Herb-Infused Corn : Add a few sprigs of fresh basil, thyme, or rosemary to the bag before sealing. The herbs infuse the corn with subtle flavor as it freezes. When you cook it, remove the herbs first or leave them in for extra aromatic goodness.
Buttery Garlic Corn : Melt a tablespoon of butter with a minced garlic clove, let it cool slightly, and toss it with the kernels before freezing. The garlic flavor permeates the corn beautifully, and you’ve got a ready-to-heat side dish that needs nothing else.
For Creamed Corn Lovers : After cutting the kernels, scrape the cobs thoroughly and mix that milky liquid back into the kernels. Freeze as usual. When you cook it, the corn releases that liquid and creates a naturally creamy sauce without any added cream or milk.
Allergen-Friendly Note : This recipe is naturally gluten-free, dairy-free, vegan, and nut-free. It’s one of those rare recipes that works for almost every dietary restriction without any modifications. If you’re adding flavor variations, just check your add-ins for allergens.
Serving & Storage Suggestions
Frozen corn is incredibly versatile in how you serve it. I’ve used it as a side dish, stirred it into pasta, added it to salads, and even thrown it into breakfast hash.
Serving Temperature : Serve hot, straight from the pan. If you’re using it in cold dishes like salads or salsas, thaw it in the refrigerator overnight and pat it dry before adding. The texture won’t be quite as crisp as fresh, but it’s still perfectly good.
Presentation Ideas : For a simple side dish, pile the corn into a bowl and top with a pat of butter, a sprinkle of smoked paprika, and fresh chives. For something fancier, serve it in individual ramekins with a dollop of crema and a squeeze of lime.
Complementary Dishes : This corn pairs beautifully with grilled meats, fish tacos, black bean burgers, or alongside a simple green salad. It also works great in cornbread, fritters, or mixed into rice pilaf.
Storage Instructions : Once frozen, your corn will keep for up to 12 months in a standard freezer. For longer storage, a deep freezer can extend that to 18 months. Always keep the bags sealed tightly to prevent freezer burn. If you notice ice crystals forming, the corn is still safe to eat — just use it soon after thawing.
Reheating Methods : For the best results, reheat frozen corn in a hot skillet with a little butter or oil. You can also microwave it in a covered bowl with a tablespoon of water for 2 to 3 minutes. Avoid boiling it in water — that turns it into a flavorless mess.
Flavor Development : Interestingly, frozen corn that’s been stored for a month or two often tastes sweeter than corn frozen for just a week. The natural sugars have time to settle and concentrate slightly. Don’t ask me the science behind it, but I’ve noticed it consistently.
Nutritional Information & Benefits
Corn often gets a bad reputation, but it’s actually a pretty nutritious vegetable when prepared simply. Here’s the breakdown for a 1-cup serving of frozen corn (cooked without added fat or salt):
| Nutrient | Amount |
|---|---|
| Calories | 143 |
| Carbohydrates | 31g |
| Fiber | 4g |
| Protein | 5g |
| Fat | 2g |
| Vitamin C | 10% DV |
| Thiamine (B1) | 24% DV |
| Folate | 19% DV |
| Magnesium | 12% DV |
| Potassium | 10% DV |
Corn is a good source of antioxidants like lutein and zeaxanthin, which support eye health. The fiber content helps with digestion and keeps you feeling full longer. Plus, since this method doesn’t require any added salt, sugar, or preservatives, it’s a whole-food option that fits into most eating plans.
Dietary Considerations : This recipe is naturally gluten-free, vegan, and paleo-friendly. It’s also low in fat and sodium, making it heart-healthy. The only potential allergen concern is corn itself — some people with corn allergies need to avoid it entirely.
Conclusion
Look, I know freezing corn without blanching sounds almost too simple to be true. But after three summers of testing, I can tell you with complete confidence — it works. The corn stays sweet, the texture holds up beautifully, and you save yourself an entire afternoon of boiling water and juggling ice baths. Honestly, I don’t know why anyone still blanches corn for freezing. Maybe it’s habit. Maybe it’s tradition. But once you try this method, you’ll never go back.
I love this recipe because it captures summer at its peak and lets me enjoy it all year long. There’s something deeply satisfying about pulling a bag of July corn out of the freezer in February and tasting that same sweet pop of sunshine. It’s like a little time capsule of the season.
So grab some corn while it’s in season, spend 20 minutes cutting kernels, and stash them away for later. Your future self — the one who’s staring at a bare fridge on a Tuesday night — will thank you. And if you come up with your own flavor variations or serving ideas, I’d love to hear about them. Drop a comment below or tag me in your photos. Happy freezing!
Frequently Asked Questions
Can I freeze corn on the cob without blanching?
Yes, absolutely. While most methods recommend blanching, you can freeze whole ears of corn without it. However, the texture won’t be as good as frozen kernels. Whole ears tend to develop more ice crystals and can become mushy. For the best results, cut the kernels off the cob first.
How long does frozen corn last in the freezer?
Properly stored frozen corn will maintain its best quality for 10 to 12 months. After that, it’s still safe to eat but may lose some sweetness and texture. Always store it in airtight freezer bags to prevent freezer burn.
Do I need to thaw frozen corn before cooking?
No, don’t thaw it. Cooking frozen corn straight from the freezer gives you the best texture. Thawing causes the kernels to release moisture and become mushy. Just toss them into a hot pan or pot and cook until heated through.
Can I freeze corn that’s already been cooked?
Yes, you can freeze cooked corn, but the texture will be softer than raw frozen corn. If you have leftover grilled or boiled corn, cut the kernels off and freeze them in the same way. They’re great for soups and chowders where texture matters less.
Why does my frozen corn taste bland?
Frozen corn can lose some of its natural sweetness over time. To fix this, add a pinch of sugar, a drizzle of honey, or a squeeze of lime juice when cooking. You can also toss the kernels with butter and salt to enhance the flavor. Freshness of the original corn also plays a big role — the sweeter it was when frozen, the better it will taste later.
Pin This Recipe!

Easy Freezer Corn on the Cob Without Blanching

Learn how to freeze fresh corn on the cob without blanching. This simple method preserves the sweet, crisp flavor of summer corn for up to 12 months, perfect for busy weeknights.
- Prep Time: 20 minutes
- Cook Time: 0 minutes
- Total Time: 20 minutes
- Yield: 4 servings
- Category: Side Dish
- Cuisine: American
Ingredients
- Fresh corn on the cob, husks removed
- Sharp knife
- Freezer-safe bags or containers
- Optional: Butter or oil
Instructions
- Husk and clean the corn. Remove all husks and silk, rinse under cool water, and pat dry.
- Set up your workstation with a large bowl on a cutting board inside a rimmed baking sheet.
- Cut the kernels off the cob by holding the ear vertically and slicing downward with a sharp chef’s knife. Rotate and repeat until all kernels are removed.
- Optional: Scrape the cobs with the back of the knife to extract the milky liquid for extra sweetness.
- Portion the corn into freezer bags, leaving about 1 inch of headspace. Typically 2 cups per bag (from 4-5 ears).
- Remove air from the bag by sealing almost completely, inserting a straw, sucking out air, then sealing fully.
- Flatten the bags and freeze on a baking sheet for 4-6 hours, then stack to save space.
- Label each bag with the date and quantity using a permanent marker.
Notes
Do not thaw before cooking; cook straight from frozen for best texture. For sautéing, use high heat in a cast iron skillet. For soups, add during the last 5 minutes. Roast at 425°F for 15-20 minutes. Add a pinch of sugar or honey if needed to enhance sweetness.
Nutrition
- Serving Size: 1 cup
- Calories: 143
- Sugar: 6
- Fat: 2
- Carbohydrates: 31
- Fiber: 4
- Protein: 5
Keywords: freezer corn, corn on the cob, no blanch, frozen corn, summer corn, easy freezer recipe


