Love this? Save it for later!
Share the inspiration with your friends
I was at the hardware store last Tuesday—honestly, I was just there for a new showerhead—when the woman in line behind me started talking about lunchboxes. She was maybe seventy, holding a bag of rubber washers, and she just launched into this whole thing about how her grandson refuses to eat sandwiches. “The bread gets soggy,” she said, shaking her head. “He wants something fun.” And then she just… told me. Right there between the plumbing aisle and the checkout. She described rolling up turkey and cheese in a tortilla, slicing them into little spirals, and how the kid calls them “snail sandwiches.” I scribbled it on the back of my receipt. I mean, I had to. It was the most practical, brilliant thing I’d heard all week. I went home, tried it, and honestly? I haven’t made a regular sandwich for lunch since. That chance encounter at the hardware store completely changed my lunch game. These Quick Turkey & Cheddar Pinwheel Lunchbox Roll-Ups are now my go-to for busy mornings, and I think you’re going to love them too. Maybe you’ve been stuck in a lunch rut, staring at the same sad bread and deli meat combo? Let me tell you—this little twist makes all the difference.
Why You’ll Love This Recipe
Let’s be real for a second. I’ve tested a lot of lunch ideas over the years, and most of them fall apart—literally or figuratively. These pinwheels? They hold up. I’ve made them for my own chaotic weekday lunches, for picnics, and even for a road trip snack. They just work.
- Quick & Easy: From start to finish, we’re talking ten minutes. That’s less time than it takes to decide what takeout to order.
- Simple Ingredients: You probably have everything in your fridge right now. Tortillas, turkey, cheese, and a little spread. No fancy grocery runs needed.
- Perfect for Lunchboxes: Kids and adults love them. They feel like a treat, but they’re just smartly assembled ingredients.
- Crowd-Pleaser: I’ve brought these to potlucks and watched them disappear. Seriously, everyone reaches for the spirals first.
- Unbelievably Delicious: The combination of soft tortilla, creamy spread, savory turkey, and sharp cheddar is simple perfection.
What makes this different from every other wrap recipe? It’s the technique. Rolling them tight and letting them rest for just a minute creates those perfect, no-fall-apart spirals. No fancy equipment, no complicated steps—just a little know-how that makes a big difference. This isn’t just another lunch idea; it’s the one you’ll come back to again and again.
What Ingredients You Will Need
This recipe uses simple, everyday ingredients to create something that feels surprisingly special. The key is using good-quality components, since there aren’t many of them.
- Large flour tortillas (8-inch or 10-inch): I prefer Mission or Guerrero for their flexibility. They roll without cracking. For a whole wheat option, try Tumaro’s.
- Deli turkey slices (8-10 slices): Look for oven-roasted or smoked turkey. I like Boar’s Head or the store-brand oven-roasted from my local deli counter. Avoid pre-packaged “lunch meat” that’s too watery.
- Cheddar cheese slices (4-6 slices): Sharp cheddar gives the best flavor. You can use mild or medium if you prefer. I like Tillamook or Cabot. Pro tip: slice them thin so they roll easily.
- Cream cheese (2-3 tablespoons), softened: This is the “glue” that holds everything together. Use full-fat for best results. Let it sit on the counter for 10 minutes before using.
- Optional spreads: You can swap cream cheese for hummus, ranch dressing, or even a thin layer of pesto. Each gives a different flavor profile.
- Salt and pepper (a pinch): Optional, but a tiny sprinkle on the turkey before rolling adds depth.
Honestly, that’s it. Five ingredients, and you’re on your way to lunchbox greatness. The beauty of this recipe is its flexibility—you can swap the turkey for ham or roast beef, and the cheddar for provolone or Swiss. Just keep the tortilla and the spread constant, and you’ll have success every time.
Equipment Needed
You don’t need a fancy kitchen to make these roll-ups. Here’s what I use:
- Cutting board: Any size works. I prefer a large wooden one because it doesn’t slide around.
- Sharp knife: A serrated bread knife is actually best for slicing pinwheels cleanly. A chef’s knife works too, but it can squish the roll.
- Butter knife or offset spatula: For spreading the cream cheese evenly.
- Plastic wrap: This is optional but helpful. Wrapping the rolled tortilla tightly before slicing helps keep the shape.
- Toothpicks (optional): If you’re packing these for a lunchbox, a toothpick through each pinwheel keeps them from unrolling.
I’ve made these with nothing but a butter knife and a plate in a pinch. It’s not the prettiest, but it works. If you’re investing in a good knife, this is the recipe to justify it.
Preparation Method
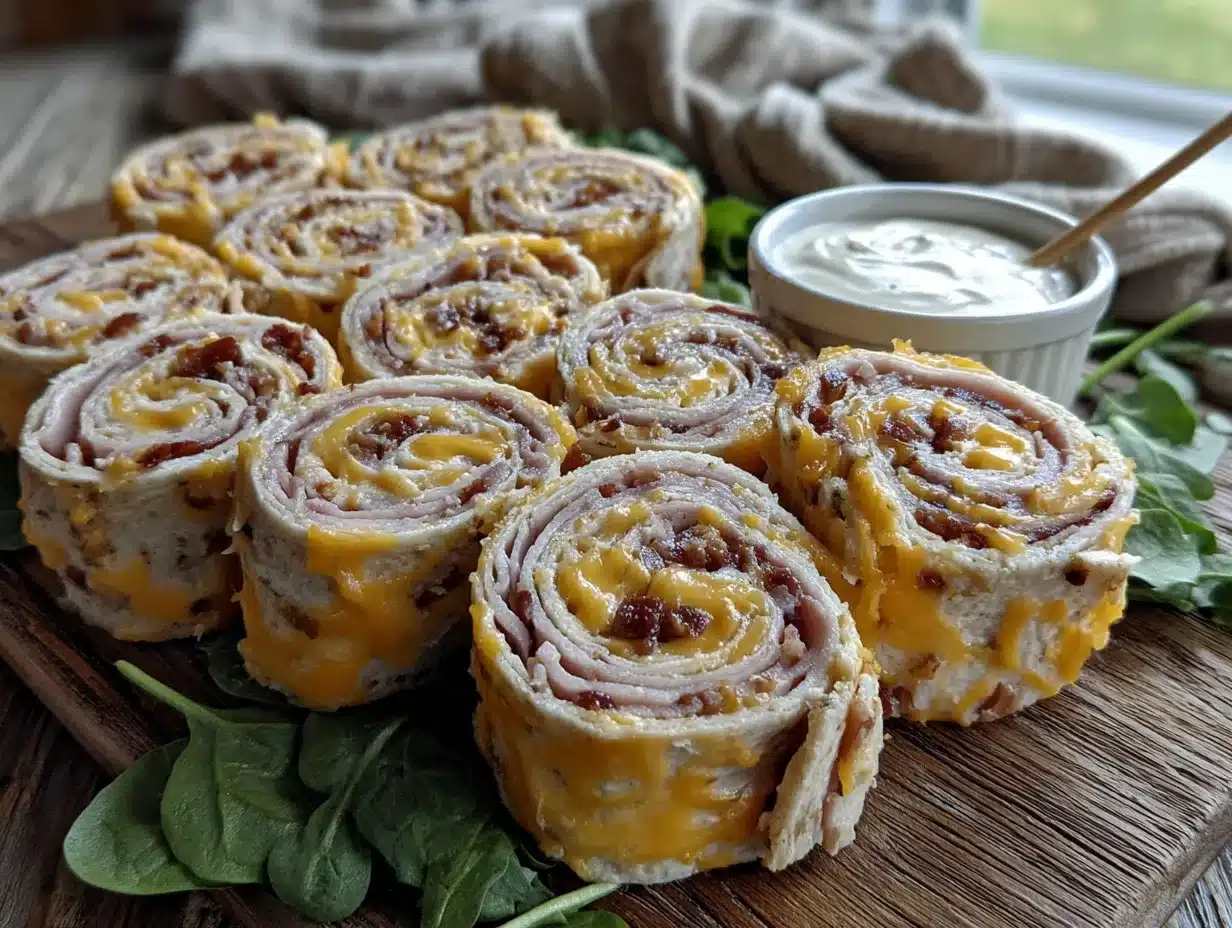
Let’s get rolling. This is where the magic happens. Follow these steps, and you’ll have perfect pinwheels every time.
- Soften the cream cheese: Take your cream cheese out of the fridge 10-15 minutes before you start. You want it spreadable, not cold and stiff. If you forgot, microwave it for 5-10 seconds.
- Lay out the tortilla: Place one large flour tortilla flat on your cutting board. Make sure it’s at room temperature—cold tortillas crack when rolled.
- Spread the cream cheese: Using your butter knife or offset spatula, spread an even, thin layer of cream cheese over the entire surface of the tortilla. Leave about a half-inch border around the edges. This acts as the glue.
- Layer the turkey: Place 4-5 slices of deli turkey flat over the cream cheese. Overlap them slightly so there are no gaps. Don’t pile them too thick—you want a single, even layer.
- Add the cheese: Place 2-3 slices of cheddar cheese on top of the turkey. If your slices are large, you can tear them in half to fit better. Again, keep it even.
- Season (optional): Sprinkle a tiny pinch of salt and pepper over the cheese. This is a small step, but it makes the flavors pop.
- Roll it tight: Starting from one edge, tightly roll the tortilla into a log. Use your fingers to keep the filling snug as you go. Roll it like you mean it—a loose roll means messy pinwheels.
- Wrap and rest: Wrap the rolled tortilla tightly in plastic wrap. Twist the ends like a candy wrapper. Let it rest in the fridge for 5-10 minutes. This sets the cream cheese and makes slicing cleaner. If you’re in a hurry, skip this step—just slice gently.
- Slice into pinwheels: Unwrap the log and place it on the cutting board. Using a sharp serrated knife, slice the log into 1-inch thick rounds. Use a gentle sawing motion—don’t press down hard or you’ll squish the roll.
- Serve or pack: Arrange the pinwheels on a plate or pack them directly into a lunchbox. They’re ready to go.
I’ve learned the hard way that rushing the roll is a mistake. My first batch looked like sad, flattened blobs. Now I take my time, and the spirals come out picture-perfect. You’ll get the hang of it after one or two tries.
Cooking Tips & Techniques
I’ve made these pinwheels at least thirty times, and I’ve messed up plenty. Here’s what I’ve learned so you don’t have to repeat my mistakes.
The biggest mistake? Using too much filling. I know it’s tempting to pile on the turkey and cheese, but less is more. A thick filling makes the roll bulky and the pinwheels fall apart. Keep it thin and even.
Another common issue: The tortilla cracking. This happens when the tortilla is too cold. Let it sit on the counter for a few minutes before you start. If you’re using corn tortillas (which I don’t recommend for this recipe), you’ll definitely have cracking issues.
Timing is everything: If you’re making these for a lunchbox, assemble them the night before. Wrap them tightly in plastic wrap and store them in the fridge. Slice them in the morning right before packing. The slices stay fresher that way.
My personal pro tip: Use an angled knife for slicing. A serrated knife with a slight curve lets you use a gentle sawing motion that doesn’t crush the roll. I bought a cheap one at a kitchen supply store, and it made all the difference.
Multitasking strategy: While the rolled tortilla rests in the fridge, wash your cutting board and knife. Or pack the rest of the lunchbox. That five-minute rest is the perfect window to get ahead.
Variations & Adaptations
One of the best things about this recipe is how easy it is to change up. Here are some variations I’ve tried and loved.
- Veggie-Packed Version: Add thin slices of cucumber, bell pepper, or avocado before rolling. Pat the veggies dry with a paper towel first to avoid sogginess. I like adding a few spinach leaves for extra color.
- Spicy Southwest Style: Swap the cream cheese for a layer of spicy hummus or chipotle mayo. Use pepper jack cheese instead of cheddar. Add a few slices of jalapeño if you’re brave.
- Italian Herb Twist: Spread a thin layer of pesto instead of cream cheese. Use provolone or mozzarella, and add a few slices of salami or prosciutto along with the turkey. Sprinkle dried oregano on top.
- Gluten-Free Option: Use gluten-free tortillas. They can be a bit more brittle, so warm them slightly in the microwave for 10 seconds before rolling. I like the Cassava Flour tortillas from Siete.
- Dairy-Free Adaptation: Use dairy-free cream cheese and dairy-free cheddar-style slices. Kite Hill makes a good cream cheese alternative. The texture is slightly different, but the flavor is still great.
I once made a batch with everything bagel seasoning sprinkled inside. It was a happy accident—I was making bagels and had seasoning on my hands. Now it’s my favorite variation. Don’t be afraid to experiment!
Serving & Storage Suggestions
These pinwheels are incredibly versatile. Here’s how to serve and store them for the best experience.
Serving temperature: They’re best served cold or at room temperature. Straight from the fridge is fine, but letting them sit for 5 minutes takes the chill off and brings out the flavors.
Presentation: Arrange the pinwheels on a plate with the spiral facing up. Garnish with a few fresh herbs like parsley or chives if you’re feeling fancy. For lunchboxes, nestle them in a compartment with some grapes or baby carrots.
Complementary dishes: These pair beautifully with a simple side salad, a cup of tomato soup, or some crunchy veggie sticks. For a full lunch spread, add a handful of chips or a piece of fruit.
Storage instructions: Store leftover pinwheels in an airtight container in the refrigerator for up to 3 days. Place a paper towel at the bottom of the container to absorb any excess moisture. Change the paper towel if it gets damp.
Reheating: Honestly, I don’t recommend reheating these. They’re designed to be enjoyed cold. If you absolutely must warm them, pop them in a microwave for 10 seconds, but the texture of the tortilla will soften.
Freezer instructions: You can freeze the un-sliced roll. Wrap it tightly in plastic wrap, then in aluminum foil. Freeze for up to 2 months. Thaw in the refrigerator overnight, then slice and serve. The texture is slightly softer after freezing, but it’s still good.
Flavor development: These pinwheels actually taste better after an hour or two in the fridge. The flavors meld together, and the cream cheese sets up perfectly. Make them ahead for the best results.
Nutritional Information & Benefits
Here’s a rough estimate for one serving (about 4-5 pinwheels, made with the standard ingredients):
- Calories: Approximately 280-320
- Protein: 20-25 grams
- Fat: 14-18 grams
- Carbohydrates: 22-26 grams
- Fiber: 2-3 grams
- Sugar: 2-4 grams
Health benefits of key ingredients: Turkey is a lean source of protein, which helps keep you full and supports muscle health. Cheddar cheese provides calcium for strong bones. The cream cheese adds a small amount of fat that helps with satiety. Using whole wheat tortillas adds extra fiber.
Dietary considerations: This recipe can be made gluten-free, dairy-free, or lower in carbs by using appropriate substitutes. It’s naturally nut-free (unless you add pesto with pine nuts).
Potential allergens: Contains wheat, dairy, and possibly tree nuts (if using pesto). Always check your ingredient labels.
I personally love that these pinwheels give me a balanced lunch without feeling heavy. They’re not a “health food,” but they’re a smart, satisfying choice that doesn’t leave me crashing an hour later.
Conclusion
So there you have it—a ten-minute lunch solution that actually works. These Quick Turkey & Cheddar Pinwheel Lunchbox Roll-Ups came to me from a stranger in a hardware store, and they’ve been a staple in my kitchen ever since. They’re proof that the best ideas often come from the most unexpected places.
I love this recipe because it’s forgiving. You can swap ingredients, adjust the size, or add your own twist, and it still comes out delicious. It’s the kind of recipe that makes you feel like a kitchen pro, even on a busy Tuesday morning.
Now I want to hear from you. Have you tried making these? What’s your favorite filling combination? Drop a comment below and share your version. And if you found this helpful, share it with a friend who’s tired of soggy sandwiches. Let’s make lunch fun again!
Frequently Asked Questions
Can I make these pinwheels ahead of time?
Yes! Assemble and roll the tortillas up to 24 hours in advance. Wrap them tightly in plastic wrap and store in the fridge. Slice just before serving for the best presentation.
How do I keep the pinwheels from getting soggy?
Pat your turkey slices dry with a paper towel before assembling. Also, avoid using wet ingredients like sliced tomatoes or overly moist spreads. The cream cheese layer actually helps create a barrier that prevents sogginess.
Can I use a different type of cheese?
Absolutely. Provolone, Swiss, mozzarella, or pepper jack all work great. Just make sure the cheese slices are thin so they roll easily. Hard cheeses like aged cheddar might crack, so use younger, more flexible slices.
What if I don’t have cream cheese?
You can substitute with hummus, ranch dressing, mashed avocado, or even a thin layer of mayonnaise. Each will give a different flavor and texture. Hummus makes them a bit heartier, while avocado adds creaminess.
How long do these pinwheels last in the fridge?
Stored in an airtight container, they’ll stay fresh for up to 3 days. After that, the tortilla starts to soften and the edges may dry out. I recommend making only what you’ll eat within that window for the best taste.
Pin This Recipe!
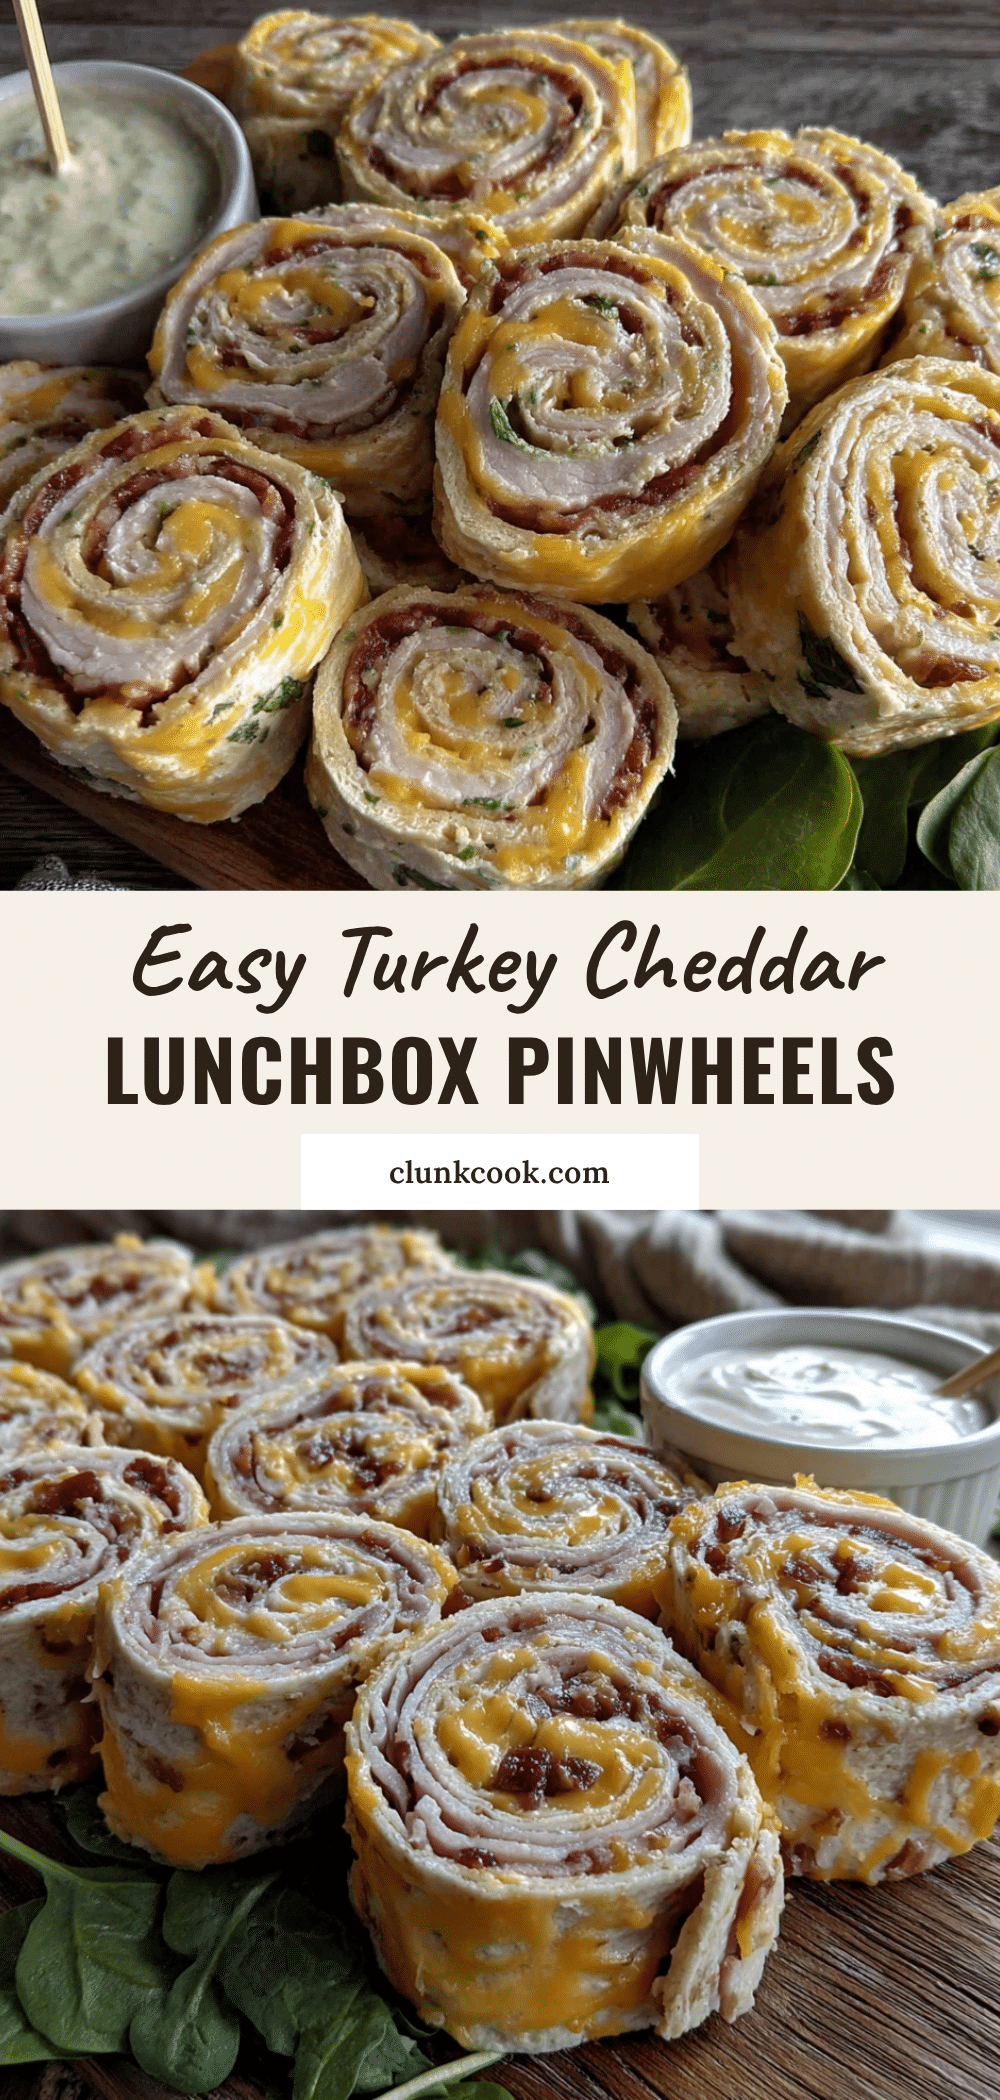
Quick Turkey & Cheddar Pinwheel Lunchbox Roll-Ups

These quick and easy turkey and cheddar pinwheel roll-ups are perfect for lunchboxes, picnics, or a simple snack. Made with just a few ingredients, they come together in 10 minutes and are a fun twist on the classic sandwich.
- Prep Time: 10 minutes
- Cook Time: 0 minutes
- Total Time: 10 minutes
- Yield: 4 servings 1x
- Category: Lunch
- Cuisine: American
Ingredients
- 4 large flour tortillas (8-inch or 10-inch)
- 8–10 slices deli turkey (oven-roasted or smoked)
- 4–6 slices cheddar cheese (sharp cheddar preferred)
- 2–3 tablespoons cream cheese, softened
- Salt and pepper to taste (optional)
Instructions
- Soften the cream cheese by letting it sit at room temperature for 10-15 minutes, or microwave for 5-10 seconds.
- Lay one tortilla flat on a cutting board. Ensure it is at room temperature to prevent cracking.
- Spread an even, thin layer of cream cheese over the entire tortilla, leaving a half-inch border around the edges.
- Place 4-5 slices of turkey flat over the cream cheese, overlapping slightly to cover evenly.
- Add 2-3 slices of cheddar cheese on top of the turkey, tearing slices if needed to fit.
- Optionally, sprinkle a pinch of salt and pepper over the cheese.
- Starting from one edge, tightly roll the tortilla into a log, keeping the filling snug.
- Wrap the rolled tortilla tightly in plastic wrap and refrigerate for 5-10 minutes to set.
- Unwrap the log and slice into 1-inch thick rounds using a sharp serrated knife with a gentle sawing motion.
- Serve immediately or pack into lunchboxes. For best results, slice just before serving.
Notes
For best results, let the rolled tortilla rest in the fridge for 5-10 minutes before slicing. Pat turkey slices dry to prevent sogginess. Use room temperature tortillas to avoid cracking. These pinwheels can be made up to 24 hours in advance; slice just before serving.
Nutrition
- Serving Size: 4-5 pinwheels
- Calories: 300
- Sugar: 3
- Sodium: 800
- Fat: 16
- Saturated Fat: 8
- Carbohydrates: 24
- Fiber: 2
- Protein: 22
Keywords: turkey pinwheels, cheddar roll-ups, lunchbox recipe, easy lunch, no-cook recipe, kid-friendly lunch


