Love this? Save it for later!
Share the inspiration with your friends
I was standing in the fluorescent-lit aisle of a hardware store, staring at a wall of paint rollers, when the plumber’s assistant started talking about breakfast. I wasn’t expecting cooking advice from the guy holding a wrench and looking tired, but there I was, holding a can of primer, listening to him describe exactly how to make honey oat protein balls. It was a Tuesday, which is already a weird day for food epiphanies, but this was something else. He wasn’t talking about gourmet meals or complicated meal prep trends. He was talking about something he threw together in five minutes before his van broke down three towns over.
He said he had no oven, no mixer, and zero patience for cleanup. All he had was a bowl, some oats, honey, and whatever protein powder was left in the bottom of a shaker bottle. Honestly, I thought he was joking. I mean, protein balls usually sound like something you’d buy at a fancy gym that costs eight dollars for three of them. But he pulled out his phone and showed me a picture. It looked messy but real. Sticky, golden, and packed with stuff that actually kept him going during long shifts.
I forgot my paint roller in the cart. I walked to the checkout with nothing but a mental note to buy oats and honey. I was skeptical, you know? I’ve tried those store-bought energy bites before, and they tasted like sweetened cardboard. But this guy’s version had a specific texture he described—chewy, not crumbly. He mentioned the honey was key, not just for sweetness but for binding everything together without making it heavy. I got home and immediately raided my pantry. I didn’t have protein powder, so I used crushed nuts and seeds instead. It was a mess. I got sticky fingers, spilled some oats on the counter, and had to scrape the mixture off my hands with a butter knife.
That first bite was unexpected. It wasn’t dry. It wasn’t cloying. It tasted like comfort and energy at the same time. Maybe you’ve been there, standing in your kitchen at 3 PM, hungry but too tired to cook, wondering if you should just eat another cookie? I didn’t. I ate one of these. And then I made another batch. I keep making them because they are the only thing that saves me when my energy crashes. They are simple, cheap, and they don’t require a single dish to wash. This recipe stayed with me because it proved that good food doesn’t need a fancy kitchen or an hour of your time. It just needs the right mix of simple ingredients and a little bit of honey magic.
Why You’ll Love This Recipe
Let’s be real for a second. Most “healthy” snack recipes are a lot of work for very little reward. You spend twenty minutes chopping, blending, and worrying if your ingredients are at room temperature. This recipe is different because it respects your time. I’ve tested this version dozens of times, from rushed mornings to lazy Sundays, and it never fails to deliver. It’s not just another copy-paste recipe from the internet; it’s a tested method that balances flavor, texture, and nutrition perfectly.
Here is why this recipe earns a permanent spot in your kitchen routine:
- Quick & Easy: You can have these ready in under 10 minutes. No baking, no waiting for timers, no preheating the oven. It is perfect for busy weeknights or last-minute cravings when you need fuel fast.
- Simple Ingredients: You likely already have everything in your kitchen right now. No fancy grocery trips needed. Just oats, honey, nut butter, and a few extras. It’s pantry-friendly and stress-free.
- Perfect for On-the-Go: Whether you are heading to the gym, packing a lunch for work, or feeding kids after school, these are portable and non-messy (once chilled). They are great for potlucks, trail mixes, or cozy dinners when you need a quick side.
- Crowd-Pleaser: I’ve handed these out to picky eaters, fitness buffs, and office coworkers. Everyone loves them. The sweet, nutty flavor is universally appealing, and the texture is satisfying without being too heavy.
- Unbelievably Delicious: The combination of sticky honey and toasted oats creates a next-level comfort food experience. It’s not just a “diet” food; it tastes like a treat, which makes sticking to healthy habits so much easier.
What makes this version stand out from the rest is the balance. Many no-bake recipes turn out too hard or too dry. This one uses the right ratio of wet to dry ingredients to create a soft, chewy center with a slightly firm exterior. I also found that letting them rest in the fridge is the secret step that transforms them from a sticky mess into perfect, bite-sized spheres. It’s the kind of recipe that makes you close your eyes after the first bite. It’s comfort food reimagined—healthier, faster, but with the same soul-soothing satisfaction. It’s perfect for impressing guests without stress, or turning a simple meal into something memorable.
What Ingredients You Will Need
This recipe uses simple, wholesome ingredients to deliver bold flavor and satisfying texture without the fuss. The beauty of these honey oat protein balls lies in their versatility. You don’t need expensive superfoods or hard-to-find items. Most of these are staples you probably already have hiding in your pantry or fridge. The key is quality over quantity—using good honey and natural nut butter makes a huge difference in the final taste.
Here is what you will need to get started:
- Rolled Oats (Old-Fashioned): 1.5 cups. These provide the base and chewy texture. Avoid quick oats if you can, as they make the balls too dense. I recommend using a trusted brand like Bob’s Red Mill for consistent size and chewiness.
- Sticky Honey: 1/2 cup. This is the primary sweetener and binder. Raw honey adds a floral note, but regular honey works fine. It helps hold everything together when chilled.
- Natural Peanut Butter or Almond Butter: 1/2 cup. Use a runny, natural variety for best mixing. If your butter is stiff, warm it slightly in the microwave for 10 seconds. This adds protein and healthy fats.
- Ground Flaxseed: 2 tablespoons. This adds fiber and omega-3s. You can use chia seeds as a substitute if you prefer a slightly crunchier texture.
- Protein Powder (Optional): 1 scoop. Vanilla or unflavored works best. If you don’t use protein powder, you can increase the oats by 2 tablespoons. I prefer whey isolate for a smoother texture.
- Mini Chocolate Chips: 1/4 cup. For a treat-like vibe. You can swap these for dried cranberries or chopped nuts if you want to avoid sugar.
- Vanilla Extract: 1 teaspoon. Adds depth and warmth. Don’t skip this; it makes the honey taste more complex.
- Salt: A pinch. Essential to balance the sweetness. It highlights the nutty flavors.
If you are looking for substitutions, you can use maple syrup instead of honey for a vegan option, though the texture will be slightly softer. For a nut-free version, swap the nut butter for sunflower seed butter. In summer, you might add a handful of fresh blueberries, but be aware this will make the mixture wetter, so you may need extra oats. The goal is a mixable dough that isn’t too sticky to handle.
Equipment Needed
You don’t need a lot of fancy gear to make these, which is part of the appeal. The main tool you need is a medium-sized mixing bowl. A wide bowl is better than a deep one so you can mix everything by hand without splattering. I usually use a ceramic bowl because it has a bit of weight and doesn’t slide around on the counter.
You will also need a spoon or a sturdy spatula for mixing. A silicone spatula is ideal because it scrapes the sides of the bowl and gets every bit of sticky honey out. If you don’t have one, a large wooden spoon works too, though it might take a bit more elbow grease.
For rolling the balls, you need a clean surface. A baking sheet lined with parchment paper is the easiest way to set them once they are formed. Parchment paper prevents sticking and makes cleanup a breeze. If you don’t have parchment, lightly greasing the baking sheet with coconut oil works, but parchment is definitely the better option for consistency.
Finally, you need a refrigerator. These balls need to chill for at least 30 minutes to firm up. Without chilling, they will be too soft to handle. A standard fridge is perfect. If you are in a hurry, you can put them in the freezer for 15 minutes, but the fridge gives the best texture. No specialized equipment is required, making this a budget-friendly project for any kitchen.
Preparation Method
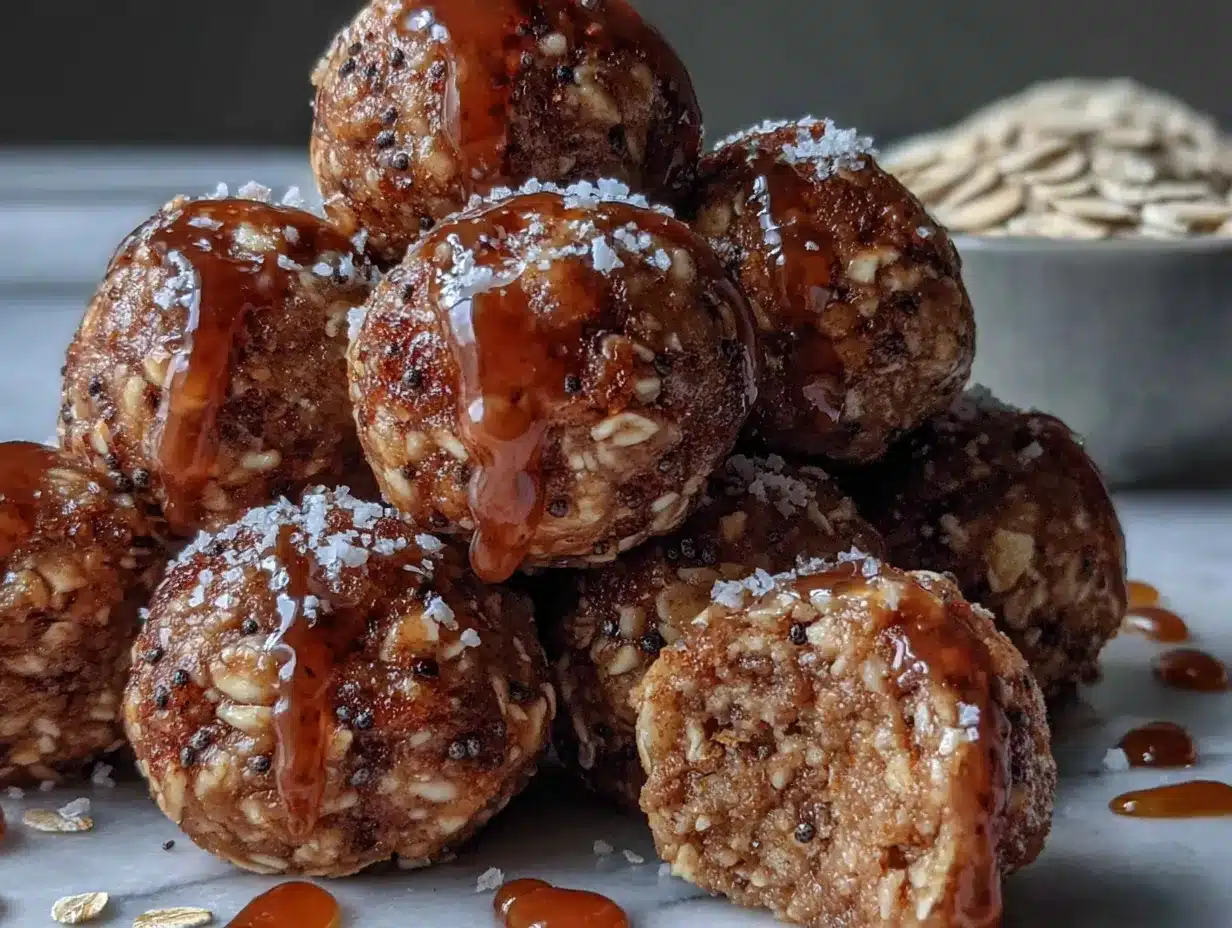
Making these honey oat protein balls is straightforward, but there are a few small steps that ensure they come out right. Follow these steps carefully for the best results.
- Mix the Wet Ingredients (2 minutes): In your medium bowl, combine the honey, nut butter, and vanilla extract. If your nut butter is stiff, microwave it for 15 seconds to soften it. Whisk them together with a spoon until the mixture is smooth and creamy. This should take about a minute. If it looks too thick to stir, add a teaspoon of water or milk to loosen it up.
- Add the Dry Ingredients (1 minute): Pour in the rolled oats, ground flaxseed, protein powder (if using), and salt. Stir vigorously. The mixture will look dry and shaggy at first. Keep stirring until all the oats are coated and the mixture starts to clump together. This indicates the honey is binding the oats.
- Check the Consistency (1 minute): Stop and look at the dough. It should hold together when you squeeze a handful. If it is too crumbly and falls apart, add another tablespoon of honey or nut butter. If it is too sticky and won’t form a ball, add another tablespoon of oats. This step is crucial for getting the texture right.
- Fold in Extras (30 seconds): If you are adding chocolate chips, dried fruit, or nuts, fold them in now. Be gentle so you don’t crush the oats. Mix just until they are evenly distributed.
- Chill the Mixture (20 minutes): Place the bowl in the refrigerator. Letting the mixture chill firms up the honey and nut butter, making it much easier to roll. Do not skip this step, or you will end up with sticky fingers and misshapen blobs.
- Roll into Balls (5 minutes): Remove the bowl from the fridge. Wet your hands slightly with water or oil to prevent sticking. Scoop out about a tablespoon of mixture and roll it between your palms to form a smooth ball. Place it on the parchment-lined baking sheet. Repeat with the remaining mixture. You should get about 12-15 balls depending on size.
- Final Chill (30 minutes): Place the baking sheet in the refrigerator for at least 30 minutes. This sets the balls so they are firm enough to eat and transport. After 30 minutes, they are ready to enjoy.
Cooking Tips & Techniques
Even though there is no actual cooking involved, there are techniques that separate a good batch from a great one. The biggest mistake people make is rushing the mixing process. You need to ensure the honey is fully incorporated into the oats. If you see dry spots of oats, keep mixing. It might take an extra minute, but it prevents dry bites later.
Another common issue is the temperature of your ingredients. If your kitchen is very warm, the nut butter and honey might be too soft. In that case, chill your nut butter in the fridge for 10 minutes before starting. Conversely, if your honey is crystallized and hard to stir, warm it slightly. Room temperature ingredients mix more evenly and create a smoother dough.
I once tried making these with cold straight-from-the-fridge nut butter. It was a nightmare. The mixture was lumpy and impossible to roll. Lesson learned: always soften your wet ingredients first. It saves time and frustration.
Also, don’t over-press the balls when rolling them. You want them to be compact, but not dense like a rock. A gentle rolling motion between your palms is all you need. If you press too hard, they might crack or become too hard to chew. Aim for a soft, chewy texture.
Timing is also key. If you make a huge batch, store them properly. They stay fresh in the fridge for up to two weeks. If you want to keep them longer, freeze them. But make sure they are completely firm before freezing, or they will stick together in a big clump.
Variations & Adaptations
One of the best things about this recipe is how easy it is to customize. You can adapt it to fit your dietary needs or taste preferences without losing the core structure. Here are a few variations I love:
- Chocolate Lovers: Add 1 tablespoon of cocoa powder to the wet ingredients. This makes the dough look like cookie dough and adds a rich chocolate flavor. Top with extra chocolate chips.
- Green Goddess: Add 1 tablespoon of matcha powder and swap the honey for maple syrup. This gives a subtle earthy flavor and a nice green color. Add white chocolate chips for contrast.
- Nut-Free Option: Use sunflower seed butter instead of peanut or almond butter. You can also swap the oats for puffed quinoa or rice cereal for a different crunch. This is great for school-safe snacks.
- High-Protein Boost: Add two scoops of protein powder and a tablespoon of collagen peptides. You may need to add a splash of almond milk if the mixture gets too dry. This is perfect for post-workout recovery.
I also like to add a pinch of cinnamon or cardamom for a spiced version. It pairs beautifully with the honey and makes the balls taste like a dessert. Don’t be afraid to experiment with different seeds like pumpkin or hemp hearts. They add a nice crunch and extra nutrients.
Serving & Storage Suggestions
These protein balls are best served chilled. The cold temperature enhances the sweetness and gives them a firmer, more satisfying texture. You can serve them as a standalone snack, or pair them with a cup of coffee or tea for a quick energy boost. They also go well with Greek yogurt or smoothie bowls as a topping.
For storage, keep them in an airtight container in the refrigerator. They will stay fresh for up to two weeks. If you want to keep them longer, place them in the freezer. They can be frozen for up to three months. When you want a snack, just take one out and let it sit for a minute to soften slightly.
Reheating is not necessary, and I don’t recommend it. Eating them cold or at room temperature is the best experience. If you leave them out on the counter for more than an hour, they might get too soft, especially in hot weather. So, always keep them in the fridge until you are ready to eat.
The flavors actually develop over time. I’ve noticed that after a day or two, the oats soften slightly and the honey permeates everything, making the taste even more cohesive. If you make a big batch, let them sit for 24 hours before eating for the best flavor.
Nutritional Information & Benefits
These honey oat protein balls are a balanced snack that provides sustained energy. Each ball contains approximately 150-180 calories, depending on the size and specific ingredients used. They are a good source of carbohydrates from the oats, which provide quick energy, and healthy fats from the nut butter and seeds, which keep you full longer.
The protein content varies based on whether you use protein powder, but you can expect around 5-8 grams per ball. This makes them a great option for athletes or anyone looking to maintain muscle mass. The oats provide fiber, which aids in digestion and helps regulate blood sugar levels. Honey is a natural sweetener that contains antioxidants, unlike refined sugars.
For those with dietary restrictions, this recipe can be made gluten-free by using certified gluten-free oats. It can also be vegan if you skip the honey and use maple syrup, and avoid whey protein. Always check your ingredient labels to ensure they meet your specific needs. I find that these balls help me stay focused during long workdays, avoiding the mid-afternoon slump that comes from sugary snacks.
Conclusion
Making these honey oat protein balls is a small effort that pays off in big ways. They are easy to make, delicious to eat, and nutritious enough to fuel your day. I love this recipe because it is so flexible. You can change it up every week without getting bored. It has become a staple in my household, and I know it will become one in yours too.
I encourage you to try this recipe and make it your own. Add your favorite nuts, swap the honey for maple syrup, or boost the protein. The base is solid, so the possibilities are endless. I would love to hear how you adapt it. Leave a comment below with your favorite variations or tell me how you like to eat them.
Share this recipe with a friend who needs a quick, healthy snack idea. Let’s spread the love for simple, good food. Enjoy making these, and enjoy every bite.
Frequently Asked Questions
Can I use quick oats instead of rolled oats?
Yes, you can, but the texture will be softer and less chewy. Rolled oats provide a better structure, so if you must use quick oats, reduce the amount of honey slightly.
How long do these protein balls last?
They last up to two weeks in the refrigerator when stored in an airtight container. They can also be frozen for up to three months.
Can I make these vegan?
Absolutely. Just swap the honey for maple syrup or agave nectar, and use a plant-based protein powder if you are adding one. The rest of the ingredients are naturally vegan.
Why are my protein balls too sticky?
This usually means there is too much wet ingredient. Add more oats, one tablespoon at a time, until the mixture is manageable. You can also chill the mixture longer before rolling.
Can I bake these instead of eating them raw?
You can, but they are designed to be no-bake. If you bake them, they will become harder and crispier. Bake at 350°F (175°C) for 10-12 minutes, but note that they will lose their soft, chewy texture.
Pin This Recipe!
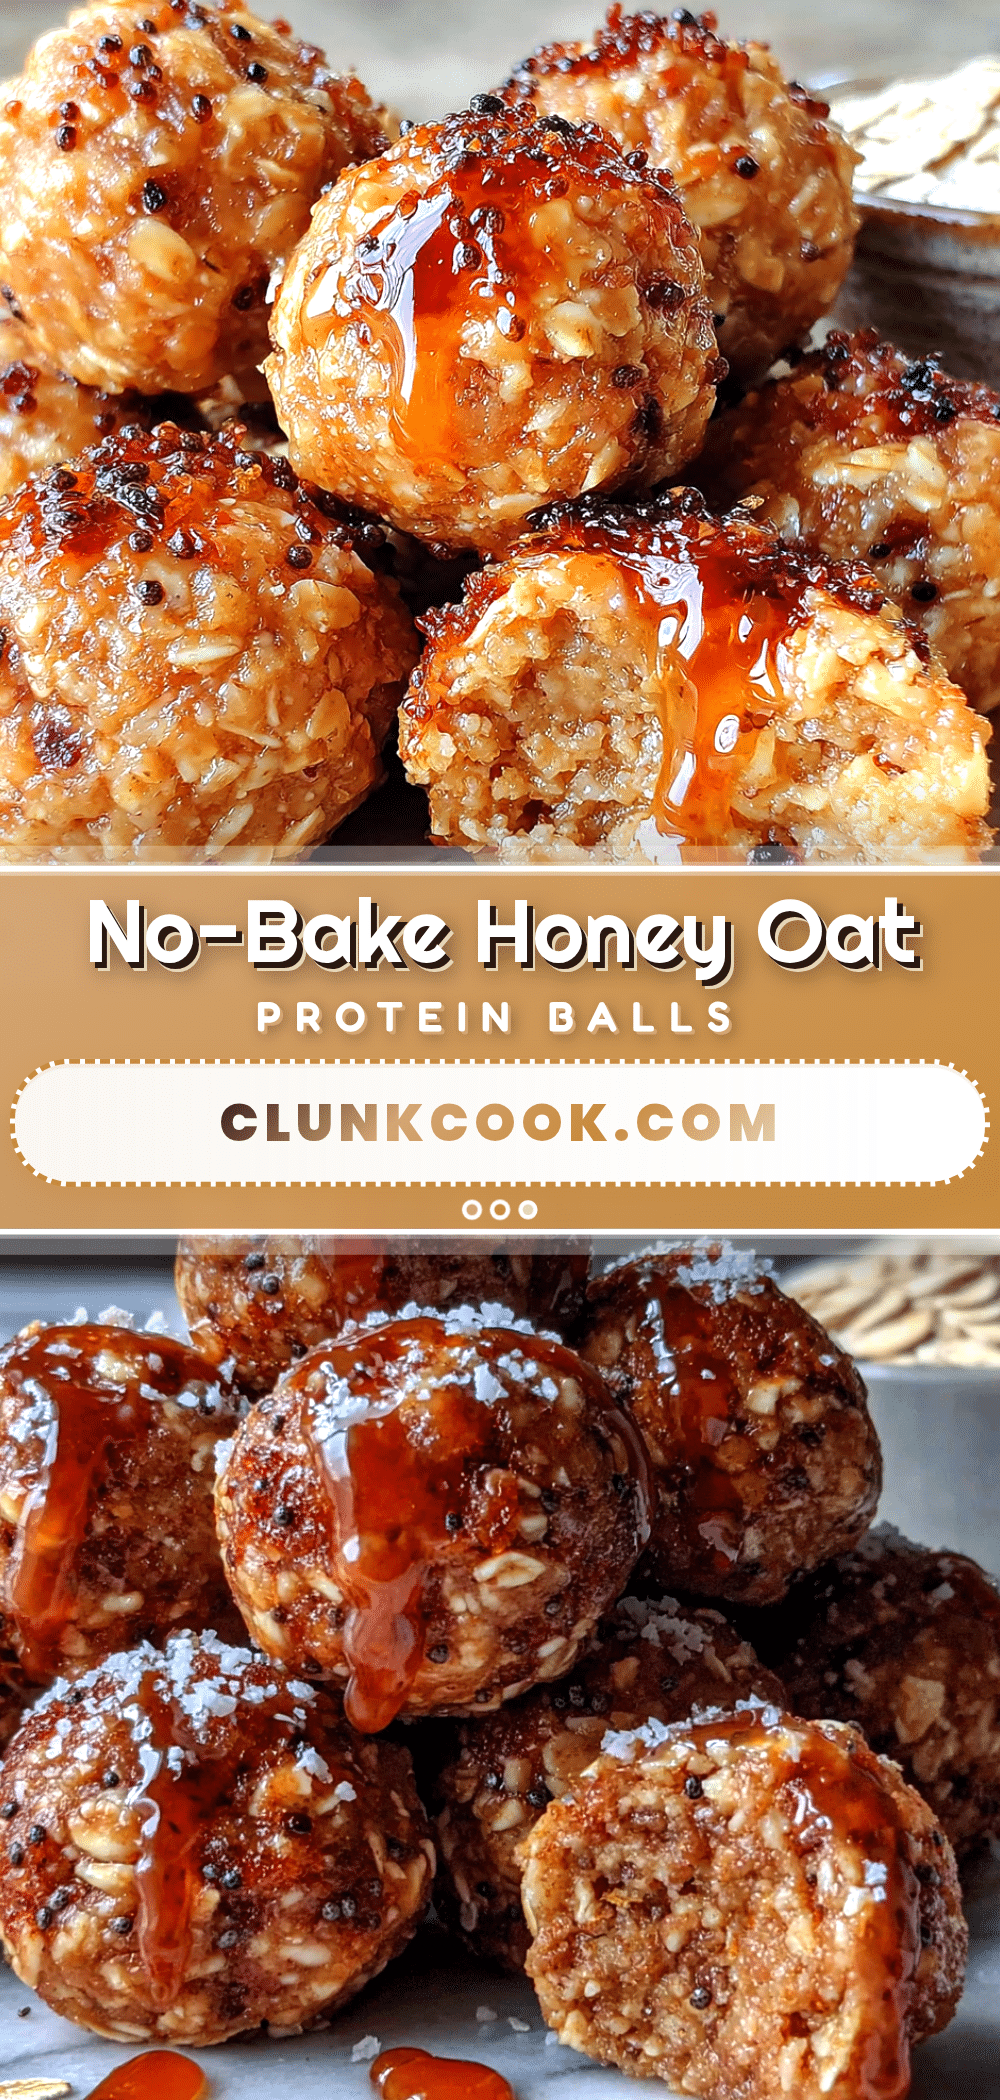
Easy No-Bake Honey Oat Protein Balls

A quick, no-bake snack made with simple pantry staples like oats, honey, and nut butter. These protein balls are chewy, energy-boosting, and perfect for on-the-go snacking without any cooking required.
- Prep Time: 10 minutes
- Cook Time: 0 minutes
- Total Time: 40 minutes
- Yield: 12-15 servings 1x
- Category: Snack
- Cuisine: American
Ingredients
- 1.5 cups Rolled Oats (Old-Fashioned)
- 1/2 cup Sticky Honey
- 1/2 cup Natural Peanut Butter or Almond Butter
- 2 tablespoons Ground Flaxseed
- 1 scoop Protein Powder (Vanilla or Unflavored, Optional)
- 1/4 cup Mini Chocolate Chips
- 1 teaspoon Vanilla Extract
- A pinch Salt
Instructions
- In a medium bowl, combine the honey, nut butter, and vanilla extract. If the nut butter is stiff, microwave it for 15 seconds to soften. Whisk until smooth and creamy.
- Add the rolled oats, ground flaxseed, protein powder (if using), and salt to the wet mixture. Stir vigorously until all oats are coated and the mixture begins to clump together.
- Check the consistency: the dough should hold together when squeezed. If too crumbly, add more honey or nut butter; if too sticky, add more oats.
- Fold in chocolate chips, dried fruit, or nuts gently until evenly distributed.
- Place the bowl in the refrigerator and chill for 20 minutes to firm up the mixture.
- Remove from the fridge and wet your hands slightly with water or oil. Scoop about a tablespoon of mixture and roll between palms to form smooth balls. Place on a parchment-lined baking sheet.
- Refrigerate the baking sheet for at least 30 minutes to set the balls before serving.
Notes
For best results, ensure ingredients are at room temperature or slightly softened for easier mixing. If the mixture is too sticky, chill longer or add more oats. Store in an airtight container in the fridge for up to two weeks or freeze for up to three months. Do not bake as it alters the texture.
Nutrition
- Serving Size: 1 ball
- Calories: 165
- Sugar: 12
- Sodium: 50
- Fat: 7
- Saturated Fat: 1.5
- Carbohydrates: 22
- Fiber: 3
- Protein: 6
Keywords: no-bake, protein balls, healthy snack, honey oat, energy bites, gluten-free option, vegan option, quick snack