Love this? Save it for later!
Share the inspiration with your friends
My sister asked why I couldn’t just press the crust into the pan instead of rolling it out. I was mid-lecture about pastry structure and butter temperature—the whole thing. I started to explain why that wouldn’t work, that a proper crust needs even thickness and crimped edges. Then I stopped. Honestly, I was tired. It was a Tuesday, and I had a sink full of dishes. So I shrugged, handed her the bowl, and said, “Fine. You do it.” She pressed that buttery dough into the bottom of a 9×13 with her fingers, all casual, like she’d been doing it for years. No rolling pin. No flour cloud. No drama. And you know what? It came out of the oven perfectly golden and crispy. I mean, I was annoyed at how easy she made it look. But I was also thrilled. That moment changed how I make this dessert. These easy pumpkin pie bars with shortbread crust are the result of me learning to shut up and listen once in a while. Maybe you’ve been there—the moment someone suggests something that sounds wrong but turns out to be exactly right. That’s this recipe. It’s the dessert I bring to every fall gathering now, and it never fails to steal the show.
Why You’ll Love This Recipe
Let me tell you why these bars have become my go-to for every potluck and dinner party. I’ve tested this recipe more times than I can count, and it’s the one my friends actually request by name. Not the fancy French dessert I spent hours on. These simple bars.
- Made for a Crowd: This recipe fills a 9×13 pan, giving you 24 generous servings. Perfect for Thanksgiving, Friendsgiving, or any gathering where you need to feed a hungry group.
- No Rolling Pin Required: The shortbread crust gets pressed directly into the pan. No floury counter, no chilled dough, no stress. You can prep this in 15 minutes flat.
- That Buttery Crust: The shortbread base is thick, crisp, and slightly sweet. It holds up to the creamy pumpkin filling without getting soggy—trust me, I’ve tested this extensively.
- Make-Ahead Magic: These bars actually taste better the next day. The flavors meld together overnight, and the crust stays perfectly crisp. You can make them two days ahead of your event.
- No Water Bath Required: Unlike traditional pumpkin pie, these bars don’t need a fussy water bath. No cracked tops, no leaking foil, no stress.
- Always Gets Rave Reviews: I’ve brought these to six different gatherings this fall alone. Every single time, someone asks for the recipe. Last Thanksgiving, my neighbor Mark ate four bars before dinner even started.
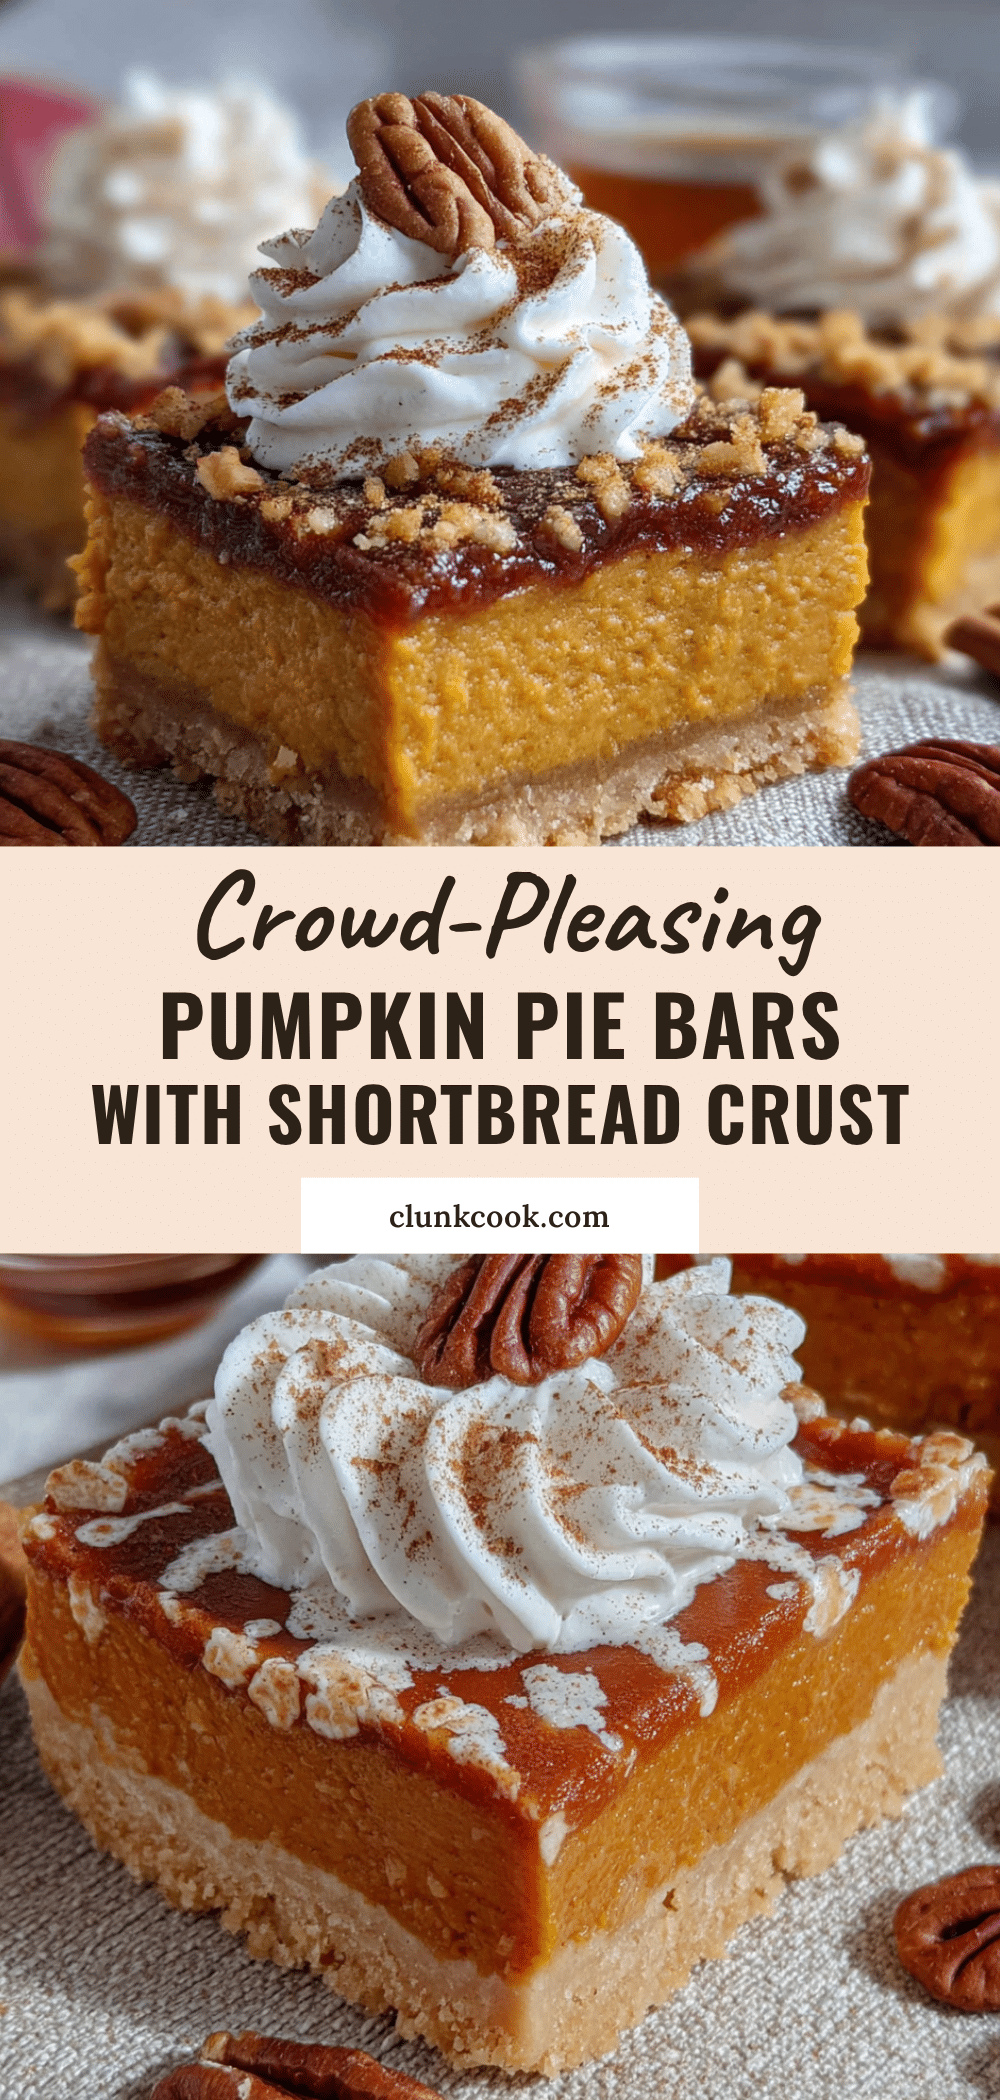
These bars are comfort food at its finest. They’re the kind of dessert that makes you close your eyes after the first bite. The pumpkin filling is silky and spiced just right, while the shortbread crust adds this incredible buttery crunch. It’s like pumpkin pie and shortbread cookies had a beautiful baby. Perfect for impressing guests without spending all day in the kitchen.
What Ingredients You Will Need
This recipe uses simple, pantry-friendly ingredients to create something truly special. Most of these are probably in your kitchen right now, which is exactly how I like it.
For the Shortbread Crust
- 2 cups all-purpose flour (I use King Arthur Flour for consistent results)
- 1/2 cup granulated sugar
- 1 cup cold unsalted butter, cut into small cubes (must be cold—this is crucial for a flaky crust)
- 1/4 teaspoon salt
- 1 teaspoon vanilla extract
For the Pumpkin Filling
- 1 can (15 oz) pure pumpkin puree (not pumpkin pie filling—look for 100% pumpkin)
- 1 can (14 oz) sweetened condensed milk
- 2 large eggs, room temperature
- 1/4 cup brown sugar, packed (dark or light both work)
- 2 teaspoons pumpkin pie spice (or make your own: 1 tsp cinnamon, 1/2 tsp ginger, 1/4 tsp nutmeg, 1/4 tsp cloves)
- 1/2 teaspoon cinnamon
- 1/4 teaspoon salt
For the Topping (Optional but Recommended)
- 1 cup heavy cream, cold
- 2 tablespoons powdered sugar
- 1/2 teaspoon vanilla extract
- Ground cinnamon, for dusting
Let me share a few things I’ve learned. For the pumpkin puree, I always reach for Libby’s. It’s consistently thick and not watery, which means your filling sets up perfectly. If you use a store brand, just check the ingredients—it should be 100% pumpkin with nothing added. For the butter in the crust, it needs to be cold. I cut mine into cubes and pop it back in the fridge while I measure out the flour. This little step makes a big difference in how flaky the crust turns out.
The sweetened condensed milk is non-negotiable here. It adds sweetness and that silky texture that makes these bars so addictive. I’ve tried making a lighter version with evaporated milk and extra sugar, and it just wasn’t the same. Sometimes the real deal is worth it.
If you’re out of pumpkin pie spice, no worries. Just mix cinnamon, ginger, nutmeg, and a pinch of cloves. I actually prefer my homemade blend because I can adjust the ratios. More cinnamon, less clove—that’s my sweet spot.
Equipment Needed
You don’t need anything fancy here. That’s the beauty of this recipe.
- 9×13 baking pan (metal or glass both work, but metal gives a crispier crust)
- Parchment paper (for easy lifting and cleanup)
- Mixing bowls (one medium, one large)
- Pastry cutter or fork (for cutting butter into flour)
- Whisk
- Measuring cups and spoons
- Rubber spatula
- Cooling rack
- Electric mixer (for the whipped cream topping, or you can whisk by hand if you’re feeling strong)
I’ve made this recipe with nothing but a fork and a whisk when I was camping last fall. The crust came out a little less uniform, but it still tasted amazing. Don’t let missing equipment stop you. If you don’t have a pastry cutter, two knives work fine. Or just use your hands—the warmth will soften the butter a bit, but it’ll still work.
One tip: line your pan with parchment paper, leaving some overhang on the sides. This makes lifting the bars out so much easier. I learned this the hard way after struggling to get the first batch out in one piece.
Preparation Method
Let me walk you through this step by step. I promise it’s easier than traditional pumpkin pie.
Step 1: Preheat and Prep
Preheat your oven to 350°F (175°C). Line a 9×13 baking pan with parchment paper, leaving about 2 inches of overhang on the long sides. This will be your handles for lifting the bars later. Lightly spray the parchment with non-stick spray.
Step 2: Make the Shortbread Crust
In a medium bowl, whisk together the flour, sugar, and salt. Add the cold butter cubes and vanilla extract. Use a pastry cutter or your fingers to work the butter into the flour mixture until it resembles coarse sand with some pea-sized butter pieces remaining. This takes about 2-3 minutes. Don’t overwork it—those little butter bits create flaky pockets in the crust.
Press the mixture evenly into the prepared pan. Use the bottom of a measuring cup to really pack it down firmly. I mean really press it—this prevents the crust from crumbling when you cut the bars later. Bake for 18-20 minutes until the edges are just starting to turn golden. The center will still look a little pale, and that’s perfect. Set it on a cooling rack while you make the filling.
Step 3: Make the Pumpkin Filling
In a large bowl, whisk together the pumpkin puree and sweetened condensed milk until smooth. Add the eggs, brown sugar, pumpkin pie spice, cinnamon, and salt. Whisk until everything is well combined and silky. The mixture should be a beautiful deep orange color. If you see any streaks of egg white, keep whisking.
Pour the filling over the warm crust. Gently tilt the pan to spread it evenly, or use a spatula. Don’t pour it all in one spot—distribute it around so you don’t disturb the crust.
Step 4: Bake the Bars
Bake at 350°F (175°C) for 35-40 minutes. The edges should be set and the center should jiggle slightly when you gently shake the pan. It will continue to set as it cools. I start checking at 30 minutes because every oven is different. My old oven took exactly 38 minutes, but my new one runs hot and only needs 34.
Let the bars cool completely on a wire rack. This takes about 2 hours. Then refrigerate for at least 3 hours, or overnight. This step is crucial—the bars need to be fully chilled to cut cleanly. I know it’s hard to wait, but trust me.
Step 5: Cut and Serve
Use the parchment overhang to lift the bars out of the pan. Place them on a cutting board. Use a sharp knife to cut into squares. Wipe the knife clean between cuts for neat edges. I cut mine into 24 bars—4 rows by 6 rows. But you can make them bigger or smaller depending on your crowd.
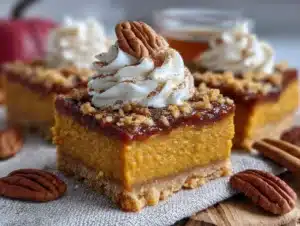
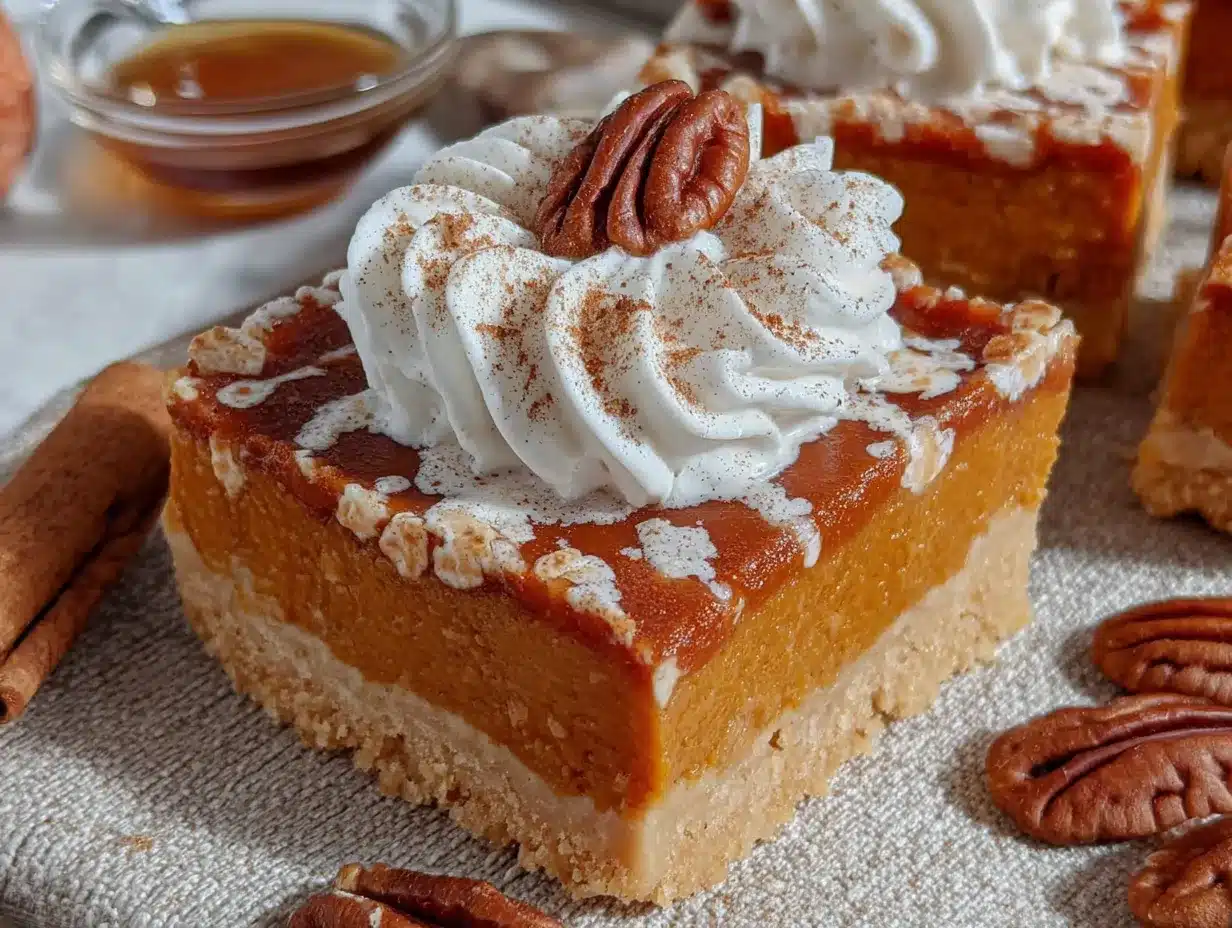
Serve with a dollop of whipped cream and a dusting of cinnamon. Watch them disappear.
Cooking Tips & Techniques
After making these bars probably twenty times, I’ve collected some hard-earned wisdom. Let me save you from my mistakes.
The Crust Secret
The biggest mistake people make is not pressing the crust firmly enough. I mean really pack it down. Use the flat bottom of a glass or measuring cup. If the crust is too loose, it will crumble when you cut the bars. I learned this the hard way when my first batch fell apart into a pile of buttery rubble. Still delicious, but not pretty.
Room Temperature Eggs
Cold eggs can make the filling lumpy. I set my eggs on the counter about 30 minutes before I start. If I forget, I put them in a bowl of warm water for 5 minutes. Works like a charm.
Don’t Overbake
The filling should still have a slight jiggle in the center when you pull it out. It will continue to cook from residual heat. Overbaked pumpkin bars get cracks and a rubbery texture. You want them silky and smooth. I aim for that gentle wobble, like Jell-O that’s almost set.
Chill Time is Non-Negotiable
I know you want to cut into them immediately. I’ve been there. But warm pumpkin bars are a mess. They need at least 3 hours in the fridge to set up properly. Overnight is even better. The flavors deepen, the texture firms up, and you get those clean, beautiful squares.
Sharp Knife, Clean Cuts
Use a long, sharp chef’s knife. Run it under hot water and wipe it dry between each cut. This gives you those gorgeous, bakery-style edges. If the knife is sticky, the filling will drag and create messy cuts.
Make Ahead Strategy for Hosting
These bars are my secret weapon for dinner parties. I make them two days ahead and keep them covered in the fridge. The day of the party, I just cut them, add the whipped cream, and arrange them on a platter. No last-minute stress. I can focus on the main course while the dessert is already done.
Variations & Adaptations
This recipe is flexible, and I’ve tried quite a few variations over the years. Here are some of my favorites.
Gluten-Free Version
Replace the all-purpose flour with a 1:1 gluten-free baking flour. I use Bob’s Red Mill. The crust will be slightly more crumbly, but the flavor is still amazing. Just make sure you press it really firmly.
Dairy-Free Adaptation
Use vegan butter sticks (not spreadable) for the crust. For the filling, you can substitute the sweetened condensed milk with a dairy-free version—there are several brands now, or you can make your own with coconut milk and sugar. The texture will be slightly different, but still delicious.
Spice It Up
Add a pinch of cayenne pepper or chipotle powder to the filling for a spicy kick. I tried this last year for a Friendsgiving, and it was a huge hit. The heat balances perfectly with the sweet, creamy filling. Start with 1/8 teaspoon and adjust from there.
Chocolate Lover’s Twist
Melt 1/2 cup of semi-sweet chocolate chips and drizzle it over the crust before adding the filling. The chocolate layer adds a rich, fudgy element that pairs beautifully with the pumpkin. My kids beg for this version.
Pecan Praline Topping
After the bars are baked and cooled, top with a layer of candied pecans. Mix 1 cup chopped pecans with 2 tablespoons melted butter, 2 tablespoons brown sugar, and a pinch of salt. Toast in a skillet until caramelized, then sprinkle over the bars. It adds an incredible crunch.
Individual Mini Bars
Use a mini muffin tin lined with paper liners. Press a small amount of crust into each cup, add filling, and bake for about 15-18 minutes. These are perfect for parties where people want to grab and go.
Serving & Storage Suggestions
These bars are versatile, and how you serve them can really elevate the experience.
Serving Temperature
Serve these bars cold, straight from the fridge. The filling is firm and creamy, and the crust stays crisp. If you let them sit at room temperature too long, the crust can soften. I pull them out about 10 minutes before serving, just to take the chill off.
Presentation Tips
Arrange the bars on a large platter or cake stand. Add a generous dollop of whipped cream to each bar, then dust with cinnamon. For a show-stopping presentation, drizzle caramel sauce over the top and sprinkle with toasted pecans. Fresh cranberries and a few mint leaves add a pop of color that looks gorgeous on a holiday table.
What to Serve Alongside
These bars pair beautifully with a hot cup of coffee or spiced apple cider. For a full dessert spread, serve them alongside other fall favorites like apple crisp or pecan pie. They also work great on a dessert board with cookies, brownies, and fresh fruit.
Storage Instructions
Store the bars in an airtight container in the refrigerator for up to 5 days. Layer them with parchment paper between each layer to prevent sticking. I’ve found they actually taste better on day two or three—the spices meld together and the texture becomes even creamier.
Freezing Instructions
These bars freeze beautifully. Cut them into squares, place them on a baking sheet in the freezer for 1 hour, then transfer to a freezer-safe container with parchment between layers. They’ll keep for up to 3 months. Thaw in the refrigerator overnight before serving. Add the whipped cream fresh after thawing.
Reheating Tips
I prefer these bars cold, but if you want them warm, microwave individual bars for 10-15 seconds. Just know the crust will soften. For a fun twist, warm a bar and top it with vanilla ice cream. It’s like pumpkin pie à la mode, but easier.
Nutritional Information & Benefits
Here’s the honest breakdown. These bars are a treat, no question. But they do have some redeeming qualities.
Estimated Nutritional Values (per bar, based on 24 servings)
- Calories: 215
- Total Fat: 12g
- Saturated Fat: 7g
- Cholesterol: 55mg
- Sodium: 135mg
- Total Carbohydrates: 25g
- Dietary Fiber: 1g
- Sugars: 16g
- Protein: 4g
Health Benefits
- Pumpkin is packed with vitamin A, which supports eye health and immune function. One serving provides about 70% of your daily vitamin A needs.
- Pumpkin is also rich in antioxidants like beta-carotene, which helps fight inflammation.
- Eggs provide high-quality protein and essential nutrients like choline, which supports brain health.
- Cinnamon has anti-inflammatory properties and may help regulate blood sugar levels.
Dietary Considerations
- Contains: dairy, eggs, gluten, wheat
- Can be made gluten-free with appropriate flour substitution
- Can be made dairy-free with appropriate substitutions
- Not suitable for vegan diets (though you could experiment with egg replacers and dairy-free alternatives)
I’m not going to pretend these are health food. They’re a dessert for special occasions. But knowing there’s real pumpkin and eggs in there makes me feel a little better about having a second bar. Everything in moderation, right?
Conclusion
These easy pumpkin pie bars with shortbread crust have become my signature fall dessert, and I think they’ll become yours too. They have everything we love about pumpkin pie—the silky filling, the warm spices, that nostalgic fall flavor—but without the stress of a finicky crust or a fussy water bath.
What I love most about this recipe is how it brings people together. Every time I bring these bars to a gathering, I watch faces light up. People take one bite and their eyes close. They lean over to their neighbor and say, “You have to try these.” That’s the kind of food I want to make. Food that creates moments.
I encourage you to make these bars your own. Add extra spice, throw in some chocolate, top them with candied pecans. The recipe is forgiving and adaptable. And if someone suggests a tweak that sounds crazy? Maybe give it a try. You never know—it might just become your new favorite version.
Have you made these bars? I’d love to hear how they turned out. Drop a comment below and let me know your favorite variation. And don’t forget to share this recipe with a friend who needs an easy, impressive dessert for their next gathering. Happy baking!
Frequently Asked Questions
Can I use fresh pumpkin instead of canned?
Yes, you can. Roast a small sugar pumpkin until tender, then puree the flesh in a food processor. You’ll need about 1 3/4 cups of puree. Just make sure to drain any excess liquid by pressing the puree through a fine-mesh strainer or cheesecloth. Fresh pumpkin can be more watery than canned, which might make the filling softer.
Why did my crust turn out soggy?
A soggy crust usually means it wasn’t baked long enough before adding the filling, or the filling was too wet. Make sure you pre-bake the crust for the full 18-20 minutes until it’s lightly golden. Also, don’t pour the filling over the crust while it’s piping hot—let it cool for about 5-10 minutes first.
Can I make these bars vegan?
I’ve experimented with vegan versions. Use vegan butter for the crust. For the filling, replace the eggs with flax eggs (1 tablespoon ground flaxseed mixed with 3 tablespoons water per egg) and use a dairy-free sweetened condensed milk. The texture won’t be exactly the same, but it’s still tasty. I’d recommend adding an extra tablespoon of cornstarch to help the filling set.
How do I know when the bars are done baking?
The edges should look set and slightly puffed, while the center should have a gentle jiggle when you shake the pan. It should wobble like firm Jell-O, not slosh like liquid. A toothpick inserted near the center should come out mostly clean with a few moist crumbs. If it comes out wet, bake for another 5 minutes and check again.
Can I double this recipe?
Absolutely. For a larger crowd, double all ingredients and bake in a half-sheet pan (about 13×18 inches). You’ll need to increase the baking time by about 10-15 minutes. Keep an eye on it and use the jiggle test to determine doneness. This is perfect for big holiday gatherings or potlucks.
Pin This Recipe!
Easy Pumpkin Pie Bars with Buttery Shortbread Crust
These easy pumpkin pie bars feature a buttery shortbread crust pressed directly into the pan, a silky pumpkin filling, and no water bath required. Perfect for fall gatherings, they can be made ahead and always get rave reviews.
- Prep Time: 15 minutes
- Cook Time: 55 minutes
- Total Time: 4 hours 10 minutes (includes chilling)
- Yield: 24 servings 1x
- Category: Dessert
- Cuisine: American
Ingredients
- 2 cups all-purpose flour
- 1/2 cup granulated sugar
- 1 cup cold unsalted butter, cut into small cubes
- 1/4 teaspoon salt
- 1 teaspoon vanilla extract
- 1 can (15 oz) pure pumpkin puree
- 1 can (14 oz) sweetened condensed milk
- 2 large eggs, room temperature
- 1/4 cup brown sugar, packed
- 2 teaspoons pumpkin pie spice
- 1/2 teaspoon cinnamon
- 1/4 teaspoon salt
- 1 cup heavy cream, cold
- 2 tablespoons powdered sugar
- 1/2 teaspoon vanilla extract
- Ground cinnamon, for dusting
Instructions
- Preheat oven to 350°F (175°C). Line a 9×13 baking pan with parchment paper, leaving about 2 inches of overhang on the long sides. Lightly spray the parchment with non-stick spray.
- In a medium bowl, whisk together flour, sugar, and salt. Add cold butter cubes and vanilla extract. Use a pastry cutter or your fingers to work the butter into the flour mixture until it resembles coarse sand with some pea-sized butter pieces remaining.
- Press the mixture evenly into the prepared pan. Use the bottom of a measuring cup to pack it down firmly. Bake for 18-20 minutes until the edges are just starting to turn golden. Set on a cooling rack.
- In a large bowl, whisk together pumpkin puree and sweetened condensed milk until smooth. Add eggs, brown sugar, pumpkin pie spice, cinnamon, and salt. Whisk until well combined and silky.
- Pour the filling over the warm crust. Gently tilt the pan to spread it evenly.
- Bake at 350°F (175°C) for 35-40 minutes. The edges should be set and the center should jiggle slightly when gently shaken.
- Let the bars cool completely on a wire rack (about 2 hours). Then refrigerate for at least 3 hours, or overnight.
- Use the parchment overhang to lift the bars out of the pan. Cut into squares with a sharp knife, wiping the knife clean between cuts.
- Serve with a dollop of whipped cream and a dusting of cinnamon.
Notes
For best results, chill bars overnight before cutting. Use a sharp knife and wipe clean between cuts for neat edges. Bars can be made up to 2 days ahead and stored in the refrigerator.
Nutrition
- Serving Size: 1 bar
- Calories: 215
- Sugar: 16
- Sodium: 135
- Fat: 12
- Saturated Fat: 7
- Carbohydrates: 25
- Fiber: 1
- Protein: 4
Keywords: pumpkin pie bars, shortbread crust, easy pumpkin dessert, fall dessert, Thanksgiving dessert, pumpkin bars