Love this? Save it for later!
Share the inspiration with your friends
My neighbor, an older woman named Clara who grew up in a tiny town in Vermont, watched me hauling a giant, heavy casserole dish across the porch one November afternoon. She didn’t say anything at first. Then she just shook her head and laughed, “You’re making that for a party? You’re going to spend the whole night serving, not talking.” She was right, of course. I was stressed, the dish was too big, and I felt more like a caterer than a guest. A few days later, she handed me a small, dented muffin tin and a handwritten note. “Mini,” she said. “That way, everyone gets their own little hug.”
That note turned into these Mini Chicken Pot Pies. Honestly, I haven’t made a big pie since. There’s something about having your own personal little pie—the crispy, golden crust cradling a creamy, savory filling—that just feels right for a cozy gathering. I mean, a Friendsgiving should feel intimate and warm, not like a formal banquet. These little guys solve that problem. They’re easy to grab, you can eat them with one hand while holding a glass of wine, and they make everyone at the table feel special.
Maybe you’ve been there—you want to host a Friendsgiving but the thought of a massive turkey and a complicated pie feels overwhelming. Let me tell you, these mini pies are the answer. They’re comfort food in its purest form, and the best part? The filling is simple, the crust is buttery, and you can make them ahead of time. They’re the kind of dish that makes your friends linger a little longer at the table, you know that feeling when everyone just doesn’t want to leave? That’s the magic of a good mini pot pie.
Why You’ll Love This Recipe
I’ve tested this recipe more times than I can count—Clara’s note was just the beginning. I’ve burned crusts, made fillings that were too runny, and even tried a gluten-free version that turned into a sad, crumbly mess. But after all those trials, this is the version that works every single time. It’s been “family-approved” by my pickiest friends and “chef-tested” by my own impatience in the kitchen.
- Quick & Easy: These come together in under an hour. No complicated techniques, just simple steps that even a beginner can nail.
- Simple Ingredients: You probably have most of this in your pantry right now. No fancy grocery trips needed—just chicken, veggies, cream, and puff pastry.
- Perfect for Friendsgiving: These are the ultimate party food. They’re individual, so no fighting over the last piece, and they look impressive without the stress.
- Crowd-Pleaser: I’ve never met anyone who doesn’t love a mini pot pie. Kids, adults, even that friend who “doesn’t like chicken”—they all go for seconds.
- Unbelievably Delicious: The texture is what gets you. That flaky, golden top with the creamy, chunky filling underneath? It’s next-level comfort food.
What makes this recipe different from the rest? It’s the little things. I use a trick of pre-cooking the filling just slightly so it stays thick and luscious, not watery. And I brush the tops with an egg wash and a pinch of flaky salt—that tiny detail makes the crust taste like it came from a bakery. This isn’t just another version of chicken pot pie; it’s the best version for a cozy, no-stress gathering.
What Ingredients You Will Need
This recipe uses simple, wholesome ingredients to deliver that rich, satisfying flavor without any fuss. Most of these are pantry staples, so you can whip these up on a whim.
For the Filling
- 2 tablespoons unsalted butter (adds richness; I prefer Kerrygold for the flavor)
- 1 small yellow onion, diced (about 1 cup; use sweet onion if you want a milder taste)
- 2 medium carrots, peeled and diced (look for firm, bright orange carrots for the best texture)
- 2 celery stalks, diced (adds that classic savory base)
- 3 cloves garlic, minced (fresh is best, but jarred minced garlic works in a pinch)
- 1/3 cup all-purpose flour (this thickens the sauce; use gluten-free 1:1 flour if needed)
- 1 1/2 cups chicken broth (low-sodium is best so you can control the salt; I like Swanson brand)
- 1 cup whole milk or heavy cream (cream makes it extra luxurious, but milk works for a lighter version)
- 2 cups cooked, shredded chicken (rotisserie chicken is a lifesaver here—just shred it up)
- 1 cup frozen peas (no need to thaw; they cook perfectly in the hot filling)
- 1/2 teaspoon dried thyme (or 1 teaspoon fresh; thyme is the soul of a good pot pie)
- Salt and black pepper to taste
For the Topping
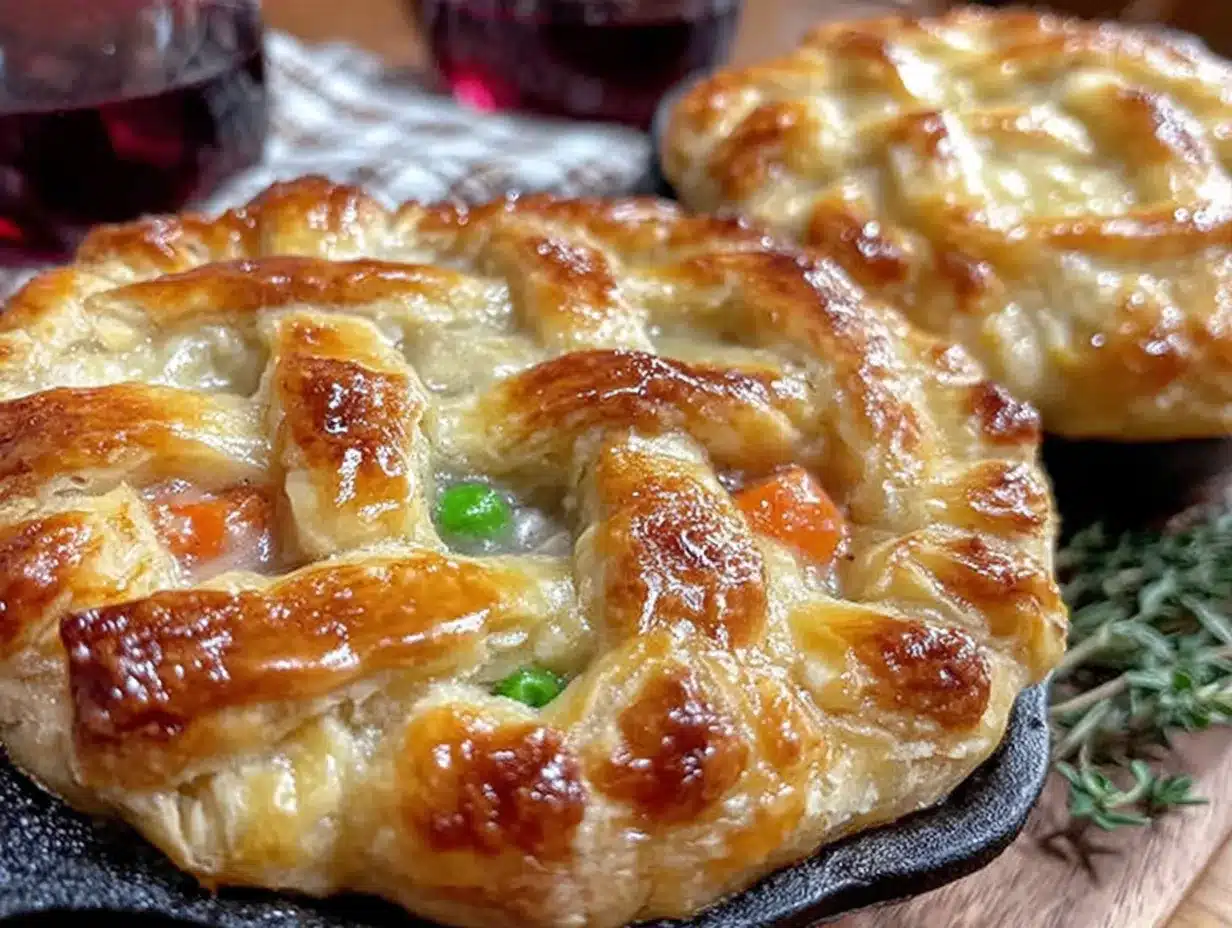
- 1 sheet puff pastry, thawed (I recommend Pepperidge Farm; it’s reliable and buttery)
- 1 large egg, beaten (for the egg wash; this gives the crust that golden shine)
- Flaky sea salt for sprinkling (Maldon is my go-to; that little crunch is everything)
Ingredient Selection Tips: When choosing your puff pastry, make sure it’s fully thawed but still cold to the touch. If it gets too warm, it becomes sticky and hard to work with. For the chicken, a rotisserie chicken from the store is not only convenient but also adds a little extra flavor from the seasoning on the skin. If you’re using leftover cooked chicken breast, just make sure it’s not too dry—shred it while it’s still warm if possible.
Substitution Guidance: You can swap the chicken for turkey if you have leftovers from Thanksgiving—honestly, that might be even better. For a vegetarian version, use a mix of mushrooms and extra veggies, and swap the chicken broth for vegetable broth. Use dairy-free butter and oat milk if you need it to be dairy-free.
Equipment Needed
- 12-cup standard muffin tin (this is non-negotiable for the mini size; a jumbo tin will change the cooking time)
- Large skillet or saucepan (for making the filling; a 12-inch skillet works best)
- Rolling pin (for rolling out the puff pastry slightly; a wine bottle works in a pinch—I’ve done it)
- Round cookie cutter or glass (about 3 inches in diameter to cut the pastry tops; a wide-mouth mason jar ring works too)
- Pastry brush (for the egg wash; if you don’t have one, just use a paper towel gently)
- Chef’s knife and cutting board
Personal Experience: I used to try to cut the puff pastry with a knife and get those perfect circles, but honestly, a cookie cutter makes it so much easier. And don’t skip the pastry brush—I once tried using my fingers to spread the egg wash and ended up with a sticky mess. A cheap silicone brush is totally worth it.
Preparation Method
- Preheat your oven to 400°F (200°C). Place your muffin tin on a baking sheet—this catches any drips and makes it easier to get the pies in and out of the oven.
- Start the filling. In a large skillet or saucepan, melt the butter over medium heat. Add the diced onion, carrots, and celery. Cook for about 5-7 minutes, stirring occasionally, until the vegetables have softened. You’ll know they’re ready when the onions are translucent and the kitchen starts smelling like a cozy kitchen.
- Add the garlic and flour. Stir in the minced garlic and cook for 30 seconds until fragrant. Then sprinkle the flour over the vegetables and stir constantly for about 1 minute. This cooks out the raw flour taste and starts the thickening process. It will look like a thick paste—that’s good.
- Pour in the liquids. Slowly pour in the chicken broth while whisking constantly to prevent lumps. Then add the milk or cream. Keep whisking until the mixture comes to a gentle simmer. Let it cook for 2-3 minutes, stirring often, until it thickens enough to coat the back of a spoon. If it’s too thick, add a splash more broth. Too thin? Let it simmer a minute longer.
- Add the chicken and peas. Stir in the shredded chicken, frozen peas, dried thyme, and a generous pinch of salt and pepper. Taste it—yes, right now. Does it need more salt? More pepper? Adjust it now. Remove the skillet from the heat and let the filling cool slightly while you prepare the pastry.
- Prepare the puff pastry. On a lightly floured surface, gently roll out the thawed puff pastry sheet just slightly—you want it thin enough to fit nicely over the muffin cups but thick enough to puff up beautifully. Use your round cutter or glass to cut out 12 circles. You might need to re-roll the scraps once to get all 12.
- Assemble the pies. Spoon the filling evenly into the 12 muffin cups, filling them almost to the top. Place a pastry circle on top of each cup, gently pressing the edges to the rim of the muffin tin. It doesn’t have to be perfect—a little overlap is fine. Cut a small slit in the top of each pastry to let steam escape. This is important; if you forget, the steam will make the pastry soggy.
- Brush and bake. Brush the tops with the beaten egg wash and sprinkle with a pinch of flaky sea salt. Bake for 18-22 minutes, or until the pastry is puffed up and golden brown. The filling should be bubbling up through the slits. Let them cool in the tin for 5 minutes before carefully lifting them out with a fork or small spatula.
Troubleshooting Tip: If your filling seems too thin before baking, don’t panic. The flour in the mixture will continue to thicken as it bakes. If it’s too thick, just add a splash of milk. And if the pastry is browning too quickly but the filling isn’t hot yet, tent the whole tray loosely with foil for the last 5 minutes of baking.
Cooking Tips & Techniques
One thing I learned the hard way: don’t overfill the muffin cups. I once piled the filling so high that the pastry couldn’t seal properly, and it all turned into a bubbly, delicious mess. Aim for the filling to be just below the rim of the muffin cup. Also, make sure your puff pastry is cold when it goes into the oven. If it’s warm, the butter in the pastry melts too quickly and you lose that flaky texture. Pop the assembled pies in the fridge for 10 minutes before baking if your kitchen is warm.
Another mistake I made early on was using a non-stick muffin tin without greasing it. The filling stuck, and I ended up with mini pot pie “smashed potatoes” instead of neat little pies. Even if your tin is non-stick, give it a light spray of cooking spray or a swipe of butter. Trust me on this one.
For multitasking: while the filling is cooling, roll out your pastry. That way, you’re not waiting around. And if you’re making these for a party, you can assemble them completely a few hours ahead of time, keep them in the fridge, and then bake them right before your guests arrive. They’ll still be perfectly flaky and hot.
Variations & Adaptations
1. The Turkey Leftover Version: This is a no-brainer for the day after Thanksgiving. Swap the chicken for shredded turkey, and add a spoonful of leftover cranberry sauce to the filling for a sweet-tart surprise. It’s incredible.
2. The Vegetarian Mushroom & Leek Version: Replace the chicken with a mix of sautéed mushrooms (cremini and shiitake are great) and one sliced leek. Use vegetable broth and add a splash of white wine when you add the broth. It’s earthy, rich, and totally satisfying.
3. The Gluten-Free Adaptation: Use a gluten-free all-purpose flour blend for the roux (I like Bob’s Red Mill 1:1) and a gluten-free puff pastry. The filling will be slightly less thick, but still delicious. Just make sure to let it cook a minute or two longer to help it set.
I once tried a version with sweet potatoes and kale—it was a bit of a experiment, and honestly, it was amazing. Just cube a small sweet potato, roast it until tender, and add it along with some chopped kale at the end. The sweetness of the potato with the creamy sauce is a winner.
Serving & Storage Suggestions
Serve these mini pies warm, straight from the oven. The contrast between the hot, creamy filling and the cool, flaky crust is everything. I like to set them out on a big wooden board or a platter so everyone can grab their own. They’re perfect as a main dish for a cozy Friendsgiving, but they also work as a hearty appetizer if you’re serving a big meal.
For drinks, a crisp white wine like Sauvignon Blanc or a light red like Pinot Noir pairs beautifully. Or, honestly, a good hard cider is the perfect cozy companion. For sides, a simple green salad with a tangy vinaigrette cuts through the richness, or you can serve them with roasted Brussels sprouts for a full comfort meal.
Storage: Leftover baked pies can be stored in an airtight container in the refrigerator for up to 3 days. To reheat, pop them in a 350°F oven for about 10 minutes to crisp up the pastry again. The microwave works in a pinch, but the pastry will get soft. You can also freeze the unbaked assembled pies for up to 2 months—just bake them straight from the freezer, adding 5-7 minutes to the baking time.
The flavors actually get better overnight as the filling melds together. So if you can, make them a day ahead and just reheat before serving. Your future self will thank you.
Nutritional Information & Benefits
Each mini pie (based on the recipe making 12) contains approximately 280 calories, 16g fat, 22g carbohydrates, and 14g protein. This is an estimate and will vary based on your specific ingredients.
This dish offers a good balance of protein from the chicken, fiber from the vegetables, and healthy fats from the butter and pastry. The carrots provide a solid dose of Vitamin A, and the peas add a little Vitamin C and fiber. It’s comfort food that actually has some nutritional merit, which is always a win in my book.
If you’re watching your sodium, use low-sodium broth and skip the flaky salt on top. For a lower-carb option, you can skip the pastry top and just bake the filling in ramekins with a sprinkle of cheese on top. It’s a different dish, but still delicious.
Conclusion
These Mini Chicken Pot Pies are the kind of recipe that makes hosting feel easy and joyful. They’re warm, comforting, and just the right size for a cozy Friendsgiving where the focus is on the people, not the presentation. I love that I can make them ahead, that everyone gets their own little pie, and that they taste like a hug in food form.
I really hope you give these a try. And don’t be afraid to make them your own—swap the veggies, change up the herbs, or add a little cheese to the filling. The best recipes are the ones that adapt to your kitchen and your people. So go ahead, make a batch, and watch your friends smile. And if you do make them, I’d love to hear about it—leave a comment below or tag me in your photos. Happy Friendsgiving!
Frequently Asked Questions
Can I use pie crust instead of puff pastry?
Absolutely! A traditional pie crust works great. Just roll it out slightly thinner than you would for a regular pie, and bake at the same temperature. The texture will be more like a classic pot pie top, less flaky but still delicious.
Can I make these in a mini cast iron skillet?
Yes, you can! Use small 4-inch cast iron skillets. You’ll need to adjust the baking time slightly—start checking at 20 minutes. The cast iron will give you an extra crispy bottom crust if you preheat the skillets first.
How do I prevent the bottom of the pie from getting soggy?
The key is to make sure the filling is thick enough before baking. If it’s too watery, it will soak into the bottom of the pastry. Also, letting the pies cool in the tin for 5 minutes before removing them helps the steam escape and keeps the bottom crisp.
Can I use a different meat?
Definitely. Cooked turkey, shredded pork, or even diced ham work beautifully. For a seafood version, try cooked shrimp or flaked salmon, but reduce the cooking time slightly so the seafood doesn’t overcook.
How do I make these dairy-free?
Use a dairy-free butter substitute (like Earth Balance) and replace the milk with unsweetened oat milk or canned coconut milk. The filling will be slightly less creamy but still very tasty. Also, check your puff pastry—many brands are dairy-free, but some contain butter.
Pin This Recipe!
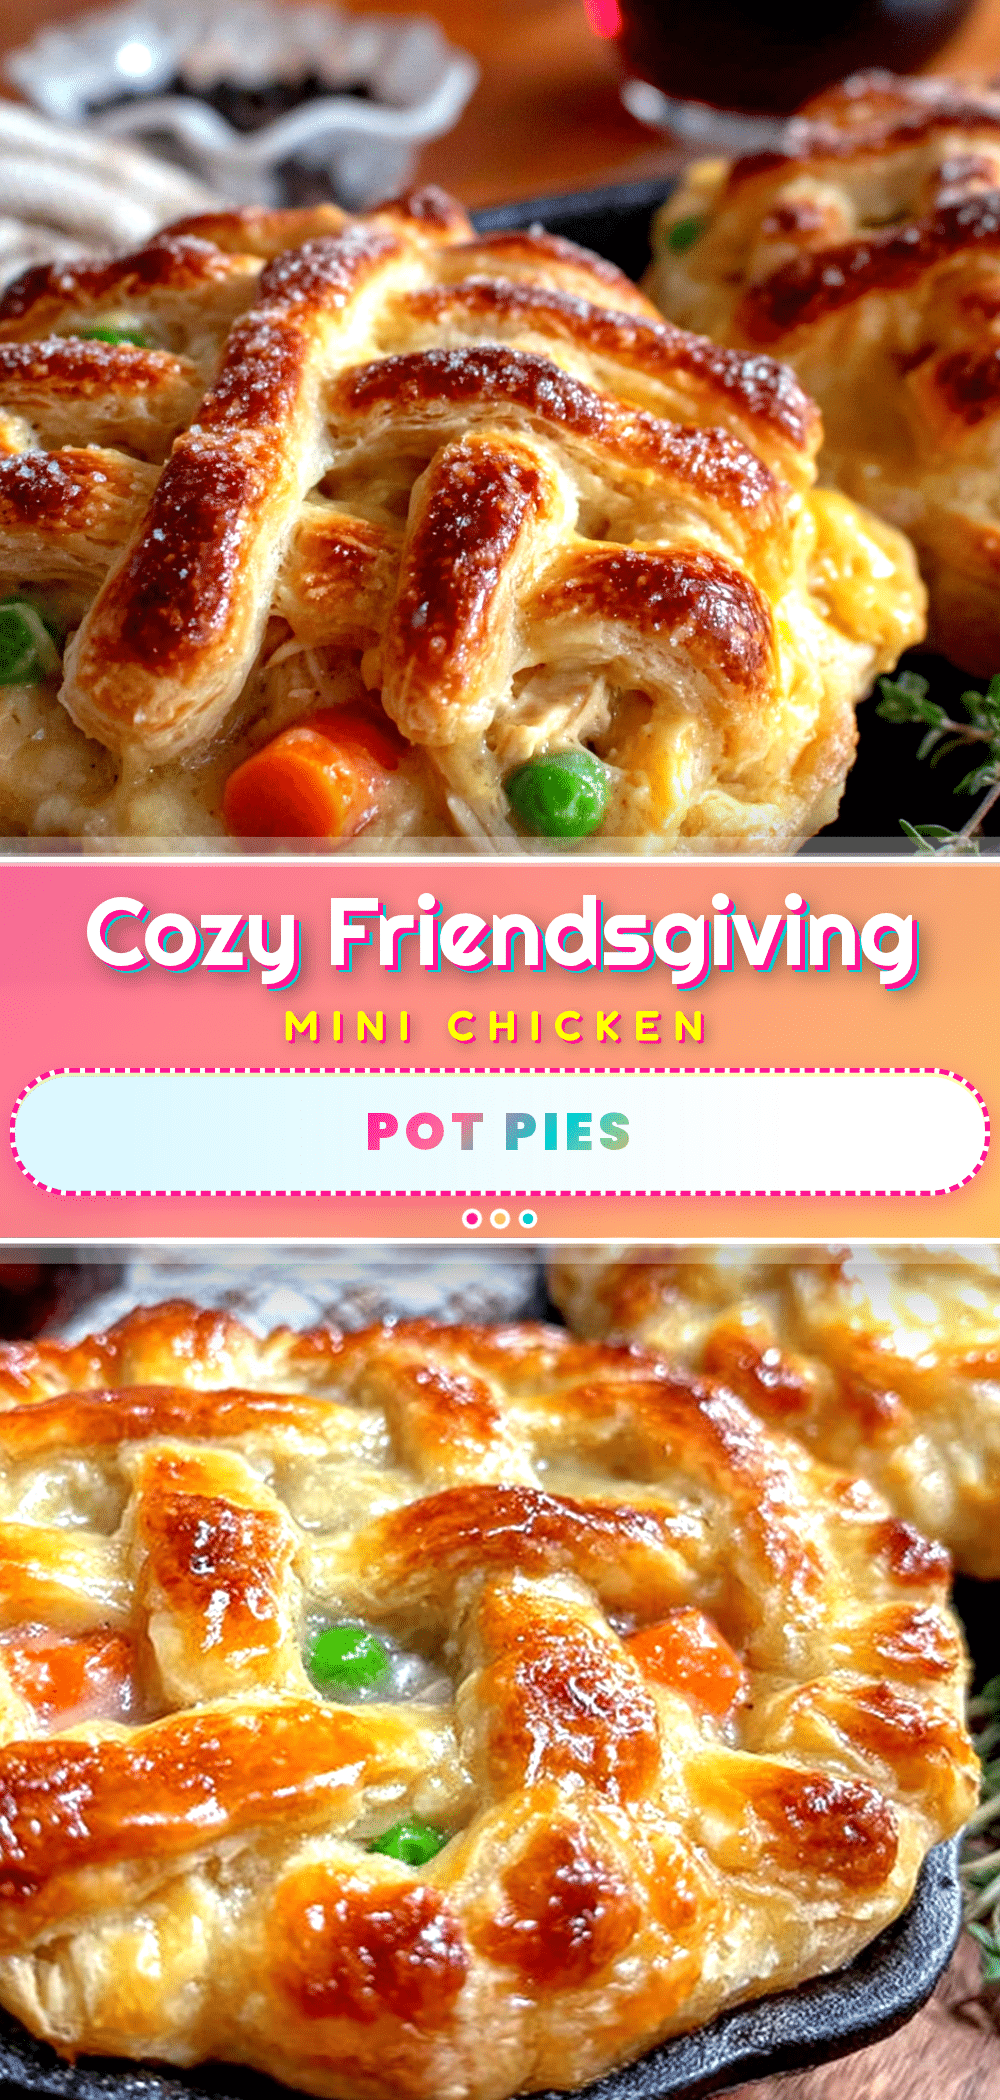
Best Mini Chicken Pot Pies for Cozy Friendsgiving

These individual mini chicken pot pies feature a creamy, savory filling and a flaky, golden puff pastry top. Perfect for a cozy Friendsgiving, they’re easy to grab, make ahead, and taste like a hug in food form.
- Prep Time: 20 minutes
- Cook Time: 22 minutes
- Total Time: 42 minutes
- Yield: 12 servings 1x
- Category: Main Course
- Cuisine: American
Ingredients
- 2 tablespoons unsalted butter
- 1 small yellow onion, diced (about 1 cup)
- 2 medium carrots, peeled and diced
- 2 celery stalks, diced
- 3 cloves garlic, minced
- 1/3 cup all-purpose flour
- 1 1/2 cups chicken broth, low-sodium
- 1 cup whole milk or heavy cream
- 2 cups cooked, shredded chicken
- 1 cup frozen peas
- 1/2 teaspoon dried thyme
- Salt and black pepper to taste
- 1 sheet puff pastry, thawed
- 1 large egg, beaten
- Flaky sea salt for sprinkling
Instructions
- Preheat your oven to 400°F (200°C). Place your muffin tin on a baking sheet.
- In a large skillet or saucepan, melt the butter over medium heat. Add the diced onion, carrots, and celery. Cook for about 5-7 minutes, stirring occasionally, until the vegetables have softened.
- Stir in the minced garlic and cook for 30 seconds until fragrant. Sprinkle the flour over the vegetables and stir constantly for about 1 minute.
- Slowly pour in the chicken broth while whisking constantly to prevent lumps. Then add the milk or cream. Keep whisking until the mixture comes to a gentle simmer. Let it cook for 2-3 minutes, stirring often, until it thickens enough to coat the back of a spoon.
- Stir in the shredded chicken, frozen peas, dried thyme, and a generous pinch of salt and pepper. Taste and adjust seasoning. Remove from heat and let cool slightly.
- On a lightly floured surface, gently roll out the thawed puff pastry sheet just slightly. Use a round cutter or glass (about 3 inches in diameter) to cut out 12 circles. Re-roll scraps if needed.
- Spoon the filling evenly into the 12 muffin cups, filling them almost to the top. Place a pastry circle on top of each cup, gently pressing the edges to the rim. Cut a small slit in the top of each pastry to let steam escape.
- Brush the tops with the beaten egg wash and sprinkle with a pinch of flaky sea salt. Bake for 18-22 minutes, or until the pastry is puffed up and golden brown. Let cool in the tin for 5 minutes before carefully lifting out.
Notes
For a vegetarian version, use mushrooms and extra veggies with vegetable broth. For dairy-free, use dairy-free butter and oat milk. Assemble pies ahead and refrigerate until ready to bake. If pastry browns too quickly, tent with foil for last 5 minutes.
Nutrition
- Serving Size: 1 mini pie
- Calories: 280
- Sugar: 4
- Sodium: 450
- Fat: 16
- Saturated Fat: 8
- Carbohydrates: 22
- Fiber: 2
- Protein: 14
Keywords: mini chicken pot pie, friendsgiving, individual pot pie, puff pastry, comfort food, chicken pot pie