Love this? Save it for later!
Share the inspiration with your friends
This was supposed to be a batch of classic chocolate chip cookies. You know the ones. The recipe I’d made a hundred times before, the one I could practically do in my sleep. But on this particular Tuesday night, I was distracted—my mind was on a work deadline, my phone was buzzing, and I grabbed the wrong butter. Instead of the cold, hard sticks I usually creamed with sugar, I grabbed the butter I’d left out to soften for tomorrow’s pancakes. It was practically liquid. And I was already running late for dinner.
I stared at the bowl. The butter was a puddle. I couldn’t un-melt it. I couldn’t start over because I was out of butter. So I just went with it. I browned it in the pan, because that’s what you do when you have melted butter and you’re trying to salvage a situation. I figured the cookies would be flat and greasy. I was ready to toss the whole thing and order pizza. But I mixed the dough anyway, feeling pretty annoyed at myself.
I scooped the dough onto the tray, threw a little sea salt on top because I was feeling reckless, and shoved them in the oven. Honestly, I didn’t even watch them. I was cleaning up the mess I’d made. When the timer went off, I pulled out a tray of cookies that looked… perfect. They were golden at the edges, crackled on top, and smelled like toffee and caramel. One bite, and I just stood there in my kitchen, holding the cookie, completely baffled. It was the best cookie I’d ever made. The nutty, deep flavor from the brown butter, the crispy edges, the soft center, the little crunch of salt—it was a happy accident I still don’t fully understand. But I’ve been making them this way ever since. Maybe you’ve had one of those kitchen moments where a mistake turns into something you’ll never forget. This is that recipe.
Why You’ll Love This Recipe
Let’s be real for a second. You’re busy. You’re tired. And you want a cookie that tastes like you spent hours in the kitchen, even though you didn’t. That’s exactly what these Quick Brown Butter Chocolate Chip Cookies with Sea Salt deliver. They come together in under 30 minutes, and they’ve got that “wow” factor that makes people think you’re a pastry chef.
Here’s why they work so well, especially for a weeknight:
- Quick & Easy: From start to finish, you’re looking at about 20 minutes of active time. No chilling the dough, no complicated steps. Just brown the butter, mix, scoop, and bake.
- Simple Ingredients: You probably have everything in your pantry right now. Butter, sugar, flour, eggs, chocolate chips, and salt. No weird extracts or specialty flours.
- Perfect for a Weeknight Craving: This is the cookie you make when you need something sweet after a long day. It’s fast enough to satisfy that urgent “I need a cookie” feeling.
- Crowd-Pleaser: I’ve brought these to potlucks, book clubs, and casual dinners. They disappear faster than anything else. Kids and adults both go crazy for them.
- Unbelievably Delicious: The brown butter is the secret weapon here. It adds a nutty, toffee-like flavor that regular cookies just can’t touch. The sea salt on top balances the sweetness and makes every bite sing.
The thing that makes these different from every other chocolate chip cookie recipe? It’s the brown butter technique combined with the fact that you don’t chill the dough. Most brown butter cookies require a long rest in the fridge to re-solidify the butter. Not these. I figured out the right ratio of butter to flour and the right mixing method so you get that perfect texture without the wait. It’s the best of both worlds—deep, complex flavor and instant gratification.
This is comfort food, reimagined. It’s the cookie you make when you need a hug in edible form, but you don’t have time to wait for one.
What Ingredients You Will Need
This recipe uses simple, honest ingredients to create something truly special. The magic is in the technique, not a long list of fancy items. Here’s what you’ll need and why each one matters.
For the Cookies:
- Unsalted butter, 1 cup (2 sticks / 226 grams): Use unsalted so you control the salt level. I prefer Kerrygold or any European-style butter for browning because it has a lower water content and more milk solids, which means richer flavor. But honestly, any unsalted butter works fine.
- Granulated sugar, ½ cup (100 grams): This gives the cookies crisp edges and helps them spread just right.
- Light brown sugar, packed, 1 cup (200 grams): This is non-negotiable for chewy cookies. Brown sugar adds moisture and that deep, molasses-like flavor that pairs perfectly with the brown butter. Don’t use dark brown sugar—it can overpower the delicate nutty notes.
- Large egg, 1, plus 1 egg yolk: The whole egg gives structure, and the extra yolk adds richness and chewiness. Make sure they’re at room temperature so they emulsify properly with the butter.
- Vanilla extract, 2 teaspoons: Use pure vanilla extract if you can. Imitation vanilla works in a pinch, but pure adds a more complex floral note.
- All-purpose flour, 1 ¾ cups (220 grams): Spoon and level your flour. Scooping directly from the bag packs it down and gives you too much flour, which leads to dry, cakey cookies.
- Baking soda, 1 teaspoon: This helps the cookies spread and gives them that slightly crackly top.
- Salt, ½ teaspoon: I use fine sea salt in the dough. It balances the sweetness and enhances the chocolate.
- Semi-sweet chocolate chips, 1 ½ cups (270 grams): I like Guittard or Ghirardelli chips for their consistent quality. You can also chop up a good-quality chocolate bar for bigger puddles of chocolate.
For the Topping:
- Flaky sea salt, for sprinkling: Use Maldon or any other flaky sea salt. Do not use table salt here—it’s too fine and will just make the cookies taste salty. The big, crunchy flakes are what make this special.
Substitution Guidance:
- Gluten-free: Swap the all-purpose flour with a 1:1 gluten-free baking flour blend that contains xanthan gum. I’ve tested this with King Arthur’s Measure for Measure, and it works beautifully.
- Dairy-free: Use a high-quality vegan butter stick, like Miyoko’s or Country Crock Plant Butter. The browning process might be slightly different, but it still works.
- Egg-free: You can try using a flax egg (1 tablespoon ground flaxseed mixed with 3 tablespoons water, let sit for 5 minutes) for the whole egg, but skip the extra yolk. The texture will be a little less chewy.
Equipment Needed
You don’t need a fancy kitchen to make these cookies. Here’s what you’ll need:
- A light-colored saucepan or skillet: This is important for browning the butter. A dark pan makes it hard to see the color change, and you’ll end up with burnt butter. I use a stainless steel saucepan.
- Mixing bowls: One large bowl for the wet ingredients and one medium bowl for the dry ingredients.
- A whisk and a rubber spatula: The whisk for the dry ingredients, the spatula for folding in the chocolate chips.
- Baking sheets: Two standard half-sheet pans work best. If you only have one, let it cool completely between batches.
- Parchment paper or a silicone baking mat: Parchment is cheaper and easier to clean up. Silicone mats work great but can make cookies spread a tiny bit more.
- A cookie scoop: I use a 1.5-tablespoon scoop for consistent cookies. A regular tablespoon works too, but the cookies won’t be as uniform.
- A wire cooling rack: Essential for getting those crispy edges. If you leave cookies on the hot pan, they’ll keep cooking and get overdone.
If you don’t have a cookie scoop, just use two spoons to portion the dough. It’s a little messier, but it gets the job done. I’ve definitely used a drinking glass to scoop dough in a pinch.
Preparation Method
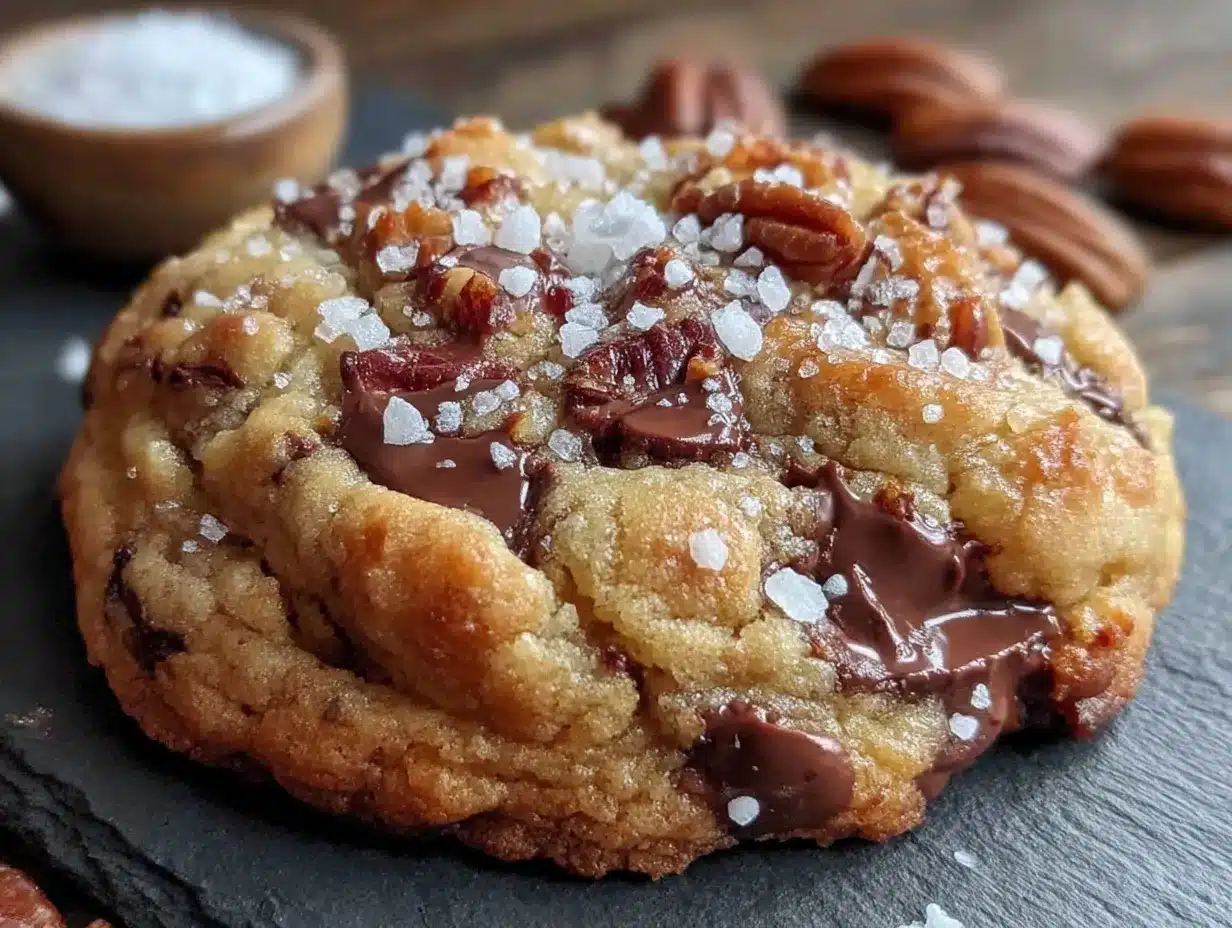
Alright, let’s make these cookies. The process is simple, but there’s one step that makes all the difference: browning the butter. Don’t skip it. Here’s how it goes.
- Brown the butter. Cut the butter into tablespoon-sized pieces and place them in your light-colored saucepan. Set it over medium heat. Let the butter melt completely, then start stirring with a rubber spatula or a whisk. You’ll see it foam up, then subside, then foam again. Keep stirring. After about 5-7 minutes, you’ll see little brown specks forming at the bottom of the pan. The butter will smell nutty and toasty. As soon as it turns a golden-amber color and smells like toasted hazelnuts, take it off the heat immediately. Pour it into a heatproof bowl to stop the cooking process. Let it cool for 10 minutes. It should be warm but not hot.
- Preheat your oven. Set it to 350°F (175°C). Line your baking sheets with parchment paper.
- Mix the sugars and butter. In a large bowl, combine the warm brown butter, granulated sugar, and brown sugar. Whisk them together until they’re well combined and the mixture looks like wet sand. It won’t be fluffy like creamed butter, and that’s okay. Let it sit for 2 minutes—this helps the sugar dissolve a little.
- Add the eggs and vanilla. Crack the whole egg and the extra yolk into the bowl. Add the vanilla extract. Whisk vigorously for about 30 seconds until the mixture is smooth, glossy, and slightly thickened. It should look like caramel.
- Mix the dry ingredients. In a separate bowl, whisk together the flour, baking soda, and salt. Make sure there are no lumps.
- Combine wet and dry. Pour the dry ingredients into the wet ingredients. Use your rubber spatula to fold them together gently. Mix just until you can’t see any more streaks of flour. Overmixing leads to tough cookies.
- Add the chocolate chips. Fold in the chocolate chips with your spatula. Make sure they’re evenly distributed throughout the dough. The dough will be thick and slightly greasy-looking—that’s the brown butter at work.
- Scoop the cookies. Use your cookie scoop to portion out rounded tablespoons of dough. Place them on the prepared baking sheets, spacing them about 2 inches apart. They will spread.
- Top with sea salt. Sprinkle a few flakes of flaky sea salt on top of each dough ball. Don’t be shy, but don’t go overboard. Just a few flakes per cookie.
- Bake. Bake for 10-12 minutes, rotating the pan halfway through. The cookies should be golden brown around the edges and still pale and slightly puffed in the center. They will look underdone—that’s what you want. They’ll continue to set on the pan.
- Cool. Let the cookies cool on the baking sheet for 5 minutes. Then transfer them to a wire rack to cool completely. Or, you know, eat one warm. I won’t judge.
Cooking Tips & Techniques
I’ve made these cookies more times than I can count, and I’ve learned a few things along the way. Here’s what I wish someone had told me.
Don’t walk away from the browning butter. I know it sounds dramatic, but it can go from perfect to burnt in about 15 seconds. The first time I made these, I got distracted by a text message and ended up with black butter. It smelled like a campfire, and not in a good way. Watch it like a hawk. Swirl the pan constantly. The moment you see those brown specks and smell that nutty aroma, pull it off the heat.
Let the brown butter cool. I know you’re impatient. I am too. But if you add the sugars to hot butter, it’ll melt the sugar and your cookies will spread into flat, greasy pucks. Let it cool for at least 10 minutes. It should feel warm to the touch, not hot.
Use a cookie scoop for consistent size. This isn’t just about aesthetics. Cookies that are the same size bake evenly. If you have some big and some small, you’ll end up with burnt edges and raw centers. A scoop takes the guesswork out.
Underbake them. This is the biggest tip I can give you. Pull the cookies out when the edges are set and golden, but the centers still look soft and puffy. They’ll continue to bake on the hot pan. If you wait until they look fully done in the oven, they’ll be overbaked and crunchy all the way through.
Let them rest on the pan. That 5-minute rest on the baking sheet is crucial. It gives the cookies time to set up without drying out. If you try to move them too soon, they’ll fall apart.
Variations & Adaptations
Once you’ve mastered the basic recipe, feel free to play around. Here are some of my favorite variations.
- Double Chocolate Chip: Replace ¼ cup of the all-purpose flour with ¼ cup of unsweetened cocoa powder. Use white chocolate chips or dark chocolate chunks instead of semi-sweet. The brown butter and chocolate combo is insane.
- Nutty Brown Butter: Toast ½ cup of chopped pecans or walnuts in a dry skillet over medium heat until fragrant, about 3-4 minutes. Let them cool, then fold them into the dough along with the chocolate chips. The crunch is wonderful.
- Gluten-Free Version: I’ve tested this with a 1:1 gluten-free flour blend, and it works perfectly. The texture is slightly more tender, but the flavor is spot on. Just make sure your blend contains xanthan gum.
- Spiced Brown Butter: Add 1 teaspoon of cinnamon, ½ teaspoon of nutmeg, and ¼ teaspoon of cardamom to the dry ingredients. It gives the cookies a cozy, almost chai-like warmth. Perfect for fall.
- M&M’s Cookies: Swap the chocolate chips for a cup of M&M’s and a half cup of mini chocolate chips. The colors make them fun for birthdays or holidays.
I once tried a version where I added a tablespoon of bourbon to the wet ingredients. It was a little too boozy for my taste, but my neighbor loved it. So if you’re feeling adventurous, go for it.
Serving & Storage Suggestions
These cookies are best served warm, when the chocolate is still a little melty and the edges are crisp. But they’re pretty fantastic at room temperature too.
Serving: I love to serve them with a cold glass of milk, obviously. But they’re also amazing with a scoop of vanilla ice cream sandwiched between two cookies. Or crumbled over a bowl of vanilla yogurt for a quick dessert. For a grown-up twist, pair them with a cup of strong black coffee or a glass of bourbon.
Storage: Store the cookies in an airtight container at room temperature for up to 5 days. To keep them soft, toss a slice of bread in the container—the cookies will absorb the moisture and stay chewy. Replace the bread slice every other day.
Freezing: These cookies freeze beautifully. You can freeze the baked cookies in a zip-top bag for up to 3 months. Thaw them at room temperature or pop them in a 300°F oven for 5 minutes to re-crisp. Even better, freeze the dough balls. Scoop the dough onto a parchment-lined baking sheet and freeze until solid, then transfer to a zip-top bag. Bake from frozen, adding 2-3 minutes to the bake time. This is my go-to move for unexpected guests.
Flavor Development: Here’s a secret: these cookies are actually better the next day. The brown butter flavor deepens and melds with the chocolate overnight. So if you can resist eating them all fresh, you’re in for a treat.
Nutritional Information & Benefits
Let’s be honest—these are cookies. They’re a treat. But that doesn’t mean you can’t feel good about eating them.
- Estimated Nutritional Values (per cookie, based on 24 cookies): Calories: 195, Fat: 11g, Saturated Fat: 7g, Cholesterol: 35mg, Sodium: 125mg, Carbohydrates: 24g, Fiber: 1g, Sugar: 16g, Protein: 2g.
- Health Benefits: The brown butter process actually creates compounds called melanoidins, which have antioxidant properties. The dark chocolate chips contain flavonoids, which are good for heart health. The sea salt provides trace minerals like magnesium and potassium.
- Dietary Considerations: This recipe is vegetarian. It can be made gluten-free and dairy-free with the substitutions listed above. It contains eggs, dairy, and gluten in its standard form.
- Potential Allergens: Wheat, dairy, eggs. The chocolate may contain soy and traces of nuts.
I’m not a nutritionist, and I’m not going to pretend these are health food. But I do believe that a well-made treat, eaten mindfully and with joy, is part of a balanced life. And these cookies bring a lot of joy.
Conclusion
So there you have it. A cookie that started as a mistake and became my absolute favorite. These Quick Brown Butter Chocolate Chip Cookies with Sea Salt are proof that sometimes the best things in life come from happy accidents. They’re fast enough for a Tuesday night craving, but fancy enough to impress your friends. The nutty brown butter, the melty chocolate, the little crunch of sea salt—it’s a combination that works on every level.
I really hope you give these a try. Don’t be afraid of the brown butter step—it’s easier than it sounds, and the payoff is huge. And if you mess up? That’s okay. That’s how I found this recipe in the first place. Play around with the variations, make them your own, and let me know how they turn out. Drop a comment below or tag me in your photos on social media. I love seeing your creations.
Go on. Brown that butter. Your cookies are waiting.
Frequently Asked Questions
Can I use salted butter instead of unsalted?
You can, but you’ll want to reduce or omit the added salt in the dough. The brown butter process concentrates the salt, so it can get a little too salty if you’re not careful. I recommend sticking with unsalted so you have full control.
Why did my cookies turn out flat?
Flat cookies usually mean the butter was too warm when you mixed the dough, or you didn’t use enough flour. Make sure your brown butter has cooled to room temperature before mixing. Also, be sure to spoon and level your flour—scooping directly from the bag packs it down and gives you too much.
Can I chill the dough?
You can, but it’s not necessary for this recipe. If you do chill the dough, let it sit at room temperature for 10-15 minutes before scooping, or it’ll be too hard to work with. Chilled dough will produce slightly thicker, chewier cookies.
How do I know when the butter is properly browned?
Look for three signs: the butter will turn a golden-amber color, you’ll see tiny brown specks at the bottom of the pan, and it will smell nutty and toasty, like toasted hazelnuts. The whole process takes about 5-7 minutes over medium heat.
Can I use milk chocolate chips instead of semi-sweet?
Absolutely. Just know that milk chocolate is sweeter and creamier, so the cookies will be a bit more sugary. I personally prefer semi-sweet because it balances the richness of the brown butter, but use whatever you love.
Pin This Recipe!
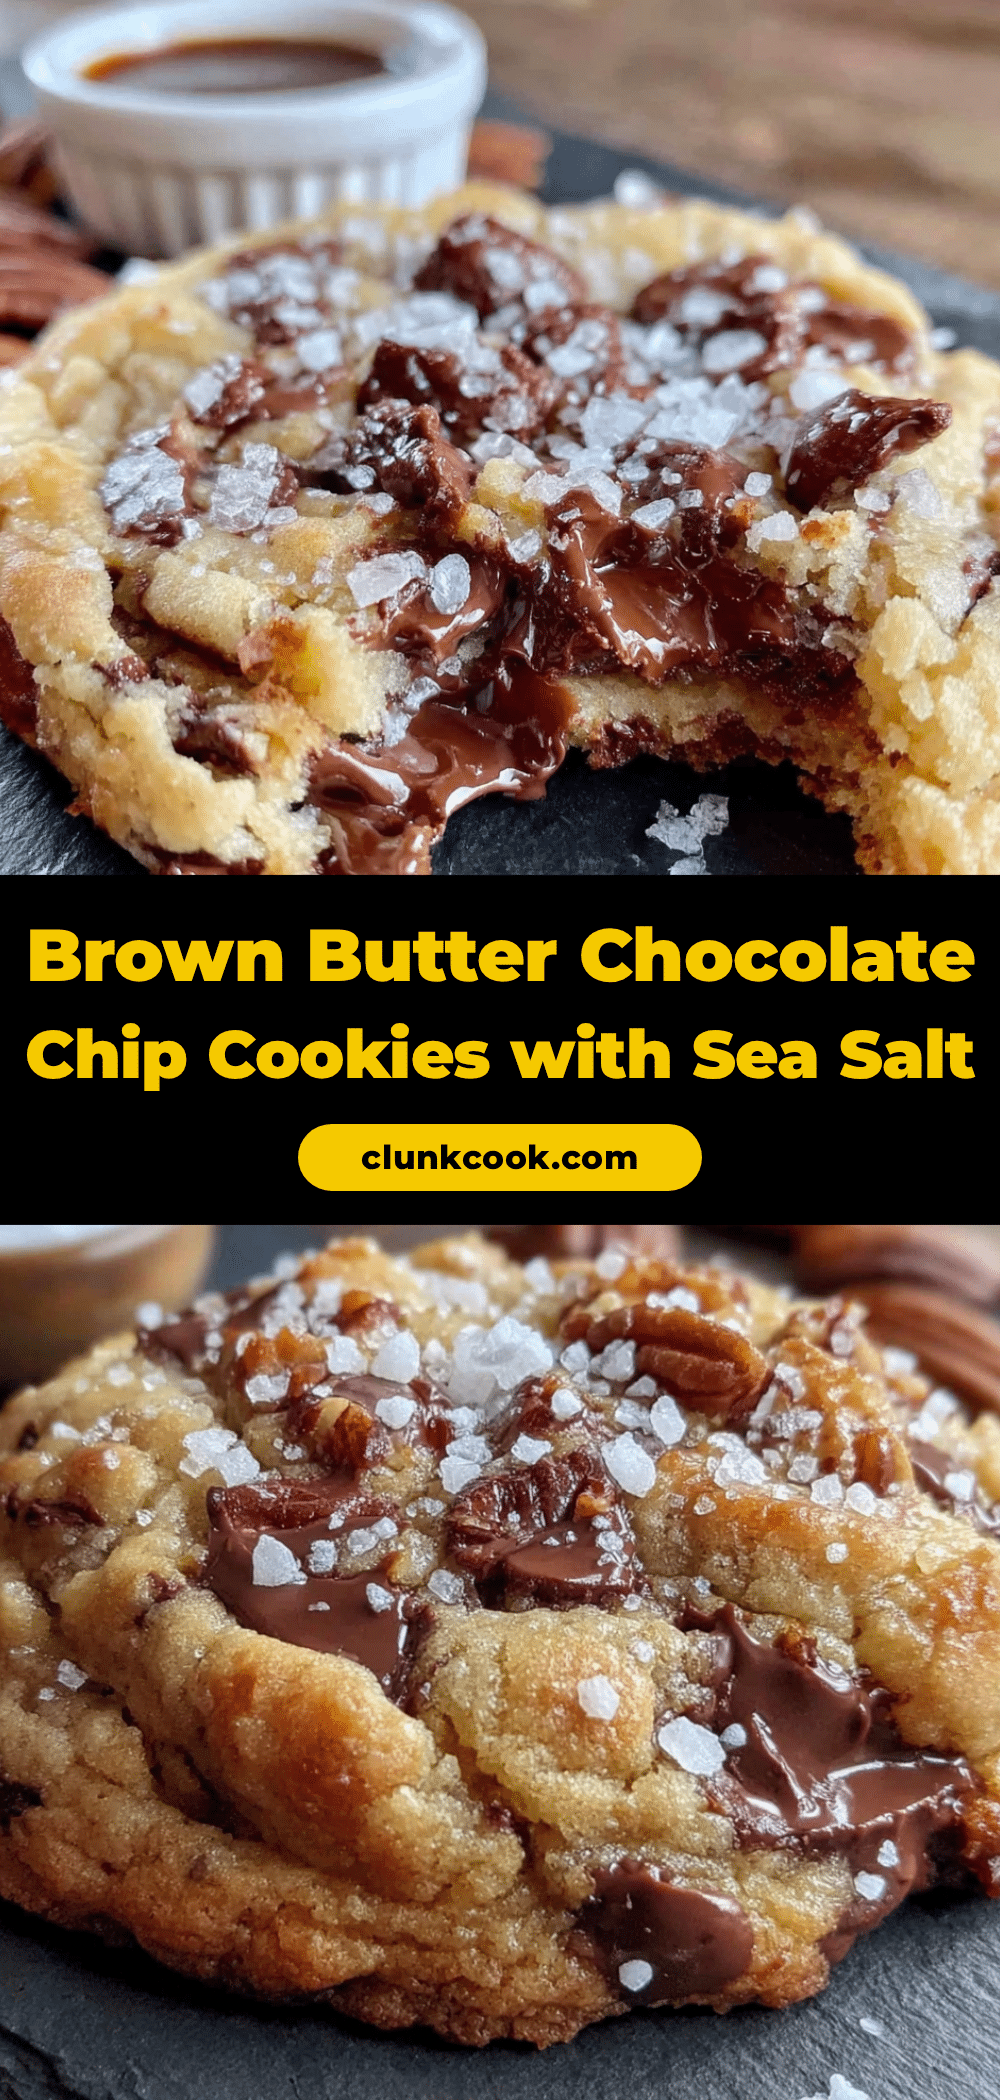
Best Quick Brown Butter Chocolate Chip Cookies with Sea Salt
These quick brown butter chocolate chip cookies with sea salt come together in under 30 minutes with no chilling required. The nutty brown butter, crispy edges, soft center, and flaky sea salt create an unforgettable cookie that started as a happy accident.
- Prep Time: 20 minutes
- Cook Time: 12 minutes
- Total Time: 32 minutes
- Yield: 24 cookies 1x
- Category: Dessert
- Cuisine: American
Ingredients
- 1 cup (2 sticks / 226 grams) unsalted butter
- ½ cup (100 grams) granulated sugar
- 1 cup (200 grams) packed light brown sugar
- 1 large egg plus 1 egg yolk, at room temperature
- 2 teaspoons pure vanilla extract
- 1 ¾ cups (220 grams) all-purpose flour, spooned and leveled
- 1 teaspoon baking soda
- ½ teaspoon fine sea salt
- 1 ½ cups (270 grams) semi-sweet chocolate chips
- Flaky sea salt, for sprinkling
Instructions
- Brown the butter: Cut the butter into tablespoon-sized pieces and place in a light-colored saucepan over medium heat. Melt completely, then stir constantly with a rubber spatula or whisk. After 5-7 minutes, the butter will foam, subside, then foam again. When you see brown specks form at the bottom and it smells nutty and toasty (golden-amber color), remove from heat immediately. Pour into a heatproof bowl and let cool for 10 minutes until warm but not hot.
- Preheat oven to 350°F (175°C). Line baking sheets with parchment paper.
- In a large bowl, combine the warm brown butter, granulated sugar, and brown sugar. Whisk until well combined and looks like wet sand. Let sit for 2 minutes.
- Add the whole egg, egg yolk, and vanilla extract. Whisk vigorously for about 30 seconds until smooth, glossy, and slightly thickened (like caramel).
- In a separate bowl, whisk together the flour, baking soda, and salt until no lumps remain.
- Pour dry ingredients into wet ingredients. Fold gently with a rubber spatula just until no streaks of flour remain. Do not overmix.
- Fold in the chocolate chips until evenly distributed. Dough will be thick and slightly greasy-looking.
- Using a 1.5-tablespoon cookie scoop, portion rounded tablespoons of dough onto prepared baking sheets, spacing 2 inches apart.
- Sprinkle a few flakes of flaky sea salt on top of each dough ball.
- Bake for 10-12 minutes, rotating the pan halfway through. Cookies should be golden brown around edges and still pale and slightly puffed in the center (they will look underdone).
- Let cookies cool on the baking sheet for 5 minutes, then transfer to a wire rack to cool completely. Enjoy warm or at room temperature.
Notes
Don’t walk away from browning butter—it can burn in seconds. Let brown butter cool for at least 10 minutes before mixing with sugars. Underbake cookies slightly; they continue to set on the hot pan. For best texture, let cookies rest on the baking sheet for 5 minutes before transferring. Cookies are even better the next day as flavors deepen. To keep soft, store with a slice of bread in the container. Freeze dough balls for up to 3 months; bake from frozen adding 2-3 minutes.
Nutrition
- Serving Size: 1 cookie
- Calories: 195
- Sugar: 16
- Sodium: 125
- Fat: 11
- Saturated Fat: 7
- Carbohydrates: 24
- Fiber: 1
- Protein: 2
Keywords: brown butter chocolate chip cookies, quick cookies, sea salt cookies, no chill cookies, easy chocolate chip cookies, weeknight cookies


