Love this? Save it for later!
Share the inspiration with your friends
I was standing in the produce aisle last Tuesday when a kid walked past with one of those caramel apple lollipops—you know, the sticky green ones wrapped in plastic. The smell hit me, that sweet-buttery-caramel thing, and suddenly I was eight years old in my great-aunt Rita’s tiny kitchen, watching her peel apples over the sink while some old country station played on a crackly radio. She’d let me lick the spoon after she made caramel sauce, and I remember thinking nobody in the world could be luckier than me right then. She’s been gone almost fifteen years now, and I still can’t find her recipe box anywhere—my cousin swears she took it, but honestly, I think it got lost in one of those moves nobody wants to talk about.
So I’ve been trying to recreate that feeling ever since. Not just the caramel, not just the apples, but the whole thing—the way the kitchen smelled, the way the crumble got all golden on top, the way she’d let me eat it straight from the dish with a big spoon because “company’s not coming till tomorrow anyway.” This salted caramel apple crisp with oat crumble is my best attempt yet. I’ve tested it maybe seven times now, and I think I finally got it right. Maybe you’ve been there too—chasing a taste you can’t quite describe but you’d know the second it hit your tongue.
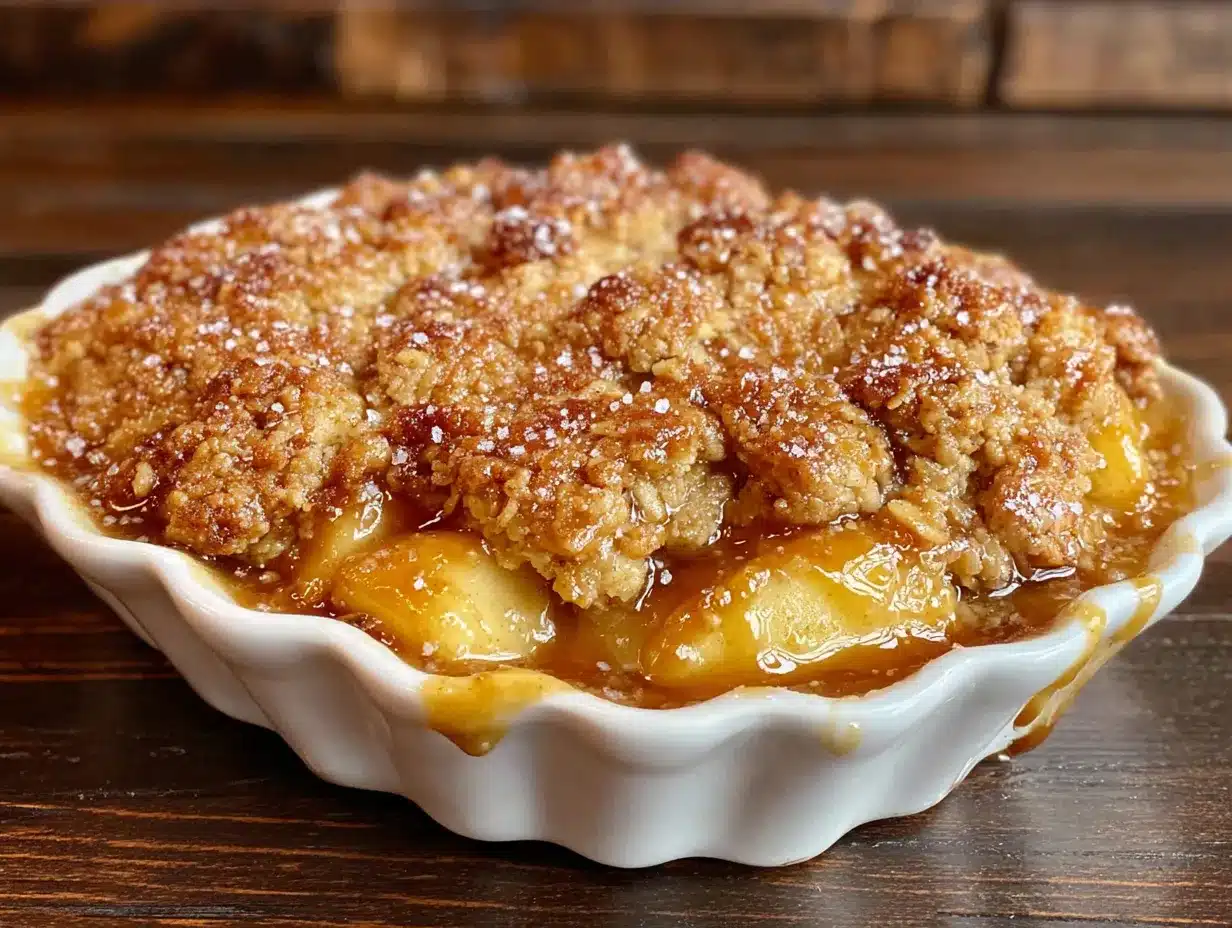
The thing about this recipe is it’s not trying to be fancy. It’s just really, really good. The apples get soft and jammy underneath all that buttery oat topping, and the salted caramel sauce seeps down into every single crack and crevice. I keep making it because it’s the closest I’ve gotten to that Tuesday afternoon feeling—and honestly, that’s worth a few burnt fingertips from caramel testing.
Why You’ll Love This Recipe
This isn’t just another apple crisp recipe you’ll find floating around the internet. I developed this version after countless trials—some where the topping was too dry, others where the apples turned to complete mush, and a few where the caramel just refused to cooperate. What I landed on is something special, and here’s why you’re going to love it:
- Quick & Easy: From start to table in about 55 minutes, with only 15 minutes of active prep. Perfect for those evenings when you need dessert but don’t want to spend hours in the kitchen.
- Simple Ingredients: No trips to specialty stores required. Apples, oats, butter, brown sugar, and a few pantry staples—that’s all you need.
- Perfect for Fall Gatherings: This is the dessert that disappears at Thanksgiving, Friendsgiving, or any cozy dinner party. It’s also amazing for a quiet Sunday afternoon with a scoop of vanilla ice cream.
- Crowd-Pleaser: Kids love the sweet caramel and crunchy topping, while adults appreciate that perfect salty-sweet balance. I’ve served this to picky eaters and dessert snobs alike, and it never fails.
- Unbelievably Delicious: The texture is everything—soft, tender apples with a bit of bite left, a crispy oat crumble that stays crunchy even the next day, and that silky salted caramel that ties it all together.
What makes this recipe different from the rest is the technique. Instead of just tossing apples with sugar and flour, I take five extra minutes to cook the apples briefly on the stovetop first. This releases some of their liquid and concentrates the flavor, so you don’t end up with a watery crisp. And the salted caramel? It’s homemade, but I promise it’s easier than you think. I’ve streamlined the process so there’s no candy thermometer needed, no stressful timing—just a simple saucepan and a little patience.
This is the kind of dessert that makes people close their eyes after the first bite. It’s comfort food at its finest—warm, cozy, and deeply satisfying. Perfect for impressing guests without breaking a sweat, or for treating yourself on a chilly evening when you need something sweet.
What Ingredients You Will Need
This salted caramel apple crisp uses simple, wholesome ingredients to create something truly special. Most of these are probably already in your pantry, which makes this recipe even better for those spontaneous dessert cravings.
For the Salted Caramel Sauce
- 1 cup (200g) granulated sugar – Regular white sugar works best here. Don’t substitute with brown sugar; it changes the texture of the caramel.
- 6 tablespoons (85g) unsalted butter, cut into cubes, at room temperature – I use Kerrygold for its rich flavor, but any good-quality butter works.
- 1/2 cup (120ml) heavy cream, at room temperature – Cold cream will seize the caramel, so let it sit out for 20 minutes first.
- 1 teaspoon flaky sea salt, plus more for finishing – Maldon is my go-to for that perfect crunchy texture on top.
- 1 teaspoon vanilla extract – Pure vanilla, not imitation, makes a noticeable difference here.
For the Apple Filling
- 6 medium apples (about 2.5 pounds or 1.1 kg), peeled, cored, and sliced 1/4-inch thick – I recommend a mix of Granny Smith and Honeycrisp for the best balance of tart and sweet. The Granny Smiths hold their shape beautifully, while the Honeycrisps break down slightly to create that jammy texture.
- 1/4 cup (50g) granulated sugar
- 1/4 cup (50g) packed light brown sugar
- 2 tablespoons all-purpose flour
- 1 tablespoon fresh lemon juice – This keeps the apples from browning and brightens the flavor.
- 1 teaspoon ground cinnamon
- 1/4 teaspoon ground nutmeg – Freshly grated if you have it, but pre-ground works fine.
- 1/4 teaspoon salt
For the Oat Crumble Topping
- 1 cup (120g) old-fashioned rolled oats – Not quick oats! They’ll turn to mush. I prefer Bob’s Red Mill brand for their hearty texture.
- 3/4 cup (95g) all-purpose flour
- 1/2 cup (100g) packed light brown sugar
- 1/4 cup (50g) granulated sugar
- 1/2 teaspoon ground cinnamon
- 1/4 teaspoon salt
- 1/2 cup (115g) unsalted butter, melted and slightly cooled
- 1/2 cup (55g) chopped pecans – Optional, but I love the crunch they add. Walnuts work too.
For the apples, look for firm apples without any soft spots. If you’re using mostly soft apples like McIntosh, reduce the cooking time slightly so they don’t turn to applesauce. And for the oats, I really do recommend old-fashioned rolled oats—they give that wonderful chewy texture that makes this crisp so satisfying.
Equipment Needed
You don’t need a fancy kitchen to make this salted caramel apple crisp, but having the right tools makes the process smoother. Here’s what you’ll need:
- 9×13-inch baking dish – Glass or ceramic works best. I use a Pyrex dish and it distributes heat evenly. If you only have metal, reduce the baking temperature by 25°F.
- Medium saucepan – For the caramel sauce. Use a light-colored pan if you have one; it helps you see the color change as the sugar melts.
- Large skillet – For pre-cooking the apples. A 12-inch skillet gives enough room for the apples to cook evenly.
- Mixing bowls – One large for the apples, one medium for the crumble topping.
- Wooden spoon or silicone spatula – For stirring the caramel. Metal can scratch your pan.
- Sharp knife and cutting board – For peeling and slicing the apples. A Y-shaped peeler makes the job much faster.
- Measuring cups and spoons – Accurate measurements matter in baking, especially for the caramel.
- Pastry brush – Optional, but helpful for greasing the baking dish.
If you don’t have a pastry brush, just use a paper towel with a bit of butter. And if you’re short on time, you can skip the stovetop caramel and use a good-quality store-bought version—just make sure it’s salted caramel. I’ve tried both, and honestly, the homemade version is worth the extra 10 minutes.
Preparation Method
Let me walk you through this step by step. I’ve tested this process multiple times to find the most efficient order, so trust me on the timing.
- Preheat your oven to 375°F (190°C). Grease your 9×13 baking dish with butter or non-stick spray and set it aside.
- Make the salted caramel sauce first. In a medium saucepan over medium heat, spread the granulated sugar in an even layer. Don’t stir it yet—just let it melt. After about 3-4 minutes, you’ll see the edges start to turn golden. Now you can gently swirl the pan (don’t use a spoon yet). Continue cooking until the sugar turns a deep amber color, like the color of a penny. This takes about 6-8 minutes total. Watch it carefully—caramel can go from perfect to burnt in seconds.
- Remove the pan from heat immediately. Add the cubed butter and whisk until it’s completely melted and smooth. The mixture will bubble up vigorously, so be careful. Let it settle for a few seconds, then slowly pour in the heavy cream while whisking constantly. Again, it will bubble up. Keep whisking until the sauce is smooth and glossy.
- Stir in the flaky sea salt and vanilla extract. Let the sauce cool slightly while you work on the apples. It will thicken as it cools, which is exactly what you want.
- Prepare the apple filling. In a large bowl, toss the sliced apples with both sugars, flour, lemon juice, cinnamon, nutmeg, and salt. Make sure every slice is coated.
- Cook the apples briefly on the stovetop. Heat a large skillet over medium heat. Add the apple mixture and cook for 5-6 minutes, stirring occasionally, until the apples start to soften and release their juices. They should be slightly tender but still hold their shape. This step is crucial—it concentrates the apple flavor and prevents that watery crisp problem.
- Make the oat crumble topping. In a medium bowl, combine the rolled oats, flour, both sugars, cinnamon, and salt. Pour in the melted butter and stir until the mixture looks like wet sand with some clumps. If you’re using pecans, stir them in now.
- Assemble the crisp. Spread the cooked apple mixture evenly in your prepared baking dish. Drizzle about half of the salted caramel sauce over the apples—save the rest for serving. Sprinkle the oat crumble topping evenly over the apples, covering them completely.
- Bake for 35-40 minutes, or until the topping is golden brown and the filling is bubbling around the edges. If the topping is browning too quickly, tent the dish loosely with foil for the last 10 minutes.
- Let it rest for 10-15 minutes before serving. This allows the filling to set slightly so it doesn’t run all over the plate. Drizzle the remaining caramel sauce over the top and sprinkle with a little extra flaky sea salt.
A few things I’ve learned the hard way: if your caramel seizes up when you add the cream (it happens), don’t panic. Return the pan to low heat and whisk gently until it comes back together. And if your apples release a lot of liquid during the stovetop cooking, just let it cook an extra minute or two until it reduces slightly. Your future self will thank you.
Cooking Tips & Techniques
After making this salted caramel apple crisp more times than I care to count, I’ve picked up a few tricks that make a real difference. Here’s what I wish someone had told me:
Don’t skip the stovetop apple cooking. I know it’s an extra step, but it’s the secret to a crisp that isn’t soupy. When you cook the apples first, you’re controlling how much moisture stays in the final dish. Raw apples release their liquid in the oven, and that’s when things get watery. Pre-cooking gives you control.
Use a light-colored pan for the caramel. Dark pans make it nearly impossible to see when the sugar has reached that perfect amber color. I ruined three batches before I figured this out. If all you have is dark, use a smaller pan and cook on slightly lower heat.
Room temperature ingredients matter. I know, I know—who has time for that? But with caramel, cold cream or cold butter can cause the mixture to seize and become grainy. Just set your butter and cream on the counter 20 minutes before you start. It makes a real difference.
Let the crisp rest before serving. I learned this one the hard way when I served a piping hot crisp that immediately turned into apple soup on everyone’s plates. Giving it 10-15 minutes allows the filling to thicken and set. The caramel will still be warm and gooey, but it won’t run everywhere.
Make extra caramel sauce. Seriously, double the caramel recipe. You’ll want extra for drizzling, and it keeps in the fridge for up to two weeks. I use it on ice cream, pancakes, and even stirred into coffee. It’s dangerous knowledge, but worth having.
Variations & Adaptations
One of the best things about this salted caramel apple crisp is how adaptable it is. Here are some variations I’ve tried and loved:
Gluten-Free Version: Substitute the all-purpose flour in both the filling and the topping with a good 1:1 gluten-free flour blend. I’ve used Bob’s Red Mill with great results. Make sure your oats are certified gluten-free too, since oats are often processed with wheat.
Vegan Adaptation: Use coconut oil or vegan butter in place of regular butter in both the caramel and the topping. For the caramel, full-fat coconut cream works beautifully instead of heavy cream. The texture is slightly different but still delicious.
Different Apple Combinations: Try using all Granny Smith for a tarter crisp, or all Honeycrisp for something sweeter. I once made it with Fuji apples and it was incredible—they held their shape perfectly and had this lovely floral sweetness. Avoid Red Delicious; they turn into mush.
Spice It Up: Add a pinch of cardamom or ginger to the apple mixture for a warm, aromatic twist. I tried it with cardamom last Thanksgiving and it was a huge hit. You could also add a tablespoon of bourbon or dark rum to the apples for extra depth.
Individual Servings: Divide the mixture among 6-8 ramekins and bake for about 20-25 minutes instead. They’re perfect for dinner parties and everyone gets their own little dish of crispy, caramelly goodness.
Serving & Storage Suggestions
This salted caramel apple crisp is best served warm, about 10-15 minutes after it comes out of the oven. The filling should be bubbly and the topping golden and crisp. I like to serve it in shallow bowls with a generous scoop of vanilla ice cream melting into the warm caramel. A dollop of whipped cream works beautifully too, and a final sprinkle of flaky sea salt right before serving makes all the difference.
For drinks, a hot cup of coffee or a glass of cold milk is perfect. If you’re feeling fancy, a bourbon or rye whiskey on the rocks pairs beautifully with the caramel and apples. For a non-alcoholic option, spiced apple cider is a natural choice.
Storage: Cover the cooled crisp tightly with foil or plastic wrap and store in the refrigerator for up to 4 days. The topping will lose some of its crunch, but it’s still delicious. I actually think the flavors get better after a day or two as the caramel seeps deeper into the apples.
Reheating: The best way to reheat is in a 350°F oven for about 10-15 minutes. This helps revive the crispness of the topping. In a pinch, the microwave works, but the topping will be soft rather than crunchy. If you’re microwaving, do it in 30-second bursts and serve immediately.
Freezing: You can freeze the unbaked crisp for up to 3 months. Assemble everything in the baking dish, wrap it tightly in plastic wrap and then foil, and freeze. When you’re ready to bake, add about 10-15 minutes to the baking time and don’t thaw first. The baked crisp also freezes well for up to 2 months.
Nutritional Information & Benefits
Let’s be real—this is dessert, and it’s meant to be enjoyed. But here’s what I can tell you about what’s in each serving (based on 8 servings):
- Calories: Approximately 420-450 per serving
- Fat: 18-20g (mostly from butter and nuts)
- Carbohydrates: 62-68g
- Fiber: 4-5g
- Protein: 4-5g
- Sugar: 42-46g
On the plus side, apples are packed with fiber and vitamin C, and the oats provide soluble fiber that’s good for heart health. The pecans add healthy fats and a little protein. And honestly, there’s something to be said for the mental health benefits of a warm, comforting dessert shared with people you love.
This recipe contains dairy, gluten, and nuts (if you add the pecans). For allergen-friendly versions, check the variations section above.
Conclusion
This salted caramel apple crisp with oat crumble is more than just a dessert—it’s the kind of recipe that becomes part of your fall traditions. It’s the thing you make when the leaves start turning, when you want the house to smell like cinnamon and butter, when you need something warm and sweet to share with the people you love.
I’ve spent years trying to recreate that feeling from my great-aunt’s kitchen, and while I’m not sure I’ll ever get it exactly right, this version comes pretty close. The best part is that you can make it your own. Use your favorite apples, add extra caramel if you’re feeling bold, or skip the nuts if that’s not your thing. The recipe is forgiving and flexible, just like the best comfort food always is.
I’d love to hear how yours turns out! Drop a comment below and let me know what apple combination you used, or if you tried any fun variations. And if you share a photo on social media, tag me so I can see your beautiful creation. Happy baking, friends—go make something delicious!
Frequently Asked Questions
Can I use store-bought caramel sauce instead of making my own?
Absolutely. If you’re short on time, a good-quality store-bought salted caramel sauce works fine. Look for one that’s thick and not too runny. I recommend Trader Joe’s or Stonewall Kitchen brands. Just keep in mind that homemade caramel has a deeper, more complex flavor that really elevates the dish.
What are the best apples for apple crisp?
A mix of tart and sweet apples gives the best results. Granny Smith apples hold their shape well and provide that necessary tartness to balance the sweet caramel. Honeycrisp adds sweetness and a nice texture. Fuji, Braeburn, and Jonagold are also excellent choices. Avoid Red Delicious and McIntosh, as they break down too much.
Why is my apple crisp watery?
This usually happens when the apples release too much liquid during baking. The solution is to pre-cook the apples on the stovetop, which is exactly what this recipe does. If you’re still having issues, make sure you’re using the right amount of flour in the filling, and let the crisp rest for at least 10 minutes after baking before serving.
Can I make this ahead of time?
Yes! You can assemble the entire crisp (without baking) up to 24 hours in advance. Cover it and refrigerate. When you’re ready to bake, add about 10 minutes to the baking time since you’re starting from cold. You can also make the caramel sauce up to a week ahead and store it in the refrigerator.
How do I get the topping to stay crunchy?
The key is using old-fashioned rolled oats and making sure your butter is melted but not too hot. If the butter is too hot, it will soak into the oats and make them soggy. Also, don’t overmix the topping—you want some clumps for texture. And finally, let the crisp rest after baking so the steam can escape instead of making the topping soft.
Pin This Recipe!

Best Salted Caramel Apple Crisp with Oat Crumble

This salted caramel apple crisp with oat crumble is the ultimate fall dessert—soft, jammy apples under a buttery oat topping, with homemade salted caramel seeping into every bite. Quick to prepare and perfect for gatherings, it’s comfort food at its finest.
- Prep Time: 15 minutes
- Cook Time: 40 minutes
- Total Time: 55 minutes
- Yield: 8 servings 1x
- Category: Dessert
- Cuisine: American
Ingredients
- 1 cup (200g) granulated sugar
- 6 tablespoons (85g) unsalted butter, cut into cubes, at room temperature
- 1/2 cup (120ml) heavy cream, at room temperature
- 1 teaspoon flaky sea salt, plus more for finishing
- 1 teaspoon vanilla extract
- 6 medium apples (about 2.5 pounds or 1.1 kg), peeled, cored, and sliced 1/4-inch thick
- 1/4 cup (50g) granulated sugar
- 1/4 cup (50g) packed light brown sugar
- 2 tablespoons all-purpose flour
- 1 tablespoon fresh lemon juice
- 1 teaspoon ground cinnamon
- 1/4 teaspoon ground nutmeg
- 1/4 teaspoon salt
- 1 cup (120g) old-fashioned rolled oats
- 3/4 cup (95g) all-purpose flour
- 1/2 cup (100g) packed light brown sugar
- 1/4 cup (50g) granulated sugar
- 1/2 teaspoon ground cinnamon
- 1/4 teaspoon salt
- 1/2 cup (115g) unsalted butter, melted and slightly cooled
- 1/2 cup (55g) chopped pecans (optional)
Instructions
- Preheat your oven to 375°F (190°C). Grease a 9×13-inch baking dish with butter or non-stick spray and set aside.
- Make the salted caramel sauce: In a medium saucepan over medium heat, spread the granulated sugar in an even layer. Let it melt without stirring for 3-4 minutes until the edges turn golden. Gently swirl the pan and continue cooking until the sugar turns a deep amber color (like a penny), about 6-8 minutes total.
- Remove the pan from heat immediately. Add the cubed butter and whisk until melted and smooth. The mixture will bubble vigorously. Let it settle for a few seconds, then slowly pour in the heavy cream while whisking constantly. Keep whisking until smooth and glossy.
- Stir in the flaky sea salt and vanilla extract. Let the sauce cool slightly; it will thicken as it cools.
- Prepare the apple filling: In a large bowl, toss the sliced apples with both sugars, flour, lemon juice, cinnamon, nutmeg, and salt until every slice is coated.
- Cook the apples briefly on the stovetop: Heat a large skillet over medium heat. Add the apple mixture and cook for 5-6 minutes, stirring occasionally, until the apples start to soften and release their juices. They should be slightly tender but still hold their shape.
- Make the oat crumble topping: In a medium bowl, combine the rolled oats, flour, both sugars, cinnamon, and salt. Pour in the melted butter and stir until the mixture looks like wet sand with some clumps. If using pecans, stir them in now.
- Assemble the crisp: Spread the cooked apple mixture evenly in the prepared baking dish. Drizzle about half of the salted caramel sauce over the apples (save the rest for serving). Sprinkle the oat crumble topping evenly over the apples, covering them completely.
- Bake for 35-40 minutes, or until the topping is golden brown and the filling is bubbling around the edges. If the topping is browning too quickly, tent the dish loosely with foil for the last 10 minutes.
- Let it rest for 10-15 minutes before serving. Drizzle the remaining caramel sauce over the top and sprinkle with a little extra flaky sea salt.
Notes
For best results, use a mix of Granny Smith and Honeycrisp apples. If caramel seizes when adding cream, return to low heat and whisk gently. Let the crisp rest before serving to allow the filling to set. Make extra caramel sauce for drizzling; it keeps in the fridge for up to two weeks.
Nutrition
- Serving Size: 1 serving (1/8 of re
- Calories: 435
- Sugar: 44
- Sodium: 320
- Fat: 19
- Saturated Fat: 11
- Carbohydrates: 65
- Fiber: 4.5
- Protein: 4.5
Keywords: salted caramel apple crisp, apple crisp, oat crumble, fall dessert, apple dessert, caramel apple crisp


