Love this? Save it for later!
Share the inspiration with your friends
This was supposed to be a simple weeknight casserole. I had my mind set on something creamy, mild, and completely unremarkable—the kind of dinner you throw together when you’re too tired to think. But then I grabbed the wrong chiles from the back of the fridge, the ones I’d roasted last weekend and completely forgotten about. The smell hit me first—that deep, smoky, almost hypnotic aroma that fills your whole kitchen and makes your neighbors text you asking what you’re cooking. I was already running late, the kids were circling like hungry sharks, and honestly, I almost just tossed them in the trash and used the canned stuff. But something stopped me. Maybe it was stubbornness. Maybe it was the memory of that first Hatch chile season I experienced in New Mexico, standing in a parking lot while the roaster churned out those blackened peppers by the bushel. I chopped them up, mixed them into the filling, and crossed my fingers. What came out of the oven was nothing like the plan—and better. Way better.
I mean, let me tell you, I stood there with the oven door open, fork in hand, just staring at this pan of enchiladas like they’d fallen from the sky. The smoky heat from the Hatch chiles had woven itself into every single bite, and the creamy sauce I’d thrown together somehow balanced it perfectly. My husband walked in, grabbed a fork, and didn’t say a word for about five minutes. That’s when I knew I’d stumbled onto something worth keeping. You know that feeling when a recipe just clicks? When every ingredient seems like it was meant to be together? That’s this dish. It’s the kind of meal that makes you forget you were ever in a rush to begin with.
Why You’ll Love This Recipe
These Smoky Roasted Hatch Chile Chicken Enchiladas aren’t just another enchilada recipe. They’re the result of a happy accident and a whole lot of taste-testing. I’ve made this dish at least a dozen times since that first night, tweaking the sauce, adjusting the heat, and perfecting the ratios. Here’s why it keeps ending up on my table:
- Quick & Easy : Comes together in under 45 minutes, perfect for busy weeknights or last-minute dinner guests. The active prep time is only about 20 minutes.
- Simple Ingredients : No fancy grocery trips needed. You likely already have the chicken, cheese, tortillas, and spices in your kitchen. The Hatch chiles are the star, and they’re worth seeking out.
- Perfect for Entertaining : Great for potlucks, family dinners, or any gathering where you want to impress without spending all day in the kitchen. It travels beautifully, too.
- Crowd-Pleaser : Always gets rave reviews from kids and adults alike. The smoky heat is bold but not overwhelming, so even picky eaters tend to love it.
- Unbelievably Delicious : The texture and flavor combo is next-level comfort food. The creamy sauce, tender chicken, and that signature smoky kick from the roasted Hatch chiles create something truly special.
What makes this recipe different from the rest? It’s the technique. Roasting the Hatch chiles yourself brings out a depth of flavor you just can’t get from a can. And the sauce—oh, the sauce. It’s not your typical enchilada sauce. It’s creamier, richer, and perfectly balanced to let the chiles shine without overwhelming them. This isn’t just another version. It’s my best version, born from a mistake and perfected through repetition.
This recipe isn’t just good—it’s the kind that makes you close your eyes after the first bite. It’s comfort food reimagined, with the same soul-soothing satisfaction but a smoky twist that keeps you coming back for more. Perfect for impressing guests without stress, or turning a simple Tuesday night into something memorable.
What Ingredients You Will Need
This recipe uses simple, wholesome ingredients to deliver bold flavor and satisfying texture without the fuss. Most of these are pantry staples, but the Hatch chiles are the star of the show. If you can find them fresh during Hatch chile season, grab a bunch and roast them yourself. If not, frozen or jarred Hatch chiles work beautifully too.
For the Smoky Hatch Chile Enchilada Sauce
- 2 tablespoons unsalted butter (adds richness and helps thicken the sauce)
- 2 tablespoons all-purpose flour (creates the roux base)
- 1 cup chicken broth (low-sodium preferred, so you can control the salt)
- 1 cup heavy cream (for that luxurious, velvety texture)
- 1 cup roasted Hatch chiles, chopped (about 4-5 medium chiles, stems and seeds removed)
- 1 teaspoon smoked paprika (deepens the smoky flavor)
- ½ teaspoon ground cumin (adds warmth and earthiness)
- ½ teaspoon garlic powder
- Salt and black pepper to taste
For the Chicken Filling
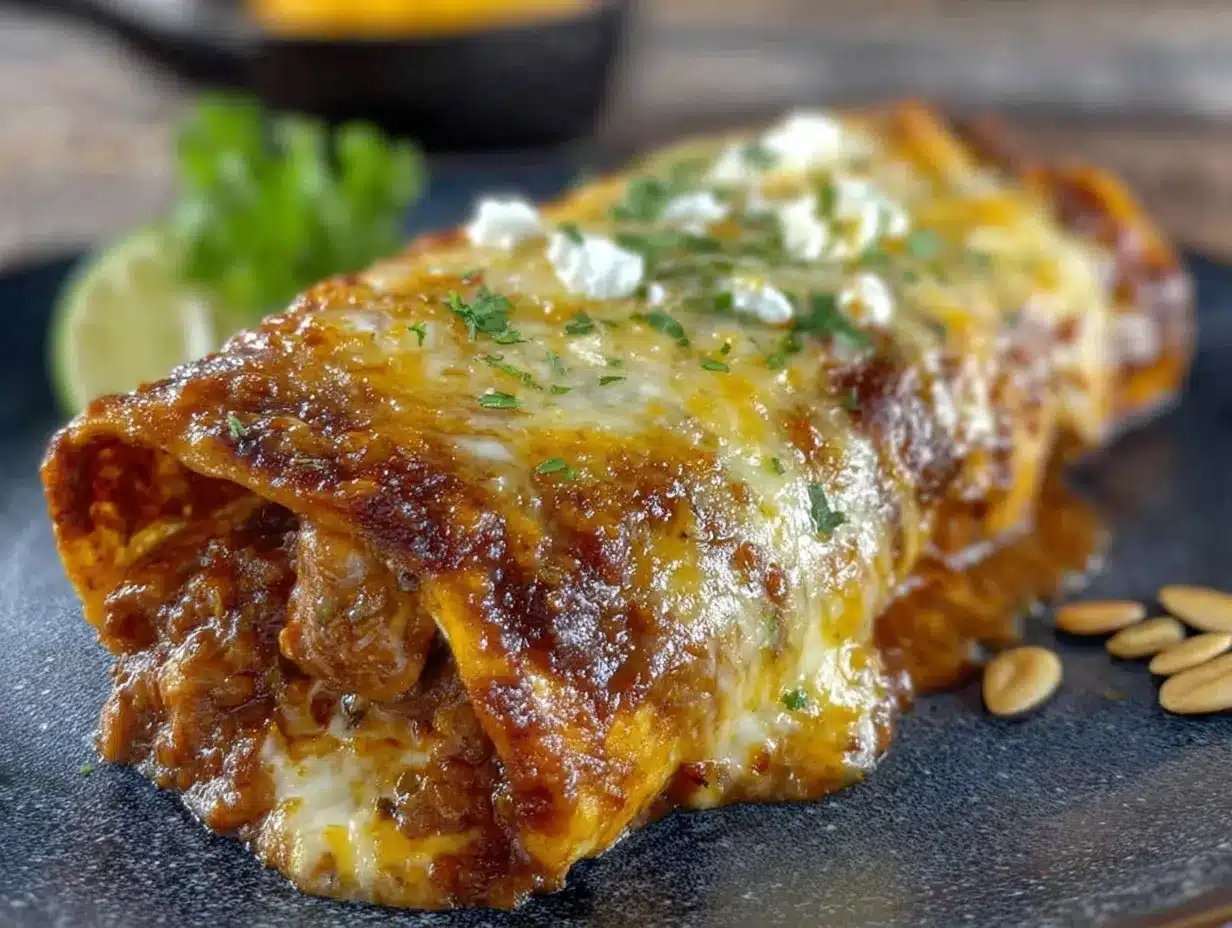
- 3 cups cooked, shredded chicken (rotisserie chicken works great here—I use it all the time)
- 8 ounces cream cheese, softened (makes the filling extra creamy and holds everything together)
- ½ cup sour cream (adds tanginess and moisture)
- 1 cup shredded Monterey Jack cheese (melts beautifully and has a mild, buttery flavor)
- ½ cup chopped roasted Hatch chiles (same batch as the sauce—keep them separate)
- ¼ cup chopped fresh cilantro (adds a fresh, bright note)
- ½ teaspoon salt
- ¼ teaspoon black pepper
For Assembly
- 8-10 flour or corn tortillas (I prefer flour for their flexibility, but corn works for a more traditional texture)
- 1 cup shredded cheddar cheese (for that golden, bubbly top)
- ½ cup shredded Monterey Jack cheese (for extra meltiness)
- Optional: sliced green onions, extra cilantro, and a dollop of sour cream for garnish
Ingredient Tips: When choosing Hatch chiles, look for firm, medium-sized chiles with a deep green color. The heat level varies—some are mild, some have a nice kick. I personally love the medium heat for this recipe. If you’re sensitive to spice, remove the seeds and membranes before roasting. For a dairy-free version, use vegan cream cheese, dairy-free sour cream, and a plant-based shredded cheese. I’ve tested it, and it works surprisingly well.
Equipment Needed
- 9×13 inch baking dish (glass or ceramic works best for even heating)
- Large skillet or saucepan (for making the sauce)
- Mixing bowls (one large for the filling, one small for the cheese blend)
- Cutting board and sharp knife
- Measuring cups and spoons
- Wooden spoon or whisk
- Oven mitts (you’ll be handling a hot baking dish)
- Optional: tongs for handling tortillas, a spatula for spreading the filling
If you don’t have a 9×13 dish, you can use two smaller dishes or even a cast-iron skillet. Just adjust the baking time slightly. I’ve used my trusty old Pyrex dish for years, and it’s never let me down. For the sauce, a non-stick skillet makes cleanup easier, but any heavy-bottomed pan will work.
Preparation Method
- Preheat your oven to 375°F (190°C). Lightly grease your 9×13 baking dish with butter or non-stick spray. This prevents sticking and makes cleanup a breeze.
- Make the smoky Hatch chile sauce. In a large skillet over medium heat, melt the butter. Once it’s bubbling, whisk in the flour and cook for about 1 minute, stirring constantly. You’re looking for a light golden color—don’t let it brown too much. Slowly pour in the chicken broth while whisking, then add the heavy cream. Keep whisking until the sauce thickens, about 3-4 minutes. Stir in the chopped roasted Hatch chiles, smoked paprika, cumin, garlic powder, salt, and pepper. Reduce the heat to low and let it simmer gently while you prepare the filling. The sauce should be smooth and slightly thick, like a creamy gravy.
- Prepare the chicken filling. In a large mixing bowl, combine the shredded chicken, softened cream cheese, sour cream, 1 cup of Monterey Jack cheese, the remaining ½ cup of chopped Hatch chiles, cilantro, salt, and pepper. Mix everything together until it’s well combined. The cream cheese should be fully incorporated, creating a thick, creamy mixture. Taste it and adjust the seasoning if needed. I always sneak a little bite here—it’s that good.
- Assemble the enchiladas. Warm your tortillas slightly so they’re pliable. You can do this in the microwave for 20 seconds, or wrap them in foil and pop them in the oven for a few minutes. Spoon about ⅓ cup of the smoky Hatch chile sauce into the bottom of your greased baking dish and spread it around evenly. This creates a little bed for the enchiladas and prevents them from drying out. Take a tortilla, place about ⅓ cup of the chicken filling in the center, and roll it up tightly. Place it seam-side down in the dish. Repeat with the remaining tortillas and filling. You should have about 8-10 enchiladas, nestled snugly together.
- Top and bake. Pour the remaining sauce over the rolled enchiladas, making sure to cover them evenly. Use a spatula to spread it around if needed. Sprinkle the shredded cheddar and remaining Monterey Jack cheese over the top. Bake for 20-25 minutes, until the sauce is bubbly and the cheese is melted and lightly golden. If you want a browner top, switch the oven to broil for the last 2 minutes—but watch it closely so it doesn’t burn.
- Rest and serve. Let the enchiladas rest for about 5 minutes after you take them out of the oven. This helps them set so they don’t fall apart when you serve them. Garnish with sliced green onions, extra cilantro, and a dollop of sour cream if you like. Serve hot and watch them disappear.
Cooking Tips & Techniques
Roasting Hatch chiles at home is easier than you think. Place them directly on a gas burner or under the broiler, turning occasionally, until the skin is charred and blistered. Transfer them to a bowl, cover with plastic wrap, and let them steam for 10 minutes. The skin will slide right off. This step is non-negotiable for that deep, smoky flavor.
One mistake I made early on was not warming the tortillas before rolling. Cold tortillas crack and tear, and you end up with a mess. A quick 20-second zap in the microwave makes them flexible and easy to work with. Also, don’t overfill the tortillas. About ⅓ cup is perfect—any more and they’ll burst open during baking.
For the sauce, patience is key. Whisk constantly when you add the liquid to the roux, or you’ll end up with lumps. If you do get lumps, don’t panic—just whisk harder or use an immersion blender to smooth it out. I’ve done that more times than I’d like to admit.
Timing is everything. Prep the filling and sauce while the oven preheats, and you’ll have the enchiladas assembled in no time. If you’re making these for a party, you can assemble them up to a day ahead, cover them, and refrigerate. Just add 10 minutes to the baking time if they’re going in cold.
Variations & Adaptations
Vegetarian Version: Swap the chicken for black beans, pinto beans, or roasted vegetables like zucchini and bell peppers. The smoky sauce works beautifully with earthy flavors. I’ve made this for my vegetarian friends, and they always ask for the recipe.
Spice Level Adjustment: If you’re heat-sensitive, use mild Hatch chiles and remove all the seeds. For extra heat, add a diced jalapeño to the filling or a pinch of cayenne to the sauce. My brother-in-law likes his enchiladas fiery, so I toss in some chipotle powder when he’s coming over.
Gluten-Free Option: Use corn tortillas instead of flour, and substitute the all-purpose flour in the sauce with a gluten-free blend or cornstarch. Corn tortillas have a more traditional texture, and they hold up well in the sauce.
Dairy-Free Adaptation: Use vegan cream cheese, dairy-free sour cream, and a plant-based shredded cheese. I’ve tested this with a cashew-based cream cheese, and it was surprisingly creamy. The sauce works with full-fat coconut milk instead of heavy cream, though it adds a slight coconut flavor that pairs nicely with the smoky chiles.
Flavor Twist: Add a tablespoon of adobo sauce from a can of chipotle peppers to the sauce for an extra layer of smoky heat. Or stir in some roasted corn and black beans to the filling for a Southwestern vibe. I tried this once on a whim, and it was fantastic.
Serving & Storage Suggestions
Serve these enchiladas hot, straight from the oven. The cheese should be bubbly and the sauce thick and luscious. I love pairing them with a simple side salad dressed with lime vinaigrette—the acidity cuts through the richness perfectly. Mexican rice, refried beans, or a scoop of guacamole are also fantastic choices. For drinks, a cold Mexican beer or a tangy margarita complements the smoky flavors beautifully.
Store leftovers in an airtight container in the refrigerator for up to 4 days. The flavors actually deepen overnight, so they might taste even better the next day. To reheat, microwave individual portions for 1-2 minutes, or reheat the whole dish in a 350°F oven for about 15 minutes. If the sauce seems a little thick, add a splash of chicken broth or milk before reheating.
These enchiladas freeze beautifully. Assemble the dish completely but don’t bake it. Wrap it tightly in plastic wrap and then foil, and freeze for up to 3 months. When you’re ready to bake, thaw it in the refrigerator overnight, then bake as directed, adding 10-15 minutes to the cooking time. This is my go-to strategy for busy weeks—having a homemade meal ready to go in the freezer is a lifesaver.
Nutritional Information & Benefits
Each serving (two enchiladas) contains approximately 580 calories, 35g fat, 35g protein, and 30g carbohydrates. These are estimates and will vary based on your specific ingredients and portion sizes.
Hatch chiles are packed with vitamin C and capsaicin, which can boost metabolism and reduce inflammation. Chicken provides lean protein for muscle health, and the dairy adds calcium for strong bones. The smoked paprika isn’t just for flavor—it’s rich in antioxidants that support overall health.
If you’re watching your carb intake, this recipe can be made lower-carb by using low-carb tortillas or even large lettuce leaves for wrapping. For a lighter version, use reduced-fat cream cheese and sour cream, and swap the heavy cream for half-and-half. I’ve tried all these variations, and while they’re slightly different, they’re still delicious.
Potential allergens include dairy and gluten. See the variations section for dairy-free and gluten-free adaptations. Always check your ingredient labels if you have specific dietary concerns.
Conclusion
These Smoky Roasted Hatch Chile Chicken Enchiladas are the kind of recipe that makes you feel like a kitchen wizard. They came from a mistake, but they’ve earned a permanent spot in my dinner rotation. The smoky heat, the creamy sauce, the tender chicken—it all comes together in a way that’s comforting, satisfying, and just a little bit special. I love that I can make them for a busy Tuesday or a festive gathering, and they always deliver.
Don’t be afraid to customize them based on what you have on hand or what your family loves. That’s the beauty of cooking—making a recipe your own. I’d love to hear how yours turn out. Leave a comment below and let me know what variations you tried, or share a photo of your enchiladas on social media. Tag me so I can see your creation! And if you’re looking for another smoky, comforting dish, you might enjoy my smoky black bean soup or these chipotle lime chicken tacos. Happy cooking, friends!
Frequently Asked Questions
Can I use canned Hatch chiles instead of roasting fresh ones?
Absolutely. Canned or jarred Hatch chiles work perfectly and save time. Just drain them well before using. The flavor won’t be quite as smoky as freshly roasted, but it’s still delicious. I’ve used both, and honestly, the canned version is my go-to when I’m short on time.
How do I know when the enchiladas are fully baked?
The enchiladas are done when the sauce is bubbly around the edges and the cheese on top is melted and lightly golden. A thermometer inserted into the center should read at least 165°F (74°C). If the top is browning too quickly, cover the dish loosely with foil for the last 10 minutes of baking.
Can I make these enchiladas ahead of time?
Yes! Assemble the enchiladas completely, but don’t bake them. Cover and refrigerate for up to 24 hours. When you’re ready to bake, add about 10 minutes to the cooking time since they’ll be going into the oven cold. This is perfect for meal prep or entertaining.
What’s the best way to shred chicken for this recipe?
I use a stand mixer with the paddle attachment on low speed—it shreds a whole chicken breast in seconds without any effort. You can also use two forks to shred the chicken by hand, or buy a rotisserie chicken and shred it with your fingers. Any method works, so go with whatever’s easiest for you.
Can I freeze these enchiladas?
Definitely. Assemble the dish completely, wrap it tightly in plastic wrap and then foil, and freeze for up to 3 months. Thaw overnight in the refrigerator before baking. Add 10-15 minutes to the baking time. I always keep a pan in the freezer for those days when I need a homemade meal without any effort.
Pin This Recipe!
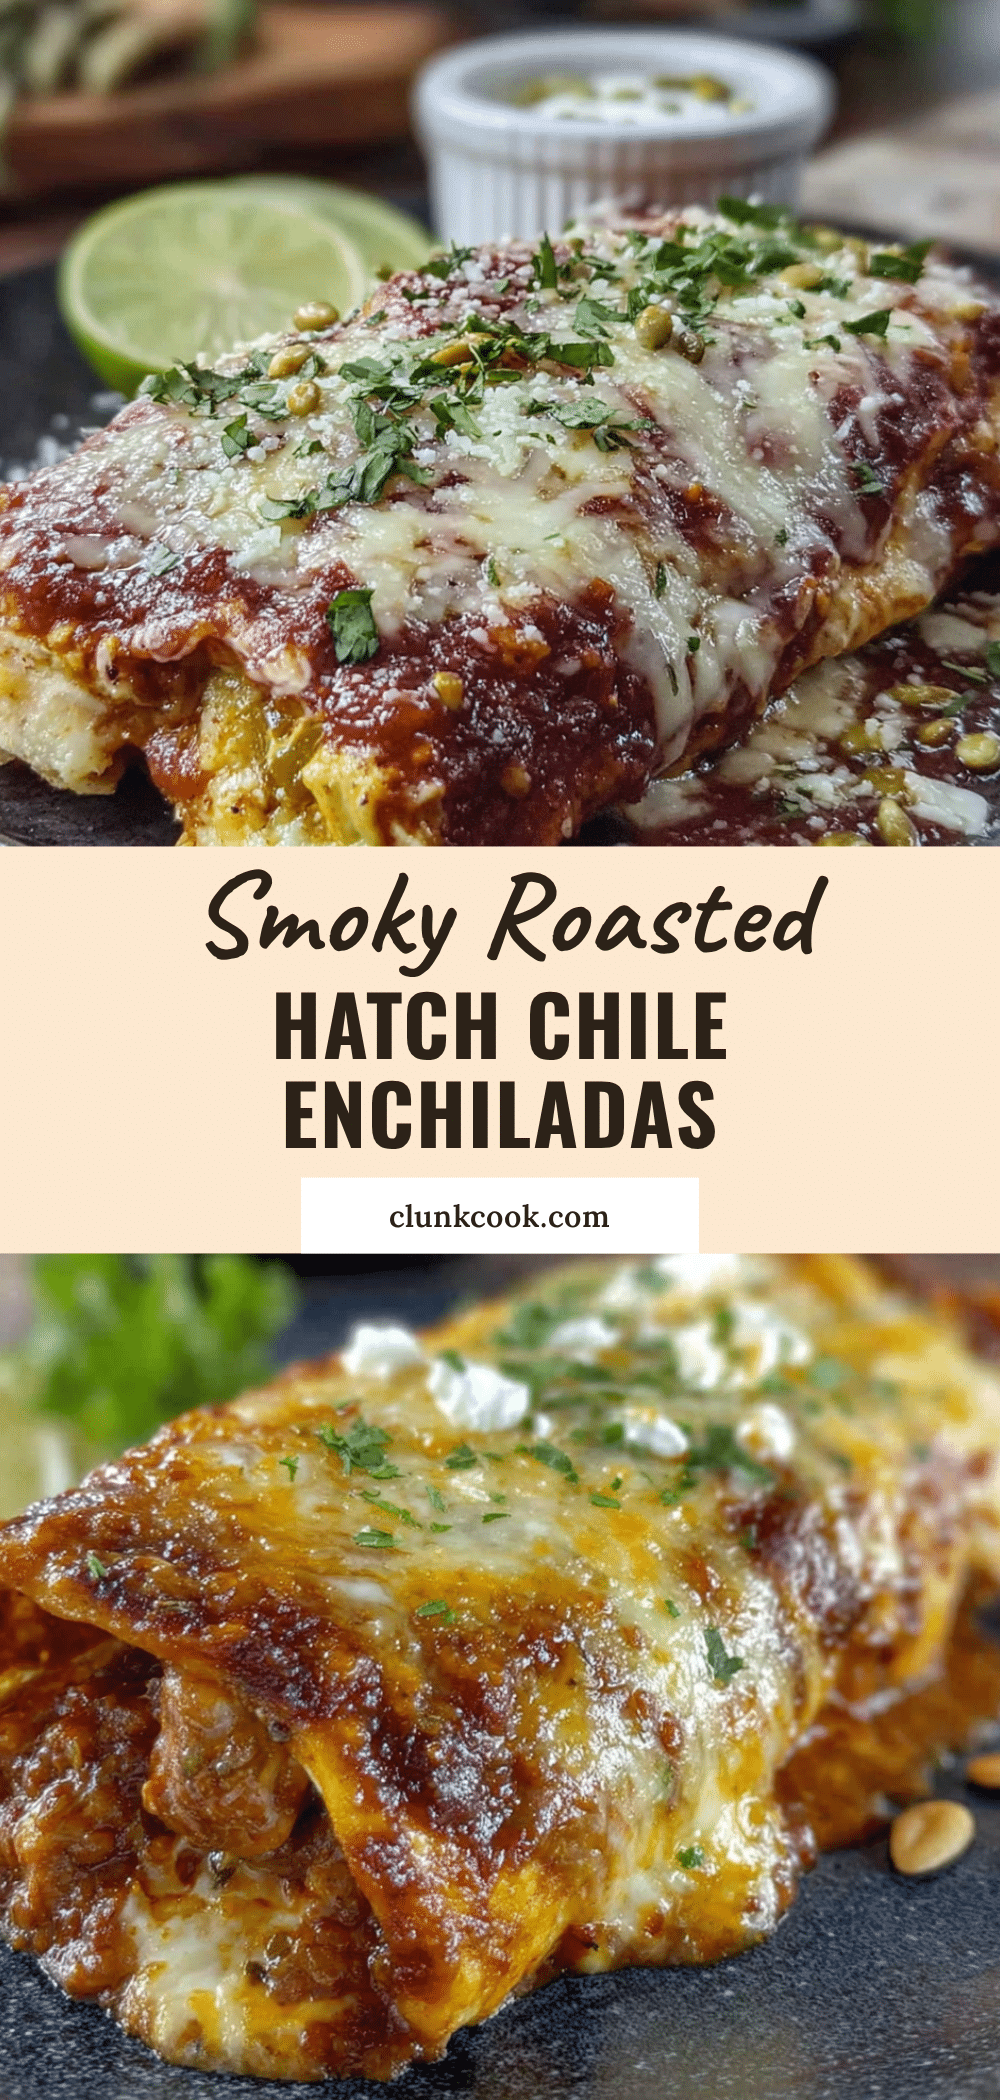
Best Smoky Roasted Hatch Chile Chicken Enchiladas
These Smoky Roasted Hatch Chile Chicken Enchiladas are a happy accident turned into a family favorite. Creamy, smoky, and perfectly balanced, they come together in under 45 minutes for a comforting weeknight dinner or impressive entertaining dish.
- Prep Time: 20 minutes
- Cook Time: 25 minutes
- Total Time: 45 minutes
- Yield: 4 servings (2 enchiladas per serving) 1x
- Category: Main Course
- Cuisine: Mexican, Southwestern
Ingredients
- 2 tablespoons unsalted butter
- 2 tablespoons all-purpose flour
- 1 cup low-sodium chicken broth
- 1 cup heavy cream
- 1 cup roasted Hatch chiles, chopped (about 4–5 medium chiles, stems and seeds removed)
- 1 teaspoon smoked paprika
- ½ teaspoon ground cumin
- ½ teaspoon garlic powder
- Salt and black pepper to taste
- 3 cups cooked, shredded chicken (rotisserie chicken works great)
- 8 ounces cream cheese, softened
- ½ cup sour cream
- 1 cup shredded Monterey Jack cheese
- ½ cup chopped roasted Hatch chiles (separate from sauce)
- ¼ cup chopped fresh cilantro
- ½ teaspoon salt
- ¼ teaspoon black pepper
- 8–10 flour or corn tortillas
- 1 cup shredded cheddar cheese
- ½ cup shredded Monterey Jack cheese (for topping)
- Optional: sliced green onions, extra cilantro, sour cream for garnish
Instructions
- Preheat your oven to 375°F (190°C). Lightly grease a 9×13 inch baking dish with butter or non-stick spray.
- Make the smoky Hatch chile sauce: In a large skillet over medium heat, melt the butter. Whisk in the flour and cook for about 1 minute, stirring constantly, until light golden. Slowly pour in the chicken broth while whisking, then add the heavy cream. Continue whisking until the sauce thickens, about 3-4 minutes. Stir in the chopped roasted Hatch chiles, smoked paprika, cumin, garlic powder, salt, and pepper. Reduce heat to low and let simmer gently while you prepare the filling.
- Prepare the chicken filling: In a large mixing bowl, combine the shredded chicken, softened cream cheese, sour cream, 1 cup of Monterey Jack cheese, the remaining ½ cup of chopped Hatch chiles, cilantro, salt, and pepper. Mix until well combined and creamy.
- Assemble the enchiladas: Warm the tortillas slightly (microwave for 20 seconds or wrap in foil and warm in oven). Spoon about ⅓ cup of the smoky Hatch chile sauce into the bottom of the greased baking dish and spread evenly. Place about ⅓ cup of the chicken filling in the center of each tortilla, roll tightly, and place seam-side down in the dish. Repeat with remaining tortillas and filling.
- Top and bake: Pour the remaining sauce over the rolled enchiladas, covering them evenly. Sprinkle the shredded cheddar and remaining Monterey Jack cheese over the top. Bake for 20-25 minutes, until the sauce is bubbly and the cheese is melted and lightly golden. For a browner top, broil for the last 2 minutes, watching closely.
- Rest and serve: Let the enchiladas rest for about 5 minutes before serving. Garnish with sliced green onions, extra cilantro, and a dollop of sour cream if desired. Serve hot.
Notes
Roast Hatch chiles at home by charring them on a gas burner or under the broiler, then steaming in a covered bowl for 10 minutes before peeling. Warm tortillas before rolling to prevent cracking. For make-ahead, assemble without baking, cover, and refrigerate up to 24 hours; add 10 minutes to baking time. Freeze unbaked, wrapped tightly, for up to 3 months; thaw overnight and add 10-15 minutes to baking time.
Nutrition
- Serving Size: 2 enchiladas
- Calories: 580
- Sugar: 4
- Sodium: 800
- Fat: 35
- Saturated Fat: 18
- Carbohydrates: 30
- Fiber: 3
- Protein: 35
Keywords: Hatch chile enchiladas, smoky chicken enchiladas, roasted Hatch chile, creamy enchiladas, easy weeknight dinner, New Mexican recipe


