Love this? Save it for later!
Share the inspiration with your friends
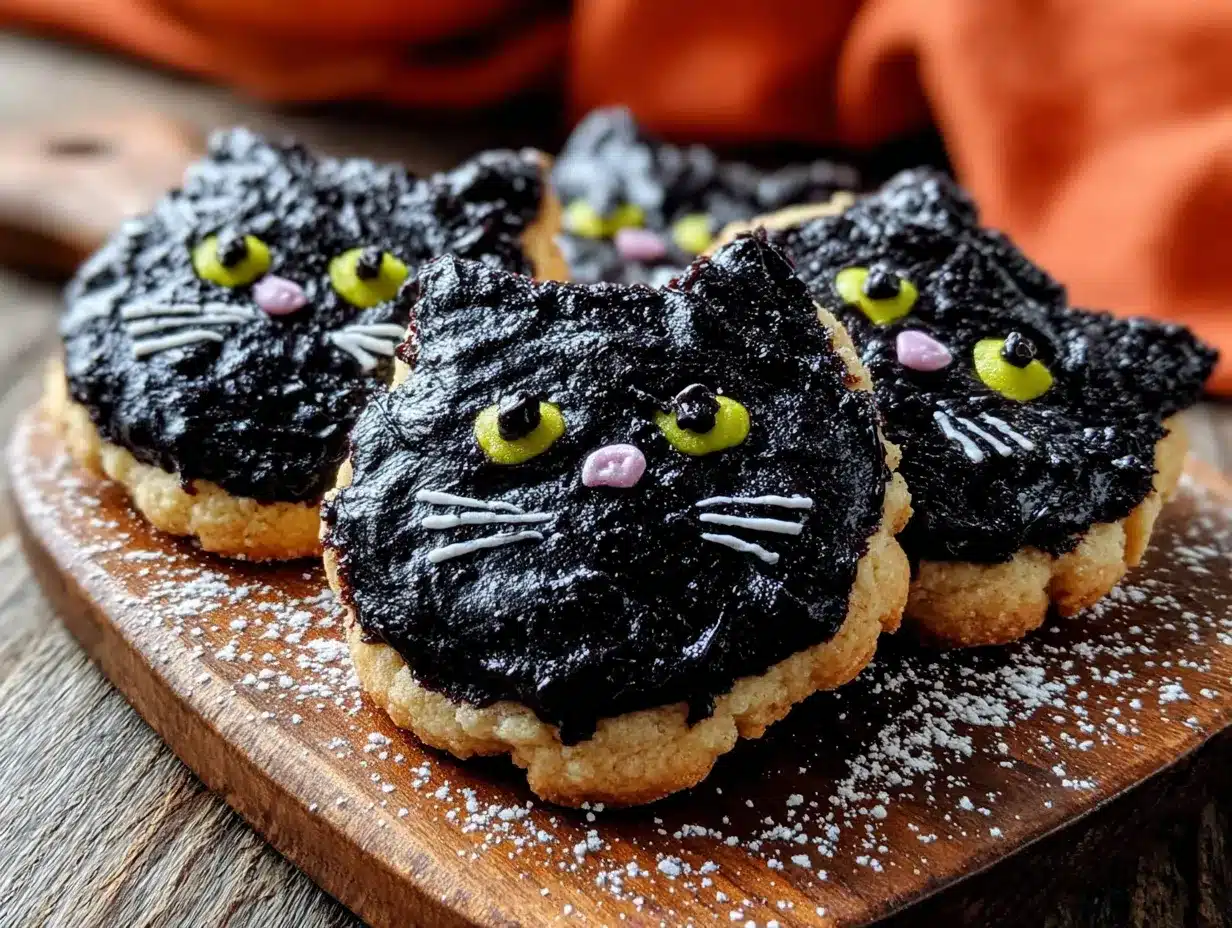
My friend Claire swore she hated Halloween baking. For years. Every October, she’d post photos of store-bought pumpkin cookies and call it a day. Then last year, I showed up at her door with a batch of these black cat sugar cookies, still warm from the oven, their little icing faces staring up at her. I found her an hour later, sitting on her kitchen floor with powdered sugar on her shirt, eating a third one while pretending to text someone. She asked for the recipe before I left.
I get it, honestly. There’s something about Halloween treats that can feel like a lot of work—between the carving and the costumes and the candy, who has time to make cute cookies from scratch? But these black cat cookies are different. They’re actually easier than they look, and that’s coming from someone who once melted a spatula trying to rush a batch of royal icing. Let me tell you, the first time I pulled these out of the oven, I actually laughed out loud. They were just so stinking cute.
The idea came to me on a random Tuesday afternoon in mid-October. I was staring at my cat, who was sprawled across my kitchen counter like he owned the place, and I thought—why not make cookies that look like him? That first batch was a little wonky, I’ll admit. The ears were lopsided and one of the tails looked more like a squiggly line than an actual tail. But the second batch? That’s where the magic happened. I figured out the trick to getting the ears to stay on and the perfect consistency for the black icing. And now I make them every single year, sometimes twice. They’ve become my signature Halloween contribution, the thing people ask me to bring to parties. Maybe you’ve been there—that feeling when a recipe just clicks and suddenly it’s yours.
Why You’ll Love This Recipe
These black cat Halloween cookies aren’t just adorable—they’re genuinely fun to make. Here’s why they’ve become my most-requested fall treat:
- Simple Ingredients : You probably already have most of these in your pantry. No special trips to three different stores for obscure extracts or hard-to-find decorations.
- Beginner-Friendly : If you can roll dough and cut shapes, you can make these. The decorating looks impressive but uses basic piping techniques.
- Perfect for Halloween Gatherings : Whether it’s a classroom party, an office potluck, or a spooky movie night, these cookies fit right in.
- Crowd-Pleaser : Kids go wild for them, and adults can’t resist grabbing one (or three) when they think nobody’s looking.
- Customizable : Change the expressions, add little pumpkins, or make them into black cats with different poses—each cookie can have its own personality.
What makes these different from other decorated sugar cookies is the technique. I spent three batches figuring out how to get the ears to stay attached during baking without falling off or burning. The secret? A little egg wash and pressing them on at just the right angle. Plus, the icing recipe I’m sharing is foolproof—it sets firm enough to stack but soft enough to bite into without cracking your teeth. I’ve tested this with friends who swear they can’t decorate cookies, and every single one of them ended up with cats that actually looked like cats.
This isn’t just another Halloween sugar cookie recipe. It’s the one that makes you close your eyes after that first bite and think, “Okay, I’m actually proud of this.” It’s comfort food with a spooky twist—familiar butter cookie goodness dressed up in its cutest Halloween costume. Perfect for impressing your Instagram followers without spending hours in the kitchen, or for turning a regular Tuesday into something a little more magical.
What Ingredients You Will Need
This recipe uses simple, wholesome ingredients to deliver that classic sugar cookie flavor with a spooky twist. Most of these are pantry staples, which means you can decide at 3 PM on a Saturday that you’re making Halloween cookies and actually follow through.
For the Cookie Dough
- 2 ¾ cups (345g) all-purpose flour — spoon and level it, don’t scoop straight from the bag or you’ll end up with dry dough
- 1 cup (226g) unsalted butter, softened — let it sit out for about an hour, you want it soft but not melty
- 1 cup (200g) granulated sugar — regular white sugar works perfectly here
- 1 large egg, room temperature — (adds richness and helps the dough hold together)
- 1 teaspoon vanilla extract — I prefer pure vanilla, but imitation works fine for these cookies
- ½ teaspoon baking powder — gives them a slight lift without making them puffy
- ½ teaspoon salt — don’t skip this, it balances the sweetness
For the Royal Icing
- 3 cups (360g) powdered sugar — sift it if it’s lumpy, trust me on this one
- 2 large egg whites — or use meringue powder if you’re worried about raw eggs (3 tablespoons meringue powder + 4 tablespoons water)
- 1 teaspoon lemon juice — helps stabilize the icing and cuts the sweetness slightly
- Black gel food coloring — liquid coloring won’t give you that deep, dark black without ruining the consistency
- White gel food coloring — for the eyes and any little details
For Decoration
- Piping bags or zip-top bags — I use disposable piping bags for the black icing and small zip-top bags for the white details
- Round piping tips — size 2 or 3 for the black outline, size 1 for the white details
- Black sanding sugar (optional) — adds a sparkly touch if you want extra pizzazz
I recommend using Americolor Super Black gel for the icing—it’s the only one I’ve found that gives you true black without using half the bottle. For the cookies themselves, I’ve tested this with both King Arthur Flour and Gold Medal, and both work great. Just make sure your butter is actually softened, not microwaved into a puddle. I learned that one the hard way when my first batch spread into sad, flat blobs instead of cute cat shapes.
Equipment Needed
You don’t need a fancy bakery setup for these cookies. Here’s what you’ll actually use:
- Stand mixer or hand mixer — either works, I’ve made these with both. Hand mixer just takes a little more elbow grease
- Rolling pin — adjustable thickness rings are nice but not required, just roll evenly
- Cat-shaped cookie cutter — I found mine at a craft store for three dollars, but any cat silhouette cutter works
- Baking sheets — two or three so you can rotate batches
- Parchment paper or silicone baking mats — parchment is cheaper, silicone is reusable
- Cooling rack — wire racks help cookies cool flat and even
- Piping bags and tips — if you don’t have these, small zip-top bags with the corner snipped off work in a pinch
- Small offset spatula — for moving delicate cookies without breaking them
If you don’t have a cat cutter, you can actually freehand these by cutting around a paper template with a sharp knife. It takes longer, but the cookies end up looking more unique. I did that my first year and honestly, those wonky cats had more personality than the perfectly cut ones.
Preparation Method
Let’s make some Halloween magic. Set aside about three hours total—one hour for the dough and baking, two for decorating. The decorating is the fun part, so pour yourself something warm and put on a spooky playlist.
Step 1: Make the Cookie Dough
In a medium bowl, whisk together the flour, baking powder, and salt. In a large bowl (or your stand mixer bowl), beat the softened butter and sugar together until light and fluffy—about 3 minutes on medium speed. You’re looking for a pale, creamy texture. Scrape down the sides once or twice. Add the egg and vanilla, then beat until combined. It might look a little curdled at this point, that’s normal. Gradually add the dry ingredients, mixing on low until just combined. The dough should come together into a soft, cohesive ball. If it’s sticky, add a tablespoon more flour. If it’s crumbly, add a teaspoon of milk.
Step 2: Chill the Dough
Divide the dough in half, flatten each half into a disc, and wrap tightly in plastic wrap. Refrigerate for at least 1 hour, or up to 3 days. This step is non-negotiable—chilled dough holds its shape better, spreads less, and makes the ears much easier to attach. I once skipped this step because I was impatient, and my cats came out looking like melted blobs with vague cat-like features. Learn from my mistakes.
Step 3: Cut and Shape the Cookies
Preheat your oven to 350°F (175°C). Line your baking sheets with parchment paper. On a lightly floured surface, roll one disc of dough to about ¼-inch thickness. Cut out your cat shapes and transfer them to the prepared baking sheets, spacing them about 2 inches apart. Here’s the trick for the ears: after cutting the cat shape, use a small knife or the back of a piping tip to gently press the ear shapes inward slightly, creating a more defined triangle. This helps them hold their shape during baking. Gather the scraps, re-roll, and cut more cookies. Repeat with the second disc.
Step 4: Bake the Cookies
Bake for 8-10 minutes, rotating the pans halfway through. The cookies are done when the edges are just barely golden—you want them pale on top. Let them cool on the baking sheet for 5 minutes, then transfer to a wire rack to cool completely. Do not try to decorate warm cookies. The icing will slide right off and you’ll end up with a sad, sticky mess. I speak from experience.
Step 5: Make the Royal Icing
In a clean bowl, beat the egg whites (or meringue powder mixture) with the lemon juice until frothy. Gradually add the powdered sugar, beating on low until combined, then increase speed to medium-high and beat for 5 minutes. The icing should be thick, glossy, and hold a stiff peak. Divide the icing—you’ll need about ¾ of it for the black base and ¼ for the white details. Add black gel coloring to the larger portion, a little at a time, until you reach your desired darkness. It will look gray at first, keep adding until it’s truly black. Thin the black icing with drops of water until it reaches a “15-second consistency”—when you lift the spoon, the icing should smooth out in about 15 seconds. This is perfect for flooding (filling in) the cookies.
Step 6: Decorate the Cats
Fit a piping bag with a round tip and fill it with the black icing. Outline each cookie, then fill in the center with more icing, using a toothpick to spread it into the corners. Tap the cookie gently on the counter to help the icing settle. Let the black icing dry for at least 2 hours, or overnight. Once the black is completely dry, thin the white icing slightly and pipe on little eyes—two small dots or half-circles. Add a tiny white dot to each eye for that cute cartoon shine. You can also pipe little whiskers, a tiny nose, or a spooky grin. Let the white icing dry for another hour before stacking or serving.
Cooking Tips & Techniques
After making these cookies about a dozen times (not an exaggeration), here’s what I’ve learned the hard way so you don’t have to:
Chill between batches. If your second batch of dough feels soft or sticky, pop it back in the fridge for 15 minutes before rolling. Warm dough spreads more, and nobody wants a flat cat.
Don’t overbake. Sugar cookies should be pale, not golden. The edges might look slightly dry, but the centers should still look soft. They continue baking on the hot sheet after you pull them out. Overbaked cookies are harder to decorate and taste more like cardboard than butter.
Royal icing consistency is everything. Too thick and it won’t smooth out. Too thin and it runs off the edges. The “15-second rule” is your friend—dip a spoon in the icing, lift it, and count how long it takes for the ribbon to disappear back into the bowl. If it’s faster than 10 seconds, add more powdered sugar. If it’s slower than 20, add more water.
Work in batches. Don’t try to flood all the cookies at once. The icing starts to crust over after about 10 minutes, so work in groups of 4-6 cookies. Fill one, move to the next, then come back and tap them all gently.
Use a toothpick for details. If you mess up a white dot, scrape it off with a toothpick before it dries. You can also use a toothpick to drag the white icing into little cat whiskers—just pipe a small dot and drag it outward. It looks surprisingly professional.
I once forgot to add the egg to my dough and ended up with crumbly, sad cookies that fell apart when I tried to pick them up. That was a rough Tuesday. But you know what? I scraped the crumbs into a bowl and ate them with a spoon like cereal. Don’t be like me. Double-check your ingredients.
Variations & Adaptations
These cookies are surprisingly flexible. Here are some ways to make them your own:
Gluten-Free Version: Substitute the all-purpose flour with a 1:1 gluten-free baking flour blend. I’ve used Bob’s Red Mill and King Arthur Measure for Measure with great results. Add an extra tablespoon of milk to the dough since gluten-free flours tend to be thirstier.
Vegan Adaptation: Use vegan butter (I like Miyoko’s or Earth Balance) and replace the egg with a flax egg (1 tablespoon ground flaxseed + 3 tablespoons water, let sit for 5 minutes). For the royal icing, use aquafaba (the liquid from a can of chickpeas) instead of egg whites—3 tablespoons of aquafaba whipped to stiff peaks works perfectly.
Different Cat Poses: Instead of the standard sitting cat silhouette, try cutting the dough into simple cat head shapes (just a circle with pointed ears) for a different look. You can also make cat paw cookies using a round cutter and adding small toe bean details with the white icing.
Spooky Flavor Twist: Add ½ teaspoon of cinnamon and ¼ teaspoon of cayenne pepper to the dough for a subtle Mexican chocolate vibe. The spice pairs beautifully with the sweet icing and gives the cookies a grown-up edge.
Halloween Color Swap: Instead of all black cats, make a few orange cats using orange gel coloring, or purple cats for a witchy vibe. You can even do a mix of colors on one cookie sheet for a whole spooky menagerie.
My personal favorite variation? I make a batch of black cats and a batch of white ghosts using the same dough and just different icing colors. They look adorable together on a platter, and it feels like I put in way more effort than I actually did.
Serving & Storage Suggestions
These cookies are best enjoyed at room temperature, which is basically the perfect excuse to keep them out on the counter where everyone can see (and grab) them. Arrange them on a dark platter or a black cake stand for maximum Halloween aesthetic. Add some candy corn or mini pumpkins around the edges for extra spooky points.
For storage, place the decorated cookies in a single layer in an airtight container. If you need to stack them, put a sheet of parchment paper between each layer. They’ll stay fresh for up to 5 days at room temperature. Do not refrigerate them—the humidity can make the icing sticky and the cookies can pick up weird fridge smells.
You can freeze the undecorated cookies for up to 3 months. Just bake them, let them cool completely, and stack them in a freezer-safe container with parchment between layers. When you’re ready to decorate, let them thaw at room temperature for about an hour, then ice as usual. The icing won’t stick to frozen cookies—the condensation makes it slide right off.
These cookies actually taste better on day two. The flavors meld together and the texture softens just slightly, becoming more tender. So if you’re making them for a party, bake a day ahead and decorate the morning of. Your future self will thank you.
Nutritional Information & Benefits
Let’s be real—these are sugar cookies with icing. They’re a treat, not a health food. But here’s the estimated breakdown per cookie (based on a 3-inch cat shape):
- Calories: 180-200
- Fat: 8g
- Carbohydrates: 28g
- Protein: 2g
- Sugar: 18g
On the bright side, the butter provides a small amount of vitamin A, and the egg whites in the icing add a tiny bit of protein. Mostly, though, these cookies are about joy and celebration and the pure happiness of biting into a little cat face. And honestly? That has its own kind of nutritional value.
If you’re watching your sugar intake, you can reduce the sugar in the dough to ¾ cup without affecting the texture too much. The icing is harder to reduce since the sugar is what gives it structure, but you can use a thinner layer for a slightly less sweet result.
Conclusion
These black cat Halloween cookies are the kind of recipe that makes you feel like a baking superstar without actually having to work that hard. They’re cute enough to impress, simple enough to enjoy making, and delicious enough that people will ask for the recipe before you’ve even finished decorating. I’ve made them for Halloween parties, for my niece’s classroom, and just for myself on a rainy October afternoon when I needed something to make me smile. They never disappoint.
I hope you give these a try and make them your own. Maybe your cats will have bigger eyes or longer tails or sparkly pink noses. That’s the beauty of a simple recipe—it leaves room for your personality to shine through. Tag me when you make them, I genuinely love seeing how they turn out. And if you figure out a way to make the ears stay on without the egg wash trick, please let me know. I’m always learning.
Happy Halloween, and happy baking. You’ve got this.
Frequently Asked Questions
Can I make the dough ahead of time?
Absolutely. The dough can be refrigerated for up to 3 days or frozen for up to 3 months. Just wrap it tightly in plastic wrap and then in foil. Thaw overnight in the fridge before rolling.
Why did my cookies spread too much?
Most likely your dough wasn’t chilled enough, or your butter was too soft. Pop the cut cookies in the fridge for 10 minutes before baking—that usually solves the problem. Also, make sure you’re measuring your flour correctly by spooning it into the cup and leveling it off.
Can I use a different cookie cutter shape?
Of course! This dough works with any shape. For Halloween, try bats, pumpkins, or ghosts. Just adjust the baking time slightly for smaller or larger shapes. Watch for golden edges as your cue.
How do I get the icing perfectly black?
Use gel food coloring, not liquid. Start with a small amount, mix it in, and keep adding until you reach your desired darkness. It will look gray at first—just keep going. I usually end up using about ½ teaspoon of black gel for a full batch of icing.
Can I skip the royal icing and use store-bought?
You can, but the results won’t be as pretty. Store-bought icing is usually too thin and doesn’t set hard, so the cookies will be sticky and hard to stack. If you’re short on time, try a simple glaze of powdered sugar and milk instead—it dries matte and looks nice in a rustic way.
Pin This Recipe!

Black Cat Halloween Cookies Easy Spooky Sugar Recipe

These adorable black cat sugar cookies are surprisingly easy to make and decorate. With a foolproof royal icing and a clever technique for keeping the ears attached, they’re the perfect spooky treat for Halloween parties, classroom events, or just a fun baking project.
- Prep Time: 1 hour
- Cook Time: 10 minutes
- Total Time: 3 hours (including decorating and drying time)
- Yield: 24 servings 1x
- Category: Dessert
- Cuisine: American
Ingredients
- 2 ¾ cups (345g) all-purpose flour
- 1 cup (226g) unsalted butter, softened
- 1 cup (200g) granulated sugar
- 1 large egg, room temperature
- 1 teaspoon vanilla extract
- ½ teaspoon baking powder
- ½ teaspoon salt
- 3 cups (360g) powdered sugar
- 2 large egg whites (or 3 tablespoons meringue powder + 4 tablespoons water)
- 1 teaspoon lemon juice
- Black gel food coloring
- White gel food coloring
- Black sanding sugar (optional)
Instructions
- Make the cookie dough: In a medium bowl, whisk together flour, baking powder, and salt. In a large bowl, beat softened butter and sugar until light and fluffy (about 3 minutes). Add egg and vanilla, beat until combined. Gradually add dry ingredients, mixing on low until just combined. Dough should be soft and cohesive.
- Chill the dough: Divide dough in half, flatten into discs, wrap in plastic wrap, and refrigerate for at least 1 hour (up to 3 days).
- Cut and shape cookies: Preheat oven to 350°F (175°C). Line baking sheets with parchment. On a lightly floured surface, roll dough to ¼-inch thickness. Cut cat shapes and transfer to baking sheets, spacing 2 inches apart. Use a small knife or piping tip to gently press ear shapes inward for defined triangles.
- Bake cookies: Bake for 8-10 minutes, rotating pans halfway through. Cookies are done when edges are just barely golden. Cool on baking sheet for 5 minutes, then transfer to wire rack to cool completely.
- Make royal icing: In a clean bowl, beat egg whites (or meringue powder mixture) with lemon juice until frothy. Gradually add powdered sugar, beating on low until combined, then increase to medium-high and beat for 5 minutes until thick, glossy, and holds a stiff peak. Divide icing: ¾ for black base, ¼ for white details. Add black gel coloring to larger portion until desired darkness. Thin black icing with water to ’15-second consistency’ (icing smooths out in 15 seconds when lifted with a spoon)…
- Decorate cats: Fit piping bag with round tip and fill with black icing. Outline each cookie, then fill in center with more icing, using a toothpick to spread into corners. Tap cookie gently to settle icing. Let black icing dry for at least 2 hours or overnight. Once dry, thin white icing slightly and pipe on eyes (two small dots or half-circles). Add tiny white dot to each eye for shine. Pipe whiskers, nose, or grin if desired. Let white icing dry for 1 hour before stacking or serving.
Notes
Chill dough thoroughly to prevent spreading. Don’t overbake; cookies should be pale. Royal icing consistency is key—use the 15-second rule. Work in batches of 4-6 cookies when flooding. Use a toothpick for details and corrections. Cookies taste better on day two. Store in airtight container at room temperature for up to 5 days. Freeze undecorated cookies for up to 3 months.
Nutrition
- Serving Size: 1 cookie
- Calories: 190
- Sugar: 18
- Sodium: 95
- Fat: 8
- Saturated Fat: 5
- Carbohydrates: 28
- Protein: 2
Keywords: Halloween cookies, black cat cookies, sugar cookies, decorated cookies, spooky treats, Halloween baking, easy Halloween cookies


