Love this? Save it for later!
Share the inspiration with your friends
I was standing in the checkout line at the hardware store—of all places—when the woman behind me, who I later learned was named Marge and had been a home ec teacher for thirty years, started talking about Halloween treats. I had a roll of duct tape and a bag of mulch in my cart. She had a single mini pumpkin in hers. “You know what kids actually remember?” she said, not really to me but to the air between us. “Not the store-bought candy. It’s the stuff that looks like you tried.” I laughed and told her I had zero craft skills and even less patience. She pulled a crumpled receipt from her purse and wrote something on the back. “Rice Krispie treats shaped like pumpkins,” she said, handing it to me. “No baking, no fancy tools, and your kitchen will smell like October.” Honestly, I almost tossed that receipt in the parking lot. But something about the way she said it—like this was a secret passed between people who knew better—made me shove it in my pocket instead. Three years later, I’ve made these little pumpkins every single Halloween. They’re the recipe I didn’t know I needed, from a person I’d never see again. And maybe you’ve been there too—stumbling into a tradition when you weren’t even looking for one.
Why You’ll Love This Recipe
Let me tell you, these cozy Halloween Rice Krispie Treat Pumpkins aren’t just cute—they’re the kind of recipe that makes you look like a kitchen hero without breaking a sweat. I’ve tested this method more times than I can count, and it works every single time. No sticky mess, no melted marshmallow disasters, just pure pumpkin-shaped perfection.
- Quick & Easy: Comes together in under 20 minutes, which means you can whip up a batch even on the busiest school night or right before the doorbell starts ringing for trick-or-treaters.
- Simple Ingredients: You probably have everything in your pantry right now. Rice Krispies, marshmallows, butter, and orange food coloring. That’s it. No fancy grocery trips required.
- Perfect for Halloween: Whether you’re hosting a cozy harvest party, sending treats to a classroom, or just want something fun to do with the kids on a chilly October evening, these pumpkins fit the bill.
- Crowd-Pleaser: I’ve brought these to potlucks, playdates, and neighborhood gatherings. Kids go wild for them, and adults can’t resist grabbing one (or three) when they think no one is looking.
- Unbelievably Delicious: The texture is spot-on—crispy on the outside, chewy in the middle, with that classic buttery marshmallow flavor that feels like a hug from your childhood.
What makes this recipe different from all the other pumpkin-shaped treats out there? It’s the technique. Most recipes tell you to shape the mixture with your hands, which is a sticky nightmare. I figured out a better way—using a lightly greased muffin tin to create the perfect pumpkin shape without the mess. Plus, I add a tiny pinch of cinnamon to the marshmallow mixture. It’s not enough to scream “spice,” but it adds this subtle warmth that makes the whole thing taste cozier. This isn’t just another version of a Rice Krispie treat—it’s the version you’ll come back to year after year.
There’s something about making these that feels like a little ritual. Maybe it’s the way the kitchen smells like butter and sugar, or the way your hands get just a little bit messy, or the way everyone’s face lights up when they see that first pumpkin shape take form. This recipe isn’t just good—it’s the kind that makes you close your eyes after the first bite and remember what Halloween felt like when you were small.
What Ingredients You Will Need
This recipe uses simple, wholesome ingredients that you likely already have in your pantry. The magic happens when these basic staples come together with a little creativity and a touch of Halloween spirit. No obscure ingredients, no complicated shopping lists—just the good stuff.
- 6 cups Rice Krispies cereal (or any crispy rice cereal; I prefer the original brand for the best crunch)
- 10 oz mini marshmallows (about 4 cups; the mini ones melt more evenly than the big ones, so stick with these if you can)
- 3 tablespoons unsalted butter (salted butter works too, just skip the extra salt I mention below; I use Kerrygold because it adds a richer flavor)
- 1/4 teaspoon vanilla extract (pure vanilla, not imitation—trust me, it makes a difference in the warmth of the flavor)
- 1/8 teaspoon salt (optional, but it balances the sweetness perfectly; flaky sea salt is nice if you have it)
- 1/8 teaspoon ground cinnamon (this is my secret ingredient—it doesn’t make the treats taste like cinnamon, just cozier)
- Orange gel food coloring (gel is better than liquid because it won’t make the mixture too wet; I use Wilton brand)
- Green candy melts or green frosting (for the stems; you can also use green licorice cut into small pieces)
- Non-stick cooking spray (for greasing your hands and the muffin tin)
A few notes on ingredient selection. For the marshmallows, I’ve tried this with both name brand and store brand, and honestly, the name brand melts a little creamier. It’s not a dealbreaker by any means, but if you want that perfectly smooth texture, spring for the Jet-Puffed ones. For the food coloring, please use gel. I learned this the hard way when I used liquid food coloring once and ended up with a soupy mess that never set properly. Gel gives you that vibrant orange without messing with the consistency. And if you’re making these for a classroom or party where nut allergies are a concern, double-check that your marshmallows and cereal are processed in a nut-free facility. Most major brands are, but it’s always worth a look.
For the stems, I’ve used everything from pretzel sticks (cut in half) to broken pieces of green Tootsie Rolls. The candy melts look the nicest, but if you’re in a pinch, a little green frosting piped on top works beautifully. You can also use a small piece of green fruit leather rolled into a stem shape—it’s a fun, slightly healthier option that kids actually enjoy eating.
Equipment Needed
You don’t need a fancy kitchen to make these pumpkin treats. In fact, you probably already own most of what you’ll need. Here’s the full list:
- Large microwave-safe bowl (glass or ceramic works best; plastic can warp with the hot marshmallow mixture)
- Muffin tin (standard 12-cup size; I use a non-stick one, but any will work with enough greasing)
- Spatula (silicone is ideal because nothing sticks to it; a wooden spoon works too, but you’ll have to work fast)
- Measuring cups and spoons (for accuracy—eyeballing the cereal can throw off the texture)
- Wax paper or parchment paper (for cooling and for shaping if needed)
- Small piping bag or zip-top bag (for the green stem frosting; a toothpick works if you’re doing dots)
- Sharp knife (for trimming any messy edges)
If you don’t have a muffin tin, you can use a mini muffin tin for smaller pumpkins or even shape them by hand into balls and then flatten slightly. Just grease your hands generously with cooking spray first—otherwise, you’ll be picking marshmallow goo off your fingers for the rest of the day. I learned that one the hard way during a particularly ambitious batch at 10 PM on Halloween eve. A silicone muffin pan is my personal favorite because the treats pop right out without any fuss. They’re about $10 at most kitchen stores and worth every penny if you make these more than once a year.
Preparation Method
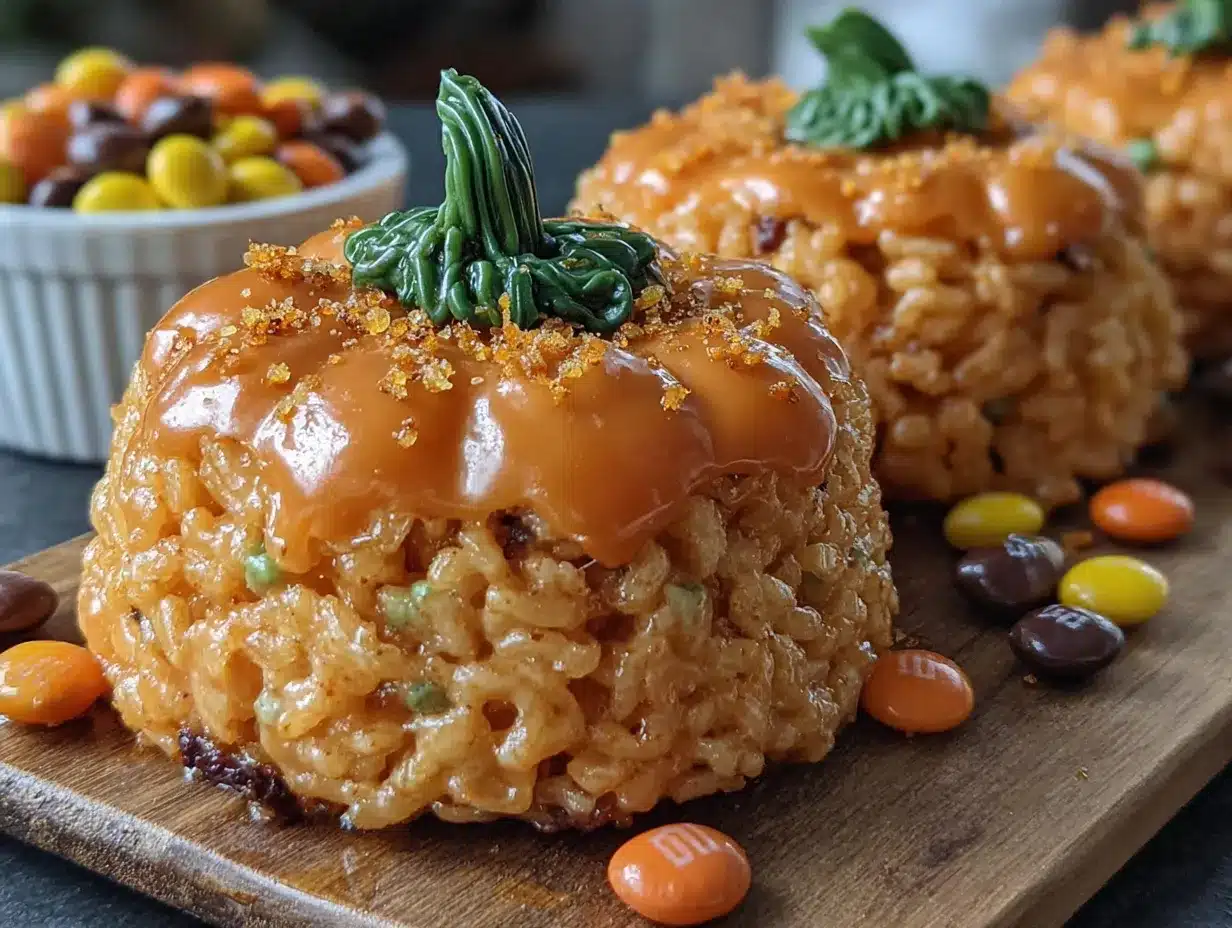
Alright, let’s get to the fun part. Here’s how to make these cozy Halloween Rice Krispie Treat Pumpkins step by step. I’ve included every little detail so you don’t end up with a sticky disaster like I did my first time.
Step 1: Prep your muffin tin.
Generously spray a standard 12-cup muffin tin with non-stick cooking spray. Don’t be shy here—get into every nook and cranny. I also lightly spray a spatula and set it aside. This step is non-negotiable. I once skipped it and spent twenty minutes chiseling hardened Rice Krispie bits out of the pan with a butter knife. Not my finest moment.
Step 2: Melt the butter and marshmallows.
In a large microwave-safe bowl, combine the 3 tablespoons of butter and the 10 oz of mini marshmallows. Microwave on high for 1 minute. Stir. Microwave in 30-second intervals after that, stirring between each, until the mixture is completely smooth and glossy. This usually takes about 2 to 3 minutes total. Be careful not to overheat—burnt marshmallow has a sad, smoky smell that ruins the whole batch. The mixture should look like a thick, shiny sauce when it’s ready.
Step 3: Add the flavor and color.
Stir in the 1/4 teaspoon vanilla extract, 1/8 teaspoon salt (if using), and 1/8 teaspoon ground cinnamon. Then add the orange gel food coloring. Start with a small amount—about 1/4 teaspoon—and stir. Add more until you reach the shade of orange you want. I usually end up using about 1/2 teaspoon total for a vibrant pumpkin color. Stir thoroughly so there are no white streaks. This is where you’ll see the magic start to happen—the mixture turns this beautiful warm orange that just screams fall.
Step 4: Add the cereal.
Pour the 6 cups of Rice Krispies into the marshmallow mixture. Fold gently with your greased spatula until all the cereal is evenly coated. Work quickly but carefully—you don’t want to crush the cereal into dust. The mixture should look like a cohesive, sticky mass with every piece of cereal holding hands with its neighbor. If you see dry spots, keep folding. This takes about 1 to 2 minutes of gentle folding.
Step 5: Fill the muffin cups.
Scoop the mixture into the prepared muffin tin. Fill each cup to the top, pressing down firmly with the back of your spatula or with greased fingers. Make sure there are no air pockets. The tops should be slightly rounded to mimic the shape of a pumpkin. Don’t overstuff, though—you want them to hold their shape, not bulge out like they’ve had one too many Halloween candies. You should get exactly 12 pumpkins from this batch.
Step 6: Let them set.
Allow the treats to cool at room temperature for about 30 minutes. Don’t rush this step. If you try to remove them too early, they’ll fall apart. I speak from experience—I once tried to speed things up by putting them in the fridge, and they got weirdly hard on the outside and sticky on the inside. Room temperature is the way to go. They’re ready when they feel firm to the touch and the pan is cool.
Step 7: Remove and decorate.
Once set, gently twist each treat to loosen it from the pan. They should pop right out if you greased the pan well. If they’re stubborn, run a thin knife around the edge. Place them on a sheet of wax paper. For the stems, melt a few green candy melts according to package directions (usually 30 seconds in the microwave), transfer to a small piping bag or zip-top bag with the corner snipped off, and pipe a small stem shape on top of each pumpkin. Alternatively, you can press a small piece of green licorice or a pretzel stick into the top. Let the stems set for another 10 minutes before serving or storing.
Step 8: Add faces (optional but adorable).
If you want to take these over the top, use black frosting or melted dark chocolate to pipe little jack-o’-lantern faces on the front. Triangle eyes, a jagged smile—the works. My kids insist on this step, and honestly, it makes them even more irresistible. Just make sure the treats are fully set before you add the faces, or the frosting will slide right off.
Cooking Tips & Techniques
I’ve made these pumpkin treats more times than I can count, and I’ve collected a few tricks along the way that make the process smoother and the results better. Here are my best tips, born from trial and error.
Work fast but stay calm. The marshmallow mixture starts to set as soon as it cools, so you have about 10 minutes from the time you add the cereal to get everything into the muffin tin. If the mixture gets too stiff to work with, pop the bowl back in the microwave for 10 seconds to soften it up. Don’t overdo it, though—30 seconds will turn it into a sticky brick.
Grease everything. I cannot stress this enough. Grease your hands, your spatula, your muffin tin, even the inside of your measuring cup if you’re feeling paranoid. The marshmallow mixture sticks to everything like glue, and the only defense is a generous layer of cooking spray. I keep a paper towel with a little oil on it nearby to re-grease my hands between steps.
Use a light touch when pressing. You want the treats to hold together, but pressing too hard makes them dense and hard. Gentle, even pressure is the goal. Think of it like patting a baby’s head—firm enough to be reassuring, but not so firm that you leave a dent.
Don’t skip the cooling time. I know it’s tempting to dig in right away, but these treats need at least 30 minutes to set properly. If you rush, you’ll end up with a crumbly mess. I usually make them in the morning and let them sit while I clean up the kitchen. By the time I’m done, they’re perfect.
The cinnamon is subtle but important. One time I forgot to add it, and the treats tasted flat—still good, but missing that cozy warmth that makes them feel like fall. It’s not a strong flavor, just a background note that makes everything taste a little more special. Don’t skip it.
If the treats get too hard overnight, microwave them for 5 to 10 seconds. They’ll soften right up. This is a lifesaver if you’re making them a day ahead for a party.
Variations & Adaptations
One of the best things about this recipe is how easy it is to tweak. Here are some of my favorite variations, all of which I’ve tested in my own kitchen.
Chocolate pumpkin treats: Melt 1/4 cup of chocolate chips with the butter and marshmallows for a chocolate-orange combo that tastes like a fancy Halloween candy bar. The chocolate adds a richness that pairs beautifully with the cinnamon. My neighbor Deb tried this version and now refuses to make them any other way.
Vegan version: Use vegan marshmallows (Dandies brand works great) and substitute the butter with coconut oil or a vegan butter stick. The texture is slightly different—a little chewier—but still delicious. Just note that vegan marshmallows take a bit longer to melt, so be patient.
Gluten-free: Rice Krispies are naturally gluten-free (in the US, anyway), but double-check the label to be safe. Some store-brand crispy rice cereals contain malt flavoring, which has gluten. The original Kellogg’s version is safe, but always verify if you’re serving someone with celiac disease.
Mini pumpkin bites: Use a mini muffin tin for bite-sized treats. Reduce the pressing time slightly, and you’ll get about 24 mini pumpkins. These are perfect for classroom parties or snack bags. My daughter’s teacher specifically requests these every year because they’re less messy than full-sized treats.
Spiced pumpkin treats: Add 1/4 teaspoon of pumpkin pie spice along with the cinnamon for a more pronounced fall flavor. This version is especially good if you’re serving these at a Thanksgiving gathering or a cozy autumn bonfire. I made a batch for our neighborhood pumpkin carving party, and they disappeared in minutes.
Nutty pumpkin treats: Fold in 1/2 cup of chopped pecans or walnuts along with the cereal. The crunch adds a lovely texture contrast. Just be mindful of nut allergies if you’re serving these at a public event.
Serving & Storage Suggestions
These pumpkin treats are best served at room temperature, which means they’re ready to go whenever you are. Arrange them on a festive platter lined with orange or black napkins for a pop of Halloween color. I like to place them on a cake stand for extra height—it makes the table look more inviting.
For a Halloween party spread, pair these pumpkins with other fall treats like caramel apples, popcorn balls, or a warm mug of apple cider. The sweetness of the Rice Krispie treats balances beautifully with the tartness of cider. If you’re serving them at a kid’s party, set out little cups of frosting and sprinkles so the kids can decorate their own pumpkins. It’s a fun activity that doubles as dessert.
To store, place the treats in an airtight container at room temperature. They’ll stay fresh for up to 3 days. Do not refrigerate them—the fridge makes them hard and dry. If you need to store them longer, you can freeze them for up to a month. Wrap each treat individually in plastic wrap, then place them in a freezer-safe bag. To thaw, let them sit at room temperature for about 30 minutes.
Here’s a little secret: these treats actually taste even better the next day. The flavors meld together overnight, and the texture softens just slightly, becoming more chewy and less crunchy. I always make a double batch so we have some for the day of and some for the day after. The second-day treats are always the first to disappear.
If you’re packing these for a lunchbox or a road trip, wrap each one individually in wax paper and secure with a piece of tape. They travel surprisingly well and won’t crumble if handled gently. Just don’t stack them too high—they can squish under their own weight.
Nutritional Information & Benefits
Let’s be real—these are a treat, not a health food. But they’re made with simple ingredients, and there are a few small nutritional bright spots worth mentioning. Here’s the approximate breakdown per pumpkin (based on 12 servings):
| Nutrient | Amount |
|---|---|
| Calories | 180 |
| Total Fat | 4g |
| Saturated Fat | 2.5g |
| Carbohydrates | 35g |
| Sugar | 18g |
| Protein | 2g |
| Sodium | 180mg |
The Rice Krispies provide a small amount of iron and B vitamins, thanks to the fortification in the cereal. The butter adds a touch of vitamin A, and the marshmallows… well, they add joy, which I think counts for something. These treats are naturally nut-free (check your specific brands) and can easily be made vegan or gluten-free with the substitutions mentioned above.
From a wellness perspective, I believe treats like these have a place in a balanced diet. They’re about celebration, connection, and a little bit of childhood magic. One pumpkin isn’t going to derail anyone’s healthy habits, but it might just make their day a little brighter. And honestly, that’s worth more than a few grams of sugar.
Conclusion
These cozy Halloween Rice Krispie Treat Pumpkins have become a non-negotiable part of my fall tradition. They’re quick enough for a last-minute school party, cute enough to impress at a gathering, and simple enough that even the littlest hands can help. That moment when you pull them out of the muffin tin and see those perfect little pumpkin shapes—it never gets old.
I love this recipe because it reminds me that the best traditions don’t have to be complicated. Sometimes they start with a scribbled note from a stranger in a hardware store checkout line. Sometimes they start with butter, marshmallows, and a little orange food coloring. And sometimes, they become the thing your family asks for year after year, the thing that makes October feel like October.
I’d love to hear how yours turn out. Did you add faces? Try a variation? Make a double batch because one wasn’t enough? Drop a comment below and let me know—I read every single one. And if you share a photo on Pinterest or Instagram, tag me so I can see your beautiful pumpkins. Happy Halloween, friends. Now go make some memories in your kitchen.
Frequently Asked Questions
Can I use regular food coloring instead of gel?
You can, but I don’t recommend it. Liquid food coloring adds extra moisture to the marshmallow mixture, which can make the treats sticky and prevent them from setting properly. Gel food coloring gives you a vibrant color without changing the texture. If you only have liquid, use it sparingly and expect the treats to be a bit softer.
How do I keep the treats from sticking to my hands?
Generously coat your hands with non-stick cooking spray before handling the mixture. I keep a small bowl of cooking spray nearby and reapply as needed. You can also rub a little butter or coconut oil on your hands for the same effect. Just don’t use water—marshmallow and water do not mix, and you’ll end up with a sticky disaster.
Can I make these ahead of time?
Absolutely. These treats stay fresh for up to 3 days in an airtight container at room temperature. You can also freeze them for up to a month. I often make them the night before a party and they’re just as good the next day. In fact, I think the texture improves slightly overnight.
My treats came out too hard. What went wrong?
This usually happens when the marshmallow mixture is overheated or when the treats are pressed too firmly into the muffin tin. Next time, microwave the marshmallows in shorter intervals and use a gentle hand when pressing. If your treats are already hard, try microwaving one for 5 to 10 seconds—it’ll soften right up.
Can I use a different cereal?
Yes, but the texture will change. Cocoa Rice Krispies make chocolate pumpkins, and Fruity Pebbles create a fun, colorful version. Just keep in mind that different cereals have different densities, so you may need to adjust the amount slightly. Start with 5 cups and add more if the mixture seems too wet.
Pin This Recipe!
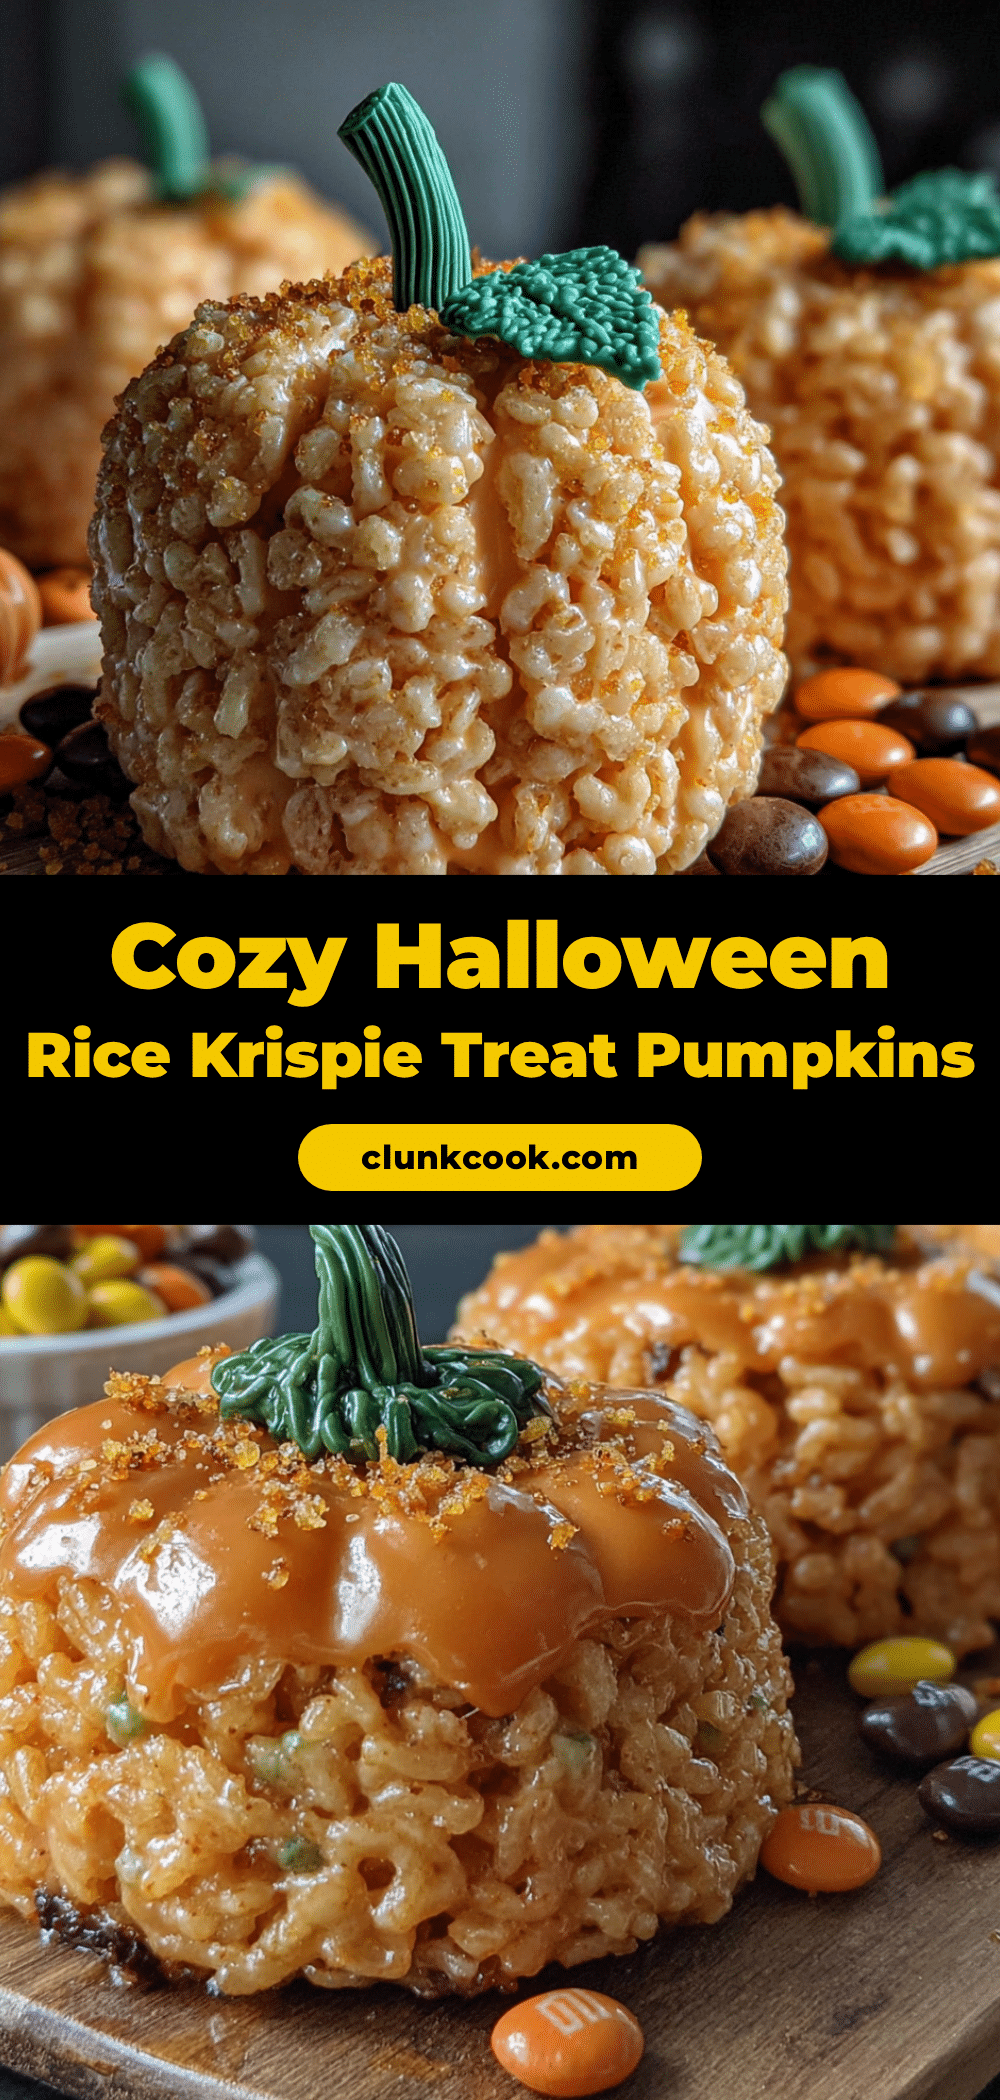
Cozy Halloween Rice Krispie Treat Pumpkins: Easy 20-Minute Recipe
These adorable pumpkin-shaped Rice Krispie treats come together in under 20 minutes with simple pantry ingredients. A secret pinch of cinnamon and a clever muffin tin technique make them the perfect no-fuss Halloween treat that kids and adults love.
- Prep Time: 10 minutes
- Cook Time: 10 minutes
- Total Time: 20 minutes
- Yield: 12 servings 1x
- Category: Dessert
- Cuisine: American
Ingredients
- 6 cups Rice Krispies cereal
- 10 oz mini marshmallows (about 4 cups)
- 3 tablespoons unsalted butter
- 1/4 teaspoon vanilla extract
- 1/8 teaspoon salt (optional)
- 1/8 teaspoon ground cinnamon
- Orange gel food coloring
- Green candy melts or green frosting (for stems)
- Non-stick cooking spray
Instructions
- Generously spray a standard 12-cup muffin tin with non-stick cooking spray. Also lightly spray a spatula and set aside.
- In a large microwave-safe bowl, combine 3 tablespoons butter and 10 oz mini marshmallows. Microwave on high for 1 minute. Stir. Microwave in 30-second intervals, stirring between each, until smooth and glossy (about 2-3 minutes total).
- Stir in 1/4 teaspoon vanilla extract, 1/8 teaspoon salt (if using), and 1/8 teaspoon ground cinnamon. Add orange gel food coloring (start with 1/4 teaspoon, add more until desired shade, about 1/2 teaspoon total). Stir until no white streaks remain.
- Pour 6 cups Rice Krispies into the marshmallow mixture. Fold gently with greased spatula until all cereal is evenly coated (about 1-2 minutes).
- Scoop mixture into prepared muffin tin, filling each cup to the top. Press down firmly with the back of the spatula or greased fingers. Tops should be slightly rounded.
- Let treats cool at room temperature for about 30 minutes until firm to the touch and pan is cool.
- Gently twist each treat to loosen from pan. If stubborn, run a thin knife around the edge. Place on wax paper. Melt green candy melts according to package directions, transfer to a piping bag or zip-top bag with corner snipped, and pipe a small stem on top of each pumpkin. Let stems set for 10 minutes.
- Optional: Use black frosting or melted dark chocolate to pipe jack-o’-lantern faces on the front.
Notes
Work quickly as the marshmallow mixture sets fast. Grease everything generously to prevent sticking. The cinnamon is subtle but adds warmth. If treats get too hard overnight, microwave for 5-10 seconds to soften. For best texture, let them sit overnight.
Nutrition
- Serving Size: 1 pumpkin
- Calories: 180
- Sugar: 18
- Sodium: 180
- Fat: 4
- Saturated Fat: 2.5
- Carbohydrates: 35
- Protein: 2
Keywords: Halloween treats, Rice Krispie treats, pumpkin treats, no-bake dessert, easy Halloween recipe, kid-friendly, fall dessert


