Love this? Save it for later!
Share the inspiration with your friends
I was standing in the grocery store aisle last Tuesday, staring at a box of frozen chicken tenders like it had personally offended me. The cartoon rooster on the front was smiling way too hard, and the ingredient list read like a science experiment. My phone buzzed—my sister sending a photo of her kid’s lunchbox, the same sad sandwich and chips combo that ends up half-eaten every day. That’s when it hit me. Not a smell or a taste, but a realization: I could make these myself, way better, and actually pack them for lunches without the guilt or the weird preservatives.
Honestly, I’d been chasing that perfect crispy-yet-juicy chicken tender for years. Not the deep-fried kind that leaves you feeling heavy, but the baked version that somehow still gives you that satisfying crunch. You know the one—where the breading actually stays on and doesn’t slide off in a sad, soggy mess by lunchtime. I’d tried a dozen recipes, and most of them were either too dry or too complicated for a Tuesday night.
Then came the accidental breakthrough. I was out of panko breadcrumbs, my oven was preheating, and I had about fifteen minutes before the kids needed to be at practice. I grabbed some regular breadcrumbs, added a secret ingredient from the back of my pantry, and crossed my fingers. The result? Golden, crunchy chicken tenders that stayed crispy even after sitting in a lunchbox for a few hours. My neighbor Karen, who’s notoriously picky about her chicken, actually asked for the recipe. Twice.
These crispy baked chicken tenders lunchbox meal prep tenders have become my weekly savior. They’re the kind of thing you make on Sunday and thank yourself for on Wednesday when lunch packing takes five minutes instead of twenty. And honestly, they taste better than anything you’d get from a drive-through or a freezer box. Maybe you’ve been there too—standing in that aisle, wondering if there’s a better way. There is. Let me show you.
Why You’ll Love This Recipe
I’ve tested this recipe more times than I care to count, and let me tell you, it’s been through the wringer. From oven temp experiments to breading consistency battles, I’ve made every mistake so you don’t have to. Here’s why these crispy baked chicken tenders lunchbox meal prep tenders are worth your time:
- Quick & Easy: Comes together in under 30 minutes, perfect for busy weeknights or last-minute lunch prep on Sunday afternoon.
- Simple Ingredients: No fancy grocery trips needed. You likely have everything in your kitchen right now, including that one spice blend you forgot about.
- Perfect for Meal Prep: These stay crispy in the fridge for up to 4 days, making them ideal for packing lunches or grabbing a quick protein hit.
- Crowd-Pleaser: My kids devour them, my husband packs them for work, and even my picky mother-in-law asked for seconds.
- Unbelievably Delicious: The texture is next-level comfort food—crunchy on the outside, tender and juicy on the inside, without a drop of deep-fryer oil.
What makes this version different from the rest? It’s the double-coating technique I stumbled on during that pantry crisis. Instead of one layer of breading, you get two thin, even coats that create a shatteringly crisp crust that actually survives refrigeration. Plus, I use a touch of grated Parmesan in the breading for extra flavor and browning without making it heavy. This isn’t just another baked chicken tender recipe—it’s your best version.
This recipe is the kind that makes you close your eyes after the first bite. It’s comfort food reimagined—healthier, faster, but with the same soul-soothing satisfaction. Perfect for impressing lunchbox critics without stress, or turning a simple meal prep session into something memorable.
What Ingredients You Will Need
This recipe uses simple, wholesome ingredients to deliver bold flavor and satisfying texture without the fuss. Most of these are pantry staples, but I’ll share a few tips on what to look for at the store.
For the Chicken
- 1½ pounds boneless, skinless chicken breasts (about 3 medium breasts) — Look for evenly sized breasts so they cook at the same rate. I prefer organic or air-chilled chicken for better texture.
- 1 teaspoon kosher salt — Don’t skip this. It seasons the chicken from the inside out.
- ½ teaspoon black pepper — Freshly ground if you have it.
- ½ teaspoon garlic powder — Not garlic salt. We want the flavor without extra sodium.
- ¼ teaspoon paprika — Smoked paprika works beautifully here too.
For the Breading

- 1 cup panko breadcrumbs — These give the crispiest texture. Regular breadcrumbs work, but panko is superior for crunch.
- ¼ cup grated Parmesan cheese — The kind in the green can works, but freshly grated melts better. (Adds richness and helps browning.)
- ½ teaspoon onion powder — A subtle savory note.
- ¼ teaspoon dried oregano — Optional but lovely.
- Pinch of cayenne pepper — Just a touch for warmth, not heat.
For the Wet Mixture
- 2 large eggs — Room temperature helps them coat evenly.
- 1 tablespoon Dijon mustard — This is my secret ingredient. It adds tang and helps the breading stick like glue.
- 1 teaspoon water — Just a splash to thin the egg wash slightly.
For Cooking
- Olive oil spray — A light spritz is all you need. Avocado oil spray works too and has a higher smoke point.
For the best results, I recommend using Ian’s panko breadcrumbs or Kikkoman if you can find them—they’re extra crispy. If you’re gluten-free, swap the panko for gluten-free breadcrumbs and use a gluten-free Dijon mustard. For a dairy-free option, omit the Parmesan and add an extra tablespoon of panko plus a pinch of nutritional yeast for that cheesy flavor.
When shopping for chicken, look for breasts that are about the same thickness. If they’re uneven, you can butterfly them or pound them gently between plastic wrap. Trust me on this—even cooking makes all the difference.
Equipment Needed
You don’t need a professional kitchen for these crispy baked chicken tenders lunchbox meal prep tenders, but having the right tools makes the process smoother.
- Baking sheet — A rimmed half-sheet pan works best. The rim catches any drips and keeps your oven clean.
- Wire rack — This is the game-changer. Placing a wire rack on the baking sheet allows air to circulate under the tenders, keeping the bottom crispy instead of soggy. I use a simple cooling rack that cost me $8.
- Three shallow bowls — For the dredging station. Pie plates or wide soup bowls work perfectly.
- Tongs — For transferring chicken without making a mess. One pair for wet hands, one for dry.
- Sharp knife and cutting board — For trimming and cutting the chicken into even strips.
- Meat thermometer — Optional but highly recommended. Chicken is safe at 165°F, and a thermometer takes the guesswork out.
- Parchment paper or silicone baking mat — Makes cleanup a breeze, especially if you’re not using a wire rack.
If you don’t have a wire rack, you can bake the tenders directly on a parchment-lined sheet, just flip them halfway through. The bottoms won’t be quite as crispy, but they’ll still be delicious. I’ve done it both ways, and honestly, the rack is worth the small investment if you make these regularly.
Preparation Method
Let’s get cooking. This method is straightforward, but I’ve added some extra notes based on my many trial-and-error runs.
- Preheat your oven to 400°F (200°C). Place a wire rack on a rimmed baking sheet and spray it lightly with olive oil. This prevents sticking and helps the bottoms crisp up.
- Prep the chicken. Trim any excess fat from the chicken breasts. Cut them lengthwise into strips about 1 inch wide and 4 inches long. You should get 4-5 strips per breast. Season the strips evenly with salt, pepper, garlic powder, and paprika. Let them sit for 5 minutes while you set up the dredging station.
- Set up your dredging station. In the first shallow bowl, whisk together the eggs, Dijon mustard, and water until smooth. In the second bowl, combine the panko breadcrumbs, Parmesan cheese, onion powder, oregano, and cayenne. Line them up in order: chicken, egg wash, breadcrumbs, baking sheet.
- Coat the chicken. Working with one strip at a time, dip it into the egg wash, letting any excess drip off. Then place it in the breadcrumb mixture. Press the breadcrumbs firmly onto both sides. Here’s the trick: lift the strip, let any loose crumbs fall off, then dip it back into the egg wash quickly and press into the breadcrumbs again. This double-coating creates that ultra-crispy crust. Place the coated strip on the wire rack.
- Repeat with all strips. Don’t crowd them—leave a little space between each tender for air circulation. If you’re making a double batch, use two baking sheets.
- Spray the tops. Lightly spray the tops of the tenders with olive oil. This helps them brown and crisp in the oven. Don’t soak them—just a quick mist.
- Bake for 12 minutes. Place the baking sheet on the middle rack. After 12 minutes, carefully flip each tender using tongs. They should be golden on the bottom. Spray the flipped side lightly with oil.
- Bake for another 8-10 minutes. The total cooking time should be 20-22 minutes. The tenders are done when they’re golden brown and reach an internal temperature of 165°F (74°C). If you don’t have a thermometer, cut into the thickest tender—the juices should run clear and there should be no pink.
- Let them rest. Remove the baking sheet from the oven and let the tenders rest on the wire rack for 3-5 minutes. This allows the juices to redistribute and the crust to set. Don’t skip this step—it keeps them from getting soggy when you pack them.
A few notes from experience: If your tenders are browning too quickly on top but aren’t cooked through, tent them loosely with foil for the last 5 minutes. If they’re not browning enough, give them an extra minute under the broiler—but watch closely, it happens fast. The egg wash should feel tacky, not runny, when you dip the chicken. If it’s too thin, add a pinch more mustard.
Cooking Tips & Techniques
I’ve made these crispy baked chicken tenders lunchbox meal prep tenders at least thirty times, and I’ve learned a few things the hard way. Let me save you some trouble.
The double-coating trick. This is non-negotiable if you want that shatteringly crisp crust. The first coat of breading sticks to the egg wash, then the second coat creates a thick, crunchy shell. I learned this after a batch where the breading slid off in one sad sheet. Never again.
Don’t skip the rest time. After breading, let the coated tenders sit on the wire rack for 5 minutes before baking. This helps the coating adhere better. I know it’s tempting to rush, but trust me on this one.
Watch your oven temperature. Every oven runs differently. If yours runs hot, check the tenders at 18 minutes. If it runs cool, give them an extra 2-3 minutes. I’ve had friends tell me their oven takes 25 minutes, and that’s fine—just use the thermometer to be sure.
Multitask like a pro. While the chicken is baking, wash your dishes and clean up the dredging station. Or prep your lunchbox containers with veggies, fruit, and dip. By the time the tenders are done, you’ll have everything ready to pack.
My biggest failure. The first time I made these, I forgot to spray the wire rack. Half the breading stuck to the rack and tore off when I tried to flip them. It was a mess. Now I always spray both the rack and the tops. Lesson learned.
For consistent results. Cut the chicken strips as evenly as possible. Thicker strips need more time, thinner ones cook faster, and uneven strips mean some will be overdone while others are under. Take the extra minute to cut them uniform.
Variations & Adaptations
One of the best things about this recipe is how adaptable it is. Here are some ways I’ve changed it up depending on what’s in my pantry or who I’m feeding.
Gluten-Free Version: Swap the panko for gluten-free panko or crushed pork rinds for a low-carb option. I’ve used Aleia’s gluten-free panko with great results. The texture is slightly different but still very crispy.
Spicy Buffalo Style: Add 1 tablespoon of buffalo sauce to the egg wash and increase the cayenne to ½ teaspoon. Serve with blue cheese or ranch dip. My husband requests this version every time.
Herb & Garlic: Add 1 teaspoon dried parsley and ½ teaspoon dried thyme to the breadcrumb mixture. Swap the garlic powder for 2 minced fresh garlic cloves mixed into the egg wash. This is my go-to for a more sophisticated flavor.
Air Fryer Adaptation: Preheat your air fryer to 375°F (190°C). Cook the tenders in a single layer for 8-10 minutes, flipping halfway through. No need to flip if your air fryer has a basket that circulates evenly. They come out even crispier than the oven version.
Parmesan-Crusted: Increase the Parmesan to ½ cup and reduce the panko to ¾ cup. This creates a cheesier, more golden crust. Just watch them closely—Parmesan can burn faster than breadcrumbs.
Allergen-Friendly: For egg-free, use a mixture of ¼ cup milk (dairy or non-dairy) mixed with 1 tablespoon cornstarch as the wet dip. For nut-free, this recipe is naturally nut-free as written. For dairy-free, omit the Parmesan and add an extra 2 tablespoons of panko.
I once made a lemon-herb version by adding lemon zest and fresh rosemary to the breadcrumbs. It was a hit at a summer picnic. Don’t be afraid to experiment—these tenders are forgiving.
Serving & Storage Suggestions
These crispy baked chicken tenders are incredibly versatile when it comes to serving and storing. Here’s how I handle both.
Serving: Serve the tenders warm, right out of the oven, for the crispiest experience. They’re fantastic on their own or with a dipping sauce. My favorites include honey mustard, barbecue sauce, ranch, or a simple sriracha mayo. For a complete meal, pair them with roasted vegetables, a side salad, or sweet potato fries.
Lunchbox Packing: Let the tenders cool completely before packing. Place them in a container with a paper towel on the bottom to absorb any excess moisture. Keep sauces separate to prevent sogginess. Add some carrot sticks, cucumber slices, and apple wedges for a balanced lunch. I usually pack them the night before and grab them in the morning.
Storage: Store leftover tenders in an airtight container in the refrigerator for up to 4 days. Don’t stack them too high—they’ll crush each other. If you have a lot, layer them with parchment paper between layers. They actually taste great cold, straight from the fridge, especially if you’re packing lunch.
Reheating: For best results, reheat in the oven or air fryer. Preheat to 375°F (190°C) and heat for 5-7 minutes until warmed through and crispy. The microwave works in a pinch but will soften the breading. If you’re reheating from frozen, add 2-3 minutes to the time. I’ve reheated them in a toaster oven with great results.
Freezing: These tenders freeze beautifully. Let them cool completely, then arrange in a single layer on a baking sheet and freeze for 1-2 hours. Transfer to a freezer-safe bag or container. They’ll keep for up to 3 months. To reheat, bake from frozen at 375°F for 12-15 minutes. No need to thaw.
One thing I love about this recipe is that the flavors actually develop a bit after a day in the fridge. The spices meld together, and the texture stays surprisingly good. They’re one of those rare meal prep recipes that tastes just as good on day four as it did on day one.
Nutritional Information & Benefits
Here’s an estimated nutritional breakdown per serving (about 3-4 tenders, depending on size):
| Nutrient | Amount |
|---|---|
| Calories | 320 |
| Protein | 35g |
| Carbohydrates | 18g |
| Fat | 12g |
| Saturated Fat | 3g |
| Cholesterol | 140mg |
| Sodium | 480mg |
| Fiber | 1g |
| Sugar | 1g |
These crispy baked chicken tenders are a great source of lean protein, which supports muscle repair and keeps you full longer. The Parmesan adds a small amount of calcium, and the chicken provides B vitamins, particularly niacin and B6, which help with energy metabolism. Compared to deep-fried versions, this baked method cuts the fat content by about half without sacrificing flavor or texture.
If you’re watching your sodium, you can reduce the salt to ½ teaspoon and use low-sodium Parmesan. For a lower-carb option, swap the panko for crushed pork rinds or almond flour. This recipe is naturally low in sugar and can be made gluten-free, dairy-free, or egg-free with the substitutions mentioned earlier. It’s also nut-free as written, making it a safe option for many lunchbox restrictions.
I personally love that these tenders fit into a balanced meal prep routine. They’re satisfying without being heavy, and they give me that comfort food fix without the post-meal slump. It’s all about enjoying what you eat while feeling good about it.
Conclusion
These crispy baked chicken tenders have become a staple in my weekly meal prep rotation, and I have a feeling they’ll become one in yours too. They’re proof that you don’t need a deep fryer or a complicated recipe to get that perfect crunch—just a few simple ingredients, a little patience, and a willingness to try something new.
What I love most about this recipe is how it makes lunch feel special without any extra effort. Whether you’re packing for yourself, your kids, or your partner, these tenders bring a little joy to the midday meal. And honestly, isn’t that what cooking is all about? Finding those small moments of happiness in the everyday.
I’d love to hear how these turn out for you. Did you try a variation? Did your kids love them? Drop a comment below and share your experience—I read every single one. And if you’re looking for more meal prep inspiration, check out my easy weeknight dinner ideas or my healthy snack recipes for more lunchbox-friendly options. Happy cooking!
Frequently Asked Questions
Can I use chicken thighs instead of breasts?
Absolutely. Chicken thighs are more forgiving and stay juicier, but they have a higher fat content. Cut them into strips and adjust cooking time slightly—thighs may need 2-3 extra minutes. The breading technique works the same way.
Why did my breading fall off?
This usually happens if the chicken is too wet before coating or if you didn’t press the breadcrumbs firmly enough. Pat the chicken dry with paper towels before seasoning, and really press that breading in. The double-coating method also helps prevent this issue.
Can I make these ahead of time for a party?
Yes! Bake them as directed, let them cool completely, and store in the fridge. Reheat in a 375°F oven for 5-7 minutes just before serving. They’ll be almost as crispy as fresh. For a party, I often make a double batch and keep them warm in a low oven on a wire rack.
How do I keep them crispy in a lunchbox?
Let them cool completely before packing. Place a paper towel at the bottom of the container to absorb moisture. Keep sauces separate and add them just before eating. Avoid stacking too many tenders on top of each other. If you’re packing the night before, they’ll still be crispy the next day.
Can I freeze the breaded but uncooked tenders?
Yes, this is a great meal prep trick. Bread the tenders, place them on a parchment-lined baking sheet, and freeze for 1-2 hours. Transfer to a freezer bag. When ready to cook, bake from frozen at 400°F for 22-25 minutes, adding a few extra minutes as needed. No need to thaw.
Pin This Recipe!
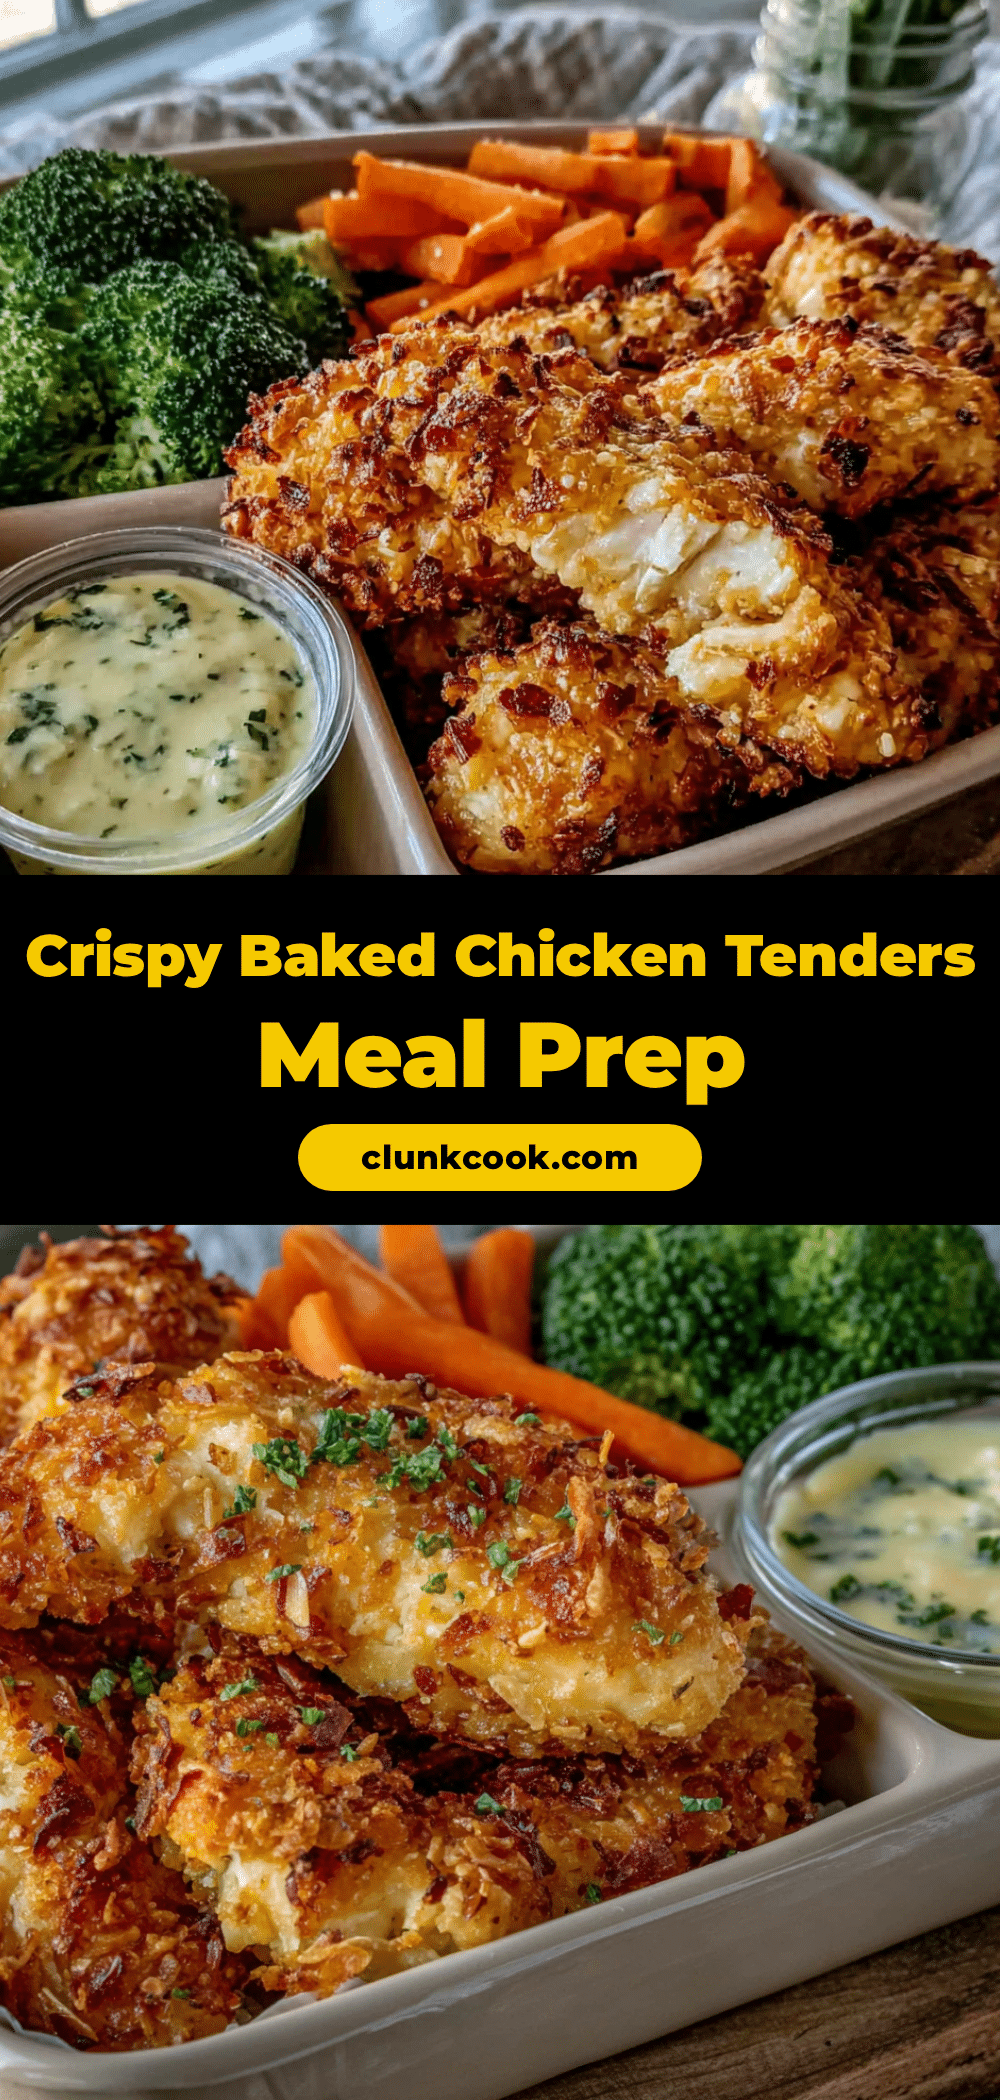
Crispy Baked Chicken Tenders Easy Lunchbox Meal Prep

These crispy baked chicken tenders are perfect for lunchbox meal prep, staying crunchy even after refrigeration. Made with simple ingredients and a double-coating technique, they’re a healthier, delicious alternative to frozen or deep-fried versions.
- Prep Time: 15 minutes
- Cook Time: 20 minutes
- Total Time: 35 minutes
- Yield: 4 servings 1x
- Category: Main Course
- Cuisine: American
Ingredients
- 1½ pounds boneless, skinless chicken breasts (about 3 medium breasts)
- 1 teaspoon kosher salt
- ½ teaspoon black pepper
- ½ teaspoon garlic powder
- ¼ teaspoon paprika
- 1 cup panko breadcrumbs
- ¼ cup grated Parmesan cheese
- ½ teaspoon onion powder
- ¼ teaspoon dried oregano
- Pinch of cayenne pepper
- 2 large eggs
- 1 tablespoon Dijon mustard
- 1 teaspoon water
- Olive oil spray
Instructions
- Preheat your oven to 400°F (200°C). Place a wire rack on a rimmed baking sheet and spray it lightly with olive oil.
- Trim any excess fat from the chicken breasts. Cut them lengthwise into strips about 1 inch wide and 4 inches long. Season the strips evenly with salt, pepper, garlic powder, and paprika. Let them sit for 5 minutes.
- Set up your dredging station. In the first shallow bowl, whisk together the eggs, Dijon mustard, and water until smooth. In the second bowl, combine the panko breadcrumbs, Parmesan cheese, onion powder, oregano, and cayenne.
- Working with one strip at a time, dip it into the egg wash, letting any excess drip off. Then place it in the breadcrumb mixture. Press the breadcrumbs firmly onto both sides. Lift the strip, let any loose crumbs fall off, then dip it back into the egg wash quickly and press into the breadcrumbs again. Place the coated strip on the wire rack.
- Repeat with all strips, leaving a little space between each tender for air circulation.
- Lightly spray the tops of the tenders with olive oil.
- Bake for 12 minutes. Carefully flip each tender using tongs. Spray the flipped side lightly with oil.
- Bake for another 8-10 minutes, until golden brown and internal temperature reaches 165°F (74°C).
- Remove from oven and let the tenders rest on the wire rack for 3-5 minutes before serving or packing.
Notes
For extra crispiness, use the double-coating technique. Let the coated tenders rest on the wire rack for 5 minutes before baking to help the coating adhere. If your oven runs hot, check the tenders at 18 minutes. For gluten-free, use gluten-free panko. For dairy-free, omit Parmesan and add extra panko plus nutritional yeast.
Nutrition
- Serving Size: 3-4 tenders
- Calories: 320
- Sugar: 1
- Sodium: 480
- Fat: 12
- Saturated Fat: 3
- Carbohydrates: 18
- Fiber: 1
- Protein: 35
Keywords: crispy baked chicken tenders, lunchbox meal prep, healthy chicken tenders, baked chicken tenders, easy chicken recipe


