Love this? Save it for later!
Share the inspiration with your friends
This was supposed to be a gingerbread cheesecake—the kind you bake in a springform pan, cool for hours, and then try to slice neatly while everyone stares at you. I had the cream cheese out, the molasses measured, and this whole vision of a tall, elegant holiday dessert. Then my oven decided it was done being reliable. It was one of those Tuesday nights where the kids needed homework help, the dog needed walking, and honestly, I just needed something sweet to make it through.
I grabbed the wrong pan—a 9×13 instead of the springform—and I was already too tired to start over. So I pressed the crust into the bigger pan, poured the filling over it, and crossed my fingers. The cheesecake baked up thinner than planned, of course. But when I cut it into bars the next morning? Let me tell you, it was better than the original. The edges were slightly chewy, the center was creamy, and the whole thing came together in a fraction of the time.
That accidental shortcut taught me something. You don’t need a fancy pan or hours of patience to get that rich, spiced gingerbread flavor with silky cheesecake. These bars are proof that sometimes the best recipes come from the moments when you just make it work. Maybe you’ve been there—staring at a half-baked plan, wondering if you should just order pizza. Stick with me. This one’s worth the detour.
Why You’ll Love These Easy Gingerbread Cheesecake Bars
I’ve tested this recipe about seven times since that first happy accident. I’ve made it for holiday parties, for book club, and for a Tuesday when I just needed a win. Every single time, someone asks for the recipe. Here’s why these bars have earned a permanent spot in my rotation:
- Quick & Easy: From start to finish, you’re looking at about 30 minutes of active time. No water bath, no complicated steps, no stress.
- Simple Ingredients: You probably have most of this in your pantry right now. Molasses, spices, cream cheese—nothing weird or hard to find.
- Perfect for the Holidays: These bars have that classic gingerbread flavor everyone craves in December, but they’re also great for Thanksgiving, Christmas parties, or even a cozy weekend treat.
- Crowd-Pleaser: Kids love the creamy texture. Adults love the warm spices. And everyone loves that you can pick one up and eat it without a plate.
- Unbelievably Delicious: The combo of tangy cheesecake and deep, molasses-y gingerbread is next-level comfort food. It’s the kind of dessert that makes you close your eyes after the first bite.
What makes these bars different from other cheesecake bar recipes is the texture. By pressing the crust into a larger pan, you get a better crust-to-filling ratio. Every bite has that perfect crunch followed by velvety smoothness. Plus, the gingerbread flavor is front and center without being overpowering. It’s balanced, it’s cozy, and it’s exactly what a busy weeknight dessert should be.
What Ingredients You Will Need for Gingerbread Cheesecake Bars
This recipe uses simple, honest ingredients to deliver bold flavor and satisfying texture without the fuss. Most of these are pantry staples, especially if you do any holiday baking. Let’s break down what you need and why each ingredient matters.
For the Crust
- 1 ½ cups (150g) gingersnap cookie crumbs — About 20-25 cookies, crushed fine. I use Nabisco Ginger Snaps because they have that perfect snap and spice level. You can also use graham crackers with a teaspoon of ginger added, but the real deal is better.
- ¼ cup (50g) granulated sugar — Just enough sweetness to balance the spices.
- 5 tablespoons (70g) unsalted butter, melted — Use real butter here. Margarine just doesn’t give the same richness or help the crust hold together as well.
- Pinch of salt — A small pinch brings out all the flavors and keeps the crust from tasting flat.
For the Cheesecake Filling
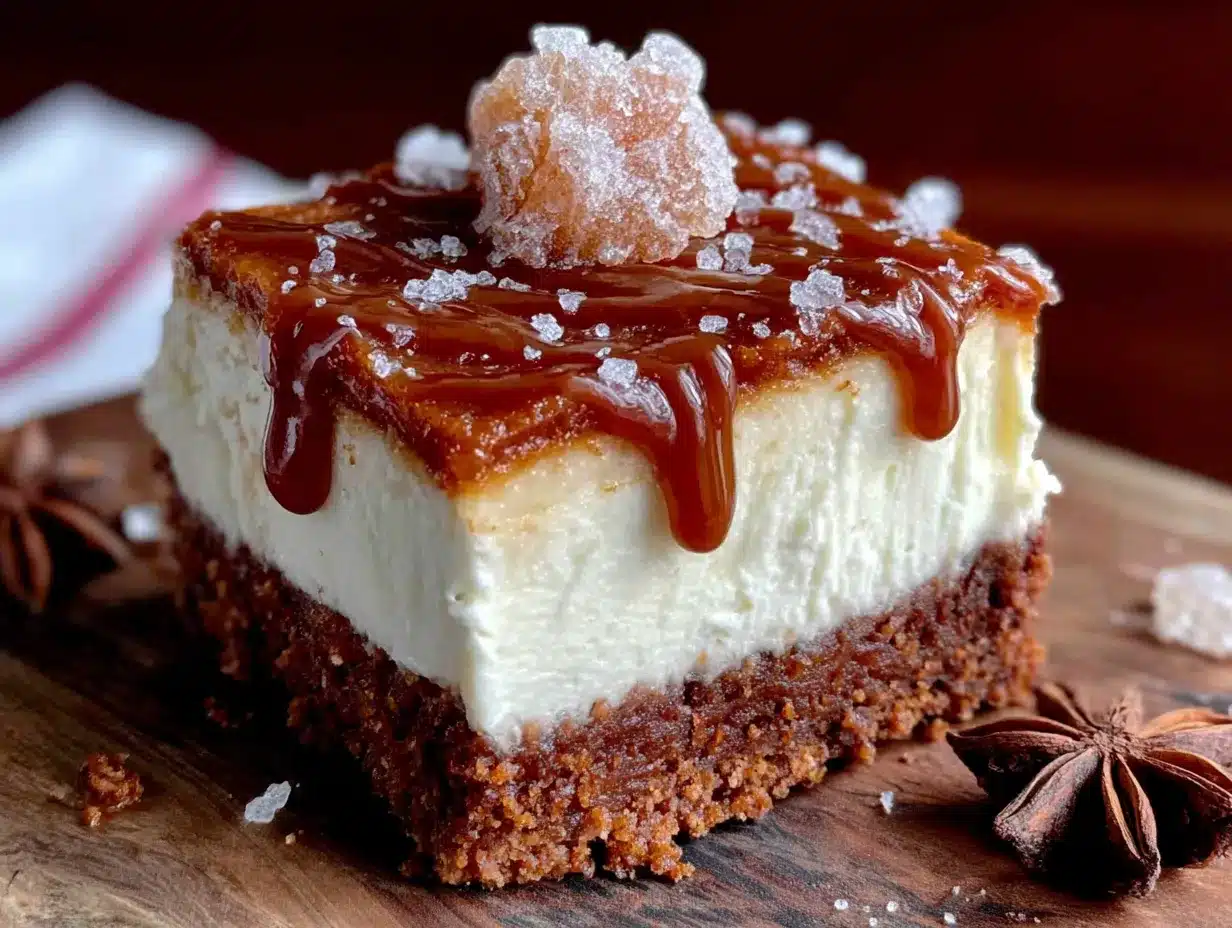
- 16 ounces (450g) cream cheese, softened — Full-fat cream cheese gives the creamiest texture. I use Philadelphia because it’s consistent. Let it sit on the counter for about 30 minutes before you start so it blends smoothly.
- ½ cup (100g) granulated sugar — Sweetens the filling without making it too sweet.
- 2 large eggs, room temperature — Cold eggs can make the filling lumpy. If you forgot to take them out, place them in a bowl of warm water for 5 minutes.
- 1 teaspoon vanilla extract — Pure vanilla makes a difference here. The artificial stuff has a chemical aftertaste that doesn’t play well with the spices.
- ¼ cup (60ml) molasses — Use unsulphured molasses, not blackstrap. Blackstrap is too bitter and will overpower everything. Grandma’s Molasses or Brer Rabbit are both great choices.
- 1 teaspoon ground ginger — This is where the gingerbread flavor really comes from. Fresh ginger won’t work here—it’s too watery and won’t distribute evenly.
- 1 teaspoon ground cinnamon — Warm and sweet, cinnamon is the backbone of the spice blend.
- ¼ teaspoon ground cloves — A little goes a long way. Cloves add that deep, almost peppery warmth that makes gingerbread taste like gingerbread.
- ¼ teaspoon ground nutmeg — Freshly grated if you have it, but pre-ground works fine too.
- Pinch of salt — Don’t skip this. Salt balances the sweetness and makes the spices pop.
Optional Toppings
- Whipped cream — A dollop on top makes these feel extra special.
- Caramel sauce — Drizzle over the bars before serving for a decadent touch.
- Crystallized ginger, chopped — Adds a nice chew and a pop of spicy sweetness.
If you’re dairy-free, you can use dairy-free cream cheese and a vegan butter stick. The texture will be slightly less firm, but the flavor is still fantastic. For a gluten-free version, use gluten-free gingersnap cookies or gluten-free graham crackers. I’ve tested both, and they work beautifully.
Equipment Needed
You don’t need a fancy bakery setup for these gingerbread cheesecake bars. Here’s what you’ll need:
- 9×13-inch baking pan — This is the key to the whole shortcut. A metal pan works great, but glass or ceramic will also do. Just note that glass might need an extra minute or two in the oven.
- Parchment paper — Line the pan with parchment, leaving some overhang on the long sides. This makes lifting the bars out so much easier. Trust me on this one.
- Mixing bowls — You’ll need one medium bowl for the crust and one large bowl for the filling.
- Electric hand mixer or stand mixer — A hand mixer is perfect here. You want the cream cheese to be completely smooth with no lumps.
- Food processor or zip-top bag and rolling pin — For crushing the cookies. A food processor is faster and gives you even crumbs, but a bag and rolling pin work just fine if you don’t mind a little arm work.
- Spatula — A rubber spatula helps you scrape every bit of filling into the pan.
- Measuring cups and spoons — Accuracy matters in baking, so use proper measuring tools, not random spoons from your drawer.
If you don’t have a 9×13 pan, you can use a 9×9 square pan. The bars will be thicker, so you’ll need to bake them about 5 minutes longer. Just keep an eye on them.
Preparation Method for Gingerbread Cheesecake Bars
Here’s the step-by-step process. Take your time with each step, and you’ll have perfect bars every time.
- Preheat your oven to 350°F (175°C). Line your 9×13-inch pan with parchment paper, leaving about 2 inches of overhang on the long sides. This will be your handle for lifting the bars out later.
- Make the crust. In a medium bowl, combine the gingersnap crumbs, sugar, and salt. Pour in the melted butter and stir with a fork until every crumb is moistened. The mixture should look like wet sand and hold together when you squeeze it.
- Press the crust into the pan. Dump the crumbs into the prepared pan and press them down firmly using your fingers or the bottom of a measuring cup. Make sure the crust is even across the bottom and about ¼ inch up the sides. Bake for 8 minutes, then set aside to cool slightly while you make the filling.
- Beat the cream cheese. In a large bowl, beat the softened cream cheese with an electric mixer on medium speed until it’s completely smooth and fluffy—about 2 minutes. Scrape down the sides and bottom of the bowl with a spatula.
- Add the sugar and vanilla. Add the sugar and vanilla extract to the cream cheese and beat on medium until smooth, about 1 minute. Scrape the bowl again.
- Add the eggs one at a time. Crack the first egg into the bowl and beat on low just until incorporated. Add the second egg and do the same. Overmixing at this stage can incorporate too much air, which can cause cracks. You want it just combined.
- Mix in the molasses and spices. Add the molasses, ginger, cinnamon, cloves, nutmeg, and salt. Beat on low until everything is evenly mixed and the filling is a uniform tan color. Scrape the bowl one last time.
- Pour the filling over the crust. Pour the cheesecake filling over the warm crust and spread it into an even layer with a spatula. Give the pan a gentle tap on the counter to release any air bubbles.
- Bake. Place the pan in the preheated oven and bake for 22-25 minutes. The edges should be set and slightly puffed, but the center should still jiggle slightly when you shake the pan. That jiggle is what gives you that creamy texture.
- Cool completely. Place the pan on a wire rack and let it cool to room temperature, about 1 hour. Don’t rush this step—putting warm cheesecake in the fridge can cause condensation, which makes the top watery.
- Chill. Once cooled, cover the pan with plastic wrap and refrigerate for at least 4 hours, preferably overnight. This is the hardest part, I know. But the bars need this time to set up properly so they slice cleanly.
- Slice and serve. When you’re ready to serve, lift the bars out of the pan using the parchment handles. Place on a cutting board and slice into 24 squares. For clean cuts, wipe your knife with a damp paper towel between slices.
Cooking Tips & Techniques
After making these gingerbread cheesecake bars more times than I can count, I’ve learned a few things the hard way. Here are my best tips to save you the trouble.
Don’t overbake. This is the number one mistake people make with cheesecake. The center should still wobble when you pull it out of the oven. It will continue to set as it cools. Overbaked cheesecake turns grainy and dry, and nobody wants that.
Room temperature ingredients matter. I know it’s annoying to wait for cream cheese and eggs to warm up, but it really does make a difference. Cold cream cheese creates lumps that are nearly impossible to beat out completely. Cold eggs can seize up the batter. Set everything out on the counter 30 minutes before you start, and you’ll get a silky smooth filling every time.
Press the crust firmly. A loose crust will crumble when you try to cut the bars. Use a flat-bottomed glass or measuring cup to really pack those crumbs down. I press for about 30 seconds, making sure every corner is compacted.
Let them chill fully. I once tried to cut these after only 2 hours in the fridge, and it was a mess. The bars need that full 4 hours (or overnight) to firm up. If you’re in a rush, you can pop them in the freezer for 1 hour, but the texture won’t be quite as creamy.
Use a sharp knife. A dull knife will drag through the cheesecake and make ragged edges. Run your knife under hot water, dry it off, and make one clean cut. Wipe the blade between cuts for the prettiest presentation.
One thing I learned the hard way: Don’t use a silicone spatula to press the crust. It’s too flexible and you won’t get it even. Use your fingers or a flat-bottomed tool. Trust me on this one.
Variations & Adaptations
One of the best things about this recipe is how easy it is to change up. Here are some of my favorite variations.
Pumpkin Gingerbread Cheesecake Bars: Swap ¼ cup of the cream cheese for pumpkin puree. Add an extra tablespoon of sugar and a pinch of pumpkin pie spice. The pumpkin adds moisture, so bake for an extra 2-3 minutes. I made these for a fall potluck and they disappeared in minutes.
Chocolate Gingerbread Cheesecake Bars: Melt 4 ounces of dark chocolate and swirl it into the cheesecake filling before baking. Use a knife to create a marbled effect. The chocolate and gingerbread combo is honestly one of the best flavor pairings I’ve ever tasted.
Vegan Gingerbread Cheesecake Bars: Use dairy-free cream cheese and a vegan butter stick. Replace the eggs with ¼ cup of cornstarch mixed with ½ cup of water. The texture will be slightly softer, but the flavor is still amazing. Let them chill overnight for the best results.
Gluten-Free Gingerbread Cheesecake Bars: Use gluten-free gingersnap cookies or gluten-free graham crackers for the crust. Everything else in the recipe is naturally gluten-free. I’ve tested this with Pamela’s gluten-free graham crackers and it works beautifully.
Spiced Orange Gingerbread Cheesecake Bars: Add the zest of one orange to the cheesecake filling along with the spices. The citrus brightens up all the warm flavors and adds a lovely freshness. This is my go-to version for Christmas morning.
Serving & Storage Suggestions
These gingerbread cheesecake bars are versatile enough for any occasion. Here’s how to serve and store them for the best experience.
Serving Temperature: I prefer these bars cold, straight from the fridge. The texture is firm and clean, and the flavors are more pronounced. If you like a softer texture, let them sit at room temperature for about 10 minutes before serving.
Presentation Ideas: Arrange the bars on a white platter for a clean, elegant look. Dust with a little powdered sugar just before serving, or drizzle with caramel sauce. A dollop of whipped cream and a sprinkle of crystallized ginger makes them feel extra special for holiday parties.
Complementary Dishes: These bars pair beautifully with a cup of hot coffee, spiced tea, or a glass of cold milk. For a dessert spread, serve them alongside peppermint bark, chocolate truffles, or a simple fruit salad. They also work great on a cookie platter—just cut them smaller so people can try a few different treats.
Storage Instructions: Store the bars in an airtight container in the refrigerator for up to 5 days. Place a piece of parchment paper between layers to prevent sticking. The flavors actually deepen after a day or two, so don’t be afraid to make them ahead.
Freezing Instructions: These bars freeze beautifully. Place them in a single layer on a baking sheet and freeze until solid, about 2 hours. Transfer to a freezer-safe container with parchment between layers. They’ll keep for up to 3 months. Thaw in the refrigerator overnight before serving.
Reheating: I don’t recommend reheating these bars. They’re meant to be served cold or at room temperature. If you want a warm dessert, try serving them with a warm caramel sauce or hot fudge instead.
Nutritional Information & Benefits
Here’s the approximate nutritional breakdown for one bar (based on 24 servings):
- Calories: 185
- Total Fat: 12g
- Saturated Fat: 7g
- Cholesterol: 45mg
- Sodium: 145mg
- Total Carbohydrates: 18g
- Dietary Fiber: 0.5g
- Sugars: 13g
- Protein: 3g
While these are definitely a treat, there are a few nutritional bright spots. Ginger is known for its anti-inflammatory properties and can help with digestion. Cinnamon may help regulate blood sugar levels. And molasses contains iron, calcium, and magnesium—though not in huge amounts.
If you’re watching your sugar intake, you can reduce the sugar in the crust to 2 tablespoons and use a sugar substitute in the filling. Just note that the texture might be slightly different. For a lower-fat version, use reduced-fat cream cheese. The bars will be a little less creamy but still delicious.
These bars are not gluten-free or vegan as written, but I’ve included easy adaptations above. They do contain dairy and eggs, so keep that in mind if you’re cooking for someone with allergies.
I believe in enjoying dessert without guilt. These bars are a special treat, and sharing them with people you love is part of what makes food so wonderful. One bar won’t derail your health goals—it’ll just make your day a little sweeter.
Conclusion
These gingerbread cheesecake bars started as a kitchen accident, but they’ve become one of my most-requested recipes. They have everything you want from a holiday dessert—the warm spice of gingerbread, the creamy richness of cheesecake, and that satisfying crunch from the crust—all in a format that comes together in about 30 minutes.
What I love most about this recipe is how forgiving it is. You don’t need to be a pastry chef or own fancy equipment. You just need a pan, some basic ingredients, and about half an hour. The bars do the rest of the work while they chill in the fridge.
I hope you’ll give these a try, whether it’s for a holiday party, a weeknight treat, or just because you deserve something delicious. Feel free to play with the spices, swap in different crusts, or add your own favorite toppings. That’s the beauty of a simple recipe—it’s a starting point for your own creativity.
If you make these gingerbread cheesecake bars, I’d love to hear about it. Leave a comment below and tell me how they turned out, or share your own twist on the recipe. And if you’re looking for more easy dessert ideas, check out my pumpkin dessert recipes or my no-bake Christmas treats for more holiday inspiration.
Happy baking, friend. You’ve got this.
Frequently Asked Questions
Can I use a different pan size?
Yes, you can use a 9×9 square pan. The bars will be thicker, so bake for about 28-30 minutes instead of 22-25. Keep an eye on the center—it should still jiggle slightly when you shake the pan.
How do I know when the cheesecake bars are done baking?
The edges should be set and slightly puffed, but the center should still wobble when you gently shake the pan. It will continue to set as it cools. Overbaking is the most common mistake, so err on the side of underdone.
Can I make these bars ahead of time?
Absolutely. These bars actually taste better after a day or two in the fridge because the flavors have time to meld. Make them up to 3 days ahead and store them in an airtight container in the refrigerator.
Why did my cheesecake crack?
Cracks usually happen when the cheesecake is overbaked or when it cools too quickly. Make sure you don’t overmix the batter (which incorporates too much air) and let the bars cool to room temperature before refrigerating. A water bath isn’t necessary for this recipe, but if you’re worried about cracks, you can place a pan of hot water on the lower oven rack while baking.
Can I freeze these gingerbread cheesecake bars?
Yes, they freeze beautifully. Freeze them in a single layer on a baking sheet, then transfer to a freezer-safe container. They’ll keep for up to 3 months. Thaw in the refrigerator overnight before serving.
Pin This Recipe!
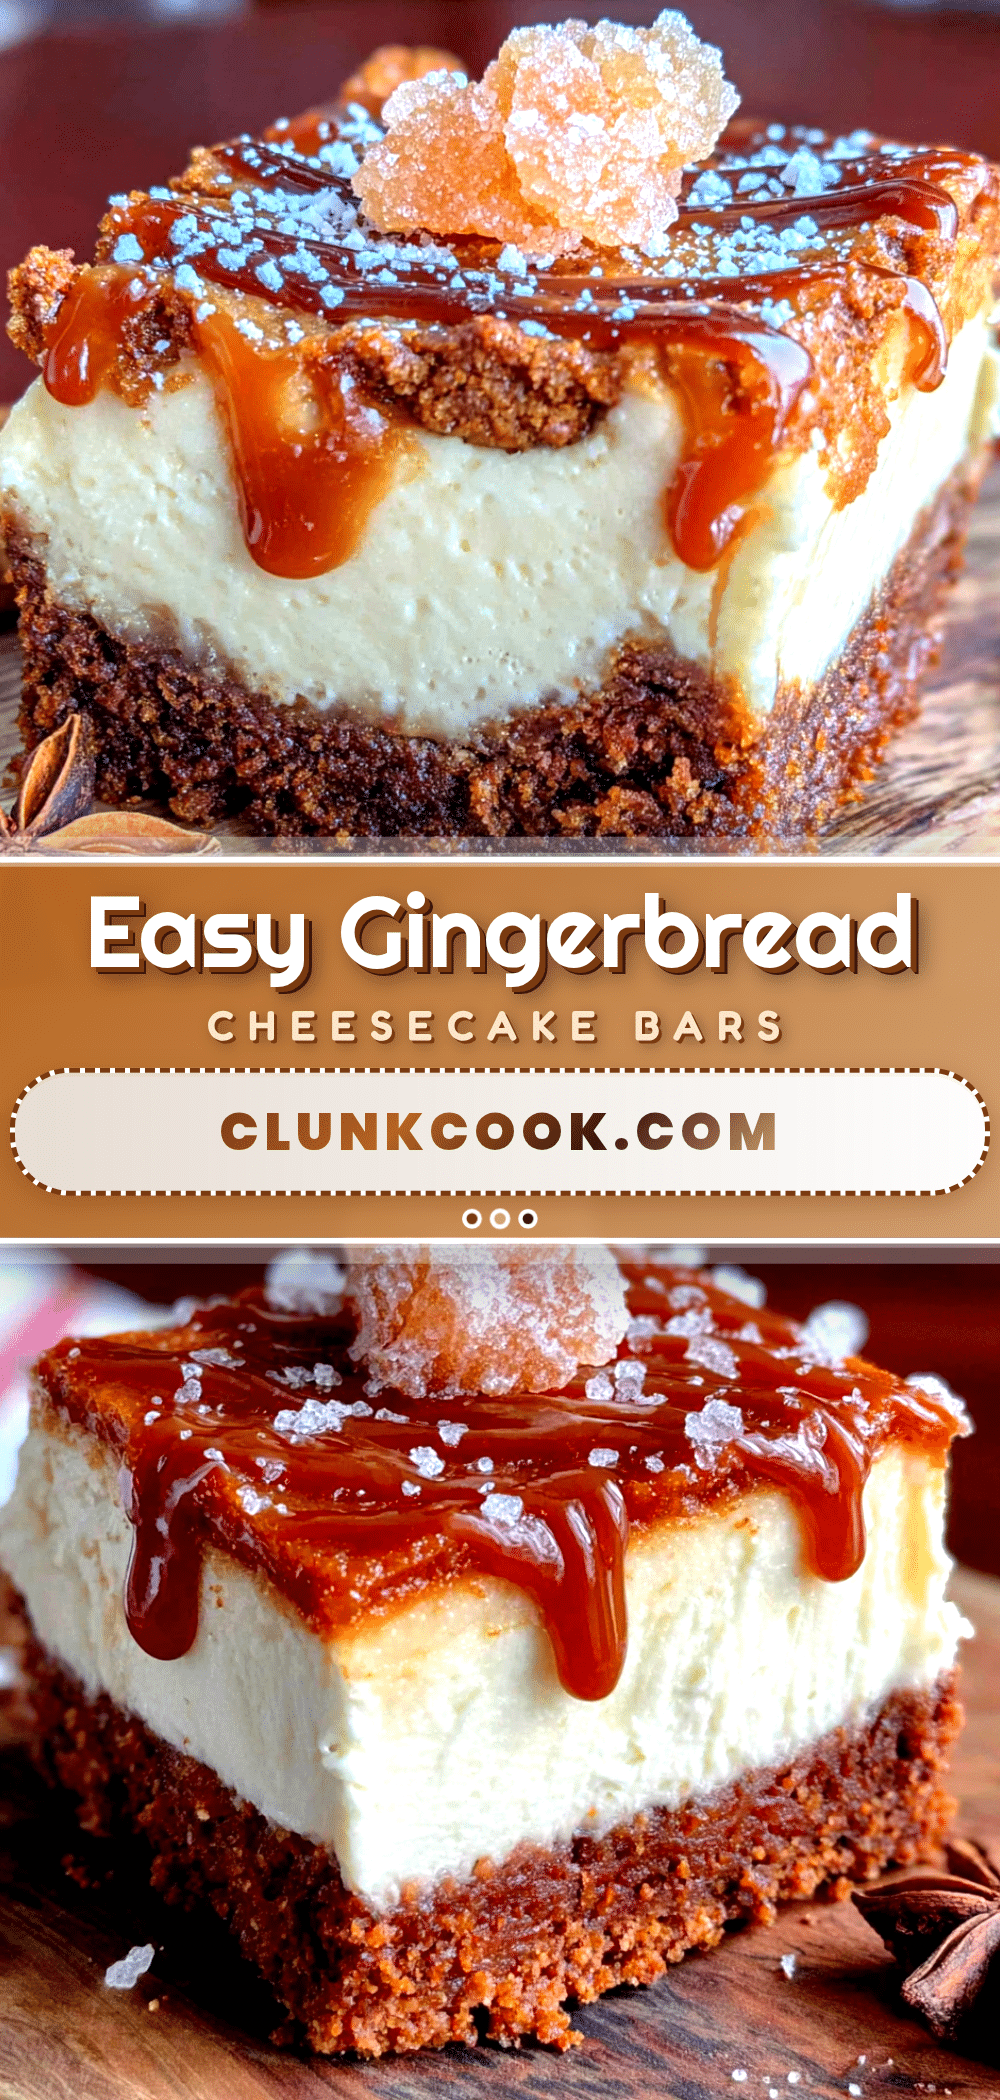
Easy Gingerbread Cheesecake Bars in 30 Minutes
These easy gingerbread cheesecake bars combine the warm spice of gingerbread with creamy cheesecake in a quick, no-fuss recipe that comes together in about 30 minutes. Perfect for holiday parties or a cozy weeknight treat.
- Prep Time: 30 minutes
- Cook Time: 25 minutes
- Total Time: 55 minutes (plus 4 hours chilling)
- Yield: 24 bars 1x
- Category: Dessert
- Cuisine: American
Ingredients
- 1 ½ cups (150g) gingersnap cookie crumbs (about 20–25 cookies)
- ¼ cup (50g) granulated sugar
- 5 tablespoons (70g) unsalted butter, melted
- Pinch of salt
- 16 ounces (450g) cream cheese, softened
- ½ cup (100g) granulated sugar
- 2 large eggs, room temperature
- 1 teaspoon vanilla extract
- ¼ cup (60ml) molasses (unsulphured, not blackstrap)
- 1 teaspoon ground ginger
- 1 teaspoon ground cinnamon
- ¼ teaspoon ground cloves
- ¼ teaspoon ground nutmeg
- Pinch of salt
Instructions
- Preheat your oven to 350°F (175°C). Line a 9×13-inch baking pan with parchment paper, leaving about 2 inches of overhang on the long sides.
- Make the crust: In a medium bowl, combine the gingersnap crumbs, ¼ cup sugar, and a pinch of salt. Pour in the melted butter and stir with a fork until every crumb is moistened (mixture should look like wet sand).
- Press the crust into the prepared pan firmly using your fingers or the bottom of a measuring cup, making sure it is even across the bottom and about ¼ inch up the sides. Bake for 8 minutes, then set aside to cool slightly.
- Beat the cream cheese: In a large bowl, beat the softened cream cheese with an electric mixer on medium speed until completely smooth and fluffy, about 2 minutes. Scrape down the sides and bottom of the bowl.
- Add the sugar and vanilla: Add ½ cup sugar and vanilla extract to the cream cheese and beat on medium until smooth, about 1 minute. Scrape the bowl again.
- Add the eggs one at a time: Crack the first egg into the bowl and beat on low just until incorporated. Add the second egg and do the same. Do not overmix.
- Mix in the molasses and spices: Add the molasses, ginger, cinnamon, cloves, nutmeg, and a pinch of salt. Beat on low until everything is evenly mixed and the filling is a uniform tan color. Scrape the bowl one last time.
- Pour the filling over the crust: Pour the cheesecake filling over the warm crust and spread it into an even layer with a spatula. Give the pan a gentle tap on the counter to release any air bubbles.
- Bake: Place the pan in the preheated oven and bake for 22-25 minutes. The edges should be set and slightly puffed, but the center should still jiggle slightly when you shake the pan.
- Cool completely: Place the pan on a wire rack and let it cool to room temperature, about 1 hour.
- Chill: Once cooled, cover the pan with plastic wrap and refrigerate for at least 4 hours, preferably overnight.
- Slice and serve: When ready to serve, lift the bars out of the pan using the parchment handles. Place on a cutting board and slice into 24 squares. For clean cuts, wipe your knife with a damp paper towel between slices.
Notes
Don’t overbake—the center should still jiggle when you pull it out. Use room temperature ingredients for a smooth filling. Press the crust firmly to prevent crumbling. Chill for at least 4 hours (or overnight) for clean slices. For a 9×9 pan, bake 28-30 minutes. For dairy-free, use dairy-free cream cheese and vegan butter. For gluten-free, use gluten-free gingersnap cookies.
Nutrition
- Serving Size: 1 bar
- Calories: 185
- Sugar: 13
- Sodium: 145
- Fat: 12
- Saturated Fat: 7
- Carbohydrates: 18
- Fiber: 0.5
- Protein: 3
Keywords: gingerbread cheesecake bars, easy cheesecake bars, holiday dessert, gingerbread dessert, cheesecake bars, quick dessert