Love this? Save it for later!
Share the inspiration with your friends
Someone asked me last week why I always seem to have a stash of these little homemade pizza kits in my fridge. I laughed, because the honest answer is that they started as a total accident. It was a Tuesday afternoon, I had a half-empty bag of shredded mozzarella staring at me from the fridge, and my kid was giving me that look — the one that says “I’m bored and hungry and the store-bought lunch kits are all gone.” I wasn’t trying to be a hero. I was just trying to avoid a meltdown.
Let me tell you, I grabbed a can of biscuits (the cheap, flaky kind), some mini pepperonis I found hiding in the back of the freezer, and a jar of sauce that was almost empty. I figured I’d throw something together and call it a day. Honestly, I didn’t even measure anything. I just pressed the dough into a muffin tin, spooned in some sauce, and tossed on the cheese and pepperoni. Twenty minutes later, I pulled out these perfect little golden cups of joy. My kid ate four of them before I could even get one. That was the moment I knew I had stumbled onto something good. You know that feeling when a recipe just works without you even trying? That was this one.
I kept tweaking it, of course. I tried different doughs, different cheese blends, and even a few sauce experiments that went sideways (too much garlic powder is a real thing). But the core of it — the simple, fun, totally customizable idea — stayed the same. These aren’t just for kids, either. I’ve packed them for my own lunch more times than I can count. They’re the kind of recipe that makes you feel like you’ve got your act together, even when you’re just winging it. And honestly, that’s the best kind of recipe to have in your back pocket.
Why You’ll Love This Recipe
These homemade pizza Lunchables are a game-changer for busy families, meal preppers, and anyone who loves a good, customizable snack. They take the classic store-bought concept and make it better, fresher, and way more fun to make. Here’s why this version is the one you’ll come back to again and again:
- Quick & Easy: These come together in under 30 minutes, from start to finish. Perfect for a last-minute lunch, an after-school snack, or a lazy weekend project with the kids.
- Simple Ingredients: You probably have most of these in your kitchen right now. No fancy grocery trips needed — just pantry staples and a few fridge basics.
- Perfect for Meal Prep: Make a batch on Sunday and you’ve got grab-and-go lunches for the whole week. They store beautifully and taste great cold or reheated.
- Crowd-Pleaser: Kids love the fun, build-your-own aspect, and adults appreciate the fresh flavors and control over ingredients. It’s a win-win.
- Unbelievably Customizable: This is more of a method than a strict recipe. You can swap the dough, change the sauce, use different cheeses, and pile on any toppings you like.
What makes this recipe different from all the others? It’s the texture. Using a muffin tin gives you these perfect little individual pizza cups with a crispy, golden edge and a soft, chewy center. They’re not soggy, they’re not dry — they’re just right. Plus, the “Lunchable” format is genius for portion control and fun. It’s not just another pizza recipe; it’s a whole experience. It’s the kind of meal that makes you feel like a kid again, but without the artificial ingredients and plastic packaging. It’s comfort food, simplified and made better.
What Ingredients You Will Need
This recipe uses simple, wholesome ingredients to deliver big flavor and satisfying texture without any fuss. Most of these are pantry staples, which makes this an easy last-minute meal or snack.
- 1 can (16.3 oz / 463 g) refrigerated biscuit dough (like Pillsbury Grands! or store brand) — This is my go-to for the perfect flaky, tender crust. Look for the “homestyle” or “buttermilk” variety for the best flavor. You can also use pizza dough or crescent roll dough in a pinch.
- 1/2 cup (120 ml) pizza sauce — Use your favorite jarred sauce or make your own quick homemade pizza sauce. I like a thicker sauce so it doesn’t make the dough soggy.
- 1 1/2 cups (170 g) shredded mozzarella cheese — Low-moisture, part-skim mozzarella works best. It melts beautifully without getting greasy. Fresh mozzarella can be used but might make the cups a bit watery.
- 1/2 cup (60 g) mini pepperoni slices — These are perfect for fitting into the little cups. You can also use regular pepperoni, cut into quarters, or turkey pepperoni for a lighter option.
- 1 tablespoon (15 ml) olive oil — For brushing the muffin tin and the tops of the dough for a golden, crispy finish.
- 1/2 teaspoon dried oregano — Optional, but adds a lovely Italian herb note. You can also use Italian seasoning.
- 1/4 teaspoon garlic powder — A little goes a long way to boost the savory flavor.
Optional Add-Ins & Toppings
- Sliced black olives — For a briny, salty pop.
- Chopped bell peppers or mushrooms — Sauté them first to remove excess moisture.
- Crumbled cooked sausage or bacon — For a heartier lunch.
- Fresh basil leaves — For garnish after baking.
Ingredient Selection Tips: For the best texture, use a refrigerated biscuit dough that is not the “flaky layers” kind — the homestyle variety holds its shape better in the muffin tin. If you’re using a gluten-free biscuit dough, check the package instructions, as baking times may vary slightly.
Equipment Needed
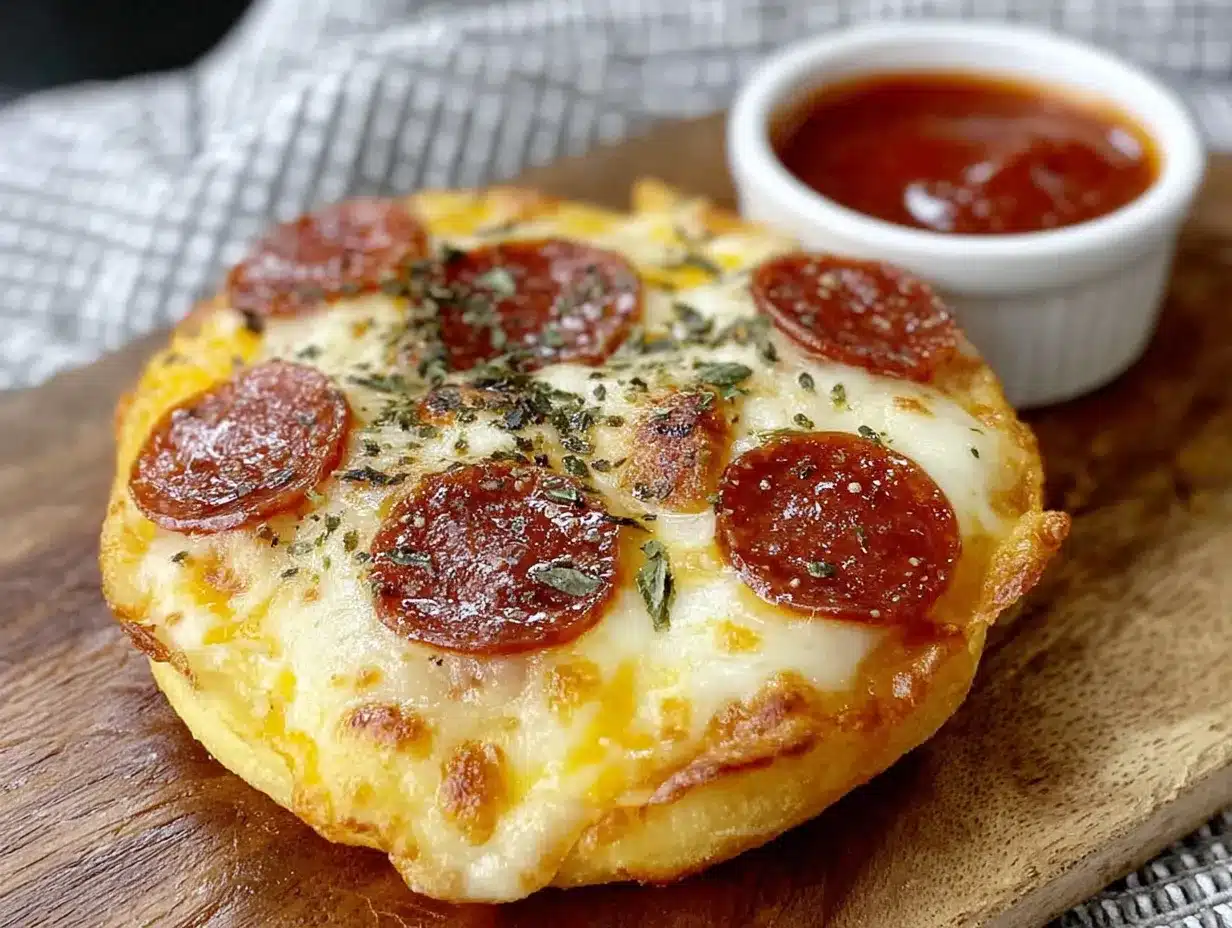
You don’t need any fancy tools for this recipe, which is part of its charm.
- 12-cup standard muffin tin — This is essential for creating the perfect cup shape. A non-stick pan works best for easy release.
- Rolling pin — For flattening the biscuit dough rounds. A clean wine bottle works in a pinch!
- Small bowl — For mixing the sauce, cheese, and pepperoni if you’re pre-combining them.
- Pastry brush — For brushing the muffin tin and dough with olive oil. A paper towel dipped in oil works too.
- Measuring cups and spoons — For accuracy, though you can eyeball it after a few batches.
- Cooling rack — Helps the cups cool evenly and stay crispy on the bottom.
Budget-Friendly Options: A standard muffin tin is a kitchen workhorse and well worth the investment. If you don’t have one, you can use a silicone muffin pan or even oven-safe ramekins, though the baking time may need to be adjusted. I’ve even used a cast-iron muffin pan before, and the results were fantastic — the crust got extra crispy.
Preparation Method
Making these little pizza cups is almost too easy. Follow these steps, and you’ll have a batch of homemade Lunchables ready in no time.
- Preheat your oven to 375°F (190°C). Position a rack in the middle of the oven. While it’s heating, lightly brush the cups of a 12-cup standard muffin tin with olive oil. Don’t skip this step — it’s the secret to getting those golden, crispy edges without sticking.
- Prepare the biscuit dough. Open the can of refrigerated biscuit dough (pop! — that sound never gets old). Separate the 8 biscuits. If your can has 8 biscuits, you’ll have 4 extra cups in your muffin tin. You can either make a second batch or fill the empty cups with water to prevent the pan from warping. Take each biscuit and either roll it out with a rolling pin or press it flat with your fingers until it’s about 3-4 inches in diameter. You want a thin, even disc — about 1/4 inch thick.
- Press the dough into the muffin tin. Gently press each flattened biscuit disc into a prepared muffin cup. Push it down to the bottom and up the sides, forming a little cup shape. Don’t worry if the dough comes up slightly over the edge — that’s the part that gets beautifully crispy. If the dough tears, just pinch it back together; it’s very forgiving.
- Add the sauce. Spoon about 1 tablespoon of pizza sauce into the bottom of each dough cup. Spread it around gently with the back of the spoon, but don’t go all the way up the sides — leave a little border of dough. This prevents the sauce from making the top edge soggy.
- Layer the cheese and pepperoni. Sprinkle about 2 tablespoons of shredded mozzarella cheese into each cup over the sauce. Then, top with 4-5 mini pepperoni slices (or 2-3 quartered regular pepperoni slices). If you’re adding any optional toppings like olives or peppers, add them now, on top of the cheese.
- Season and brush. In a small bowl, mix the dried oregano and garlic powder. Sprinkle a tiny pinch over each pizza cup. Then, lightly brush the exposed edges of the dough with a little more olive oil. This is what gives them that golden, bakery-style finish.
- Bake. Place the muffin tin on the middle rack and bake for 12-15 minutes, or until the edges of the dough are golden brown and the cheese is melted and bubbly. The exact time will depend on your oven and the type of dough you use. Start checking at 12 minutes. You’re looking for a deep golden color on the crust, not just pale yellow.
- Cool and release. Remove the muffin tin from the oven and let it cool in the pan for 5 minutes. This is crucial — the cheese needs a minute to set, and the steam helps release the cups from the pan. After 5 minutes, run a small knife or offset spatula around the edge of each cup to loosen it. Gently lift them out and transfer them to a cooling rack. Let them cool for another 2-3 minutes before serving. They’ll be hot!
A quick note on timing: If you’re making a double batch, you can prep all the dough cups first, then add the toppings. This keeps the assembly line moving smoothly. I’ve also found that letting the biscuit dough sit at room temperature for 5 minutes after opening makes it easier to roll out without cracking.
Cooking Tips & Techniques
Over the years, I’ve made these pizza cups more times than I can count, and I’ve picked up a few tricks that make a real difference.
Don’t overfill the cups. It’s tempting to pile on the cheese and pepperoni, but if you overfill, the toppings will spill over the edges and make a mess. Stick to about 2 tablespoons of cheese per cup. Trust me, I learned this the hard way when I had to scrub burnt cheese off the bottom of my oven.
The dough thickness matters. If you roll the dough too thin, the cups will be fragile and might tear when you try to remove them. If you leave them too thick, they’ll be doughy in the center. Aim for an even 1/4-inch thickness. I use a rolling pin with adjustable rings for consistency, but your fingers are a perfectly good gauge.
Use low-moisture mozzarella. Fresh mozzarella has a high water content, which can make the dough soggy and prevent the cheese from browning properly. Low-moisture, part-skim mozzarella melts into that perfect, stretchy, slightly browned blanket we all love.
Let them cool in the pan. This is non-negotiable. If you try to pull them out right away, the cheese will slide off, and the cups might fall apart. The 5-minute rest allows the structure to set. I once got impatient and ended up with a pile of delicious but structurally unsound pizza rubble.
For extra crispy bottoms: After you remove the cups from the muffin tin, place them upside down on the cooling rack for a minute. This lets any trapped steam escape and keeps the bottom crust from getting soggy. It’s a small step that makes a big difference.
Variations & Adaptations
This recipe is a fantastic base for endless creativity. Here are some of my favorite ways to switch it up.
- Vegetarian Delight: Skip the pepperoni and load up with sautéed mushrooms, bell peppers, red onion, and black olives. Add a sprinkle of red pepper flakes for a little heat.
- BBQ Chicken: Swap the pizza sauce for your favorite BBQ sauce. Use shredded cooked chicken (leftover rotisserie chicken works great) and top with mozzarella and a little red onion. Drizzle with a bit more BBQ sauce after baking.
- Breakfast Pizza Cups: Use biscuit dough as the base. Fill with scrambled eggs, cooked crumbled sausage or bacon, and shredded cheddar cheese. Bake until the cheese is melted and the edges are golden. These are a huge hit for brunch.
- Gluten-Free Option: Use a gluten-free refrigerated biscuit dough or pizza dough. The baking time might be slightly shorter, so keep an eye on them. I’ve also used gluten-free tortillas pressed into the muffin tin for a super quick version.
- Spicy Hawaiian: Top with pizza sauce, mozzarella, diced ham or Canadian bacon, and pineapple chunks. Add a drizzle of sriracha or a sprinkle of red pepper flakes for a sweet and spicy kick.
Personal Variation: My absolute favorite version is the “Supreme.” I use Italian sausage (cooked and crumbled), pepperoni, green bell peppers, red onion, and black olives. It’s a whole meal in a little cup. I’ve also made a version with a white sauce (ricotta, mozzarella, garlic, and spinach) that was surprisingly good.
Serving & Storage Suggestions
These pizza cups are incredibly versatile when it comes to serving and storing.
Serving: Serve them warm, right after they’ve cooled for a few minutes. They’re fantastic on their own as a snack or lunch. For a more complete meal, pair them with a simple side salad, some carrot and celery sticks with ranch dip, or a cup of tomato soup. They also make a great appetizer for parties — just arrange them on a platter and watch them disappear.
Storage: Let any leftover pizza cups cool completely to room temperature. Store them in an airtight container in the refrigerator for up to 4 days. I like to layer them with parchment paper so the cheese doesn’t stick together.
Freezing: These freeze beautifully! Place the cooled cups on a baking sheet in a single layer and freeze for 1-2 hours, or until solid. Then transfer them to a freezer-safe bag or container. They’ll keep for up to 3 months. You can freeze them fully assembled but unbaked, too — just add a few extra minutes to the baking time.
Reheating: The best way to reheat them is in a 350°F (175°C) oven or toaster oven for 5-7 minutes, or until heated through and the crust is crispy again. You can also microwave them for 30-45 seconds, but the crust will be softer. If reheating from frozen, add a few extra minutes in the oven.
Flavor Development: Honestly, these are delicious the next day. The flavors seem to meld together even more. I often find myself eating them cold straight from the fridge — they taste just like a pizza Lunchable, but better.
Nutritional Information & Benefits
While these are a fun treat, they can also be part of a balanced meal plan. Here’s a rough estimate per pizza cup (based on using standard biscuit dough, mozzarella, and pepperoni):
| Nutrient | Amount per Cup |
|---|---|
| Calories | 180-220 |
| Fat | 10-12g |
| Saturated Fat | 4-5g |
| Carbohydrates | 18-22g |
| Protein | 8-10g |
| Sodium | 450-550mg |
Health Benefits: Mozzarella cheese is a good source of calcium and protein, which are important for bone health and muscle repair. The tomato sauce provides lycopene, a powerful antioxidant. By making them at home, you have complete control over the sodium and fat content — you can use low-fat cheese, turkey pepperoni, and a lighter biscuit dough. For a lower-carb option, you can use a keto-friendly dough or even large portobello mushroom caps as the base.
Dietary Considerations: This recipe contains gluten (from the biscuit dough) and dairy (from the cheese). It can be made gluten-free with a GF dough and dairy-free with vegan cheese and a dairy-free dough. Pepperoni is typically made from pork and beef, but turkey or plant-based pepperoni are great alternatives.
Personal Perspective: I love that this recipe lets me enjoy a nostalgic favorite without the artificial ingredients and preservatives found in the store-bought version. It’s a small win for my family’s health, and it tastes so much better.
Conclusion
These Easy Homemade Mini Pepperoni Pizza Lunchables are more than just a recipe — they’re a little moment of joy in a busy day. They’re proof that you don’t need a lot of time or fancy ingredients to create something special. Whether you’re packing them for school lunches, serving them as a fun after-school snack, or making a batch for a party, they always deliver a smile.
I encourage you to make this recipe your own. Experiment with different doughs, sauces, and toppings. Get the kids involved in the assembly — it’s a great way to spend a rainy afternoon. And when you find your perfect combination, please come back and tell me about it. I love hearing how these little cups find their way into your kitchen.
So go ahead, pop open that can of biscuits, and make yourself a batch. You deserve a little pizza magic in your life. Happy cooking!
Frequently Asked Questions
Can I use homemade pizza dough instead of canned biscuit dough?
Absolutely! Homemade pizza dough works wonderfully. Just roll it out thin, cut it into 4-inch rounds, and press them into the muffin tin. You may need to bake them for a few extra minutes since homemade dough can be slightly denser.
Can I make these ahead of time for a party?
Yes! You can assemble the pizza cups completely (dough, sauce, cheese, toppings) and keep them in the refrigerator for up to 24 hours before baking. You can also bake them a day ahead and reheat them in a 350°F oven for 5-7 minutes before serving.
My pizza cups came out soggy on the bottom. What went wrong?
This usually happens if the sauce is too watery or if you didn’t let the cups cool in the pan for the full 5 minutes. Make sure to use a thicker pizza sauce and let them rest after baking. Placing them upside down on a cooling rack for a minute can also help.
Can I freeze the unbaked pizza cups?
Yes! Assemble the cups in the muffin tin, then place the entire tin in the freezer for 1-2 hours until the cups are solid. Pop them out of the tin and store them in a freezer bag. When you’re ready to bake, place them back in a muffin tin and bake directly from frozen, adding 3-5 minutes to the baking time.
Can I use other types of cheese?
Definitely! While mozzarella is classic, you can use a blend of provolone, parmesan, or even cheddar for a different flavor. A mix of mozzarella and parmesan is especially delicious for a sharper, saltier taste.
Pin This Recipe!
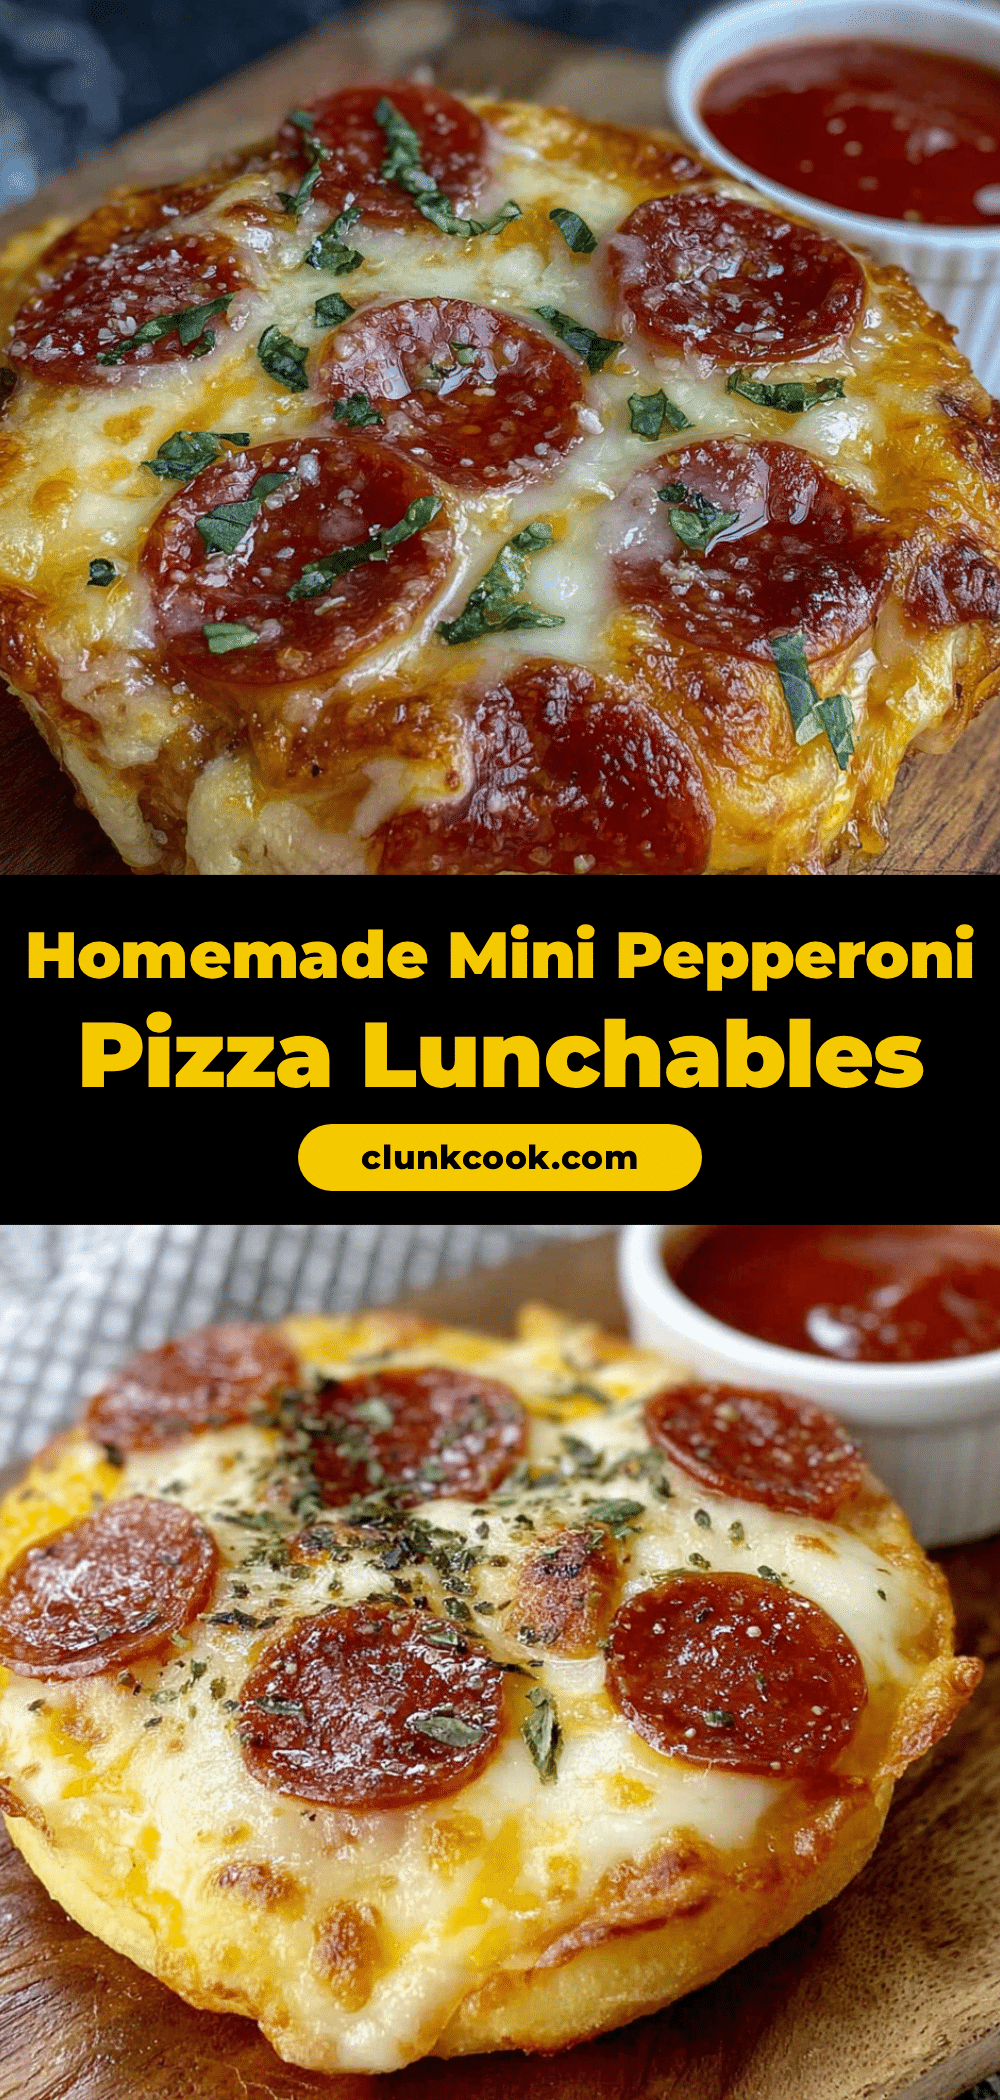
Easy Homemade Mini Pepperoni Pizza Lunchables

These homemade pizza Lunchables are a game-changer for busy families, meal preppers, and anyone who loves a good, customizable snack. They take the classic store-bought concept and make it better, fresher, and way more fun to make.
- Prep Time: 10 minutes
- Cook Time: 15 minutes
- Total Time: 25 minutes
- Yield: 8 servings 1x
- Category: Main Course
- Cuisine: Italian-American
Ingredients
- 1 can (16.3 oz / 463 g) refrigerated biscuit dough (like Pillsbury Grands! or store brand)
- 1/2 cup (120 ml) pizza sauce
- 1 1/2 cups (170 g) shredded mozzarella cheese
- 1/2 cup (60 g) mini pepperoni slices
- 1 tablespoon (15 ml) olive oil
- 1/2 teaspoon dried oregano
- 1/4 teaspoon garlic powder
Instructions
- Preheat your oven to 375°F (190°C). Lightly brush the cups of a 12-cup standard muffin tin with olive oil.
- Open the can of refrigerated biscuit dough and separate the 8 biscuits. Roll or press each biscuit into a thin disc about 3-4 inches in diameter and 1/4 inch thick.
- Press each flattened biscuit disc into a prepared muffin cup, forming a little cup shape. Push it down to the bottom and up the sides.
- Spoon about 1 tablespoon of pizza sauce into the bottom of each dough cup. Spread it around gently, leaving a small border of dough.
- Sprinkle about 2 tablespoons of shredded mozzarella cheese into each cup over the sauce. Top with 4-5 mini pepperoni slices.
- In a small bowl, mix the dried oregano and garlic powder. Sprinkle a tiny pinch over each pizza cup. Lightly brush the exposed edges of the dough with a little more olive oil.
- Bake for 12-15 minutes, or until the edges of the dough are golden brown and the cheese is melted and bubbly.
- Remove the muffin tin from the oven and let it cool in the pan for 5 minutes. Run a small knife around the edge of each cup to loosen it, then transfer to a cooling rack. Let cool for another 2-3 minutes before serving.
Notes
For extra crispy bottoms, place the cups upside down on the cooling rack for a minute after removing from the pan. Use low-moisture mozzarella to avoid sogginess. Let the cups cool in the pan for 5 minutes before removing to prevent them from falling apart.
Nutrition
- Serving Size: 1 pizza cup
- Calories: 200
- Sugar: 3
- Sodium: 500
- Fat: 11
- Saturated Fat: 4.5
- Carbohydrates: 20
- Fiber: 1
- Protein: 9
Keywords: homemade lunchables, mini pizza cups, pepperoni pizza, easy lunch, kid-friendly, meal prep, snack


