Love this? Save it for later!
Share the inspiration with your friends
There used to be a tiny French-Italian bistro tucked away on a side street in Portland called Le Coin that made a garlic butter chicken that ruined me for all other chicken. When they closed suddenly in 2018—literally, I showed up for my birthday dinner and found a “For Lease” sign in the window—I actually stood there for a full minute with my hand on the door handle, completely stunned. After twelve tries—some burnt, some soupy, one that my husband politely called “aggressively garlicky”—I finally got it. And then I did something my French-Italian bistro self would have never approved of: I made it lighter.
This Lighter One-Pan Garlic Butter Chicken and Rice is my love letter to that lost restaurant, minus the butter bath that probably shortened my life expectancy by a few years. I swapped in a fraction of the butter, added extra veggies to bulk it up, and used brown rice for fiber that keeps you full without the heavy feeling. Honestly, the first time I served this to my family, my daughter asked if we could have it every week. That’s when I knew I’d cracked the code.
You know that feeling when you want something deeply satisfying but don’t want to spend two hours scrubbing pans afterward? That’s exactly what this recipe delivers. It’s garlicky, buttery (but not too buttery), and the rice soaks up all that savory goodness while the chicken stays tender and juicy. Let me tell you—if you’ve been searching for a weeknight dinner that feels special without the guilt, this is the one. I mean, I’ve made it four times this month alone. No regrets.
Why You’ll Love This Recipe
I’ve tested this recipe more times than I care to admit, and each round taught me something new. The first version was too greasy. The second was under-seasoned. The third? The rice stuck to the pan like cement. But by version seven, I had it dialed in—and I’m sharing every hard-earned lesson with you. This isn’t just another one-pan chicken recipe; it’s the result of actual trial and error in a real home kitchen.
- Quick & Easy: From start to finish, you’re looking at about 40 minutes. Perfect for those nights when you’re starving at 5:30 and need dinner on the table before 6.
- Simple Ingredients: No fancy grocery trips required. Chicken, rice, garlic, butter, broth, and a few veggies—that’s it. You probably have most of this stuff already.
- Perfect for Meal Prep: This dish reheats beautifully, so make a double batch and thank me later when Wednesday night rolls around and dinner’s already done.
- Crowd-Pleaser: My picky-eater nephew asked for seconds. My health-conscious sister asked for the recipe. That’s the kind of universal approval you want.
- Unbelievably Delicious: The secret here is browning the chicken first to build that deep, golden crust, then letting the rice soak up all those browned bits. It’s next-level comfort food that just happens to be lighter.
What makes this recipe different from the dozens of other one-pan chicken and rice recipes out there? It’s the balance. Most versions drown everything in butter or cream, leaving you feeling heavy. Others go so light they taste like diet food. This one hits the sweet spot—rich enough to satisfy, light enough to feel good about. Plus, the one-pan cleanup means you’re not staring at a mountain of dishes afterward.
This is the kind of recipe that makes you close your eyes after the first bite. It’s comfort food reimagined—healthier, faster, but with the same soul-soothing satisfaction. Perfect for impressing guests without stress, or turning a simple Tuesday into something memorable.
What Ingredients You Will Need
This recipe uses simple, wholesome ingredients to deliver bold flavor and satisfying texture without the fuss. Most of these are pantry staples, and I’ve included notes on substitutions so you can adapt based on what you have on hand.
- Chicken thighs, boneless skinless (1.5 lbs / 680g) — I prefer thighs over breast here because they stay juicier and don’t dry out during the cooking process. If you want to use breast, reduce cooking time by about 5 minutes.
- Unsalted butter (2 tablespoons / 28g) — We’re using less than traditional recipes call for, but it’s still enough to get that signature garlic butter flavor. I like Kerrygold for its richness.
- Garlic, minced (6 cloves, or more if you’re like me) — Fresh garlic is non-negotiable here. The jarred stuff won’t give you the same punch. Trust me on this one.
- Brown rice, long-grain (1 cup / 200g) — Brown rice adds fiber and a nutty flavor that white rice just doesn’t have. It also holds up better to the cooking process without getting mushy.
- Chicken broth, low-sodium (2.5 cups / 590ml) — Homemade is great if you have it, but store-bought works perfectly. Just watch the salt content if you’re using regular instead of low-sodium.
- Yellow onion, diced (1 medium) — Adds sweetness and depth. You could use shallots for a milder flavor.
- Carrots, diced (2 medium) — These add color, nutrients, and a touch of natural sweetness that balances the garlic.
- Frozen peas (1 cup / 150g) — I add these at the very end so they stay bright green and slightly firm. Fresh peas work too, but frozen are more convenient.
- Dried thyme (1 teaspoon) — Earthy and slightly floral, thyme pairs beautifully with garlic and butter. Fresh thyme is even better if you have it—use 1 tablespoon.
- Paprika (1 teaspoon) — Adds a subtle smokiness and gives the chicken a beautiful golden color. Smoked paprika is my go-to here.
- Salt and black pepper (to taste) — I use kosher salt for better control. Start with 1 teaspoon and adjust at the end.
- Fresh parsley, chopped (for garnish) — Optional but highly recommended. It adds a fresh pop of color and brightness.
- Lemon juice (1 tablespoon, optional) — A squeeze at the end brightens everything up. I add it about half the time, depending on my mood.
Substitution Notes: For a gluten-free option, make sure your broth is certified gluten-free. For a dairy-free version, use olive oil instead of butter—though you’ll lose some of that signature garlic butter flavor. If you’re watching sodium, use no-salt-added broth and season conservatively. I’ve also made this with quinoa instead of rice, and it works surprisingly well—just reduce the cooking liquid to 2 cups and cook for about 20 minutes.
Equipment Needed
One of the best things about this recipe is how little equipment it requires. Here’s what you’ll need:
- Large deep skillet or Dutch oven (12-inch / 30cm with a lid) — A heavy-bottomed pan distributes heat evenly and prevents burning. I use my trusty Lodge cast iron Dutch oven, but any oven-safe skillet with a tight-fitting lid works. If you don’t have a lid, foil works in a pinch.
- Cutting board and sharp knife — For dicing the onion, carrots, and mincing the garlic. A dull knife makes this step miserable, so sharpen yours first.
- Wooden spoon or spatula — For stirring and scraping up those browned bits from the bottom of the pan. That’s where the flavor lives.
- Measuring cups and spoons — Rice-to-liquid ratios matter here, so measure carefully. Eyeballing it can lead to crunchy or mushy rice.
- Liquid measuring cup — For the broth. Glass ones are easiest to read.
Budget-Friendly Tips: You don’t need a fancy Dutch oven. A deep non-stick skillet with a lid works just fine. I used a $20 Walmart skillet for years before upgrading. Also, a good chef’s knife doesn’t have to cost a fortune—a Victorinox Fibrox is under $50 and will last you a decade.
Preparation Method
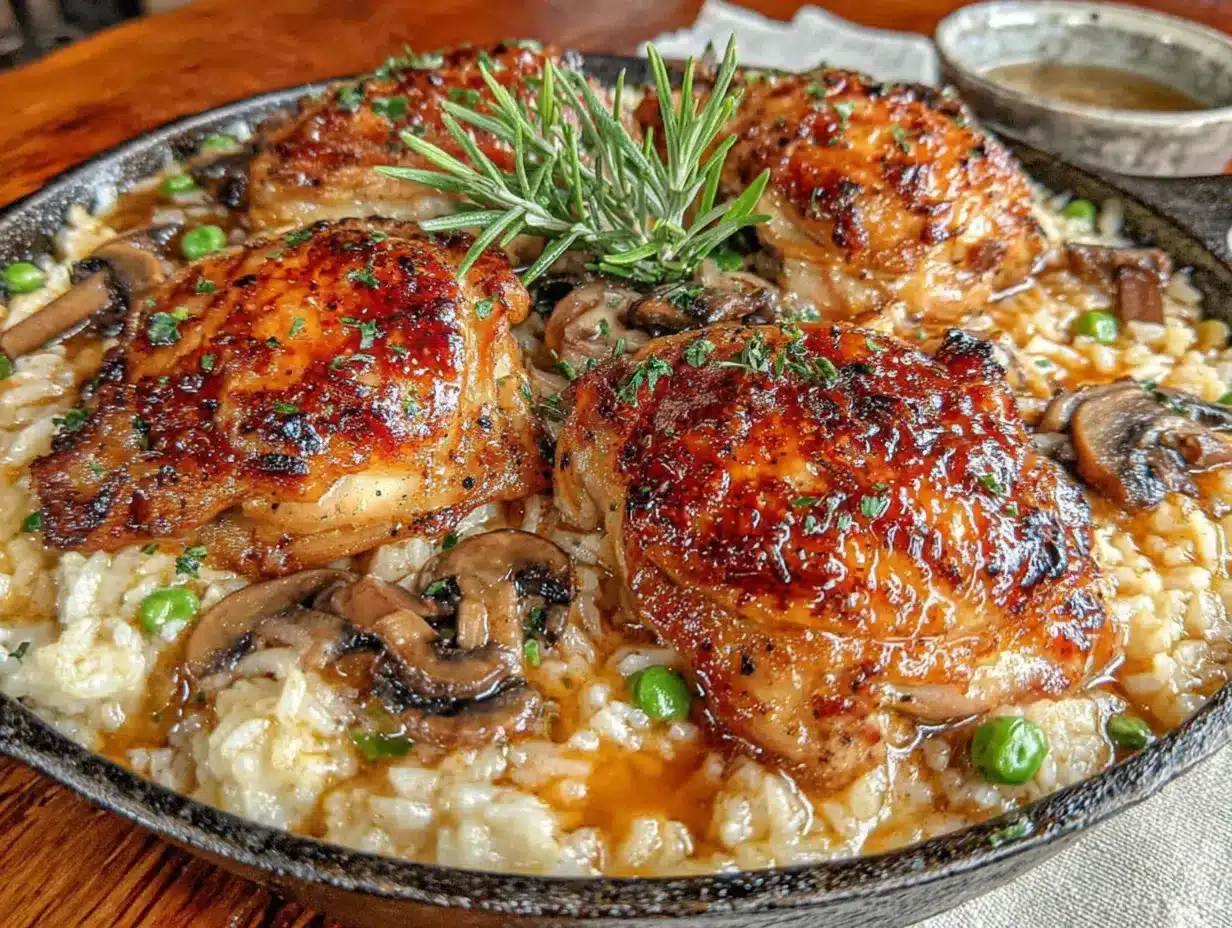
- Prep your ingredients first. Dice the onion, carrots, and mince the garlic. Measure out the rice, broth, and seasonings. Having everything ready before you start cooking makes the process smooth and prevents that frantic “where’s the paprika?” moment. Trust me, I’ve been there.
- Season the chicken. Pat the chicken thighs dry with paper towels (this is crucial for browning). Season both sides with 1/2 teaspoon salt, 1/4 teaspoon pepper, and the paprika. Let them sit for 5 minutes while your pan heats up.
- Brown the chicken. Heat your skillet over medium-high heat and add 1 tablespoon of butter. Once it’s melted and sizzling, add the chicken thighs in a single layer. Don’t crowd the pan—work in batches if needed. Cook for 4-5 minutes per side until golden brown. The chicken won’t be cooked through yet, and that’s fine. Transfer to a plate and set aside.
- Sauté the aromatics. Reduce heat to medium. Add the remaining 1 tablespoon of butter to the pan. Once melted, add the diced onion and carrots. Cook for 4-5 minutes, stirring occasionally, until the onion is translucent and the carrots start to soften. Scrape up any browned bits from the bottom of the pan—that’s pure flavor.
- Add the garlic and rice. Stir in the minced garlic and cook for 30 seconds until fragrant. Be careful not to burn it—burnt garlic turns bitter. Add the brown rice and stir to coat it in the butter and garlic mixture. Cook for 1-2 minutes, stirring constantly. This toasts the rice slightly and helps it stay separate during cooking.
- Add the broth and thyme. Pour in the chicken broth and add the dried thyme. Stir to combine, scraping up any remaining browned bits. Bring to a gentle simmer.
- Return the chicken to the pan. Nestle the browned chicken thighs into the rice mixture, skin side up (or smooth side up if using skinless). Any juices from the chicken plate should go in too—more flavor.
- Cover and cook. Reduce heat to low, cover the pan with a tight-fitting lid, and let it simmer gently for 30-35 minutes. Resist the urge to lift the lid and peek—that lets out steam and messes with the cooking time. Your kitchen will smell amazing during this step.
- Check for doneness. After 30 minutes, check the rice. It should be tender and have absorbed most of the liquid. If it’s still crunchy, add 2-3 tablespoons of water, cover, and cook for another 5 minutes. The chicken should register 165°F (74°C) on an instant-read thermometer.
- Add the peas and finish. Once the rice is done and chicken is cooked through, remove the pan from heat. Sprinkle the frozen peas over the top, cover, and let it sit for 3-4 minutes. The residual heat will warm the peas without turning them mushy. Fluff the rice with a fork, gently mixing in the peas.
- Rest and serve. Let the dish rest, uncovered, for 5 minutes before serving. This allows any excess moisture to evaporate and the flavors to meld. Garnish with fresh parsley and a squeeze of lemon juice if desired.
Sensory Cues: When you brown the chicken, listen for a steady sizzle—if it’s sputtering aggressively, the heat is too high. The rice should look slightly translucent after toasting, and the broth should be gently bubbling, not boiling hard, when you cover it. When it’s done, the rice will look fluffy and separate, not sticky or clumpy.
Cooking Tips & Techniques
I learned most of these the hard way, so you don’t have to. Here are the things I wish someone had told me before my first attempt:
Don’t skip the browning step. I know it adds an extra 10 minutes, but that golden crust on the chicken is where the deep flavor comes from. The browned bits left in the pan (called fond) infuse the rice with savory goodness. If you skip this, your dish will taste flat—trust me, I tried it once when I was in a hurry, and my husband asked if I’d forgotten to season it.
Use the right pan size. A 12-inch skillet is ideal. If your pan is too small, the rice will cook unevenly and the chicken will steam instead of browning. Too large, and the liquid evaporates too quickly, leaving you with undercooked rice. Also, make sure your lid fits tightly. I once used a slightly warped lid, and the rice came out crunchy because too much steam escaped.
Resist the urge to stir. Once you’ve covered the pan and reduced the heat, leave it alone. Stirring releases starch and makes the rice gummy. I know it’s tempting to check on it, but trust the process. Set a timer and walk away.
Let it rest. That 5-minute rest at the end isn’t optional. It allows the rice to absorb any remaining liquid and firm up slightly. If you serve it immediately, you’ll end up with a soupy mess. I learned this one when I served dinner to guests and watched the rice turn into porridge on their plates. Not my finest moment.
Adjust for your stove. Every stove is different. If yours runs hot, use medium-low instead of low. If it runs cool, you might need an extra 5 minutes. The first time I made this on my induction cooktop, the rice burned on the bottom because I didn’t adjust the heat. Now I know better.
Variations & Adaptations
One of the reasons I love this recipe is how adaptable it is. Here are some variations I’ve tried and loved:
- Vegetarian Version: Skip the chicken and use vegetable broth. Add a can of drained chickpeas or white beans along with the broth for protein. Mushrooms also work beautifully—sauté them with the onions for an earthy flavor.
- Spicy Kick: Add 1/2 teaspoon of red pepper flakes along with the garlic, or stir in a diced jalapeño. The heat cuts through the richness of the butter beautifully. My husband loves this version.
- Herb Swap: Replace thyme with rosemary or oregano for a different flavor profile. I’ve also used a teaspoon of Italian seasoning in a pinch, and it worked great.
- Veggie Boost: Add diced zucchini, bell peppers, or mushrooms along with the carrots. Just make sure to cut them into similar-sized pieces so they cook evenly. I’ve also thrown in a handful of spinach at the end—it wilts into the rice beautifully.
- Dairy-Free Option: Replace butter with olive oil or avocado oil. The flavor will be slightly different, but still delicious. I’ve made this for dairy-free friends multiple times, and nobody complained.
- Different Protein: Boneless chicken breast works, but reduce cooking time by 5-7 minutes. You can also use turkey cutlets or even firm tofu (press it first, then brown it like the chicken).
One of my favorite variations came from a happy accident. I was out of carrots, so I used a diced sweet potato instead. The sweetness balanced the garlic so perfectly that I now make it that way on purpose. Sometimes the best recipes come from mistakes!
Serving & Storage Suggestions
This dish is incredibly versatile when it comes to serving. Here’s how I like to enjoy it:
Serving Temperature: Serve it warm, straight from the skillet. The rice should be hot and fluffy, and the chicken should be tender. I like to garnish with fresh parsley and a squeeze of lemon juice right before serving—it brightens everything up.
Presentation: This is a one-pan dish, so I serve it right from the skillet for a cozy, rustic look. If you’re feeling fancy, spoon the rice onto a platter, arrange the chicken on top, and sprinkle with parsley. It looks impressive with zero extra effort.
Complementary Sides: A simple green salad with a lemon vinaigrette balances the richness of the dish. Steamed green beans or roasted asparagus also work beautifully. If you want something carb-heavy (hey, no judgment), crusty bread is perfect for sopping up any leftover juices.
Storage: Store leftovers in an airtight container in the refrigerator for up to 4 days. The flavors actually deepen overnight, so it might taste even better the next day. I love packing this for lunch—it reheats beautifully.
Reheating: The best way to reheat is in a skillet over medium-low heat with a splash of broth or water to loosen the rice. Cover and cook for 5-7 minutes, stirring occasionally. You can also microwave it in 30-second bursts, but the rice might lose some texture. I avoid the microwave when I have the time.
Freezing: This dish freezes well for up to 3 months. Let it cool completely, then transfer to a freezer-safe container. To reheat, thaw overnight in the refrigerator, then reheat in a skillet as described above. I often double the recipe and freeze half for busy weeks.
Nutritional Information & Benefits
Here’s the nutritional breakdown per serving (based on 4 servings):
| Nutrient | Amount |
|---|---|
| Calories | 485 |
| Protein | 38g |
| Carbohydrates | 45g |
| Fiber | 5g |
| Fat | 16g |
| Saturated Fat | 6g |
| Sodium | 680mg |
Pin This Recipe!
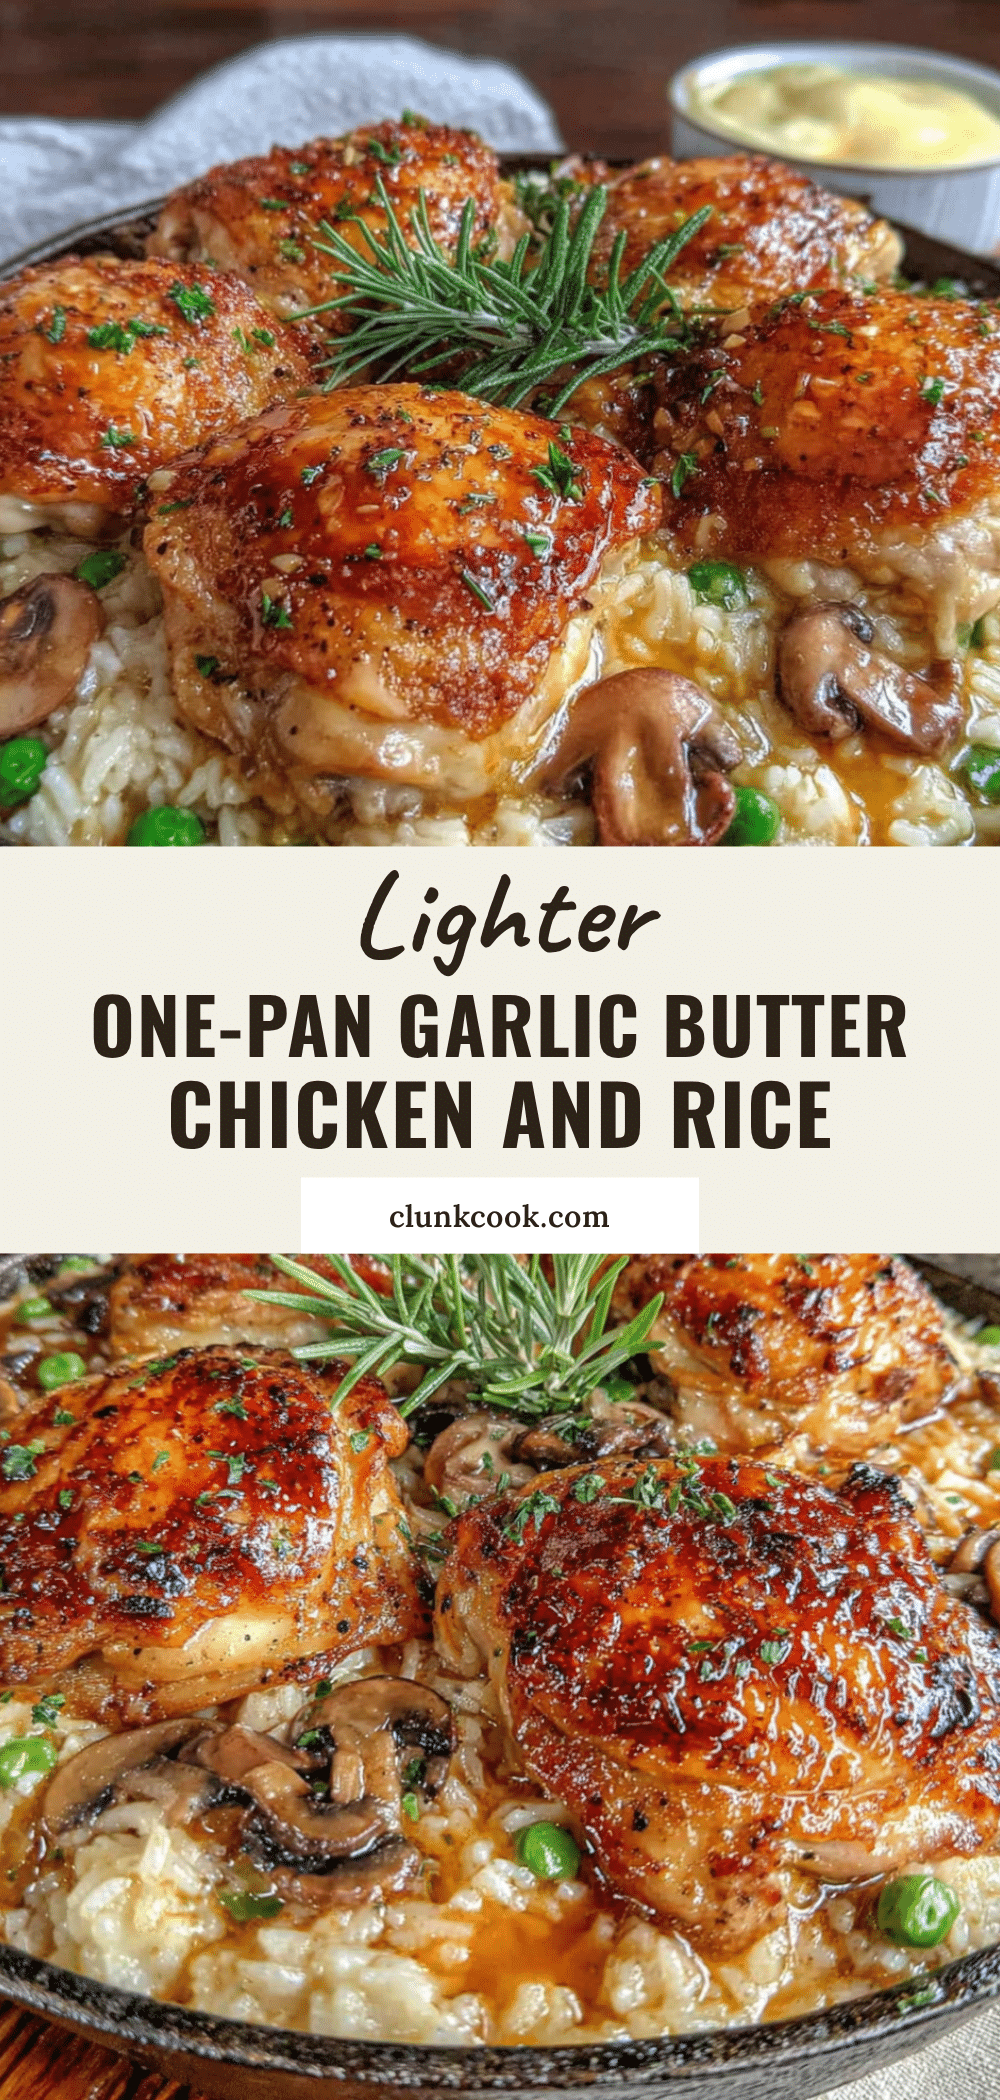
Easy One-Pan Garlic Butter Chicken and Rice
A lighter version of a classic garlic butter chicken and rice dish, made in one pan for easy cleanup. This recipe delivers rich, savory flavor with less butter and added vegetables, perfect for a satisfying weeknight dinner.
- Prep Time: 15 minutes
- Cook Time: 35 minutes
- Total Time: 50 minutes
- Yield: 4 servings 1x
- Category: Main Course
- Cuisine: American
Ingredients
- 1.5 lbs (680g) boneless skinless chicken thighs
- 2 tablespoons (28g) unsalted butter
- 6 cloves garlic, minced
- 1 cup (200g) long-grain brown rice
- 2.5 cups (590ml) low-sodium chicken broth
- 1 medium yellow onion, diced
- 2 medium carrots, diced
- 1 cup (150g) frozen peas
- 1 teaspoon dried thyme
- 1 teaspoon paprika
- Salt and black pepper to taste
- Fresh parsley, chopped (for garnish)
- 1 tablespoon lemon juice (optional)
Instructions
- Prep your ingredients first. Dice the onion, carrots, and mince the garlic. Measure out the rice, broth, and seasonings.
- Season the chicken. Pat the chicken thighs dry with paper towels. Season both sides with 1/2 teaspoon salt, 1/4 teaspoon pepper, and the paprika. Let them sit for 5 minutes while your pan heats up.
- Brown the chicken. Heat your skillet over medium-high heat and add 1 tablespoon of butter. Once melted and sizzling, add the chicken thighs in a single layer. Cook for 4-5 minutes per side until golden brown. Transfer to a plate and set aside.
- Sauté the aromatics. Reduce heat to medium. Add the remaining 1 tablespoon of butter. Once melted, add the diced onion and carrots. Cook for 4-5 minutes, stirring occasionally, until the onion is translucent and the carrots start to soften. Scrape up any browned bits from the bottom of the pan.
- Add the garlic and rice. Stir in the minced garlic and cook for 30 seconds until fragrant. Add the brown rice and stir to coat it in the butter and garlic mixture. Cook for 1-2 minutes, stirring constantly.
- Add the broth and thyme. Pour in the chicken broth and add the dried thyme. Stir to combine, scraping up any remaining browned bits. Bring to a gentle simmer.
- Return the chicken to the pan. Nestle the browned chicken thighs into the rice mixture, skin side up (or smooth side up if using skinless). Include any juices from the chicken plate.
- Cover and cook. Reduce heat to low, cover the pan with a tight-fitting lid, and let it simmer gently for 30-35 minutes. Resist the urge to lift the lid.
- Check for doneness. After 30 minutes, check the rice. It should be tender and have absorbed most of the liquid. If still crunchy, add 2-3 tablespoons of water, cover, and cook for another 5 minutes. The chicken should register 165°F (74°C) on an instant-read thermometer.
- Add the peas and finish. Once the rice is done and chicken is cooked through, remove the pan from heat. Sprinkle the frozen peas over the top, cover, and let it sit for 3-4 minutes. Fluff the rice with a fork, gently mixing in the peas.
- Rest and serve. Let the dish rest, uncovered, for 5 minutes before serving. Garnish with fresh parsley and a squeeze of lemon juice if desired.
Notes
Don’t skip the browning step—it builds deep flavor. Use a 12-inch skillet with a tight-fitting lid. Resist stirring once covered to avoid gummy rice. Let the dish rest for 5 minutes before serving. For dairy-free, substitute olive oil for butter. For white rice, use 1 cup rice with 1.5 cups broth and cook for 15-18 minutes.
Nutrition
- Serving Size: 1 serving (about 1/4
- Calories: 485
- Sugar: 6
- Sodium: 680
- Fat: 16
- Saturated Fat: 6
- Carbohydrates: 45
- Fiber: 5
- Protein: 38
Keywords: one-pan chicken, garlic butter chicken, chicken and rice, healthy chicken recipe, weeknight dinner, one-pot meal, lighter comfort food


