Love this? Save it for later!
Share the inspiration with your friends
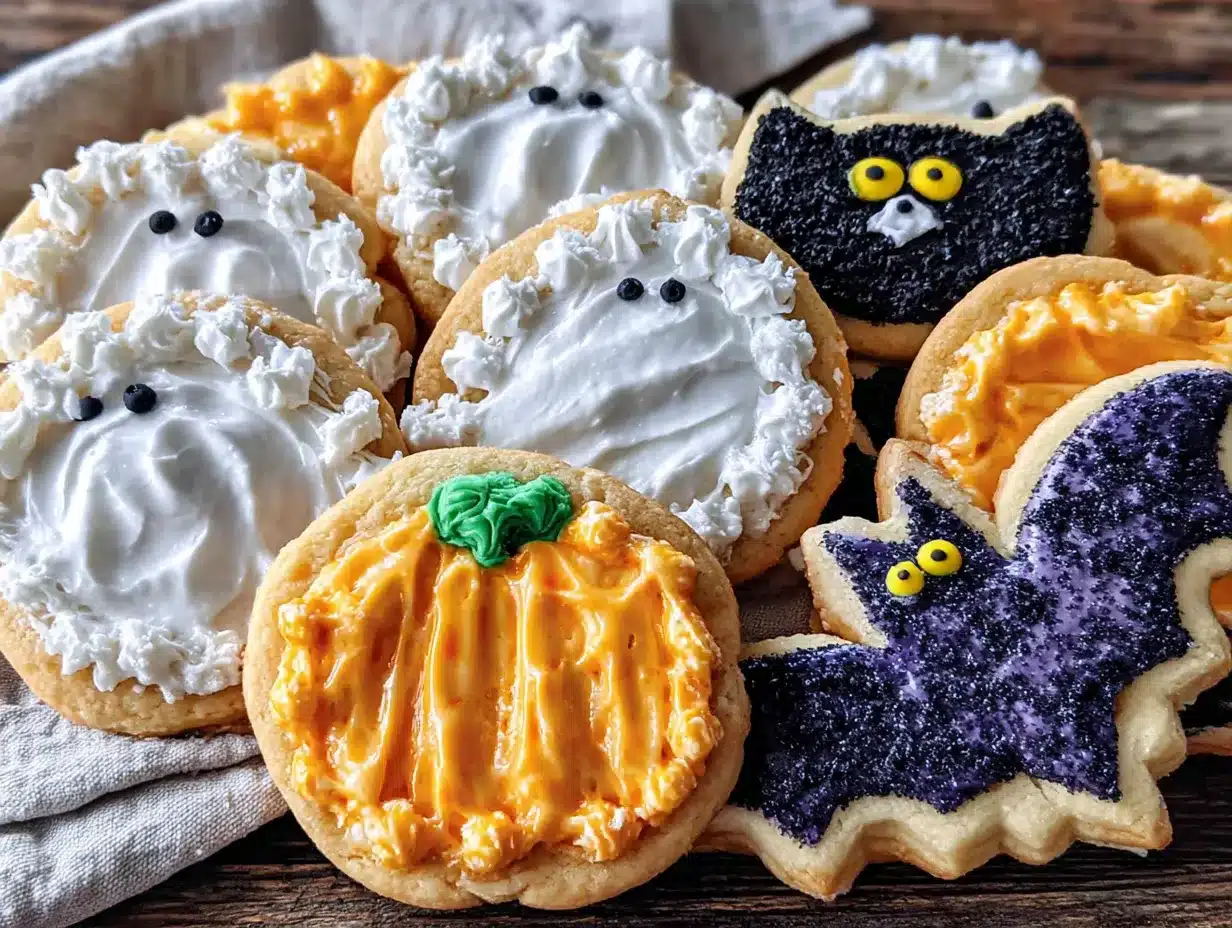
There used to be a tiny bakery tucked behind a vintage shop in Portland called The Witching Hour that made the most spectacular Halloween sugar cookies I have ever seen. When they closed their doors in 2018 — the owner retired to Maine, lucky her — I honestly felt a little lost. Those cookies were the highlight of every October party I went to. After 14 tries — and some truly disastrous batches that looked more like abstract art than ghosts and pumpkins — I finally cracked the code.
I remember standing in my kitchen that Tuesday night, covered in powdered sugar, staring at a cookie that actually looked like a proper crescent moon. I may have squealed. The secret, I discovered, wasn’t just in the royal icing consistency but in the cookie base itself. A cookie that holds its shape, tastes buttery and soft, and gives you that perfect canvas for decorating. Let me tell you, getting there was a journey.
Maybe you’ve been there too — scrolling through Pinterest, seeing those flawless decorated cookies, and thinking “there’s no way I can do that.” But honestly? You absolutely can. These Halloween sugar cookies with royal icing are designed for hosts who want to impress without losing their minds. They’re the kind of cookies that make guests stop mid-conversation and say “wait, you made these?” And that feeling? That’s exactly why I kept baking batch after batch until I got it right.
Why You’ll Love This Recipe
These aren’t just any sugar cookies. They’re the result of countless hours testing ratios, chilling times, and icing consistencies. I’ve tested this recipe with beginner bakers and experienced cookie decorators, and the feedback is always the same — these work. Here’s why they’ll become your go-to for every Halloween gathering.
- Perfect for Hosting: You can bake the cookies up to a week ahead and decorate them over several days. No last-minute kitchen panic before your party.
- Holds Shape Beautifully: No spreading, no distorted edges. Your ghost cookies will actually look like ghosts, not blobs.
- Buttery and Tender: The texture is soft but sturdy enough to hold royal icing without crumbling. It’s that perfect balance.
- Royal Icing That Actually Works: I’ve simplified the icing process so you get that glossy, smooth finish without the frustration.
- Crowd-Pleasing Design: These cookies are the first thing to disappear at every gathering. Kids and adults alike go crazy for them.
What makes this recipe different from all those other sugar cookie recipes out there? It’s the combination of cream cheese and butter in the dough. That little addition gives you a cookie that’s tender but not fragile, with just enough tang to balance the sweet royal icing. I tried versions with all butter, all shortening, and everything in between. This blend? It’s the winner.
These cookies are the kind that make you feel like a rockstar host. You set out a platter of decorated Halloween cookies, and people actually gasp. I’m not exaggerating. At my last Halloween party, someone took a photo of the cookie platter before they even took a cookie. That’s the power of a well-decorated sugar cookie.
What Ingredients You Will Need
This recipe uses simple, pantry-friendly ingredients to create bakery-quality cookies and icing. The magic is in how they come together, not in fancy specialty items.
For the Sugar Cookies
- Unsalted butter, softened (1 cup / 226g) — I prefer Kerrygold for its rich flavor, but any good quality unsalted butter works. Let it sit at room temperature for about an hour before starting.
- Cream cheese, softened (4 oz / 113g) — Full fat only here. The cream cheese adds tenderness and a subtle tang that makes these cookies unforgettable. Philadelphia is my go-to brand.
- Granulated sugar (1 ½ cups / 300g) — Regular white sugar. No need for anything fancy.
- Large egg (1) — Room temperature. Take it out of the fridge with your butter.
- Vanilla extract (2 teaspoons) — Pure vanilla extract, not imitation. It makes a real difference in the flavor.
- Almond extract (½ teaspoon) — This is my secret weapon. It adds a subtle nuttiness that makes people say “what’s in these? They’re amazing!”
- All-purpose flour (3 cups / 360g) — Spoon and level your flour. Don’t scoop directly from the bag or you’ll end up with dry cookies.
- Baking powder (1 teaspoon) — Make sure it’s fresh. Test it by dropping a bit in hot water — it should bubble.
- Salt (½ teaspoon) — Fine sea salt or table salt.
For the Royal Icing
- Powdered sugar (4 cups / 480g) — Sift it first. Trust me on this one. Lumps in your powdered sugar mean lumps in your icing.
- Meringue powder (3 tablespoons) — Wilton brand is reliable and easy to find at craft stores or online. This gives the icing that perfect glossy, hard finish.
- Warm water (6-8 tablespoons) — Start with 6 and add more as needed. The temperature matters — warm water helps the meringue powder dissolve properly.
- Vanilla extract (1 teaspoon) — For flavor in the icing too.
- Gel food coloring (assorted Halloween colors) — I use Americolor gels. They’re concentrated and don’t thin out the icing like liquid food coloring does.
For Decorating
- Piping bags (12-inch or 16-inch) — Disposable ones are fine. I actually prefer them for cleanup.
- Piping tips (#2 or #3 round tips) — Wilton tips work great. You only need a small round tip for outlining and flooding.
- Couplers — These let you switch tips without changing bags.
- Squeeze bottles (optional but helpful) — Great for flooding larger areas with icing.
- Toothpicks — Essential for popping air bubbles and spreading icing into tight corners.
- Edible glitter or sprinkles (optional) — For that extra wow factor.
Equipment Needed
You don’t need a professional bakery setup for these cookies, but having the right tools makes the process so much smoother. I’ve learned this the hard way — like the time I tried to pipe royal icing with a ziploc bag and it exploded all over my counter.
- Stand mixer or hand mixer — A stand mixer makes creaming butter and cream cheese effortless, but a hand mixer works perfectly fine. I used a hand mixer for years before upgrading.
- Rolling pin with thickness rings — These are game-changers. They ensure your dough is evenly rolled so all cookies bake at the same rate. I love my Joseph Joseph rolling pin.
- Halloween cookie cutters — Look for sturdy metal cutters, not plastic ones. Ann Clark makes excellent sets that include ghosts, pumpkins, bats, and moons.
- Baking sheets — Heavy-duty aluminum baking sheets work best. Avoid dark nonstick pans as they can cause cookies to brown too quickly on the bottom.
- Parchment paper or silicone baking mats — Silpat mats are my favorite. They prevent sticking and help cookies bake evenly.
- Cooling racks — You need these for the cookies to cool completely before icing. I have three wire racks and use them all during decorating sessions.
- Electric hand mixer or stand mixer for icing — Royal icing needs to be beaten for several minutes to develop the right consistency.
- Piping bags and tips — As mentioned above. A tip #2 is perfect for outlining, and tip #3 works well for flooding.
- Small offset spatula — Handy for spreading icing if you prefer that method for certain designs.
Preparation Method
Let me walk you through this step by step. I’ve included all the little details I wish someone had told me when I was starting out.
Make the Cookie Dough
- Cream the butter and cream cheese (5 minutes). In the bowl of your stand mixer fitted with the paddle attachment, beat the softened butter and cream cheese together on medium speed until smooth and fluffy. Scrape down the sides and bottom of the bowl at least once. You want a light, airy mixture with no lumps.
- Add sugar (2 minutes). Add the granulated sugar and beat on medium speed until the mixture is light and fluffy. It should look pale and slightly increased in volume.
- Add egg and extracts (1 minute). Add the egg, vanilla extract, and almond extract. Beat on low speed until just combined. Don’t overmix here — you just want everything incorporated.
- Combine dry ingredients (30 seconds). In a separate bowl, whisk together the flour, baking powder, and salt. This ensures the baking powder is evenly distributed throughout the flour.
- Add dry ingredients to wet (2 minutes). With the mixer on low speed, gradually add the flour mixture to the butter mixture. Mix until just combined. You should see no more streaks of flour. The dough will be soft and slightly sticky — that’s perfect.
- Divide and chill (2 hours minimum). Divide the dough into two discs, wrap each tightly in plastic wrap, and refrigerate for at least 2 hours. Overnight is even better. Chilling is non-negotiable — it prevents spreading and makes the dough much easier to roll.
Roll and Cut the Cookies
- Preheat your oven to 350°F (175°C). Line your baking sheets with parchment paper or silicone mats.
- Roll the dough (10 minutes). Lightly flour your work surface and rolling pin. Unwrap one disc of dough and roll it to ¼-inch thickness. Using thickness rings on your rolling pin makes this foolproof. If the dough cracks at the edges, let it sit at room temperature for 5 minutes to warm up slightly.
- Cut your shapes (5 minutes). Dip your cookie cutters in flour before each cut to prevent sticking. Press straight down and lift straight up — no twisting. Twisting seals the edges and prevents clean cuts.
- Transfer to baking sheets (2 minutes). Use a thin metal spatula to transfer cut cookies to your prepared baking sheets, spacing them about 2 inches apart. Gather scraps, re-roll, and cut more cookies. You can re-roll the dough up to three times before the cookies get tough.
- Chill again (15 minutes). Pop the baking sheets with cut cookies into the refrigerator for 15 minutes before baking. This final chill is what gives you those perfectly sharp edges.
Bake the Cookies
- Bake (10-12 minutes). Bake the cookies in your preheated oven until the edges are just barely starting to turn golden. The centers should look set but not browned. Rotate the baking sheet halfway through for even baking.
- Cool on the sheet (5 minutes). Let the cookies rest on the baking sheet for 5 minutes. They’ll continue to set up during this time.
- Transfer to wire racks (10 minutes). Use a spatula to transfer cookies to wire racks to cool completely. Don’t even think about icing them until they’re completely cool — warm cookies will melt your royal icing into a puddle.
Make and Color the Royal Icing
- Combine dry ingredients (1 minute). In the bowl of your stand mixer, whisk together the sifted powdered sugar and meringue powder.
- Add water and vanilla (5-7 minutes). Add 6 tablespoons of warm water and the vanilla extract. Beat on low speed until combined, then increase to medium-high speed and beat for 5-7 minutes. The icing should be thick, glossy, and hold stiff peaks when you lift the beater.
- Check consistency (30 seconds). Lift the beater — the icing should form a peak that stands up straight. If it’s too thick, add water one teaspoon at a time. If it’s too thin, add more sifted powdered sugar.
- Divide and color (5 minutes). Divide the icing into separate bowls for each color you want. Use gel food coloring — start with a tiny amount on a toothpick and add more until you reach your desired shade. Halloween colors I use: orange, purple, green, black, and white.
- Adjust for flooding (2 minutes). For outlining, keep the icing at the stiff peak consistency. For flooding (filling in), thin the icing by adding water one drop at a time until it flows like honey — it should drizzle off a spoon and smooth out within 10 seconds.
Decorate the Cookies
- Fill your piping bags (5 minutes). Fit your piping bags with #2 or #3 tips. Fill each bag halfway with icing — overfilling makes them hard to control.
- Outline your cookies (2-3 minutes per cookie). Using the thicker icing, outline the shape of your cookie. Hold the piping bag at a 45-degree angle and let the icing flow naturally. Don’t rush this step.
- Flood the cookies (1-2 minutes per cookie). Use the thinner icing to fill in the outlined area. Pipe in a back-and-forth motion, then use a toothpick to spread the icing into corners and pop any air bubbles.
- Add details (2-3 minutes per cookie). While the base icing is still wet, add dots, stripes, or other details. Use a toothpick to drag through the icing for marble effects. For ghosts, add eyes and mouth while the white base is wet.
- Let dry (6-8 hours). Place decorated cookies on a baking sheet and let them dry at room temperature. Don’t stack them until the icing is completely hard — this usually takes overnight.
Cooking Tips & Techniques
I’ve made every mistake in the book with these cookies, and I’m sharing them so you don’t have to. Here are the things I wish I knew from the start.
Temperature matters more than you think. Your butter and cream cheese need to be truly softened — not melted, not cold. If you press your finger into the butter, it should leave an indent without resistance. Cold ingredients don’t cream properly, and melted ingredients make flat, greasy cookies.
Don’t skip the chilling steps. I know it’s tempting to rush, but the two-hour dough chill and the 15-minute cut-cookie chill are what give you those perfect, non-spreading shapes. I once skipped the final chill because I was in a hurry, and my ghost cookies looked like melted snowmen. Learn from my mistake.
Royal icing consistency is everything. Too thick and it won’t smooth out. Too thin and it runs off the edges. The “10-second rule” is your friend: lift your spoon and count to 10. The icing should have mostly smoothed out by the time you reach 10. If it’s still lumpy, add water. If it’s already flat, add more powdered sugar.
Work in batches. Don’t try to decorate all 48 cookies at once. Decorate 6-8 at a time, focusing on one color or design. This keeps the wet icing workable and prevents you from getting overwhelmed.
Keep a damp paper towel over your icing bowls. Royal icing dries out fast. Cover any bowls you’re not actively using with a damp paper towel, then plastic wrap. Stir the icing occasionally to keep it from forming a skin.
Practice on parchment paper first. Before you start decorating actual cookies, pipe a few practice lines and shapes on a piece of parchment paper. It saves you from ruining cookies while you get the feel of the piping bag.
Variations & Adaptations
One of the best things about this recipe is how adaptable it is. Here are some variations I’ve tried and loved.
Gluten-Free Version: Substitute the all-purpose flour with a 1:1 gluten-free baking flour blend. I’ve had great results with King Arthur Measure for Measure. Add an extra tablespoon of cream cheese to help with moisture. The cookies will be slightly more delicate, so handle them gently.
Vegan Adaptation: Use vegan butter (I like Miyoko’s) and vegan cream cheese. Replace the egg with a flax egg (1 tablespoon ground flaxseed mixed with 3 tablespoons water). For the royal icing, use aquafaba (chickpea water) instead of meringue powder — 3 tablespoons of aquafaba whipped to stiff peaks replaces the meringue powder and water.
Flavor Variations: Swap the almond extract for lemon extract or orange extract for a citrus twist. Add a teaspoon of cinnamon or pumpkin pie spice to the dough for fall-themed cookies. I made a batch with orange zest and cardamom last year, and they were incredible.
Design Variations: Beyond Halloween shapes, this dough works for any holiday. Use Christmas tree cutters in December, heart shapes for Valentine’s Day, or flower shapes for spring. The royal icing recipe stays the same — just change your colors.
Quick Version: If you’re short on time, skip the detailed royal icing and do a simple glaze instead. Mix 2 cups powdered sugar with 3-4 tablespoons milk and a teaspoon of vanilla. Dip the tops of cooled cookies into the glaze, let the excess drip off, and add sprinkles immediately.
Serving & Storage Suggestions
These cookies are made for hosting, and presentation is everything. Here’s how to serve and store them like a pro.
Serving Temperature: Serve at room temperature. The royal icing needs to be fully set — usually after 6-8 hours of drying. Arrange them on a large platter or tiered stand for maximum visual impact. I like to group cookies by shape and color for a cohesive look.
What to Serve Alongside: These cookies are sweet enough on their own, but they pair beautifully with a hot drink. Set out a pot of coffee, spiced apple cider, or pumpkin spice lattes. For a Halloween party, serve them alongside savory snacks like spiced pumpkin dip with pretzels or a roasted butternut squash soup bar.
Storage Instructions: Store decorated cookies in a single layer in an airtight container at room temperature. Place parchment paper between layers if you must stack them — but honestly, stacking risks smudging the icing. They’ll keep for up to 2 weeks. The flavor actually improves after a day or two as the cookies soften slightly from the icing.
Freezer Instructions: You can freeze undecorated baked cookies for up to 3 months. Wrap them tightly in plastic wrap, then foil. Thaw at room temperature before decorating. I often bake my cookies a month before Halloween and decorate them the week of the party.
Transporting Tips: If you’re bringing these to a party, place them in a single layer in a sturdy container. Put a piece of wax paper between each cookie. For longer trips, nestle the container in a cooler with ice packs to prevent the icing from getting too warm and sticky.
Nutritional Information & Benefits
Let’s be honest — these are a treat, not a health food. But knowing what’s in them helps with portion planning for your gathering.
Estimated per cookie (based on 48 cookies): Calories: 145, Fat: 6g, Saturated Fat: 4g, Cholesterol: 20mg, Sodium: 55mg, Carbohydrates: 22g, Fiber: 0g, Sugar: 15g, Protein: 1g.
Health Highlights: The cream cheese adds a small amount of calcium and protein. The butter provides vitamin A. But honestly, these cookies are about joy and celebration, not nutrition. They’re a once-a-year treat for most people, and that’s perfectly fine.
Dietary Considerations: This recipe contains dairy, eggs, and gluten. For allergies, check the variations section above for substitutions. The royal icing is egg-free if you use meringue powder (which is pasteurized egg whites).
Portion Guidance: For a party, plan on 2-3 cookies per person. They’re rich and sweet, so a little goes a long way. I usually make 4-5 dozen for a party of 20 people, and there are always a few left for me to snack on the next day.
Conclusion
These Halloween sugar cookies with royal icing are more than just a recipe — they’re a way to bring a little magic to your fall gatherings. Every time I set out a platter of these decorated cookies, I remember that tiny bakery in Portland and the feeling of finally recreating something I thought was lost forever.
Don’t be afraid to make these your own. Maybe you prefer brighter colors, or maybe you want to try a different shape. The beauty of this recipe is that it’s a canvas for your creativity. Start with the basic dough and icing, then experiment. Some of my favorite designs came from happy accidents — like the time I dropped a toothpick into wet icing and discovered the marbling technique.
I’d love to hear how your cookies turn out. Drop a comment below and tell me about your decorating adventures — what shapes did you use? What colors? Did anyone at your party gasp when they saw the platter? Share your photos and tag me on social media. Happy Halloween baking, friends!
Frequently Asked Questions
Can I make the cookie dough ahead of time?
Absolutely. The dough can be refrigerated for up to 3 days or frozen for up to 3 months. Just wrap it tightly in plastic wrap and then foil. Thaw frozen dough in the refrigerator overnight before rolling.
Why did my cookies spread in the oven?
This usually happens for one of three reasons: your dough wasn’t chilled long enough, your butter was too soft, or your baking sheet was too warm. Always chill cut cookies for 15 minutes before baking, and let your baking sheets cool completely between batches.
How do I get smooth royal icing without bubbles?
Tap your baking sheet gently on the counter after flooding each cookie. This brings air bubbles to the surface. Then use a toothpick to pop any remaining bubbles. Also, avoid overmixing your icing — that incorporates too much air.
Can I use liquid food coloring instead of gel?
You can, but liquid food coloring will thin out your royal icing and make it harder to control. Gel food coloring is much more concentrated and doesn’t affect the consistency. If you only have liquid, add a little extra powdered sugar to compensate.
How far in advance can I decorate these cookies?
Decorated cookies will stay fresh for up to 2 weeks in an airtight container at room temperature. The royal icing hardens completely and actually helps preserve the cookie underneath. I usually decorate mine 3-5 days before my party for the best balance of freshness and convenience.
Pin This Recipe!

Halloween Sugar Cookies with Royal Icing

These buttery, tender Halloween sugar cookies hold their shape beautifully and are topped with glossy royal icing. Perfect for hosting, they can be baked ahead and decorated over several days for stunning, crowd-pleasing treats.
- Prep Time: 30 minutes
- Cook Time: 12 minutes
- Total Time: 2 hours 42 minutes (includes 2 hours chilling)
- Yield: 48 cookies 1x
- Category: Dessert
- Cuisine: American
Ingredients
- 1 cup (226g) unsalted butter, softened
- 4 oz (113g) cream cheese, softened
- 1 ½ cups (300g) granulated sugar
- 1 large egg, room temperature
- 2 teaspoons pure vanilla extract
- ½ teaspoon almond extract
- 3 cups (360g) all-purpose flour, spooned and leveled
- 1 teaspoon baking powder
- ½ teaspoon fine sea salt
- 4 cups (480g) powdered sugar, sifted
- 3 tablespoons meringue powder
- 6–8 tablespoons warm water
- 1 teaspoon vanilla extract
- Gel food coloring (assorted Halloween colors)
- Piping bags (12-inch or 16-inch)
- Piping tips (#2 or #3 round)
- Couplers
- Squeeze bottles (optional)
- Toothpicks
- Edible glitter or sprinkles (optional)
Instructions
- Make the cookie dough: In a stand mixer with paddle attachment, beat softened butter and cream cheese on medium speed until smooth and fluffy (5 minutes). Scrape bowl.
- Add granulated sugar and beat on medium speed until light and fluffy (2 minutes).
- Add egg, vanilla extract, and almond extract. Beat on low until just combined (1 minute).
- In a separate bowl, whisk together flour, baking powder, and salt (30 seconds).
- With mixer on low, gradually add flour mixture to butter mixture. Mix until just combined (2 minutes). Dough will be soft and slightly sticky.
- Divide dough into two discs, wrap tightly in plastic wrap, and refrigerate for at least 2 hours (overnight is better).
- Preheat oven to 350°F (175°C). Line baking sheets with parchment paper or silicone mats.
- Roll and cut cookies: Lightly flour work surface. Roll one disc of dough to ¼-inch thickness. Cut into Halloween shapes using floured cookie cutters. Transfer to prepared baking sheets, spacing 2 inches apart. Re-roll scraps up to 3 times.
- Chill cut cookies on baking sheets for 15 minutes before baking.
- Bake for 10-12 minutes, until edges are just barely golden. Rotate sheet halfway through.
- Cool on baking sheet for 5 minutes, then transfer to wire racks to cool completely.
- Make royal icing: In stand mixer bowl, whisk together sifted powdered sugar and meringue powder.
- Add 6 tablespoons warm water and vanilla extract. Beat on low until combined, then on medium-high for 5-7 minutes until thick, glossy, and holds stiff peaks.
- Check consistency: icing should form a peak that stands straight. Adjust with water or powdered sugar as needed.
- Divide icing into bowls and color with gel food coloring. For flooding, thin icing with water until it flows like honey (10-second rule).
- Decorate cookies: Fill piping bags with #2 or #3 tips. Outline cookies with thicker icing, then flood with thinner icing. Use toothpick to spread and pop bubbles. Add details while base is wet.
- Let decorated cookies dry at room temperature for 6-8 hours (overnight) until icing is hard.
Notes
Chilling dough is non-negotiable to prevent spreading. Royal icing consistency is key: use the 10-second rule. Keep a damp paper towel over icing bowls to prevent drying. Practice piping on parchment paper first. Cookies can be baked up to a week ahead and decorated over several days.
Nutrition
- Serving Size: 1 cookie
- Calories: 145
- Sugar: 15
- Sodium: 55
- Fat: 6
- Saturated Fat: 4
- Carbohydrates: 22
- Protein: 1
Keywords: Halloween sugar cookies, royal icing, decorated cookies, ghost cookies, pumpkin cookies, Halloween baking, sugar cookie recipe


