Love this? Save it for later!
Share the inspiration with your friends
I had a very specific, very loud opinion about s’mores for the longest time. I swore they were a camping-only food. The whole point, I argued, was the smoky fire, the precarious marshmallow on a stick, the frantic assembly before the thing slid off the graham cracker and into the dirt. Making them in a kitchen felt like a betrayal of the entire concept. Then last July, on a Tuesday that hit 97 degrees, I walked into my own kitchen and found my youngest, Leo, standing on a chair, clutching a box of graham crackers and a bag of marshmallows. He had a look of pure, determined genius on his face. “Mom,” he said, “it’s too hot for a fire. But I want s’mores.”
Honestly, I almost said no. I was tired, the air conditioner was struggling, and the last thing I wanted was to turn on the oven. But then I saw the desperation—the real, five-year-old kind. So I caved. I grabbed a block of cream cheese from the fridge, a tub of Cool Whip from the freezer, and decided we were going to build a s’more from the ground up, no heat required. I figured it would be a sticky, messy, probably failed experiment we’d laugh about later.
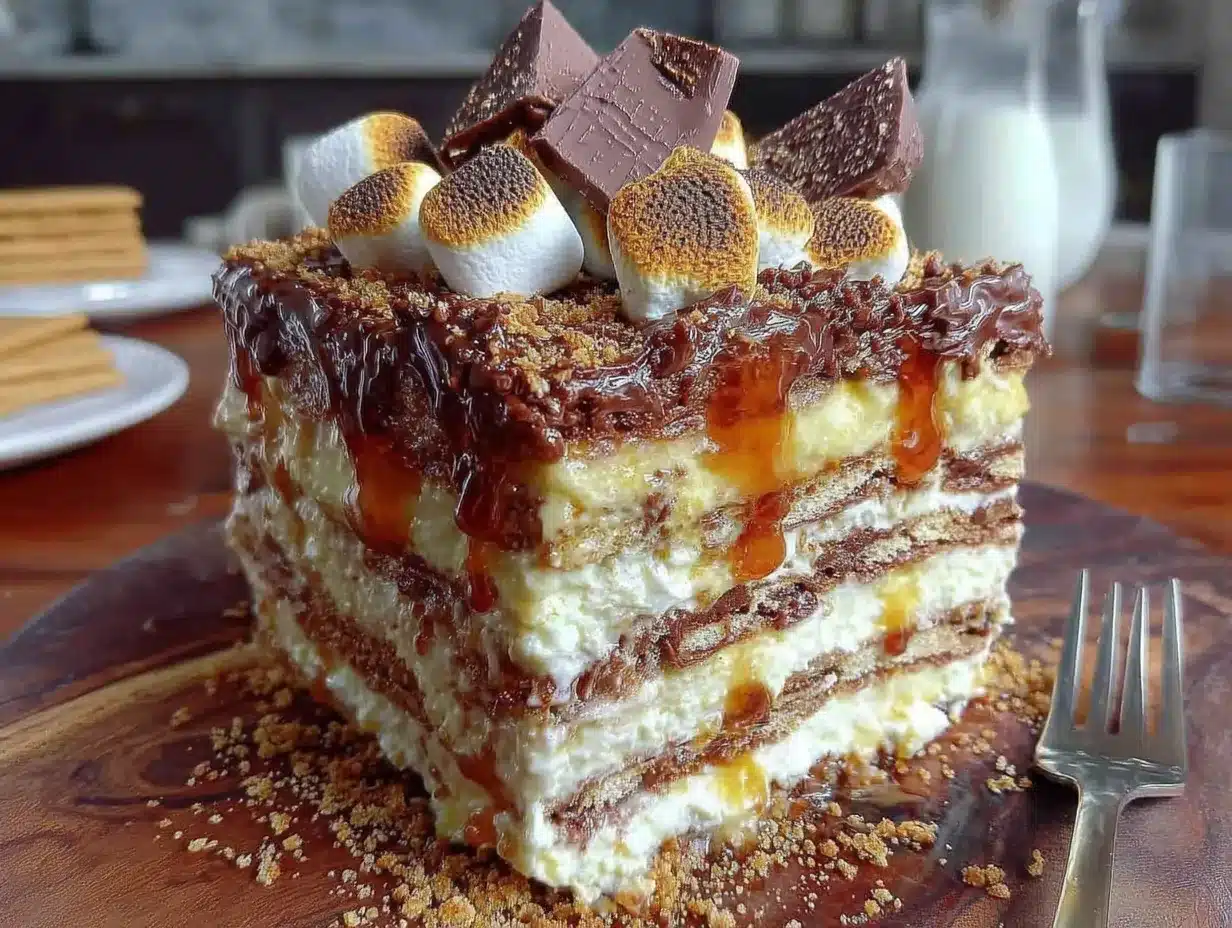
What happened instead was a little bit of kitchen magic. We layered chocolate pudding and a creamy, marshmallow fluff mixture between graham crackers, stacked it all up like a tower, and stuck it in the fridge. Maybe you’ve been there—the moment you pull a dessert out of the fridge and the whole family goes silent. That was this cake. It was cool, it was rich, and it tasted exactly like a campfire memory, but without the smoke in your eyes. This Kid-Approved No-Bake S’mores Icebox Cake wasn’t just a compromise. It was a revelation. And honestly, I’ve been making it ever since.
Why You’ll Love This Recipe
Let me tell you why this recipe has earned a permanent spot in my summer rotation. It’s not just because it tastes amazing, though it absolutely does. It’s because it solves about five different problems at once, and that’s the kind of recipe a busy parent needs.
- Truly No-Bake: We are not turning on the oven. Not the stove. Not even the microwave for the filling. This is a cold-prep dessert that comes together in about 20 minutes of active work. On a 90-degree day, that is a gift.
- Simple Ingredients: You probably have most of this in your pantry right now. Graham crackers, chocolate pudding mix, milk, cream cheese, and Cool Whip. No fancy grocery store trips required.
- Perfect for Hot Days: This is your go-to for summer barbecues, pool parties, or just a Tuesday when the sun won’t quit. It’s cool, refreshing, and sets up beautifully in the fridge.
- Crowd-Pleaser: I have yet to meet a kid who doesn’t lose their mind over this. And the adults? They go back for seconds too. It hits that nostalgic s’mores chord without the mess.
- Make-Ahead Magic: You can assemble this the morning of or even the day before. The flavors meld together in the fridge, and the graham crackers soften into a cake-like texture. It actually gets better with time.
What makes this different from every other s’mores dessert out there is the texture. Instead of a dry, crumbly bar, you get layers of creamy, pudding-like filling that soak into the graham crackers overnight. It’s like a s’mores cheesecake, but way easier and way faster. It’s the kind of dessert that makes you close your eyes after the first bite. Honestly, it’s comfort food reimagined for a hot summer day.
What Ingredients You Will Need
This recipe uses simple, wholesome ingredients to deliver that classic s’mores flavor without any fuss. Most of these are pantry staples, which is exactly what you want when a craving hits. Here is everything you need to gather.
For the Chocolate Layer
- 2 (3.9 oz) boxes of instant chocolate pudding mix (I prefer Jell-O brand for its consistent texture)
- 3 cups cold whole milk (2% works too, but whole milk gives a richer pudding)
For the Marshmallow Cream Layer
- 8 oz cream cheese, softened to room temperature (the block style, not the tub)
- 1/2 cup powdered sugar (adds sweetness and stability)
- 1 (7 oz) jar of marshmallow fluff (like Jet-Puffed)
- 8 oz Cool Whip, thawed (or 2 cups of heavy cream, whipped to stiff peaks)
- 1 teaspoon vanilla extract (pure, not imitation, if you have it)
For the Base and Layers
- 1 (14.4 oz) box of honey graham crackers (you’ll need about 3 sleeves)
For the Topping
- 1/2 cup mini chocolate chips (for sprinkling on top)
- 1/2 cup mini marshmallows (for that classic s’mores look)
- Optional: A drizzle of melted chocolate or caramel sauce
Ingredient Tips: Make sure your cream cheese is truly at room temperature. If it’s cold, you’ll end up with lumps in your marshmallow layer, and nobody wants that. For the pudding, use cold milk straight from the fridge to help it set up faster. If you’re dairy-free, you can swap the milk for oat milk and use a dairy-free cream cheese and whipped topping, though the texture will be slightly less firm.
Equipment Needed
You don’t need a lot of fancy gadgets for this one, which is part of the beauty. Here is what you’ll need to pull this together.
- 9×13 inch baking dish: This is the perfect size for a 4-layer cake. Glass or ceramic works best because it holds the cold well.
- Large mixing bowls: You’ll need one for the pudding and one for the marshmallow cream. I use my trusty Pyrex bowls.
- Electric hand mixer or stand mixer: You can whisk by hand, but a mixer makes the marshmallow layer silky smooth without wearing out your arm.
- Spatula: A rubber spatula is your best friend for spreading the layers evenly.
- Measuring cups and spoons: For the milk, sugar, and vanilla.
- Plastic wrap: To cover the dish while it chills. Press it directly onto the surface of the cake to prevent a skin from forming.
If you don’t have a 9×13, you can use a 9×9 square dish and make fewer layers, or even a large loaf pan for a taller, narrower cake. Just adjust the layering accordingly.
Preparation Method
Alright, let’s build this cake. It’s easier than you think, and the whole process takes about 20 minutes of active work. The hardest part is waiting for it to chill.
- Make the chocolate pudding: In a large bowl, whisk together the two boxes of instant chocolate pudding mix with 3 cups of cold milk. Whisk for about 2 minutes until it starts to thicken. It will be loose at first, then it will set up into a soft pudding. Set it aside. (Pro tip: If you want a richer chocolate flavor, use whole milk or even a splash of heavy cream.)
- Make the marshmallow cream layer: In a separate large bowl, beat the softened cream cheese with an electric mixer on medium speed until it’s smooth and fluffy, about 2 minutes. Add the powdered sugar and beat until combined. Then, add the entire jar of marshmallow fluff and the vanilla extract. Beat again until everything is light and airy. Finally, gently fold in the thawed Cool Whip with a spatula until no white streaks remain. This layer should be pillowy and delicious.
- Start layering the base: Grab your 9×13 baking dish. Line the bottom with a single layer of graham crackers. You’ll need to break some crackers to fill the gaps, like a puzzle. Don’t worry about perfection—just cover the bottom completely.
- Add the first filling layer: Spread half of the chocolate pudding evenly over the graham crackers. Use your spatula to get it into the corners. Then, drop half of the marshmallow cream layer on top of the pudding in spoonfuls, and gently spread it out. It’s okay if the two layers mix a little bit at the edges.
- Repeat the layers: Place another layer of graham crackers on top of the marshmallow cream. Repeat the process: spread the remaining chocolate pudding, then the remaining marshmallow cream. Finish with one final layer of graham crackers on top. Press down gently to make sure everything is even.
- Add the topping: Sprinkle the mini chocolate chips and mini marshmallows all over the top layer of graham crackers. Press them in slightly so they stick. If you want, drizzle a little melted chocolate or caramel sauce over the top for extra flair.
- Chill, chill, chill: Cover the dish tightly with plastic wrap, pressing it directly onto the surface of the cake. Refrigerate for at least 6 hours, but overnight is best. This is the crucial step—the graham crackers need time to absorb the moisture from the pudding and cream, turning into a soft, cake-like texture. Don’t rush it.
Sensory Cue: When you pull the cake out of the fridge, the top should feel firm to the touch. The graham crackers will have softened completely, so when you cut into it, the layers will hold together beautifully without sliding apart.
Cooking Tips & Techniques
I have made this cake more times than I can count, and I’ve learned a few things along the way. Here are my best tips to make sure yours turns out perfect every time.
- Don’t skip the cream cheese softening. I know, it’s a pain to wait. But if you try to beat cold cream cheese into the marshmallow fluff, you’ll get little white lumps that never quite disappear. Leave it on the counter for 30 minutes before you start.
- Use instant pudding, not cook-and-serve. Cook-and-serve pudding won’t set up properly in the fridge for this application. Instant is the way to go. It’s designed to thicken with cold milk, which is exactly what we need.
- Press the graham crackers gently. When you add each new layer of crackers, press them down just enough to make contact with the filling. Don’t smash them into a powder. You want them to soften, not disintegrate.
- Watch your chilling time. Six hours is the minimum, but 8 to 12 hours is better. I once tried to serve this after only 4 hours because I was impatient, and the middle layers were still crunchy. The texture was all wrong. Overnight is non-negotiable for the best result.
- Use a hot knife for clean slices. When you’re ready to serve, run your knife under hot water, dry it off, and then slice. The heat helps the knife glide through the layers without dragging the filling. Wipe the knife clean between cuts for the prettiest pieces.
One time, I forgot to add the vanilla extract to the marshmallow layer. It was still good, but it tasted a little flat, like something was missing. That little teaspoon of vanilla really rounds out the sweetness and makes it taste more like a real s’more. Don’t skip it.
Variations & Adaptations
This recipe is a great base for experimentation. Here are a few ways I’ve changed it up depending on what I have in the pantry or who I’m feeding.
- Peanut Butter S’mores Cake: Add 1/2 cup of creamy peanut butter to the marshmallow cream layer when you beat the cream cheese. It adds a salty, nutty kick that pairs perfectly with the chocolate. My kids call this the “Reese’s version.”
- Mint Chocolate S’mores: Use mint chocolate pudding instead of regular chocolate. You can also add a few drops of peppermint extract to the marshmallow layer. Top with crushed chocolate mints instead of mini chips. It’s incredibly refreshing.
- Gluten-Free Option: Swap the honey graham crackers for gluten-free graham crackers. Schär makes a good one, or you can use a gluten-free vanilla wafer. The texture will be slightly different, but the flavor is still spot on.
- Berry S’mores Cake: Add a layer of fresh strawberries or raspberries between the pudding and marshmallow cream layers. The tartness of the berries cuts through the sweetness beautifully. I did this once for a summer party, and the berries stained the cream a pretty pink color.
- Individual Mason Jar Desserts: Instead of a big cake, layer the ingredients in small mason jars or clear cups. This is perfect for parties or for portion control. Just crumble the graham crackers instead of laying them whole, and layer everything in the jar. They need about 4 hours to set.
I personally love the mint chocolate variation. It feels so grown-up and fancy, but it’s still just as easy to make. It’s my go-to for adult gatherings where I want to serve something that feels a little more sophisticated.
Serving & Storage Suggestions
This cake is best served cold, straight from the fridge. The texture is at its peak when it’s well-chilled, so don’t let it sit out on the counter for too long before serving. Here is how to make it shine.
Serving: Slice it into squares and serve it on a plate. A dollop of fresh whipped cream on top is never a bad idea, and a few extra mini marshmallows make it look even more festive. It pairs beautifully with a cold glass of milk for the kids or a strong cup of black coffee for the adults. The bitterness of the coffee is a perfect contrast to the sweet, creamy cake.
Storage: Cover the dish tightly with plastic wrap or transfer individual slices to an airtight container. The cake will keep in the refrigerator for up to 4 days. In fact, the flavors continue to meld and deepen, so day 2 and 3 are often even better than day 1. The graham crackers will continue to soften, becoming more and more cake-like.
Freezing: You can freeze this cake for up to 2 months. Assemble it completely, but don’t add the topping. Wrap the dish tightly in a layer of plastic wrap, then a layer of aluminum foil. To serve, thaw it in the refrigerator overnight, then add the topping. The texture is slightly icier than fresh, but it’s still delicious and a great make-ahead option for holidays.
Reheating: This is a no-bake dessert, so there’s no reheating involved. Just let it sit at room temperature for about 10 minutes before slicing to take the chill off slightly. This makes it easier to cut cleanly.
Nutritional Information & Benefits
Let’s be real—this is a dessert, and it’s meant to be enjoyed. But here’s a general idea of what you’re working with per serving (based on 12 servings).
| Nutrient | Amount Per Serving |
|---|---|
| Calories | ~380 |
| Total Fat | ~16g |
| Saturated Fat | ~10g |
| Carbohydrates | ~55g |
| Sugar | ~38g |
| Protein | ~5g |
| Calcium | ~8% DV |
Health Benefits: Okay, so there aren’t a ton of health benefits here, but the milk and cream cheese do provide a decent amount of calcium for strong bones. The graham crackers offer a little bit of whole grain fiber, depending on the brand. And honestly, the biggest benefit is the joy it brings to the table. Dessert is about connection and celebration, and this cake delivers that in spades. If you’re looking to lighten it up, you can use low-fat cream cheese, skim milk for the pudding, and sugar-free Cool Whip. It will still be delicious, just a little less decadent.
Dietary Considerations: This recipe contains dairy (milk, cream cheese, Cool Whip) and gluten (graham crackers). For a dairy-free version, use oat milk, dairy-free cream cheese, and coconut whipped cream. For a gluten-free version, use certified gluten-free graham crackers.
Conclusion
This Kid-Approved No-Bake S’mores Icebox Cake is more than just a recipe. It’s a solution. It’s the answer to the “I want s’mores but it’s a hundred degrees outside” problem. It’s the dessert you can throw together while the kids are arguing over the last popsicle, and it makes everyone happy. It’s the cake that proves you don’t need a campfire to get that perfect, nostalgic s’mores flavor.
I love this recipe because it feels like a little victory every time I make it. It’s simple enough for a beginner baker, but impressive enough to bring to a potluck. And honestly, the fact that it gets better after a day in the fridge means you can actually prep it ahead and relax when your guests arrive. That’s a win in my book.
So go ahead—grab a box of graham crackers and a tub of Cool Whip. Make this cake for your family. Let the kids help with the layering (it’s a great sensory activity). And then watch them devour it. When they ask for seconds, just smile. You’ve earned it.
I’d love to hear how yours turns out! Drop a comment below and tell me if your family loved it as much as mine does. Did you try a fun variation? Share it with us! And if you’re looking for another easy, no-bake treat, you might also enjoy my easy chocolate peanut butter pie or this no-bake lemon lush dessert. Happy cooking!
Frequently Asked Questions
Can I use homemade whipped cream instead of Cool Whip?
Absolutely! Whip 2 cups of heavy cream with 1/4 cup of powdered sugar and 1 teaspoon of vanilla extract until stiff peaks form. Fold it into the marshmallow cream layer just like you would with Cool Whip. It will be even richer and more delicious.
Why did my graham crackers stay crunchy?
This usually happens when the cake hasn’t chilled long enough. The graham crackers need at least 6 hours (and preferably overnight) to absorb the moisture from the pudding and cream. If you’re in a rush, try crushing the graham crackers into smaller pieces before layering—they’ll soften faster.
Can I make this in a different size pan?
Yes, you can! A 9×9 square pan will give you thicker layers and a taller cake. You might have a little leftover filling, which you can eat as a snack. A loaf pan works too, but you’ll need to adjust the number of graham cracker layers to fit the smaller surface area.
How do I prevent the top marshmallows from getting sticky?
If you’re making this cake a day ahead, wait to add the mini marshmallows until just before serving. They can absorb moisture from the fridge and become a little gummy overnight. Sprinkle them on fresh for the best texture and appearance.
Can I use chocolate graham crackers instead of honey?
Yes, and it’s amazing. Chocolate graham crackers make this cake even more chocolatey. It’s a great option for serious chocolate lovers. Just be aware that the cake will be significantly sweeter, so you might want to reduce the sugar in the marshmallow layer slightly.
Pin This Recipe!
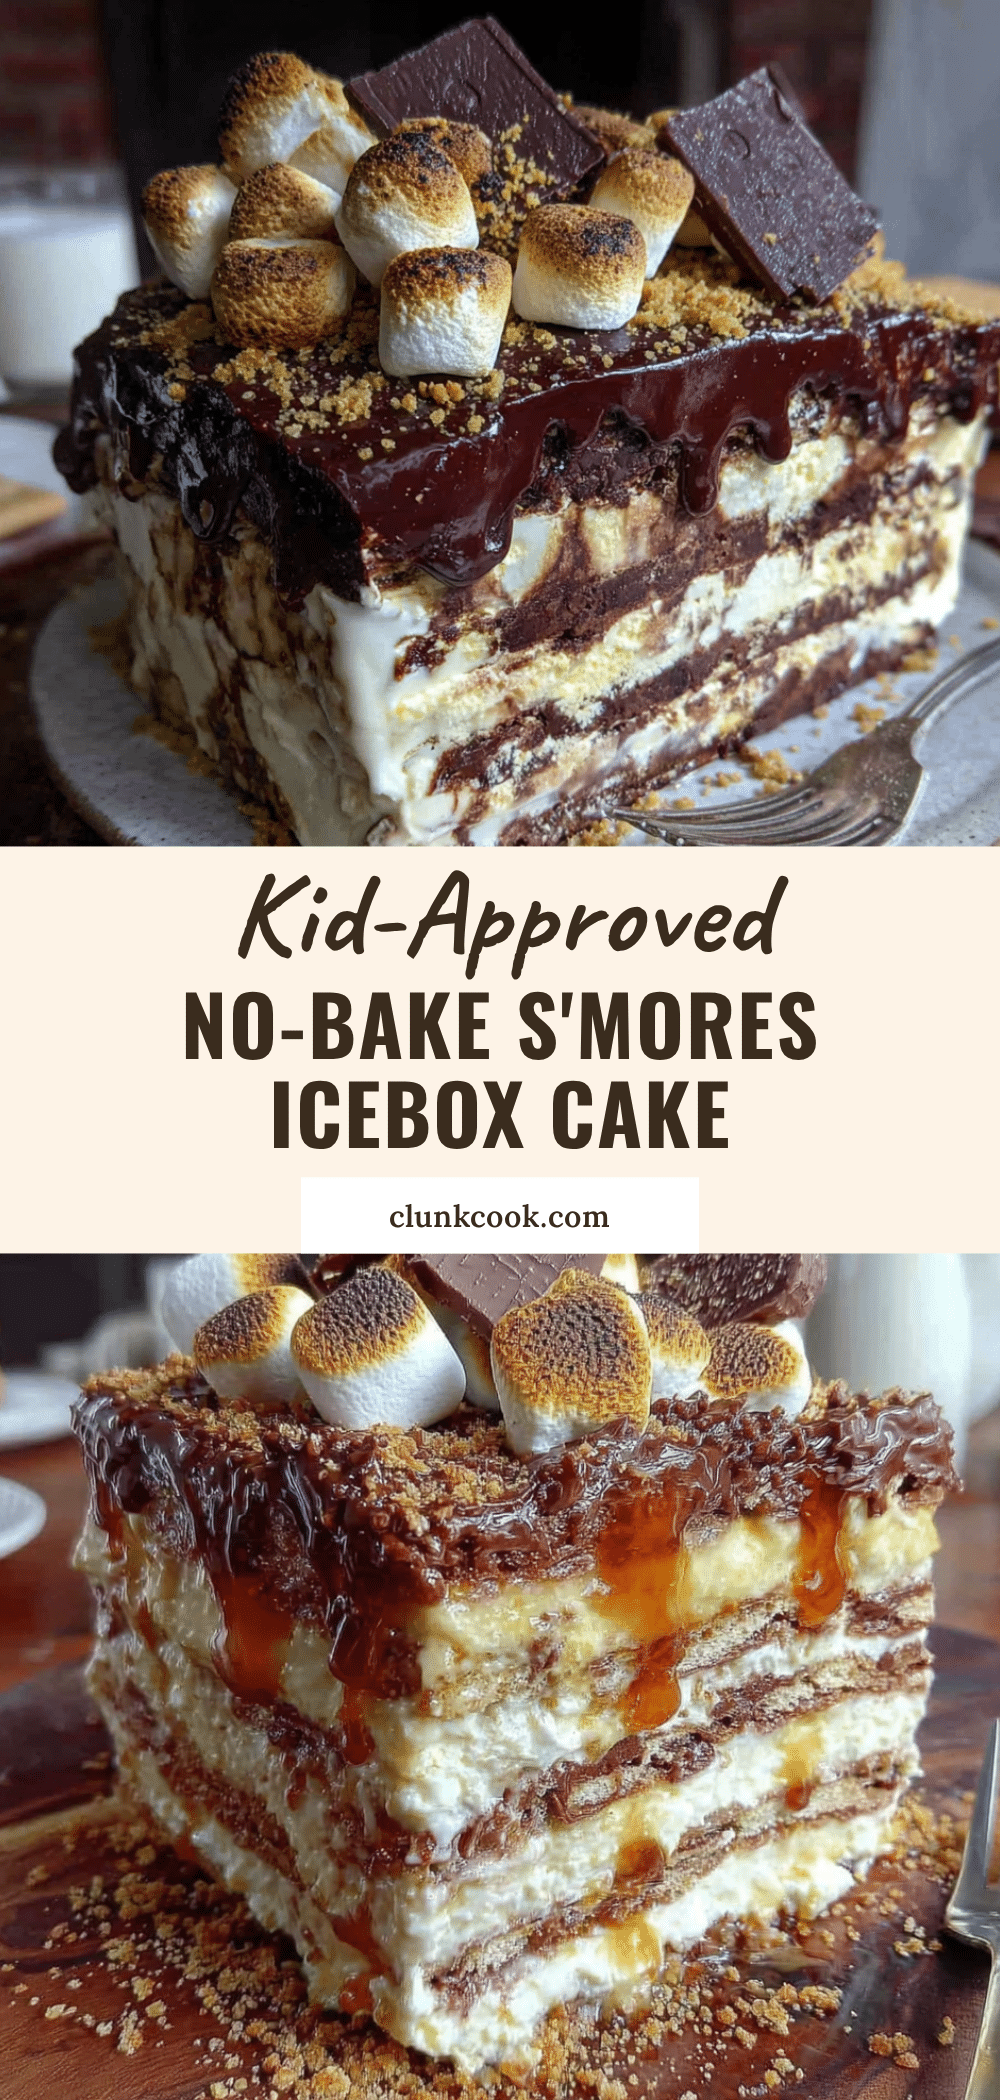
Kid-Approved No-Bake Smores Icebox Cake – Easy 4-Layer Summer Dessert
A cool, creamy, no-bake s’mores icebox cake made with layers of chocolate pudding, marshmallow cream, and graham crackers. Perfect for hot summer days, this easy dessert comes together in 20 minutes and gets better after chilling overnight.
- Prep Time: 20 minutes
- Cook Time: 0 minutes
- Total Time: 6 hours 20 minutes (includes chilling)
- Yield: 12 servings 1x
- Category: Dessert
- Cuisine: American
Ingredients
- 2 (3.9 oz) boxes instant chocolate pudding mix (e.g., Jell-O brand)
- 3 cups cold whole milk (2% works, but whole milk is richer)
- 8 oz cream cheese, softened to room temperature (block style)
- 1/2 cup powdered sugar
- 1 (7 oz) jar marshmallow fluff (e.g., Jet-Puffed)
- 8 oz Cool Whip, thawed (or 2 cups heavy cream, whipped to stiff peaks)
- 1 teaspoon vanilla extract (pure preferred)
- 1 (14.4 oz) box honey graham crackers (about 3 sleeves)
- 1/2 cup mini chocolate chips
- 1/2 cup mini marshmallows
- Optional: melted chocolate or caramel sauce for drizzling
Instructions
- Make the chocolate pudding: In a large bowl, whisk together the two boxes of instant chocolate pudding mix with 3 cups of cold milk. Whisk for about 2 minutes until it starts to thicken. Set aside.
- Make the marshmallow cream layer: In a separate large bowl, beat the softened cream cheese with an electric mixer on medium speed until smooth and fluffy, about 2 minutes. Add the powdered sugar and beat until combined. Add the entire jar of marshmallow fluff and the vanilla extract. Beat again until light and airy. Gently fold in the thawed Cool Whip with a spatula until no white streaks remain.
- Start layering the base: Line the bottom of a 9×13 inch baking dish with a single layer of graham crackers, breaking some to fill gaps.
- Add the first filling layer: Spread half of the chocolate pudding evenly over the graham crackers. Then, drop half of the marshmallow cream layer on top in spoonfuls and gently spread it out.
- Repeat the layers: Place another layer of graham crackers on top. Repeat with the remaining chocolate pudding and remaining marshmallow cream. Finish with one final layer of graham crackers on top. Press down gently.
- Add the topping: Sprinkle mini chocolate chips and mini marshmallows over the top layer of graham crackers. Press them in slightly. Optionally, drizzle with melted chocolate or caramel sauce.
- Chill: Cover the dish tightly with plastic wrap, pressing it directly onto the surface. Refrigerate for at least 6 hours, but overnight is best.
Notes
Make sure cream cheese is at room temperature to avoid lumps. Use instant pudding, not cook-and-serve. Chill for at least 6 hours, preferably overnight, for the graham crackers to soften properly. For clean slices, use a hot knife. The cake can be stored in the refrigerator for up to 4 days or frozen for up to 2 months (without topping).
Nutrition
- Serving Size: 1 square (1/12 of ca
- Calories: 380
- Sugar: 38
- Sodium: 320
- Fat: 16
- Saturated Fat: 10
- Carbohydrates: 55
- Fiber: 1
- Protein: 5
Keywords: no-bake s'mores, icebox cake, summer dessert, kid-friendly, easy dessert, no-bake dessert, s'mores cake, graham cracker dessert


