Love this? Save it for later!
Share the inspiration with your friends
“I wasn’t expecting to whip up a dessert masterpiece during an impromptu Sunday afternoon, but there I was, armed with a cracked mixing bowl and a slightly crooked whisk,” I chuckle as I recall that moment. It all started when my neighbor, Lucy, popped over with a bag of colorful gelatin packets she’d found on clearance. She joked about how kids’ snacks always seem to sneak into adult treats, and before I knew it, we were brainstorming how to turn those rainbow colors into something a bit more grown-up and elegant.
The idea of Perfect Rainbow Layered Chilled Cheesecake Glasses for Two was born right then and there, right on my sunlit kitchen counter. Honestly, it was a bit of a happy accident – I had originally planned a simple cheesecake, but the layers of vibrant colors just begged to be stacked in clear glasses, giving it that magical, jewel-like appeal. And let me tell you, the way the light catches each layer through the glass is almost hypnotic.
Maybe you’ve been there – craving something sweet, vibrant, and yet easy enough to pull together without a mountain of dirty dishes. This recipe was my answer to that craving, and it’s stuck with me ever since. It’s a playful, beautiful dessert that feels special but is perfectly sized for two (because you don’t always want a whole cake staring back at you). Plus, it’s chilled, so it’s refreshingly cool on a warm day or a sweet finish after dinner.
So, whether you’re planning a cozy date night, a fun weekend treat, or just want to impress yourself with something colorful and delicious, these rainbow layered chilled cheesecake glasses might just become your new favorite. Let me tell you, once you try it, you’ll understand why I keep making it again and again, despite that wonky whisk and my tendency to forget the timer!
Why You’ll Love This Recipe
This Perfect Rainbow Layered Chilled Cheesecake Glasses recipe has been tested thoroughly in my kitchen, and it’s truly one of those desserts that feels fancy but comes together effortlessly. Let me share why it’s worth your time:
- Quick & Easy: Ready in under 30 minutes, it’s perfect for last-minute dessert cravings or a casual yet stunning finish to dinner.
- Simple Ingredients: Most are pantry staples or easily found at any grocery store—you likely have everything on hand already.
- Perfect for Intimate Occasions: Sized for two, it’s ideal for date nights, small celebrations, or whenever you want a personal treat.
- Crowd-Pleaser: The colorful layers and creamy texture always get compliments. Kids and adults adore it alike.
- Unbelievably Delicious: The creamy cheesecake base paired with the fruity, subtly sweet gelatin layers is delightful and refreshing.
What sets this recipe apart is the layering technique I perfected after countless tries to make each color shine without bleeding into the next. The cheesecake filling is whipped just right—light but luscious—while the gelatin layers are firm enough to hold their shape but tender on the tongue. Plus, I toss in a bit of vanilla and lemon zest to brighten every bite. Honestly, it’s not just dessert; it’s a joyful experience that brings a little art to your table.
If you want to impress your special someone or treat yourself, this recipe turns simple ingredients into a memorable, eye-catching dessert that tastes as good as it looks.
What Ingredients You Will Need
This recipe uses simple, wholesome ingredients that come together to create a colorful, creamy dessert without fuss. Most are staples, with a few additions for that perfect rainbow effect.
- For the Cheesecake Base:
- 8 oz (225 g) cream cheese, softened (I prefer Philadelphia for its smooth texture)
- 1/4 cup (50 g) granulated sugar
- 1/2 tsp vanilla extract (use pure vanilla for best flavor)
- 1 tbsp fresh lemon juice (adds brightness and balance)
- 1/2 cup (120 ml) heavy cream, chilled
- For the Rainbow Gelatin Layers:
- 5 packets (about 3 oz each) flavored gelatin in different colors (e.g., strawberry, orange, lemon, lime, grape)
- 2 1/2 cups (600 ml) boiling water, divided
- 2 1/2 cups (600 ml) cold water, divided
- For the Crust (optional):
- 1/2 cup (60 g) graham cracker crumbs or digestive biscuits
- 2 tbsp (30 g) unsalted butter, melted
Substitution tips: Use coconut cream instead of heavy cream for a dairy-free version. For gluten-free crust, swap graham crackers with gluten-free cookies. If you prefer a sugar-free dessert, use sugar-free gelatin and a sugar substitute for the cheesecake base.
Equipment Needed
- Mixing bowls (preferably medium and large sizes)
- Electric mixer or hand whisk (an electric mixer makes whipping cream and cream cheese easier)
- Measuring cups and spoons
- Clear serving glasses or dessert cups (about 8 oz / 240 ml capacity each)
- Small saucepan or kettle for boiling water
- Spatula for folding and scraping
- Refrigerator space (to chill layers)
If you don’t have an electric mixer, a sturdy whisk and a bit of elbow grease will do, though it might take longer. For glasses, wine glasses, mason jars, or even small tumblers work beautifully to show off those rainbow layers. I once used mismatched glasses in a pinch, and it gave the dessert a quirky charm.
Preparation Method
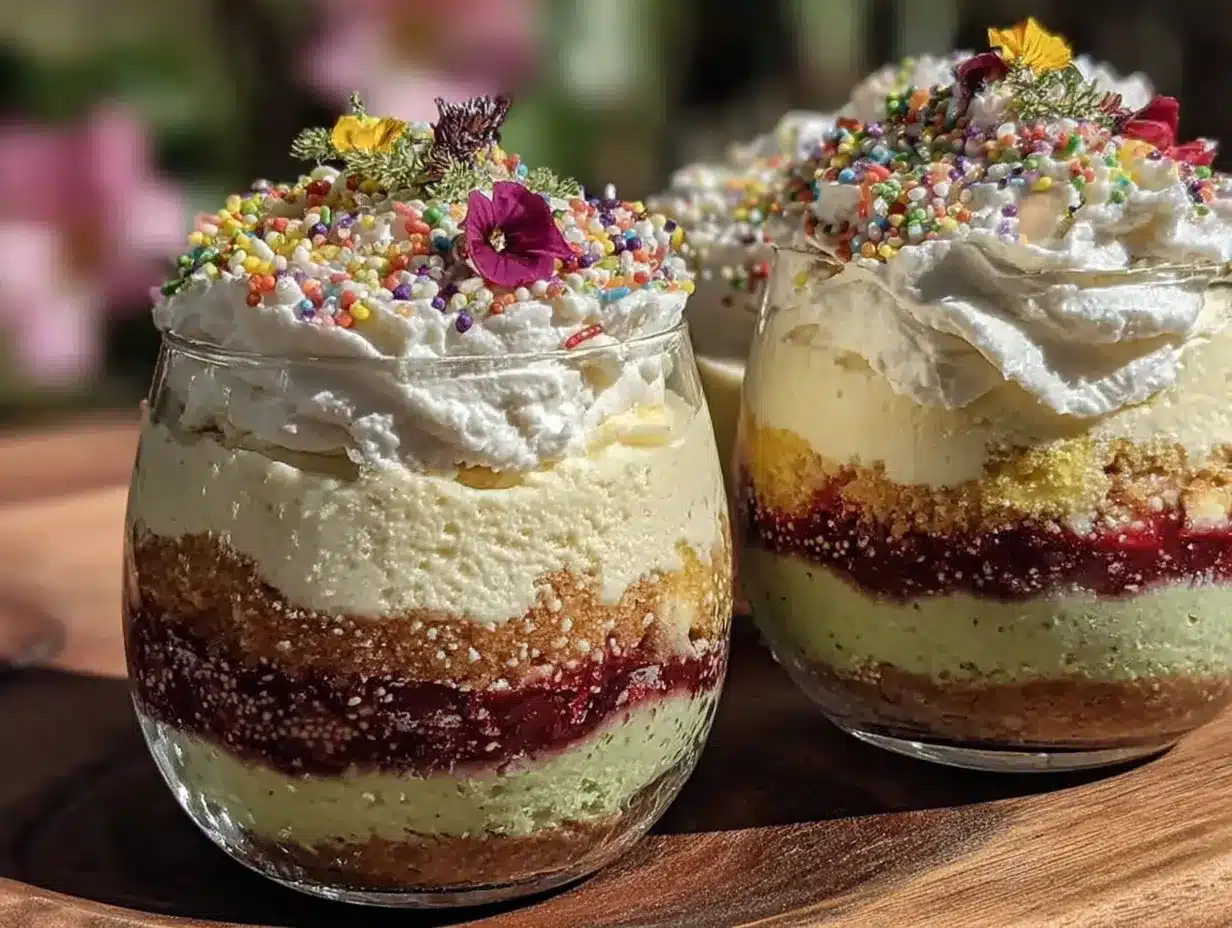
- Prepare the gelatin layers: Start by boiling 2 1/2 cups (600 ml) of water. Divide the boiling water equally into five small bowls (about 1/2 cup or 120 ml each). Add one packet of flavored gelatin to each bowl, stirring until completely dissolved.
- Add cold water: To each gelatin bowl, add 1/2 cup (120 ml) cold water. Stir and set aside to cool slightly while you prepare the cheesecake filling.
- Make the crust (optional): In a small bowl, combine graham cracker crumbs and melted butter. Press about 1 tablespoon of this mixture into the bottom of each serving glass to form a base. Chill in the fridge for 10 minutes to set.
- Prepare the cheesecake filling: In a large bowl, beat the softened cream cheese with sugar, vanilla extract, and lemon juice until smooth and creamy (about 2-3 minutes). In a separate bowl, whip the chilled heavy cream until stiff peaks form.
- Fold whipped cream into cream cheese: Gently fold the whipped cream into the cream cheese mixture until fully combined, keeping it light and airy.
- Layer the first gelatin color: Start with the first gelatin mixture (e.g., strawberry). Pour about 2 tablespoons over the crust in each glass. Place the glasses in the fridge and chill for 15-20 minutes until the gelatin is just set but still slightly tacky (this helps layers stick).
- Add a layer of cheesecake filling: Spoon 2 tablespoons of the cheesecake filling over the set gelatin layer in each glass. Smooth gently with a spoon.
- Repeat layering: Continue alternating gelatin layers and cheesecake filling layers, moving through your colors (orange, lemon, lime, grape), chilling each gelatin layer until set before adding cheesecake. Each glass should have five gelatin layers and four cheesecake layers, finishing with a cheesecake layer on top.
- Final chilling: Once all layers are assembled, chill the glasses for at least 2 hours or overnight to allow flavors to meld and layers to firm up completely.
- Serve: Garnish with fresh berries or a sprig of mint if desired. Serve chilled and enjoy!
Tip: If you find gelatin layers bleeding into each other, make sure each layer is fully tacky before adding the next. Also, be patient when chilling—it’s tempting to rush, but the layers hold best when properly set.
Cooking Tips & Techniques
- Whip cream carefully: Over-whipping can cause your cheesecake filling to turn grainy. Stop as soon as stiff peaks form.
- Softened cream cheese is key: Let it sit at room temperature for 30 minutes so it blends smoothly without lumps.
- Layer timing: Adding cheesecake over gelatin that isn’t tacky enough can cause layers to slide. Set a timer for chilling each layer.
- Use clear glasses: This isn’t just about looks; clear glasses help you see the layers and portion control (plus, presentation is half the fun!).
- Multitask: While gelatin chills, whip the cream or prepare the crust to save time.
- Watch your water temperature: Boiling water must be hot enough to dissolve gelatin completely, or layers won’t set properly.
I once skipped chilling the first gelatin layer, and the layers mixed into a pastel mess—lesson learned! Trust the process, and you’ll get those perfect, distinct rainbow stripes.
Variations & Adaptations
- Dairy-Free Version: Swap cream cheese for vegan cream cheese and heavy cream for coconut cream. Use agar-agar instead of gelatin for a plant-based setting agent.
- Flavor Twists: Use natural fruit purees instead of flavored gelatin for a fresher taste. You can make the layers with strawberry, mango, blueberry, kiwi, and blackberry for a natural rainbow.
- Different Sizes: Scale up by layering in a larger trifle bowl for a crowd or mini mason jars for bite-sized servings.
- Alcohol-Infused: Add a splash of liqueur like Grand Marnier or Chambord into the cheesecake filling for an adult twist.
- Personal Touch: I once swapped the crust for crushed peppermint cookies during Christmas, and the minty crunch complemented the creamy layers perfectly.
Serving & Storage Suggestions
Serve these cheesecake glasses chilled, straight from the fridge, for the best texture and flavor. The contrast between creamy and fruity layers is most refreshing when cold. Garnish with fresh berries, edible flowers, or a sprig of mint to add a pop of natural color and freshness.
Pair with a light dessert wine, sparkling water with lemon, or a fruity iced tea to complement the sweetness without overpowering it.
Store covered in the refrigerator for up to 3 days. The layers will hold well, though the colors may soften slightly over time. Avoid freezing, as gelatin layers can become watery and separate upon thawing.
When reheating chilled desserts isn’t an option, just let them sit at room temperature for 10 minutes before serving to soften the cheesecake slightly for a creamier mouthfeel.
Nutritional Information & Benefits
Each serving of these rainbow layered chilled cheesecake glasses provides approximately 350 calories, with 22 grams of fat, 30 grams of carbohydrates, and 6 grams of protein. The gelatin adds a bit of protein and is low in calories, while the cream cheese and heavy cream supply rich calcium and vitamin A.
Using fresh lemon juice and natural flavorings helps keep the dessert light and refreshing. You can reduce sugar content by using sugar substitutes or low-sugar gelatin options, making this treat adaptable to various dietary preferences.
For gluten-free diets, simply omit the crust or substitute with gluten-free cookies. This dessert is a nice balance of indulgence and portion control, perfect for mindful eating without sacrificing flavor or fun.
Conclusion
These Perfect Rainbow Layered Chilled Cheesecake Glasses for Two are more than just a pretty dessert—they’re a celebration of color, flavor, and easy elegance all in one small glass. Whether you’re sharing with someone special or treating yourself, this recipe brings joy with every spoonful.
Don’t hesitate to adjust the flavors or colors to suit your mood or season. I love how flexible this dessert is, and I’m sure you’ll find your own twist to make it uniquely yours. Honestly, it’s become my go-to for when I want something sweet but not overwhelming.
If you try this recipe, I’d love to hear how your layers came out or what creative spins you added. Leave a comment below and share your experience—it really makes my day to connect with fellow dessert lovers. Now, grab those colorful gelatin packets and get layering!
Here’s to sweet moments and rainbow dreams in your kitchen!
Frequently Asked Questions (FAQs)
Can I use jelly instead of gelatin packets for the layers?
Jelly won’t set firmly enough for clean layers like gelatin does. Gelatin packets are best for the firm, distinct rainbow layers in this recipe.
How far in advance can I prepare these cheesecake glasses?
You can assemble the glasses a day ahead and keep them refrigerated. Just cover them tightly to prevent drying out or fridge odors.
Is there a way to make this recipe vegan?
Yes! Use vegan cream cheese, coconut cream, and agar-agar instead of gelatin. The texture will be slightly different but still delicious.
Can I make this dessert without the crust?
Absolutely! The crust is optional and the dessert is just as delightful without it, especially if you want a lighter option.
What if I want more or fewer layers?
You can adjust the number of layers to your liking. Just remember to chill each gelatin layer until tacky before adding the next to keep them distinct.
Pin This Recipe!
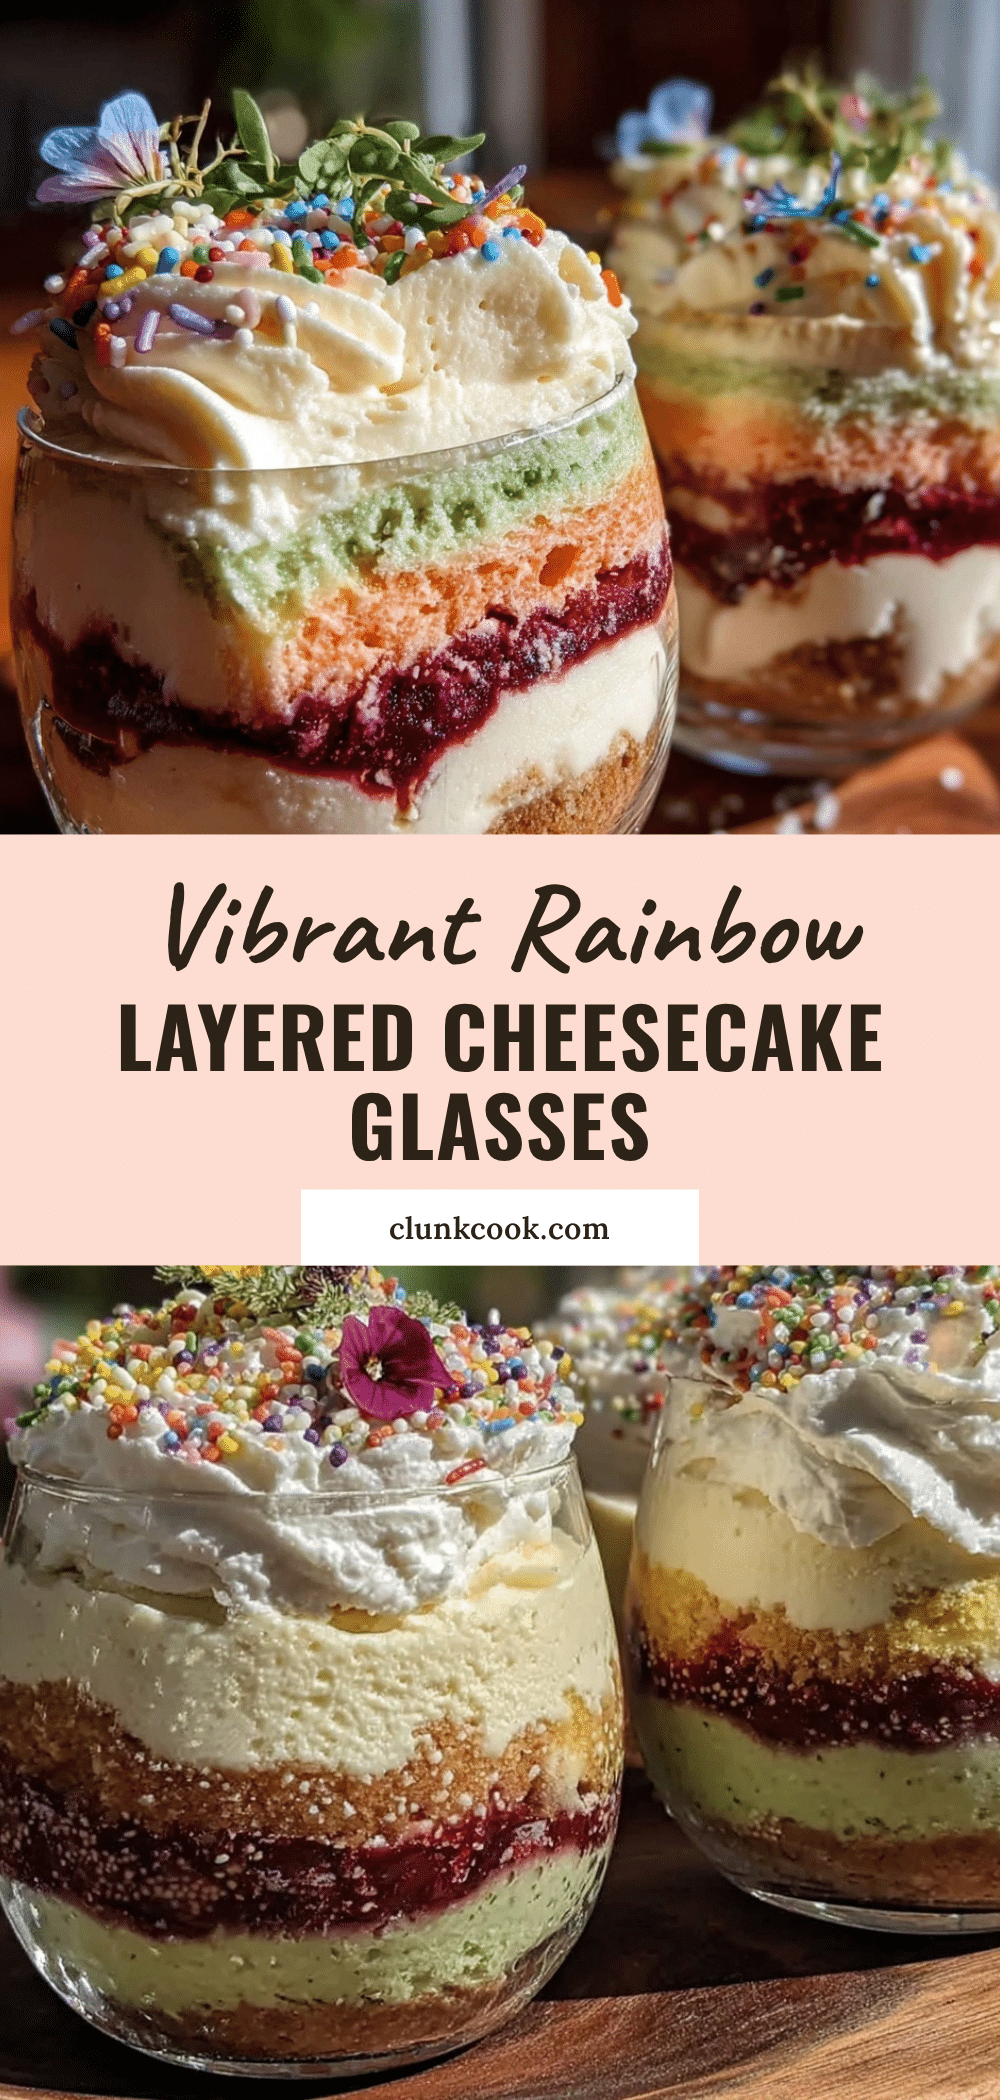
Perfect Rainbow Layered Chilled Cheesecake Glasses Recipe for Two
A colorful, easy-to-make dessert featuring layers of vibrant gelatin and creamy cheesecake, perfectly sized for two and chilled to refresh on warm days.
- Prep Time: 15 minutes
- Cook Time: 15 minutes
- Total Time: 2 hours 30 minutes
- Yield: 2 servings 1x
- Category: Dessert
- Cuisine: American
Ingredients
- 8 oz (225 g) cream cheese, softened
- 1/4 cup (50 g) granulated sugar
- 1/2 tsp vanilla extract
- 1 tbsp fresh lemon juice
- 1/2 cup (120 ml) heavy cream, chilled
- 5 packets (about 3 oz each) flavored gelatin in different colors (e.g., strawberry, orange, lemon, lime, grape)
- 2 1/2 cups (600 ml) boiling water, divided
- 2 1/2 cups (600 ml) cold water, divided
- 1/2 cup (60 g) graham cracker crumbs or digestive biscuits (optional)
- 2 tbsp (30 g) unsalted butter, melted (optional)
Instructions
- Boil 2 1/2 cups (600 ml) of water and divide equally into five small bowls (about 1/2 cup or 120 ml each). Add one packet of flavored gelatin to each bowl and stir until completely dissolved.
- Add 1/2 cup (120 ml) cold water to each gelatin bowl, stir, and set aside to cool slightly.
- Optional: In a small bowl, combine graham cracker crumbs and melted butter. Press about 1 tablespoon of this mixture into the bottom of each serving glass to form a base. Chill in the fridge for 10 minutes to set.
- In a large bowl, beat softened cream cheese with sugar, vanilla extract, and lemon juice until smooth and creamy (about 2-3 minutes).
- In a separate bowl, whip chilled heavy cream until stiff peaks form.
- Gently fold whipped cream into the cream cheese mixture until fully combined and light.
- Start layering: pour about 2 tablespoons of the first gelatin mixture (e.g., strawberry) over the crust in each glass. Chill for 15-20 minutes until gelatin is just set but tacky.
- Spoon 2 tablespoons of cheesecake filling over the set gelatin layer and smooth gently.
- Repeat alternating gelatin and cheesecake layers through the colors (orange, lemon, lime, grape), chilling each gelatin layer until set before adding cheesecake. Each glass should have five gelatin layers and four cheesecake layers, finishing with a cheesecake layer on top.
- Chill the assembled glasses for at least 2 hours or overnight to allow flavors to meld and layers to firm up completely.
- Serve chilled, optionally garnished with fresh berries or a sprig of mint.
Notes
Ensure each gelatin layer is tacky before adding the cheesecake layer to prevent bleeding. Use softened cream cheese for smooth texture. Over-whipping cream can cause graininess. The crust is optional. For dairy-free, use vegan cream cheese and coconut cream with agar-agar instead of gelatin. Store refrigerated up to 3 days; avoid freezing.
Nutrition
- Serving Size: 1 glass (about 8 oz
- Calories: 350
- Sugar: 25
- Sodium: 250
- Fat: 22
- Saturated Fat: 13
- Carbohydrates: 30
- Protein: 6
Keywords: rainbow cheesecake, layered dessert, chilled cheesecake, gelatin dessert, easy dessert for two, colorful dessert, no bake cheesecake


