Love this? Save it for later!
Share the inspiration with your friends
There used to be a little diner on the corner of Elm and 5th, a place called Millie’s that only served breakfast and lunch, and somehow, every October, they had the most incredible Halloween party for the neighborhood kids. I’m not talking about a few balloons and some candy corn. I’m talking about the full works—pumpkin carving contests, a spooky playlist, and a buffet table that looked like it belonged at a monster’s wedding reception. The star of that table, without fail, was Millie’s spider deviled eggs. When the diner closed three years ago—the owner retired to Florida to chase manatees, I swear—I felt a genuine pang of loss. Not just for the friendly faces, but for those little creepy-crawly appetizers that my kids talked about for the rest of the year.
After about seven or eight tries—honestly, the first few attempts looked more like sad, squashed bugs than anything you’d want to eat—I finally cracked the code. I spent a whole rainy Saturday afternoon in my kitchen, tweaking the filling, figuring out the perfect olive placement so the “spiders” actually looked like they were crawling, and getting the paprika just right. The kitchen was a glorious mess, and I had yolk smeared on my favorite apron, but when I stepped back and saw a platter of these guys staring back at me, I knew I had it. My daughter walked in, grabbed one, and said, “Mom, these taste like Millie’s.” That was the only review that mattered.
These spooky spider deviled eggs are now our family’s official Halloween tradition. They’re the kind of thing that makes you feel like a kitchen rockstar without spending hours slaving away. Maybe you’ve been there—trying to find a Halloween appetizer that’s actually fun to make, looks impressive, and doesn’t involve a bag of processed candy. Well, let me tell you, this is it. It’s simple, it’s scary-cute, and honestly, it’s the best thing to happen to our Halloween table since the invention of the candy bowl.
Why You’ll Love This Recipe
I’ve tested this recipe more times than I care to admit, and I can tell you with absolute confidence: these are the deviled eggs that will steal the show at any Halloween gathering. They’re not just a gimmick—they’re genuinely delicious, and they’re designed to make your life easier, not harder. Here’s why this recipe is a keeper:
- Quick & Easy: You can whip these up in under 30 minutes, including boiling time. Perfect for those busy Halloween afternoons when you’re juggling costume emergencies and last-minute decorations.
- Simple Ingredients: No fancy grocery store trips needed. You likely have everything in your kitchen right now—eggs, mayo, mustard, olives, and a little paprika.
- Perfect for Halloween Parties: Whether it’s a school potluck, a neighborhood gathering, or a family dinner before trick-or-treating, these are a guaranteed hit.
- Crowd-Pleaser: Kids love the spooky look, and adults appreciate the classic deviled egg flavor. It’s a win-win for everyone.
- Unbelievably Delicious: The creamy, tangy filling paired with the briny olive “spiders” is next-level comfort food. You’ll find yourself reaching for “just one more” long after the party’s over.
What makes this recipe different from all the other Halloween appetizers out there? It’s the attention to detail. I’ve figured out the exact ratio of mayonnaise to mustard for a filling that’s silky but holds its shape. I’ve discovered that using a piping bag (or even a zip-top bag with the corner snipped) makes the filling look professional without any effort. And the olive placement? It’s all about the angle. You want those little legs to look like they’re crawling, not just sitting there. This isn’t just another version of spooky deviled eggs—it’s the best version, tested by a mom who doesn’t have time for fussy recipes.
This recipe is the kind that makes you close your eyes after the first bite. It’s comfort food reimagined—spooky, fun, and with the same soul-soothing satisfaction of a classic deviled egg. Perfect for impressing guests without stress, or turning a simple Halloween snack into something memorable that your kids will talk about for years.
What Ingredients You Will Need
This recipe uses simple, everyday ingredients to deliver bold flavor and a seriously fun presentation. You don’t need anything exotic—just the staples you probably already have on hand, plus a couple of clever additions to make those spiders come to life.
- 12 large eggs (room temperature for easier peeling, but cold works too)
- 1/3 cup mayonnaise (I recommend Duke’s or Hellmann’s for the creamiest texture—trust me on this)
- 1 tablespoon yellow mustard (adds that classic tangy kick; Dijon works if you want a milder flavor)
- 1 teaspoon white vinegar (brightens the filling without making it watery)
- 1/2 teaspoon salt (fine sea salt works best)
- 1/4 teaspoon black pepper (freshly ground if you have it)
- 1/4 teaspoon garlic powder (optional, but adds a subtle savory depth)
- 1/4 teaspoon paprika (plus extra for garnish; smoked paprika adds a lovely twist)
- 24 black olives (canned, pitted—you’ll use these for the spider bodies and legs)
- 12 green olives with pimento (for the eyes; you can also use sliced black olives if you prefer)
Ingredient Tips & Sourcing Notes: When it comes to eggs, freshness matters for boiling. Older eggs actually peel more easily, so if you have eggs that have been in the fridge for a week or so, they’re perfect for this recipe. For the olives, I prefer the canned whole black olives—they’re firm enough to slice neatly and hold their shape. Look for brands like Lindsay or store-brand equivalents. If you’re feeling fancy, you can use kalamata olives for a more intense flavor, but the color won’t be as dark for the spider bodies.
Substitution Guidance: Need a dairy-free option? Use vegan mayonnaise—it works surprisingly well in this recipe. For a mustard-free version, skip the mustard and add an extra teaspoon of vinegar and a pinch of turmeric for color. If you’re watching your sodium, use low-sodium olives and cut back on the added salt. And if black olives aren’t your thing, you can use sliced radishes for the spider bodies—they give a fun, crunchy twist, though they won’t be as dark and spooky.
One more thing: I always keep a few extra eggs on hand when making this recipe. Sometimes an egg won’t peel perfectly, and you’ll want a backup. Plus, you can always make a mini batch of plain deviled eggs with the extras—no one’s going to complain about that!
Equipment Needed
You don’t need a fancy kitchen to pull off these spooky spiders. Here’s what you’ll need:
- Large pot for boiling eggs (a 4-quart pot works perfectly)
- Medium mixing bowl for the filling
- Sharp knife for slicing eggs and olives
- Cutting board (I prefer a non-slip one for safety)
- Small spoon or melon baller for scooping out yolks
- Fork or potato masher for mashing the yolks
- Piping bag or zip-top bag for filling the eggs (a zip-top bag works just as well and costs nothing)
- Serving platter (a dark-colored plate makes the spiders pop)
Personal Experience: I’ve tried using a pastry bag with a star tip, but honestly, a simple zip-top bag with the corner snipped gives you more control and is way easier to clean. My favorite tip? Use a small offset spatula to smooth the filling if you’re not piping—it gives a beautiful, rustic finish. And don’t stress about buying a special egg slicer; a sharp knife and a steady hand do the job perfectly.
Budget-Friendly Options: If you don’t have a piping bag, a clean zip-top bag is your best friend. No melon baller? A small teaspoon works just fine. The only thing I’d recommend investing in is a good sharp knife—it makes slicing the olives for the spider legs so much easier and safer.
Preparation Method
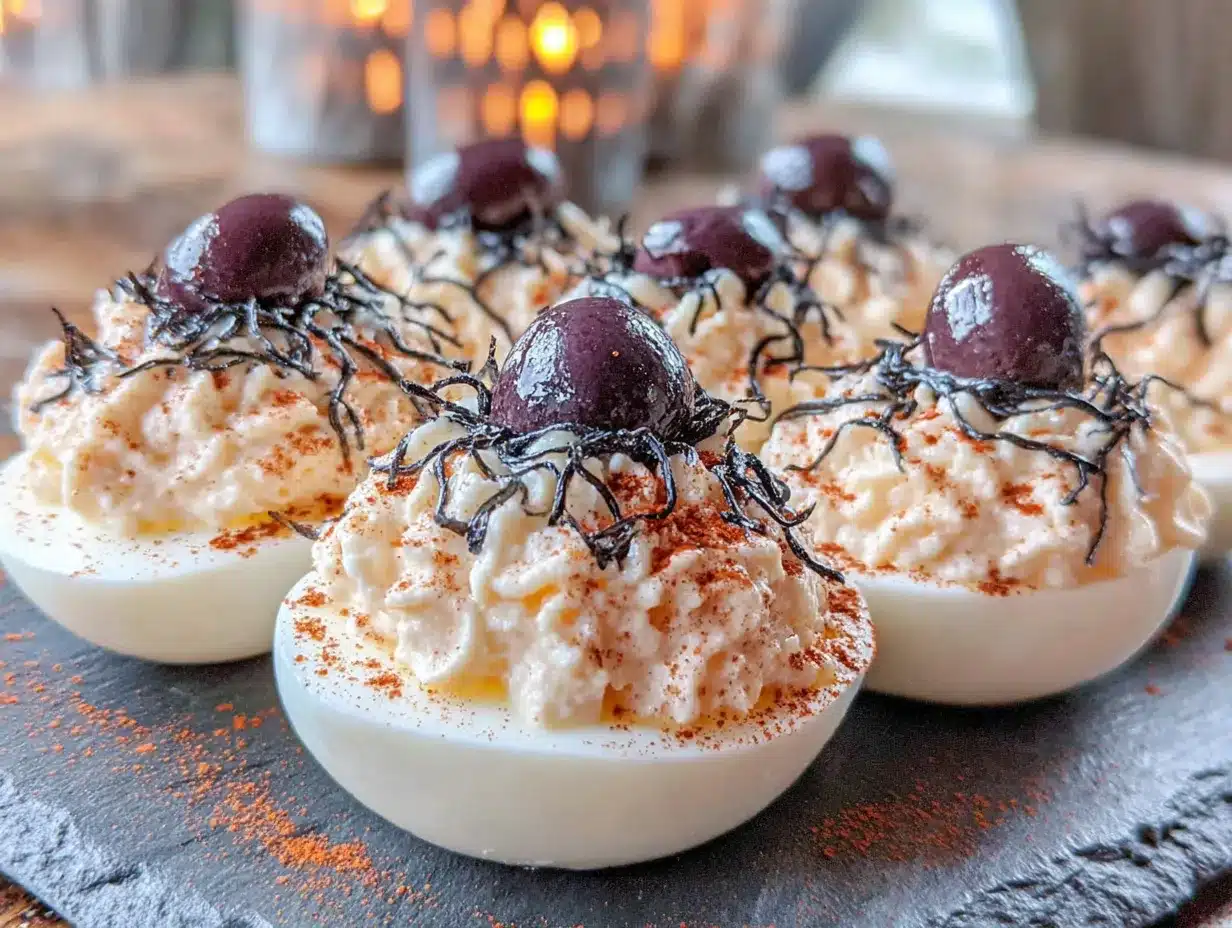
Let’s get those spooky spiders crawling onto your Halloween table. Follow these steps, and you’ll have a platter of creepy-crawly goodness in no time.
- Boil the eggs: Place the 12 eggs in a large pot and cover them with cold water by about an inch. Bring the water to a rolling boil over high heat. Once boiling, cover the pot, turn off the heat, and let the eggs sit for exactly 12 minutes. (Set a timer—this is crucial for perfectly cooked yolks.)
- Ice bath the eggs: While the eggs are cooking, fill a large bowl with ice and cold water. When the timer goes off, use a slotted spoon to transfer the eggs to the ice bath. Let them sit for at least 10 minutes. This stops the cooking process and makes peeling a breeze. (I once skipped this step and spent 15 minutes peeling eggs that looked like they’d been in a fight—learn from my mistake!)
- Peel and slice the eggs: Gently tap each egg on the counter to crack the shell, then peel under running cold water. Pat the eggs dry. Using a sharp knife, slice each egg in half lengthwise. Carefully pop out the yolks into a medium mixing bowl. Arrange the egg white halves on your serving platter, cut-side up.
- Make the filling: To the bowl with the yolks, add the mayonnaise, yellow mustard, white vinegar, salt, black pepper, garlic powder, and paprika. Mash everything together with a fork until smooth and creamy. You want the filling to be silky but firm enough to hold its shape when piped. (If it seems too thick, add a tiny splash of vinegar; if too thin, add a bit more mayonnaise.)
- Prep the olives: While the filling chills, prepare your spider decorations. For each spider, you’ll need one whole black olive for the body and half a green olive (or a slice of black olive) for the eyes. To make the legs, slice the remaining black olives lengthwise into thin strips—you want about 8 legs per spider. (Pro tip: use a paring knife for precise cuts; the legs should be thin enough to look like spider legs but thick enough to hold their shape.)
- Fill the egg whites: Transfer the yolk mixture to a piping bag or a zip-top bag with one corner snipped off. Pipe the filling into each egg white half, mounding it slightly. You want a nice, generous amount—don’t skimp! (If you’re not piping, use a small spoon to carefully fill each egg white, mounding the filling slightly in the center.)
- Assemble the spiders: Here’s where the magic happens. Gently press a whole black olive onto the top of each filled egg—this is the spider’s body. Then, carefully arrange 8 black olive strips around the body to create the legs. (I like to angle the legs slightly so they look like the spider is crawling across the egg.) Finally, place half a green olive (pimento-side down) on top of the black olive for the eyes. Repeat for all 12 eggs.
- Garnish and chill: Lightly sprinkle paprika over the entire platter for a touch of color and flavor. (Don’t overdo it—you want the spiders to stand out.) Refrigerate the deviled eggs for at least 30 minutes before serving. This helps the filling set and makes the spiders easier to handle.
Sensory Cues: When you pipe the filling, you should see a smooth, creamy ribbon that holds its shape without drooping. The olive legs should feel firm but pliable—if they’re too dry, they’ll crack; if too moist, they won’t hold their shape. And when you sprinkle the paprika, you want a light dusting that looks like autumn leaves, not a heavy blanket that hides your hard work.
Cooking Tips & Techniques
Over the years, I’ve learned a few tricks that make these spooky spider deviled eggs foolproof. Here are my best tips, hard-earned through trial and error.
Perfect Hard-Boiled Eggs Every Time: The key to easy-peeling eggs is starting with older eggs (a week old is ideal) and shocking them in an ice bath immediately after boiling. I learned this the hard way after a disastrous batch of eggs that looked like they’d been through a shredder. Also, don’t skip the timer—overcooked eggs develop a green ring around the yolk, which isn’t harmful but looks unappealing.
Getting the Filling Consistency Right: The perfect deviled egg filling should be creamy but firm enough to hold its shape when piped. If your filling is too runny, it will slide off the egg whites. If it’s too thick, it won’t pipe smoothly. The solution? Add the mayonnaise gradually and taste as you go. I’ve found that 1/3 cup of mayo is the sweet spot for 12 eggs, but you can adjust based on the size of your yolks.
Olive Placement for Maximum Spookiness: The angle of the olive legs makes all the difference. I like to place them at a slight upward curve, as if the spider is mid-crawl. If you press them too flat, they look like sad little blobs. And don’t overcrowd the legs—eight thin strips per spider is plenty. Any more, and the spider looks like a furry monster instead of a creepy-crawly.
Timing and Multitasking: Here’s how I streamline the process: while the eggs are boiling, I prep the olives. While the eggs are chilling in the ice bath, I make the filling. This way, everything comes together in under 30 minutes. I also recommend making the filling and prepping the olives the night before—then all you have to do on Halloween day is assemble and garnish.
Common Mistakes to Avoid: Don’t overmix the filling—it can become gummy. Don’t pipe too much filling; you want a nice mound, not a volcano. And whatever you do, don’t skip the chilling step. The spiders are much easier to handle and look cleaner when the filling is cold and firm.
Variations & Adaptations
One of the best things about this recipe is how adaptable it is. Here are some of my favorite variations, tested and approved by my family.
Dietary Variations: For a gluten-free version, this recipe is naturally gluten-free, so no changes needed. For a dairy-free option, use vegan mayonnaise and check that your mustard is dairy-free (most are). For a low-carb version, this recipe is already low in carbs—just be mindful of the olive quantity if you’re strict.
Seasonal Twists: In the fall, add a pinch of cinnamon or nutmeg to the filling for a warm, cozy flavor. In the summer, swap the paprika for a sprinkle of fresh chives or dill for a brighter taste. And for a truly spooky Halloween twist, use food coloring to tint the filling green or purple—just a drop or two will do.
Flavor Variations: Try adding a teaspoon of pickle relish to the filling for a tangy crunch. Or mix in a bit of crumbled bacon for a smoky, savory kick. For a spicy version, add a dash of cayenne pepper or a few drops of hot sauce to the filling. My personal favorite? A teaspoon of horseradish adds a wonderful kick that pairs beautifully with the creamy filling.
Different Cooking Methods: If you’re short on time, you can use an Instant Pot to hard-boil the eggs. Place the eggs on the trivet, add 1 cup of water, and cook on high pressure for 5 minutes, followed by a 5-minute natural release. Then transfer to an ice bath. The eggs come out perfectly every time, and they peel like a dream.
Personal Variation: Last Halloween, I tried making these with a smoked paprika and chipotle filling. I added 1/4 teaspoon of smoked paprika and a pinch of chipotle powder to the yolk mixture. The result was a subtly smoky, slightly spicy filling that paired perfectly with the briny olives. My husband, who claims he doesn’t like deviled eggs, ate six of them. Six! I call that a win.
Serving & Storage Suggestions
These spooky spider deviled eggs are best served chilled, right out of the refrigerator. The cold filling contrasts beautifully with the firm egg whites and the briny olives, making each bite a delightful experience.
Presentation Tips: Arrange the deviled eggs on a dark-colored platter or a black serving tray to make the spiders pop. You can also line the platter with fresh arugula or spinach for a “spooky forest” effect. For extra Halloween flair, place a few plastic spiders around the platter or add a small sign that says “Creepy Crawlers.”
Complementary Dishes: These deviled eggs pair wonderfully with other Halloween appetizers like mummy pigs in a blanket, a spooky Halloween charcuterie board, or a bowl of creamy pumpkin soup for a full Halloween spread. For drinks, serve with apple cider, pumpkin spice lattes, or a crisp white wine for the adults.
Storage Instructions: Store leftover deviled eggs in an airtight container in the refrigerator for up to 2 days. (They rarely last that long in my house, but just in case.) The olive decorations will soften slightly over time, so if you’re making them ahead, I recommend storing the filled eggs and olive decorations separately and assembling just before serving.
Reheating: Deviled eggs are served cold, so no reheating is needed. If you’ve refrigerated them, simply let them sit at room temperature for 10 minutes before serving to take the chill off. The flavors actually develop and deepen after a few hours in the fridge, so these are a great make-ahead option.
How Flavors Develop Over Time: Like many good things, these deviled eggs taste even better the next day. The flavors meld together, and the filling becomes even creamier. Just be aware that the olives may release a bit of brine, which can make the filling slightly more liquid. To avoid this, always store them in a single layer with a paper towel underneath to absorb any excess moisture.
Nutritional Information & Benefits
While these spooky spider deviled eggs are a treat, they also offer some surprising nutritional benefits. Here’s a quick breakdown:
| Nutrient | Amount per Serving (2 eggs) |
|---|---|
| Calories | 180 |
| Protein | 12g |
| Fat | 14g |
| Saturated Fat | 3.5g |
| Carbohydrates | 2g |
| Fiber | 0g |
| Sugar | 1g |
| Sodium | 350mg |
Health Benefits: Eggs are a fantastic source of high-quality protein, which helps keep you full and satisfied. They’re also rich in choline, a nutrient that supports brain health. The olives provide healthy monounsaturated fats and antioxidants, while the paprika adds a dose of vitamin A. This recipe is naturally low in carbohydrates and can fit into a variety of dietary patterns.
Dietary Considerations: This recipe is naturally gluten-free and low-carb. It’s also suitable for keto and paleo diets if you use a compliant mayonnaise. The main allergens are eggs and olives, so be mindful if serving to anyone with these allergies.
Personal Wellness Perspective: I love that this recipe proves you don’t have to sacrifice nutrition for fun. These deviled eggs are a protein-packed snack that satisfies without the sugar crash. They’re perfect for a Halloween party where you want something indulgent but not overly processed. Plus, they’re a great way to get kids to eat protein without complaint—they’re too busy admiring the spiders!
Conclusion
These spooky spider deviled eggs are more than just a Halloween appetizer—they’re a memory in the making. From the first time I recreated Millie’s legendary recipe to the countless Halloween parties since, these little creepy-crawlers have brought joy, laughter, and a whole lot of “oohs” and “ahhs” to our table. They’re proof that you don’t need fancy ingredients or complicated techniques to create something truly special. Just a dozen eggs, some olives, and a little bit of imagination.
I hope you’ll try this recipe and make it your own. Maybe you’ll add a pinch of cayenne for heat, or swap the green olives for sliced black ones. Maybe you’ll serve them on a bed of “spider webs” made from shredded lettuce. Whatever you do, I’d love to hear about it. Drop a comment below and let me know how your spiders turned out—did the kids love them? Did they disappear in minutes? Share your photos, your tweaks, your success stories. That’s what makes this community so special.
So go ahead, grab those eggs, and let’s make some magic happen. Happy Halloween, and happy cooking!
Frequently Asked Questions
Can I make these spooky spider deviled eggs ahead of time?
Absolutely! You can prepare the filling and boil the eggs up to 2 days in advance. Store the egg whites and filling separately in the refrigerator. Assemble the spiders on the day of your event for the best presentation. The olives can be sliced and stored in an airtight container in the fridge for up to 3 days.
How do I get my eggs to peel easily?
The secret is using older eggs (a week old is ideal) and shocking them in an ice bath immediately after boiling. Also, try peeling under running cold water—the water helps separate the membrane from the egg white. If you’re still struggling, add a teaspoon of baking soda to the boiling water; it helps loosen the shells.
Can I use a different type of olive for the spiders?
Yes! While black olives give the most classic spider look, you can experiment with kalamata olives for a richer flavor, or use green olives for a different color scheme. For the eyes, pimento-stuffed green olives are traditional, but you can use sliced black olives or even small pieces of red bell pepper for a pop of color.
How do I prevent the filling from being too runny?
Start by adding the mayonnaise gradually—you can always add more, but you can’t take it away. If your filling is too thin, add a bit more mashed yolk or a teaspoon of cream cheese to thicken it. Also, make sure your yolks are fully mashed with no lumps; lumps can make the filling seem thinner than it is.
Can I freeze deviled eggs?
I don’t recommend freezing deviled eggs. The texture of the egg whites becomes rubbery and watery when thawed, and the mayonnaise-based filling can separate. These are best enjoyed fresh or within 2 days of preparation. If you have leftovers, store them in the fridge and enjoy them within that timeframe.
Pin This Recipe!
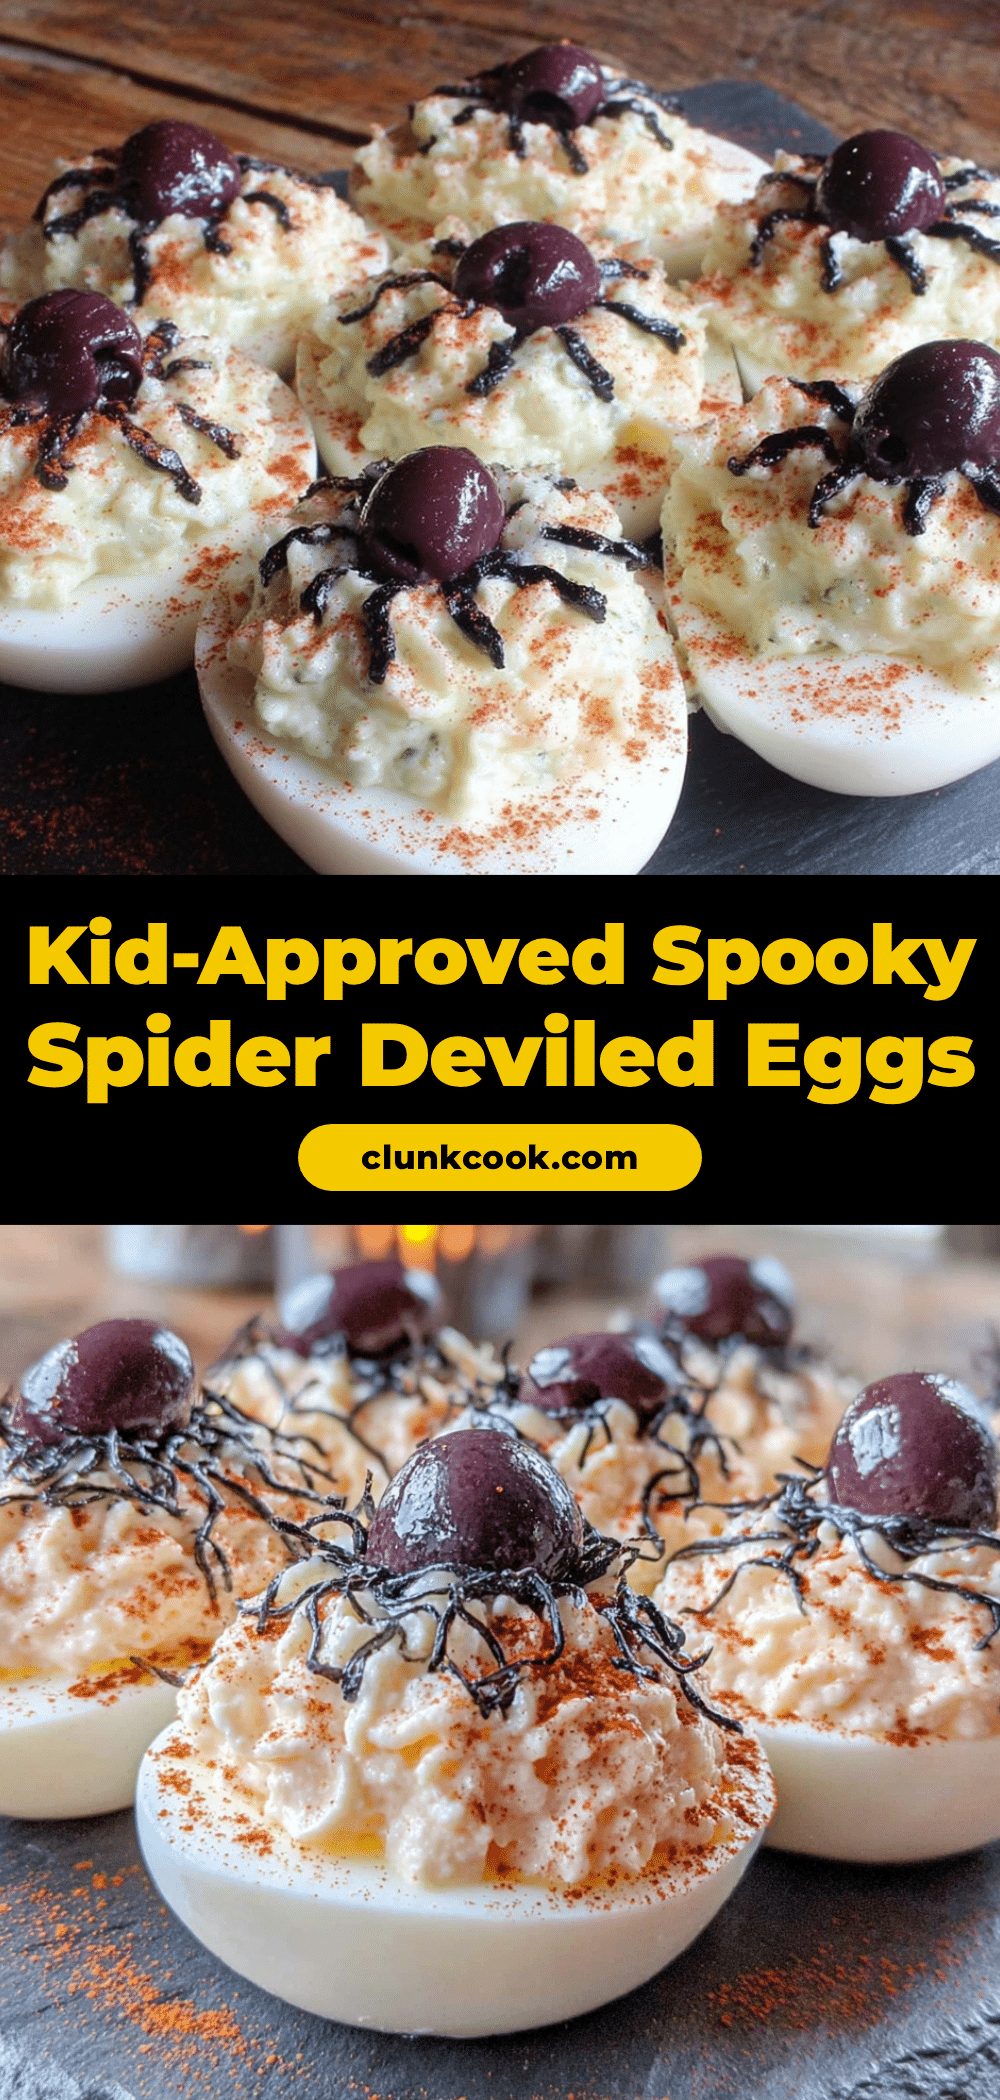
Spooky Spider Deviled Eggs – Easy Halloween Kid Recipe
These spooky spider deviled eggs are a fun and delicious Halloween appetizer that kids and adults will love. With a creamy, tangy filling and olive spiders, they’re perfect for any Halloween party.
- Prep Time: 15 minutes
- Cook Time: 12 minutes
- Total Time: 27 minutes
- Yield: 24 deviled eggs (12 servings of 2 eggs each) 1x
- Category: Appetizer
- Cuisine: American
Ingredients
- 12 large eggs (room temperature for easier peeling, but cold works too)
- 1/3 cup mayonnaise (I recommend Duke’s or Hellmann’s for the creamiest texture)
- 1 tablespoon yellow mustard (adds that classic tangy kick; Dijon works if you want a milder flavor)
- 1 teaspoon white vinegar (brightens the filling without making it watery)
- 1/2 teaspoon salt (fine sea salt works best)
- 1/4 teaspoon black pepper (freshly ground if you have it)
- 1/4 teaspoon garlic powder (optional, but adds a subtle savory depth)
- 1/4 teaspoon paprika (plus extra for garnish; smoked paprika adds a lovely twist)
- 24 black olives (canned, pitted—you’ll use these for the spider bodies and legs)
- 12 green olives with pimento (for the eyes; you can also use sliced black olives if you prefer)
Instructions
- Boil the eggs: Place the 12 eggs in a large pot and cover them with cold water by about an inch. Bring the water to a rolling boil over high heat. Once boiling, cover the pot, turn off the heat, and let the eggs sit for exactly 12 minutes. (Set a timer—this is crucial for perfectly cooked yolks.)
- Ice bath the eggs: While the eggs are cooking, fill a large bowl with ice and cold water. When the timer goes off, use a slotted spoon to transfer the eggs to the ice bath. Let them sit for at least 10 minutes. This stops the cooking process and makes peeling a breeze.
- Peel and slice the eggs: Gently tap each egg on the counter to crack the shell, then peel under running cold water. Pat the eggs dry. Using a sharp knife, slice each egg in half lengthwise. Carefully pop out the yolks into a medium mixing bowl. Arrange the egg white halves on your serving platter, cut-side up.
- Make the filling: To the bowl with the yolks, add the mayonnaise, yellow mustard, white vinegar, salt, black pepper, garlic powder, and paprika. Mash everything together with a fork until smooth and creamy. You want the filling to be silky but firm enough to hold its shape when piped.
- Prep the olives: While the filling chills, prepare your spider decorations. For each spider, you’ll need one whole black olive for the body and half a green olive (or a slice of black olive) for the eyes. To make the legs, slice the remaining black olives lengthwise into thin strips—you want about 8 legs per spider.
- Fill the egg whites: Transfer the yolk mixture to a piping bag or a zip-top bag with one corner snipped off. Pipe the filling into each egg white half, mounding it slightly. You want a nice, generous amount—don’t skimp!
- Assemble the spiders: Gently press a whole black olive onto the top of each filled egg—this is the spider’s body. Then, carefully arrange 8 black olive strips around the body to create the legs. Finally, place half a green olive (pimento-side down) on top of the black olive for the eyes. Repeat for all 12 eggs.
- Garnish and chill: Lightly sprinkle paprika over the entire platter for a touch of color and flavor. Refrigerate the deviled eggs for at least 30 minutes before serving. This helps the filling set and makes the spiders easier to handle.
Notes
For easier peeling, use older eggs (about a week old). The filling can be made up to 2 days ahead; store separately from egg whites. Assemble just before serving for best presentation. If filling is too runny, add a bit more mashed yolk or a teaspoon of cream cheese.
Nutrition
- Serving Size: 2 deviled eggs
- Calories: 180
- Sugar: 1
- Sodium: 350
- Fat: 14
- Saturated Fat: 3.5
- Carbohydrates: 2
- Protein: 12
Keywords: spider deviled eggs, Halloween appetizer, easy Halloween recipe, kid-friendly Halloween, deviled eggs with olives, spooky deviled eggs


