Love this? Save it for later!
Share the inspiration with your friends
I was standing in the frozen food aisle last Tuesday, staring at a bag of tortilla chips like it held the secrets to the universe, when the smell hit me. It wasn’t the freezer section—it was a ghost smell, a memory scent. Cumin and chili powder and something melty and cheesy, all tangled up with the sound of a football game playing too loud on a tiny TV. And just like that, I was ten years old again, wedged between my uncle Larry and his overstuffed recliner, holding a paper plate piled so high with nachos I could barely see over it. That man had a system—a specific order of layering that he swore by, and he’d talk you through it every single time, whether you asked or not. I honestly didn’t appreciate it back then. I just wanted the chips before they got soggy. But now? Now I’d give anything to hear him grumble about how I was doing it wrong.
So I grabbed the chips, the cheese, the jalapeños—the whole shopping cart gambit—and I went home to figure it out. I mean, recreating a nacho bar that lives up to a memory like that? That’s pressure. Let’s face it, nachos are easy to mess up. Soggy chips, clumpy cheese, cold toppings—it’s a minefield. But I was determined. I wanted that perfect bite: the crunch, the heat, the creamy queso, the salty beef. The kind of nacho that makes you close your eyes for a second, even with a house full of people yelling at the TV.
This is it. The Ultimate Loaded Nacho Bar with Ground Beef and Queso. The one that finally shut up the ghost of my uncle Larry in my head. Maybe you’ve got your own version of that person—the one whose cooking you’re always trying to match. This one’s for them. And for you.
Why You’ll Love This Recipe
Look, I’ve made a lot of nachos in my day. Some were, honestly, a tragedy. Soggy chip disasters. Cheese that seized up into a rubbery mess. But this recipe? This is the one I bring to every game day, every potluck, every “I don’t want to cook but I want to impress people” Tuesday night. It’s built on a few non-negotiable truths I learned the hard way, and it works every single time.
- Quick & Easy: From start to table in about 30 minutes. Seriously. The ground beef cooks up fast, the queso comes together in one pot, and the rest is just assembly. Perfect for when the game starts in half an hour and you forgot to plan anything.
- Simple Ingredients: Nothing fancy here. Ground beef, pantry spices, block cheese (please, no pre-shredded stuff—I’ll explain why later), and your favorite toppings. You probably have most of this already.
- Perfect for a Crowd: This is the ultimate party food. Set out all the toppings and let people build their own plate. It’s interactive, it’s fun, and it means less work for you. Everyone wins.
- Crowd-Pleaser: I have never, and I mean never, seen a plate of these come back with anything but crumbs. Kids love it. Adults love it. That one friend who’s “not really into Mexican food” loves it.
- Unbelievably Delicious: The key is the queso. We’re not using canned stuff or that weird processed cheese log. We’re making a real, velvety, pour-over-everything queso that clings to every chip. It’s a game-changer.
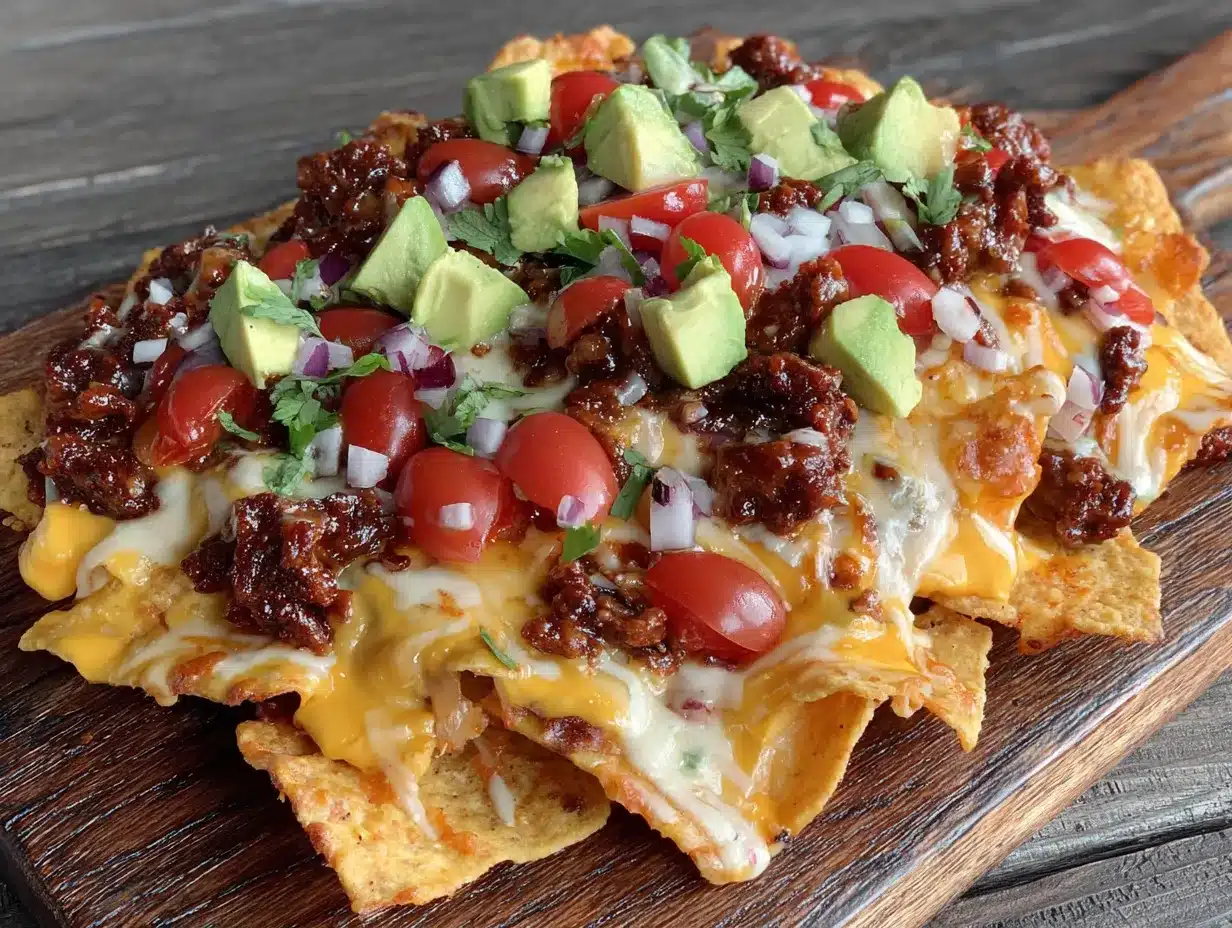
This isn’t just another nacho recipe. It’s the one where the beef is perfectly seasoned, the queso is smooth and never grainy, and the chips stay crunchy because we layer with intention. It’s the kind of dish that makes people hover around the kitchen island, picking at the toppings before you even say it’s ready. And honestly? That’s the best compliment a cook can get.
What Ingredients You Will Need
This recipe uses simple, wholesome ingredients to deliver big, bold flavor. The magic is in the technique and the quality of a few key items. Don’t skip the block cheese—it’s the single most important thing for a silky, non-grainy queso.
For the Seasoned Ground Beef
- 1 lb (450g) ground beef (80/20 is my go-to—enough fat for flavor, not so much that it’s greasy)
- 1 tablespoon (15ml) olive oil
- 1/2 medium yellow onion, finely diced (about 1/2 cup)
- 3 cloves garlic, minced (don’t use the jarred stuff, fresh is worth it here)
- 1 tablespoon (8g) chili powder
- 1 teaspoon (2g) ground cumin
- 1/2 teaspoon (1g) smoked paprika (adds a subtle smokiness that’s incredible)
- 1/2 teaspoon (1g) dried oregano
- 1/2 teaspoon (3g) salt
- 1/4 teaspoon (0.5g) black pepper
- 1/4 cup (60ml) beef broth or water (keeps the meat juicy and helps the spices meld)
For the Ultimate Queso
- 1 tablespoon (14g) unsalted butter
- 1 tablespoon (8g) all-purpose flour (this helps stabilize the cheese sauce)
- 1 cup (240ml) whole milk (don’t use skim, it won’t be as creamy)
- 8 oz (225g) block sharp cheddar cheese, freshly grated (I like Tillamook or Cabot for best melt)
- 4 oz (115g) block Monterey Jack cheese, freshly grated (for that extra stretchy texture)
- 1 (4 oz / 115g) can diced green chiles, drained
- 1/4 teaspoon (0.5g) cayenne pepper (optional, for a little kick)
- Pinch of salt
For the Nacho Bar
- 1 large (13-16 oz / 370-450g) bag of sturdy tortilla chips (look for “restaurant style” or “thick cut”—they hold up better)
- 1 (15 oz / 425g) can black beans, drained and rinsed
- 1 cup (150g) fresh or frozen corn kernels (if using frozen, thaw and pat dry)
- 1 cup (240ml) sour cream
- 1 cup (240ml) pico de gallo or salsa fresca
- 1 large avocado, diced, or 1 cup guacamole
- 1/2 cup (60g) pickled jalapeños
- 1/4 cup (15g) fresh cilantro, chopped
- 1 lime, cut into wedges
Equipment Needed
You don’t need a ton of fancy gear for this, which is part of the beauty. Here’s what I use:
- A large skillet or frying pan (12-inch is ideal) for browning the beef. Cast iron works great if you have it.
- A medium saucepan for the queso. A heavy-bottomed one helps prevent scorching.
- A box grater. I know, it’s an extra step, but please grate your own cheese. The pre-shredded stuff has anti-caking agents that ruin the texture of queso. Trust me on this one.
- A wooden spoon or silicone spatula for stirring the queso. Don’t use a whisk—you want to be gentle.
- A large sheet pan or a couple of oven-safe plates for building the nachos. If you’re serving a crowd, a disposable aluminum half-sheet pan is actually perfect.
- Small bowls and ramekins for setting up the topping bar. I use whatever mismatched ones I have—it adds to the vibe.
Budget-friendly tip: If you don’t have a grater, look for blocks of cheese at the store and ask the deli counter to shred it for you. Most will do it for free. Just make sure you use it the same day.
Preparation Method
Alright, let’s get cooking. I’ll walk you through this step-by-step, with all the little tricks I’ve picked up along the way.
- Start the beef. Heat the olive oil in your large skillet over medium-high heat. Add the diced onion and cook for 3-4 minutes, until it’s soft and translucent. Add the minced garlic and cook for another 30 seconds—just until it smells amazing. Don’t let it burn, or it’ll get bitter.
- Brown the beef. Add the ground beef to the pan. Break it up with a wooden spoon and let it cook, undisturbed, for about 3 minutes. This gives you a nice sear. Then start breaking it into smaller pieces. Cook for another 4-5 minutes, until it’s fully browned and no longer pink. If there’s a lot of excess fat, spoon most of it out, leaving about 1 tablespoon in the pan for flavor.
- Season the meat. Sprinkle the chili powder, cumin, smoked paprika, oregano, salt, and pepper over the beef. Stir to coat everything evenly. Cook for 1 minute to toast the spices—this wakes up their flavor. Then pour in the beef broth (or water) and scrape up any browned bits from the bottom of the pan. Let it simmer for 2-3 minutes, until the liquid is mostly absorbed. The meat should be juicy, not dry. Set it aside and keep it warm.
- Make the queso. While the beef is resting, start the cheese sauce. In your medium saucepan, melt the butter over medium heat. Whisk in the flour and cook for 1 minute, stirring constantly. This is called a roux, and it’s the secret to a smooth, stable queso that won’t separate.
- Add the milk. Slowly pour in the milk while whisking continuously. Keep whisking until the mixture thickens slightly, about 2-3 minutes. It should coat the back of a spoon. Don’t walk away—it can burn quickly.
- Melt the cheese. Reduce the heat to low. Add the shredded cheddar and Monterey Jack cheese one handful at a time, stirring gently after each addition until completely melted. This is where patience pays off. If you dump it all in at once, you’ll get a clumpy mess. Stir in the drained green chiles and cayenne pepper (if using). Taste and add a pinch of salt if needed. Keep the queso warm on the lowest heat, stirring occasionally.
- Prep the toppings. While the queso is coming together, get all your other toppings ready. Rinse the black beans. If using fresh corn, you can char it in a dry skillet for a few minutes for extra flavor—just let it get a little blackened. Dice the avocado or make your guacamole. Chop the cilantro. Cut the lime into wedges. Put everything into little bowls for your nacho bar.
- Build the base layer. Spread a single layer of tortilla chips on your large sheet pan. Don’t pile them too high—you want each chip to get some love. Spoon about half of the seasoned beef over the chips. Drizzle about half of the queso over the beef. Sprinkle on half of the black beans and half of the corn.
- Add the second layer. Repeat with another layer of chips, the remaining beef, the remaining queso, and the remaining beans and corn. This double-layer method ensures every chip has something on it, not just the ones on top. It’s the difference between okay nachos and unforgettable ones.
- Finish and serve. If you want the toppings a little warm, pop the whole sheet pan in a 350°F (175°C) oven for 5 minutes. Just 5 minutes—any longer and the chips might start to soften. Then pull it out and add the cold toppings: sour cream, pico de gallo, diced avocado or guacamole, pickled jalapeños, and fresh cilantro. Squeeze a lime wedge over the whole thing. Serve immediately, right off the sheet pan.
Cooking Tips & Techniques
I’ve made every mistake in the book with nachos, so you don’t have to. Here are the biggest lessons I’ve learned:
The biggest mistake is using pre-shredded cheese. I know, I know, it’s convenient. But that stuff is coated in cellulose and potato starch to prevent clumping, which means it doesn’t melt smoothly. For queso, you need freshly grated cheese from a block. It melts into a silky, cohesive sauce instead of a gritty, greasy mess. I learned this the hard way when I tried to take a shortcut for a Super Bowl party. Never again.
Don’t over-bake the assembled nachos. If you decide to heat the whole tray, keep it to 5 minutes max at 350°F (175°C). Any longer and the chips start absorbing moisture from the queso and beef, turning into sad, chewy bits. You want the chips to stay crunchy. If you’re worried about cold toppings, just warm the beef and queso separately before layering.
Toast your spices. That one minute you spend cooking the chili powder and cumin in the pan with the beef? That’s not wasted time. Toasting spices releases their essential oils and deepens their flavor dramatically. It’s the difference between a flat, one-note seasoning and a complex, layered one.
Multitask like a pro. While the beef is browning, grate your cheese. While the queso is coming together, prep your cold toppings. The whole recipe moves fast, so having everything ready to go before you start cooking makes it stress-free. I call it “mise en place” to make myself feel fancy, but really it’s just about not burning dinner.
Variations & Adaptations
This nacho bar is endlessly customizable, which is why I love it for parties. Here are some ways to switch it up:
- Make it vegetarian: Skip the ground beef and double up on the black beans and corn. You can also add sautéed bell peppers and onions, or use a plant-based ground meat substitute. Cook it the same way with the same spices—it works great.
- Go for a chicken version: Swap the ground beef for shredded rotisserie chicken. Just toss the shredded chicken with the same spice blend and a little chicken broth to keep it moist. It’s a lighter option that still feels indulgent.
- Spice it up: If you like things hot, add a diced jalapeño to the beef while it cooks, or stir a tablespoon of chipotle peppers in adobo sauce into the queso. The smoky heat is incredible.
- Try a different cheese blend: I’ve made this with pepper jack instead of Monterey Jack for extra kick, and I’ve also used a sharp white cheddar for a different flavor profile. As long as you’re using block cheese and grating it yourself, you can experiment.
- Make it a meal prep situation: Cook the beef and make the queso separately. Store them in the fridge for up to 4 days. When you’re ready, just reheat the beef in a skillet, reheat the queso gently on the stove (add a splash of milk if it’s too thick), and assemble fresh chips. It’s a great weeknight hack.
One of my favorite variations came from a neighbor who added a layer of refried beans under the chips before building the nachos. It adds a creamy, savory base that’s totally unexpected. I tried it once and now I do it half the time. Don’t be afraid to experiment—that’s how the best recipes are born.
Serving & Storage Suggestions
This recipe is designed to be served immediately, right after assembly. That’s when the chips are crunchiest and the queso is at its most luscious. I like to put the whole sheet pan in the center of the table with all the cold toppings in little bowls around it. Everyone can grab a plate and scoop up their own perfect bite. It’s casual, it’s fun, and it makes people happy.
For drinks, you can’t go wrong with a cold Mexican lager like Modelo or Corona. A margarita on the rocks is also a natural pairing. For a non-alcoholic option, horchata or a limeade with a little sparkle works beautifully.
Storage is a little tricky with nachos because of the chips. Leftovers are never as good as fresh, but if you have leftover beef and queso, store them separately in airtight containers in the fridge. The beef will keep for 3-4 days, and the queso for about 5 days. To reheat the queso, put it in a saucepan over low heat and add a tablespoon of milk at a time, whisking until it’s smooth again. Don’t microwave it—it’ll seize up.
The chips themselves don’t store well once they’re layered, so if you have leftover assembled nachos, the best bet is to pick the toppings off and enjoy them on a salad or in a burrito bowl. Honestly, that’s not a bad problem to have.
Nutritional Information & Benefits
Let’s be real: this is not a health food. But it’s made with real ingredients, and that counts for something. Here’s a rough estimate per serving (about 1/6 of the recipe):
- Calories: ~520
- Protein: 28g
- Fat: 32g
- Carbohydrates: 35g
- Fiber: 6g
- Sugar: 6g
The beef provides a solid dose of protein and iron, while the black beans and corn add fiber and a little bit of plant-based goodness. The avocado gives you healthy monounsaturated fats. And honestly, the act of making this yourself—using real cheese, fresh vegetables, and spices instead of a packet—means you’re in control of what goes into your body. That’s a win in my book.
If you’re watching your sodium, you can use low-sodium broth and no-salt-added canned beans. You can also cut back on the salt in the beef seasoning and let the toppings bring the flavor. But for a special occasion? Just enjoy it.
Conclusion
This Ultimate Loaded Nacho Bar with Ground Beef and Queso isn’t just a recipe—it’s an experience. It’s the thing you make when you want to feed people well, without spending all day in the kitchen. It’s the dish that turns a regular Tuesday into a little celebration. And honestly, it’s the kind of food that makes you feel like you’re wrapped in a warm blanket, even if the game isn’t going your way.
I hope you make this your own. Add your favorite toppings, swap in what you have, and don’t stress about perfection. The whole point is to gather around the table (or the coffee table) and share something delicious. That’s what my uncle Larry would have wanted, anyway.
When you make it—and I know you will—come back and tell me how it went. Did you add something crazy? Did your family fight over the last chip? I want to hear it all. Drop a comment below, share your photo, and tag me. Let’s keep this nacho conversation going.
Now go make some nachos. You deserve them.
Frequently Asked Questions
Can I use pre-shredded cheese for the queso?
I really don’t recommend it. Pre-shredded cheese has anti-caking agents that prevent it from melting smoothly, so your queso will end up grainy and clumpy. It takes just a few minutes to grate a block of cheese, and the texture difference is night and day.
How do I keep the chips from getting soggy?
Two things: use thick, sturdy tortilla chips, and don’t over-bake the assembled nachos. If you’re heating them, limit it to 5 minutes at 350°F (175°C). Also, layering the toppings instead of dumping them all on top helps distribute the moisture more evenly.
Can I make the queso ahead of time?
Yes! Make the queso up to 3 days in advance and store it in the fridge. Reheat it gently on the stovetop over low heat, adding a splash of milk if it’s too thick. Whisk until smooth. Don’t use the microwave—it can cause the cheese to separate.
What are the best chips for a loaded nacho bar?
Look for “restaurant style” or “thick cut” tortilla chips. They’re sturdier and can hold up to all the toppings without breaking. Avoid thin, delicate chips—they’ll crumble under the weight of the beef and queso.
Can I make this in a slow cooker?
You can keep the queso warm in a slow cooker on the “warm” setting for serving, but I wouldn’t recommend cooking the queso from scratch in a slow cooker—it won’t get hot enough to melt the cheese properly. Cook the beef on the stovetop and the queso on the stovetop, then transfer the queso to a slow cooker to keep it warm for a party.
Pin This Recipe!
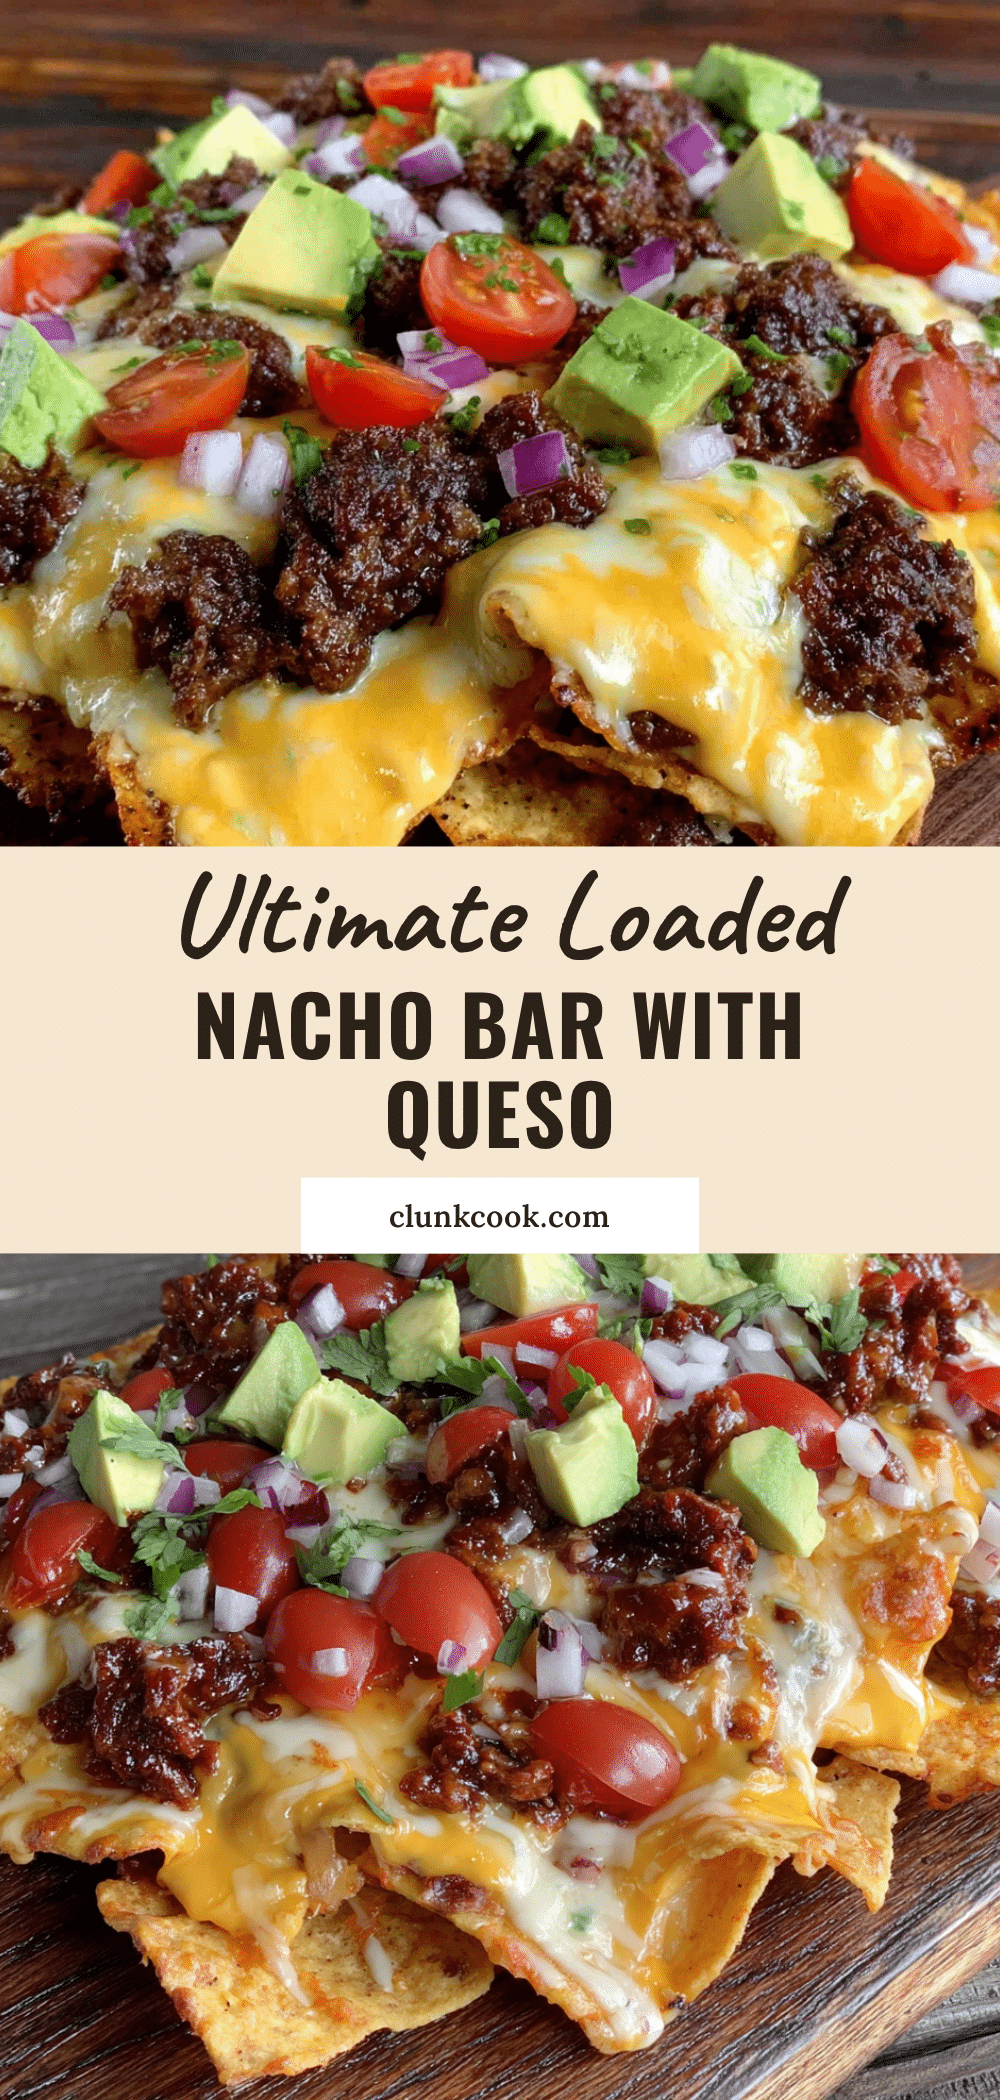
Ultimate Loaded Nacho Bar with Ground Beef & Queso
A crowd-pleasing nacho bar featuring perfectly seasoned ground beef, velvety homemade queso, and a variety of fresh toppings. Ready in about 30 minutes, this is the ultimate party food that keeps chips crunchy and everyone happy.
- Prep Time: 15 minutes
- Cook Time: 15 minutes
- Total Time: 30 minutes
- Yield: 6 servings 1x
- Category: Main Course
- Cuisine: Mexican
Ingredients
- 1 lb (450g) ground beef (80/20)
- 1 tablespoon (15ml) olive oil
- 1/2 medium yellow onion, finely diced (about 1/2 cup)
- 3 cloves garlic, minced
- 1 tablespoon (8g) chili powder
- 1 teaspoon (2g) ground cumin
- 1/2 teaspoon (1g) smoked paprika
- 1/2 teaspoon (1g) dried oregano
- 1/2 teaspoon (3g) salt
- 1/4 teaspoon (0.5g) black pepper
- 1/4 cup (60ml) beef broth or water
- 1 tablespoon (14g) unsalted butter
- 1 tablespoon (8g) all-purpose flour
- 1 cup (240ml) whole milk
- 8 oz (225g) block sharp cheddar cheese, freshly grated
- 4 oz (115g) block Monterey Jack cheese, freshly grated
- 1 (4 oz / 115g) can diced green chiles, drained
- 1/4 teaspoon (0.5g) cayenne pepper (optional)
- Pinch of salt
- 1 large (13-16 oz / 370-450g) bag sturdy tortilla chips (restaurant style or thick cut)
- 1 (15 oz / 425g) can black beans, drained and rinsed
- 1 cup (150g) fresh or frozen corn kernels (thawed and patted dry if frozen)
- 1 cup (240ml) sour cream
- 1 cup (240ml) pico de gallo or salsa fresca
- 1 large avocado, diced, or 1 cup guacamole
- 1/2 cup (60g) pickled jalapeños
- 1/4 cup (15g) fresh cilantro, chopped
- 1 lime, cut into wedges
Instructions
- Heat olive oil in a large skillet over medium-high heat. Add diced onion and cook for 3-4 minutes until soft and translucent. Add minced garlic and cook for 30 seconds until fragrant.
- Add ground beef to the pan. Break it up with a wooden spoon and let cook undisturbed for 3 minutes to sear. Then break into smaller pieces and cook for another 4-5 minutes until fully browned. Spoon out excess fat, leaving about 1 tablespoon.
- Sprinkle chili powder, cumin, smoked paprika, oregano, salt, and pepper over the beef. Stir to coat and cook for 1 minute to toast spices. Pour in beef broth (or water), scrape up browned bits, and simmer for 2-3 minutes until liquid is mostly absorbed. Keep warm.
- In a medium saucepan, melt butter over medium heat. Whisk in flour and cook for 1 minute, stirring constantly (roux).
- Slowly pour in milk while whisking continuously. Cook for 2-3 minutes until mixture thickens slightly and coats the back of a spoon.
- Reduce heat to low. Add shredded cheddar and Monterey Jack cheese one handful at a time, stirring gently after each addition until completely melted. Stir in drained green chiles and cayenne pepper (if using). Add a pinch of salt if needed. Keep warm on lowest heat.
- Prepare all other toppings: rinse black beans, char corn if desired, dice avocado, chop cilantro, cut lime wedges. Place in small bowls.
- Spread a single layer of tortilla chips on a large sheet pan. Spoon half of the seasoned beef over chips. Drizzle half of the queso. Sprinkle half of the black beans and half of the corn.
- Repeat with another layer of chips, remaining beef, remaining queso, and remaining beans and corn.
- If desired, bake at 350°F (175°C) for 5 minutes to warm toppings. Remove from oven and add cold toppings: sour cream, pico de gallo, avocado or guacamole, pickled jalapeños, and fresh cilantro. Squeeze lime wedges over the top. Serve immediately.
Notes
Use block cheese and grate it yourself for a smooth queso. Do not over-bake assembled nachos (max 5 minutes at 350°F) to keep chips crunchy. Toast spices for deeper flavor. Prep all ingredients before starting (mise en place).
Nutrition
- Serving Size: 1/6 of recipe
- Calories: 520
- Sugar: 6
- Sodium: 800
- Fat: 32
- Saturated Fat: 12
- Carbohydrates: 35
- Fiber: 6
- Protein: 28
Keywords: nachos, loaded nachos, ground beef nachos, queso, game day food, party appetizer, Mexican, easy dinner


