Love this? Save it for later!
Share the inspiration with your friends
“I wasn’t expecting my morning hike to turn into a sticky, sweet mess, but there I was, balancing a cracked cooler on my lap with melted marshmallows and chocolate smeared everywhere,” I chuckle as I think back to that weekend. It all started on a bright Saturday at Pine Ridge Campground — a spot where the trees are tall, the air smells like pine, and the campfire glow feels like a warm hug. My friend Jenna had promised to bring the classic s’mores, but she forgot the skewers. So, we improvised. Instead of holding marshmallows over the fire on sticks, we layered everything into a pan and baked it, hoping for the same gooey magic. Honestly, it turned out better than any campfire s’more I’ve ever had.
That unexpected twist led to what I now call my Easy Gooey Summer Camp S’mores Bars Recipe. It’s the kind of treat that’s perfect for camping trips, backyard bonfires, or even a lazy weekend when you want comfort food without the fuss. I mean, who has time to babysit a campfire every time they crave a s’more? Plus, this bar version means no sticky fingers or marshmallow burns (well, fewer of those anyway).
Maybe you’ve been there — craving that perfect s’mores fix but stuck inside or missing the campfire vibe. This recipe brings that cozy, nostalgic flavor straight to your kitchen with a simple, straightforward method. I still remember the smell wafting from the oven that day, the chocolate melting just right, and the marshmallows puffing up like little clouds. It was a bit messy, a bit chaotic (the dog nearly got a bite), but it was definitely unforgettable.
Since that first batch, this recipe has become my go-to for sharing with friends who want that classic summer camp taste without the campfire hassle. It’s easy to make, uses ingredients you likely have on hand, and honestly, it’s just plain fun to eat. Let me tell you, it’s the kind of treat that makes you close your eyes after the first bite — pure nostalgia with a modern twist. So, grab your favorite pan and get ready to bake some gooey happiness!
Why You’ll Love This Recipe
This Easy Gooey Summer Camp S’mores Bars Recipe is one of those rare treats that satisfies a serious sweet tooth without requiring a campfire or complicated prep. I’ve tested this recipe across dozens of camping trips and cozy weekends — it’s always a hit, no matter the setting.
- Quick & Easy: Ready in under 30 minutes, it’s perfect when you want a fast dessert with minimal cleanup.
- Simple Ingredients: No need for fancy stores; classic marshmallows, graham crackers, chocolate chips, and butter are all you need.
- Perfect for Camping Treats: Makes a great shareable snack around the campfire or even for picnics and backyard hangouts.
- Crowd-Pleaser: Kids and adults alike can’t get enough — the gooey texture and melty chocolate combo is irresistible.
- Unbelievably Delicious: The crust is buttery and crunchy, the marshmallows are perfectly toasted, and the melted chocolate pulls it all together.
What sets this recipe apart? It’s the way the marshmallows bake into the bars — they don’t just melt; they puff and create little pockets of softness that contrast beautifully with the crispy graham cracker base. I also like to use a mix of semi-sweet and milk chocolate chips for a balanced flavor that isn’t too bitter or too sweet. Plus, the bars hold together nicely, making them easy to pack for an outdoor adventure or to share with friends without the mess of traditional s’mores.
Honestly, this recipe isn’t just a dessert; it’s a shortcut to that cozy campfire feeling, no matter where you are. Whether you’re a seasoned camper or just craving some nostalgic sweetness, these bars bring it all home.
What Ingredients You Will Need
This recipe uses simple, wholesome ingredients to deliver bold flavor and that classic gooey texture without any fuss. Most of these are pantry staples, and if you’re missing something, I’ve included easy substitutions to keep your s’mores bars just right.
- Graham cracker crumbs – about 2 cups (240g), finely crushed; forms the buttery, crunchy base. I like Honey Maid for consistent texture.
- Unsalted butter – 6 tbsp (85g), melted; adds richness and helps bind the crust.
- Brown sugar – 1/4 cup (50g); gives a slight caramel note and helps with crispiness.
- Mini marshmallows – 2 cups (about 120g); these puff up beautifully in the oven. If you can’t find mini, chop regular marshmallows into smaller pieces.
- Chocolate chips – 1 1/2 cups (270g); I recommend a mix of semi-sweet and milk for depth of flavor.
- Vanilla extract – 1 tsp; adds warmth and rounds out the sweetness.
- Salt – a pinch; balances the sweetness and enhances flavor.
Optional:
- Chopped nuts (like toasted pecans or walnuts) – 1/2 cup (60g) for crunch and texture.
- Cocoa powder – 2 tbsp (15g) to mix into the crust for a chocolate twist.
You can swap almond flour for the graham cracker crumbs if you want a gluten-free version (just add a little extra butter to help bind). For a dairy-free twist, use coconut oil instead of butter and dairy-free chocolate chips — it still tastes great and melts nicely.
Equipment Needed
- 8×8-inch (20×20 cm) baking pan: This size works best for even baking and perfect bar thickness. I’ve tried smaller pans, but the bars get too thick and don’t bake as evenly.
- Mixing bowls: One large for combining the crust ingredients, and a smaller one for the marshmallow and chocolate topping.
- Spatula or wooden spoon: For mixing and pressing down the crust evenly.
- Measuring cups and spoons: Accuracy helps with the perfect texture.
- Non-stick spray or parchment paper: For lining the pan to prevent sticking — parchment makes cleanup a breeze.
If you don’t have an 8×8 pan, a 9×9 or 9×13 can work; just watch the baking time and adjust accordingly. Personally, I like using a glass baking pan because it heats evenly and lets me see the golden crust forming underneath. Just remember to grease it well or use parchment.
Preparation Method
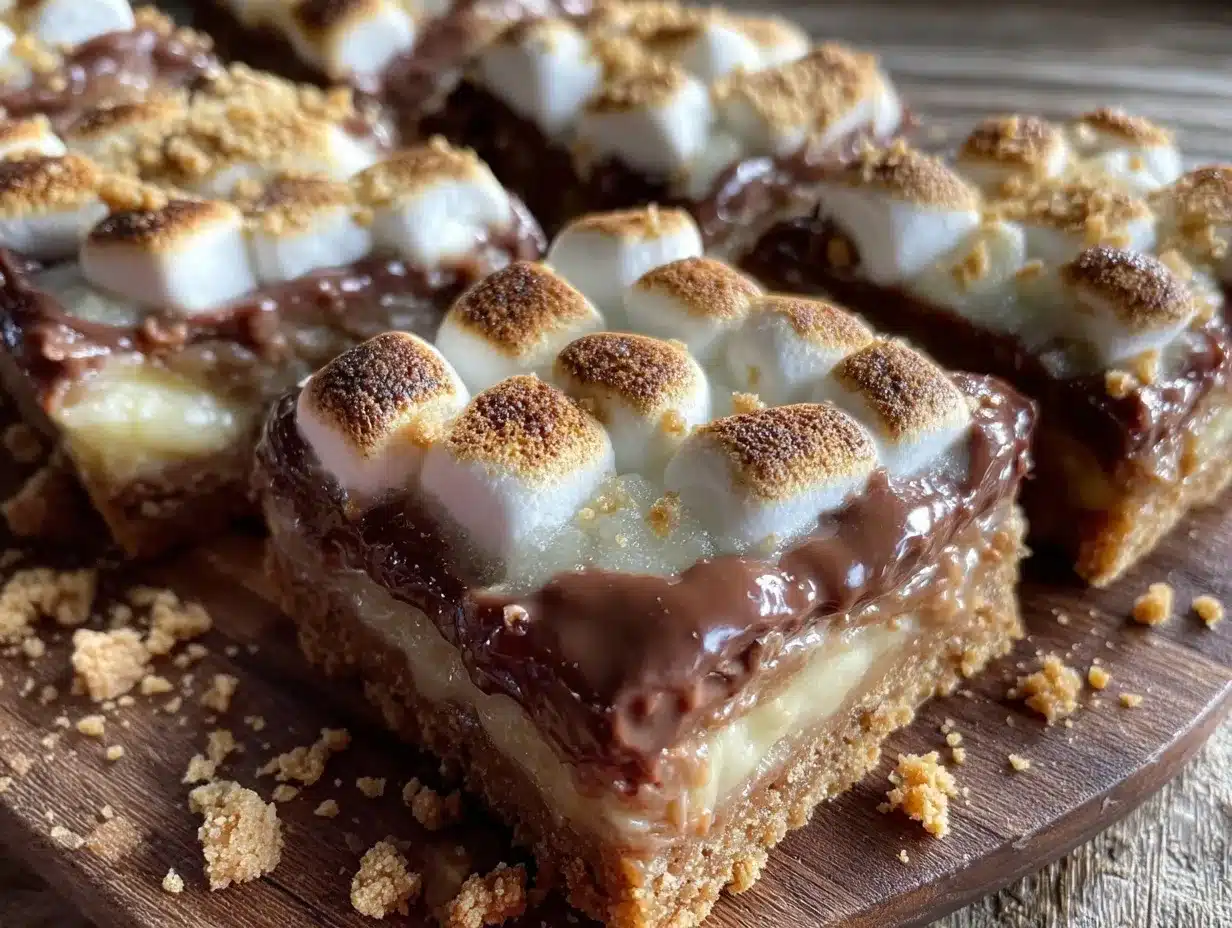
- Preheat your oven to 350°F (175°C). This ensures the oven is hot and ready so the crust bakes crisp while the marshmallows melt perfectly.
- Prepare the crust: In a large bowl, combine 2 cups (240g) graham cracker crumbs, 6 tbsp (85g) melted unsalted butter, 1/4 cup (50g) brown sugar, a pinch of salt, and 1 tsp vanilla extract. Stir until the mixture looks like wet sand with no dry patches.
- Press the crust: Line your 8×8-inch pan with parchment paper, leaving an overhang for easy removal later. Press the graham cracker mixture firmly and evenly into the bottom using the back of a spoon or your fingers. A compact crust is key to bars that hold together well.
- Bake the crust for 8-10 minutes. Look for a golden-brown color and a toasty aroma. Don’t overbake or it will dry out the bars.
- Add the toppings: While the crust is baking, mix 2 cups (120g) mini marshmallows with 1 1/2 cups (270g) chocolate chips (and nuts if using). Once the crust is out of the oven, immediately sprinkle this mixture evenly over the hot crust.
- Return to the oven for 5-7 minutes. Watch closely; the marshmallows should puff up and get lightly golden, while the chocolate softens but doesn’t fully melt. If you want gooier chocolate, give it an extra minute but be careful not to burn the marshmallows.
- Cool completely in the pan. This is crucial — the bars firm up as they cool, making them easier to cut. I usually let mine sit for at least 30 minutes at room temperature.
- Cut into 12 bars. Use a sharp knife warmed under hot water and wiped dry for clean edges. Serve and enjoy!
Pro tip: If your marshmallows aren’t browning enough, you can pop the bars under a broiler for 10-15 seconds, but watch like a hawk to avoid burning. Also, pressing the crust firmly before baking really helps avoid crumbly bars.
Cooking Tips & Techniques
Let me share a few tricks I’ve learned from making these bars over and over:
- Perfect crust texture: Don’t skip melting the butter — it helps bind the graham crumbs and sugar so the crust isn’t dry or crumbly. Press it down firmly to avoid a sandy base.
- Marshmallow magic: Using mini marshmallows means they puff up and melt evenly. Regular-sized ones can be chopped up, but the texture won’t be quite the same.
- Chocolate balance: Mixing semi-sweet and milk chocolate chips keeps the flavor rich but not overly sweet. Too much milk chocolate can overwhelm, and all semi-sweet might be a bit bitter.
- Watch your oven: Oven temperatures vary, so keep an eye on the marshmallows in the last minutes. They go from perfect to burnt fast.
- Cutting clean bars: Warm your knife in hot water before slicing to get smooth edges without dragging melted chocolate and marshmallow.
- Multitasking tip: While the crust bakes, prep your marshmallow and chocolate mix to save time and keep things moving smoothly.
I once burned a batch because I got distracted answering the doorbell — lesson learned! These bars deserve your full attention in those last few minutes of baking.
Variations & Adaptations
This recipe is flexible and welcomes your creativity. Here are some tasty tweaks I’ve tried and recommend:
- Peanut butter swirl: Drop spoonfuls of peanut butter over the marshmallow layer before baking for a nutty surprise.
- Berry boost: Add fresh or frozen raspberries or chopped strawberries on top before baking for a fruity twist that cuts the sweetness.
- Gluten-free option: Use almond or oat flour mixed with a bit of gluten-free graham cracker crumbs for the base, plus a little extra butter to bind.
- Dairy-free swap: Coconut oil instead of butter, dairy-free chocolate chips, and vegan marshmallows make this suitable for dairy-sensitive eaters.
- Salted caramel: Drizzle salted caramel sauce over the bars after baking for a decadent finish.
I personally love the peanut butter version — it adds a creamy, salty contrast that’s downright addictive. Feel free to mix and match to suit your taste buds or what you have on hand.
Serving & Storage Suggestions
These Easy Gooey Summer Camp S’mores Bars are best served at room temperature when the marshmallows are soft but the bars have set enough to hold their shape.
Try pairing them with a cold glass of milk or a cozy cup of hot chocolate — perfect for chilly evenings or post-hike treats. They also go well with fresh fruit or a scoop of vanilla ice cream for an extra indulgence.
To store, keep the bars in an airtight container at room temperature for up to 2 days. For longer storage, refrigerate for up to a week — just bring them back to room temperature before serving to soften the marshmallows.
You can freeze the bars, too! Wrap individual bars tightly in plastic wrap and freeze in a sealed bag for up to 3 months. Thaw overnight in the fridge and warm briefly in the microwave if you want that fresh-from-the-oven gooeyness again.
Fun fact: the flavors meld beautifully overnight, so if you can wait, the next day’s bars taste even better with all that chocolate and marshmallow melding together.
Nutritional Information & Benefits
Each bar contains approximately:
| Nutrient | Per Serving (1 bar) |
|---|---|
| Calories | 220 kcal |
| Fat | 12g |
| Saturated Fat | 7g |
| Carbohydrates | 26g |
| Sugars | 18g |
| Protein | 2g |
While these bars are definitely a treat, they do include some wholesome ingredients like graham cracker crumbs that provide a bit of fiber. Using dark or semi-sweet chocolate boosts antioxidants compared to milk chocolate alone. The recipe can be adapted to be gluten-free or dairy-free, making it accessible for different dietary needs.
Just a heads-up: these bars contain gluten, dairy, and marshmallows (which often have gelatin), so they aren’t suitable for strict vegan or gelatin-free diets unless you use specialty products. But honestly, for an occasional camping treat, they’re a fun way to bring a little joy and nostalgia with some simple ingredients.
Conclusion
This Easy Gooey Summer Camp S’mores Bars Recipe is one of those rare desserts that feels both nostalgic and effortless. It’s got that perfect balance of crunchy, gooey, and melty that makes you smile with every bite. Whether you’re sharing around a campfire, feeding a crowd at a picnic, or just craving something sweet and comforting, these bars have your back.
I love this recipe because it’s forgiving, fun to make, and always gets rave reviews — even from my most skeptical friends. Plus, it brings a little bit of that summer camp magic into my kitchen any time of year.
Give it a try, make it your own with the variations, and don’t forget to drop a comment below telling me how your batch turned out. Sharing your tweaks or favorite moments always makes my day! Happy baking and happy camping treats!
FAQs about Easy Gooey Summer Camp S’mores Bars
Can I make these bars ahead of time?
Yes! They store well at room temperature for a couple of days and even taste better the next day after the flavors meld. Just keep them in an airtight container.
Can I use jumbo marshmallows instead of mini ones?
You can, but I recommend chopping jumbo marshmallows into smaller pieces so they melt and puff evenly without making the bars too gooey or uneven.
How do I prevent the marshmallows from burning?
Keep a close eye on the bars during the last minutes of baking, especially if your oven runs hot. You can also finish with a quick broil for 10-15 seconds, but watch carefully.
Are these bars gluten-free?
Not as written, but you can substitute almond flour or gluten-free graham cracker crumbs to make a gluten-free version.
Can I make these bars vegan?
Yes, by using dairy-free butter or coconut oil, vegan chocolate chips, and vegan marshmallows, you can enjoy a vegan-friendly version of these bars.
For more easy dessert ideas with a nostalgic twist, you might enjoy my Classic Peanut Butter Bars or the rich and creamy No-Bake Chocolate Cheesecake.
Pin This Recipe!
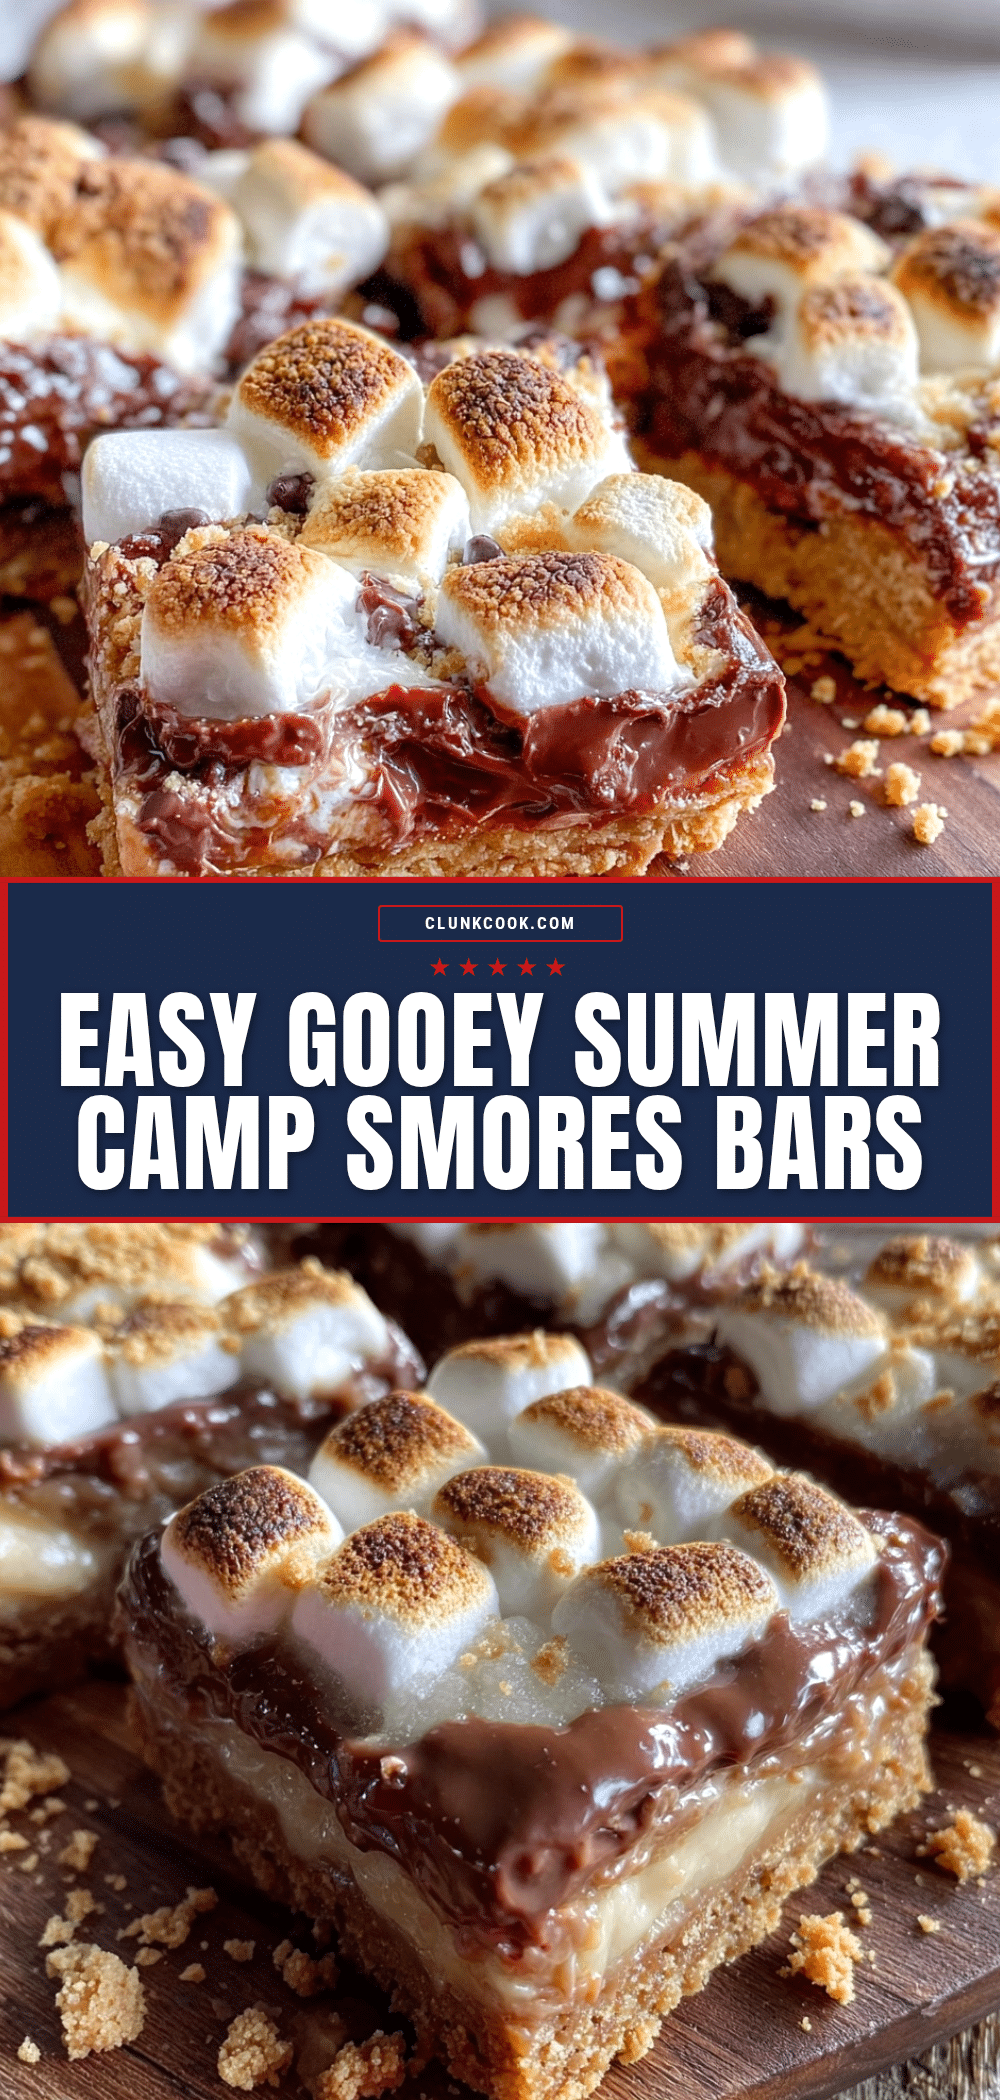
Easy Gooey Summer Camp S’mores Bars
A quick and easy s’mores bar recipe that delivers the classic gooey, melty campfire treat without the need for a campfire. Perfect for camping trips, backyard bonfires, or cozy weekends.
- Prep Time: 10 minutes
- Cook Time: 15 minutes
- Total Time: 25 minutes
- Yield: 12 bars 1x
- Category: Dessert
- Cuisine: American
Ingredients
- 2 cups (240g) graham cracker crumbs
- 6 tbsp (85g) unsalted butter, melted
- 1/4 cup (50g) brown sugar
- A pinch of salt
- 1 tsp vanilla extract
- 2 cups (120g) mini marshmallows
- 1 1/2 cups (270g) chocolate chips (mix of semi-sweet and milk chocolate recommended)
- Optional: 1/2 cup (60g) chopped nuts (toasted pecans or walnuts)
- Optional: 2 tbsp (15g) cocoa powder
Instructions
- Preheat your oven to 350°F (175°C).
- In a large bowl, combine graham cracker crumbs, melted butter, brown sugar, salt, and vanilla extract. Stir until the mixture resembles wet sand with no dry patches.
- Line an 8×8-inch baking pan with parchment paper, leaving an overhang for easy removal. Press the graham cracker mixture firmly and evenly into the bottom of the pan.
- Bake the crust for 8-10 minutes until golden brown and toasty.
- While the crust bakes, mix mini marshmallows with chocolate chips (and nuts if using).
- Remove the crust from the oven and immediately sprinkle the marshmallow and chocolate mixture evenly over the hot crust.
- Return the pan to the oven and bake for 5-7 minutes until marshmallows puff up and get lightly golden and chocolate softens but does not fully melt. For gooier chocolate, bake an extra minute but watch carefully.
- Cool completely in the pan for at least 30 minutes to allow bars to firm up.
- Cut into 12 bars using a sharp knife warmed under hot water and dried for clean edges.
- Serve and enjoy.
Notes
Press the crust firmly before baking to avoid crumbly bars. Use mini marshmallows for best puffing and melting. Watch the marshmallows closely in the last minutes to prevent burning. Warm your knife before cutting for clean edges. Variations include peanut butter swirl, berry topping, gluten-free and dairy-free substitutions.
Nutrition
- Serving Size: 1 bar
- Calories: 220
- Sugar: 18
- Fat: 12
- Saturated Fat: 7
- Carbohydrates: 26
- Protein: 2
Keywords: s'mores bars, camping treats, easy dessert, gooey bars, chocolate marshmallow bars, summer dessert, campfire dessert


