Love this? Save it for later!
Share the inspiration with your friends
I wasn’t expecting to find my new favorite snack recipe while getting my car’s oil changed. But there I was, sitting in the waiting room of a small garage on a rainy Tuesday, flipping through a worn-out magazine from 2019, when the mechanic—a guy named Dave with grease stains on his coveralls—walked over and pointed at the page. “That recipe there,” he said, “my wife makes those every Sunday. Changed our whole snacking game.” He wasn’t kidding. That scribbled-down version of what I now call my Easy No-Bake Peanut Butter Energy Bites became a staple in my kitchen within a week. Honestly, I almost didn’t take him seriously. I mean, the guy fixes transmissions for a living, not exactly a culinary expert, right? But something about how he described the texture—”like a chewy little hug”—made me grab a pen from the receptionist’s desk.
I jotted down his wife’s adjustments on a napkin, and let me tell you, that napkin is still tucked into my recipe box. The first batch I made was a bit of a mess. I used crunchy peanut butter instead of creamy, and the bites wouldn’t hold together. They crumbled all over my kitchen counter, and I spent ten minutes picking oat pieces out of the floor cracks. But the flavor? Absolutely perfect. That salty-sweet combination with the hint of honey and the pop of chocolate chips was exactly what I needed for those mid-afternoon energy slumps. Maybe you’ve been there—staring into the pantry, wanting something quick but not wanting to turn on the oven? These Easy No-Bake Peanut Butter Energy Bites are the answer you didn’t know you were looking for.
The thing that stuck with me about Dave’s recommendation was how simple he made it sound. No fancy equipment, no obscure ingredients, no hours in the kitchen. Just a bowl, a spoon, and ten minutes of your time. I’ve tweaked the original recipe a bit over the years—added a pinch of salt, swapped in dark chocolate chips, played with different nut butters—but the core idea remains the same. These bites are forgiving, adaptable, and honestly, they’ve saved me from buying expensive store-bought protein bars more times than I can count. That’s why I keep coming back to this recipe, and why I think you will too.
Why You’ll Love This Recipe
Let me be real with you for a second. I’ve tested dozens of energy ball recipes over the years, and most of them fall into one of two categories: either they taste like cardboard or they fall apart before you can even take a bite. These Easy No-Bake Peanut Butter Energy Bites are different. They’ve been through my personal trial-and-error process, and I’ve got the sticky kitchen counter stories to prove it. Here’s why this version stands out:
- Quick & Easy: These come together in under five minutes of active prep time. No baking, no waiting, no complicated steps. Just mix, roll, and eat.
- Simple Ingredients: You probably already have everything in your pantry right now. Oats, peanut butter, honey, chocolate chips. That’s it. No trips to a specialty store required.
- Perfect for Busy Days: Whether you need a pre-workout snack, a lunchbox addition for the kids, or something to keep in your bag for afternoon hunger attacks, these bites deliver.
- Crowd-Pleaser: I’ve brought these to potlucks, playdates, and even office meetings. They disappear faster than anything else on the table. Kids love them, adults love them, and nobody guesses they’re actually pretty good for you.
- Unbelievably Delicious: The texture is where these shine—chewy, slightly sticky, with little pockets of melted chocolate and that satisfying peanut butter richness. It’s comfort food that happens to be wholesome.
What makes this recipe different from all the other energy ball recipes out there? It’s the ratio. After countless batches, I found the perfect balance of wet to dry ingredients. Not too crumbly, not too sticky. The honey adds just enough sweetness without being overwhelming, and the oats give it that satisfying chew. Plus, I’ve included a little trick that keeps them from being too dense—a splash of vanilla extract that brightens up the whole flavor profile. This isn’t just another version of the same recipe. This is the version I actually look forward to making every single week.
These bites have that magical quality of making you feel good about what you’re eating while genuinely satisfying your snack cravings. They’re the kind of recipe that makes you wonder why you ever bought packaged energy bars in the first place. And honestly? They taste better than most of them.
What Ingredients You Will Need
This recipe uses simple, wholesome ingredients to deliver bold flavor and satisfying texture without any fuss. Most of these are pantry staples, which means you can whip up a batch whenever the craving strikes without a special grocery trip.
- Rolled oats (old-fashioned oats), 1 cup (90g) – These provide the base and the chewy texture. Avoid instant oats, which can turn mushy. I prefer Quaker Old Fashioned Oats for their consistent texture.
- Creamy peanut butter, 1/2 cup (130g) – The binding agent and the star flavor. Use a natural peanut butter that’s well-stirred, but avoid the super-runny kind that separates easily. Skippy Natural or Jif Natural work great. If you use homemade peanut butter, you might need to adjust the honey slightly.
- Honey, 1/3 cup (110g) – This adds sweetness and helps everything stick together. Local honey is lovely if you have it, but any liquid honey works. For a vegan option, use maple syrup instead—just note that the mixture will be slightly stickier.
- Mini chocolate chips, 1/3 cup (60g) – These little pockets of chocolate make every bite exciting. I use Ghirardelli mini semi-sweet chips because they distribute evenly and melt slightly when rolled, creating a fudgy texture. Regular chocolate chips work too, but minis are worth seeking out.
- Ground flaxseed (optional but recommended), 2 tablespoons (14g) – This adds fiber and omega-3s, plus it helps with binding. I use Bob’s Red Mill golden flaxseed meal. You can skip it or substitute with chia seeds if you prefer.
- Vanilla extract, 1 teaspoon – A small addition that makes a big difference. It rounds out the flavors and adds warmth. Pure vanilla extract is best, but imitation works in a pinch.
- Salt, a pinch (about 1/8 teaspoon) – This balances the sweetness and enhances the peanut butter flavor. If your peanut butter is already salted, you can skip this, but I find a tiny pinch makes everything pop.
Substitution guidance: If you need a nut-free version, swap the peanut butter for sunflower seed butter or WowButter. The flavor will change, but the texture stays similar. For a gluten-free option, make sure your oats are certified gluten-free—cross-contamination is common with regular oats. If you’re cutting back on sugar, reduce the honey to 1/4 cup and add an extra tablespoon of peanut butter to compensate for moisture.
One thing I’ve learned from making these dozens of times: the quality of your peanut butter matters more than you’d think. Cheap, overly processed peanut butters with added sugar and hydrogenated oils can make the bites greasy and artificially sweet. Stick with a simple peanut butter that lists peanuts and maybe salt as the only ingredients. Your taste buds will thank you.
Equipment Needed
The beauty of these Easy No-Bake Peanut Butter Energy Bites is that you don’t need a fancy kitchen setup. Here’s what you’ll need:
- Large mixing bowl – Any medium-to-large bowl works. I use a ceramic mixing bowl because it’s heavy enough to stay put while I stir.
- Measuring cups and spoons – Accurate measurements matter for getting the right texture. A 1-cup dry measure and a 1/2-cup measure are essential.
- Rubber spatula or wooden spoon – For mixing everything together. A rubber spatula is easier for scraping the sides and getting every last bit of mixture.
- Baking sheet or plate – To hold the rolled bites while they set. Line it with parchment paper for easy cleanup.
- Small cookie scoop (optional) – This makes portioning the bites uniform and quick. I use a 1-tablespoon scoop, which gives me consistently sized bites every time. If you don’t have one, just use your hands.
- Refrigerator – The bites need at least 30 minutes to firm up. No special equipment required, just shelf space.
If you don’t have a cookie scoop, wet your hands slightly before rolling the mixture—it prevents sticking and makes the process much smoother. I learned this trick after my first batch left me with peanut butter caked under my fingernails. Not a fun look.
Preparation Method
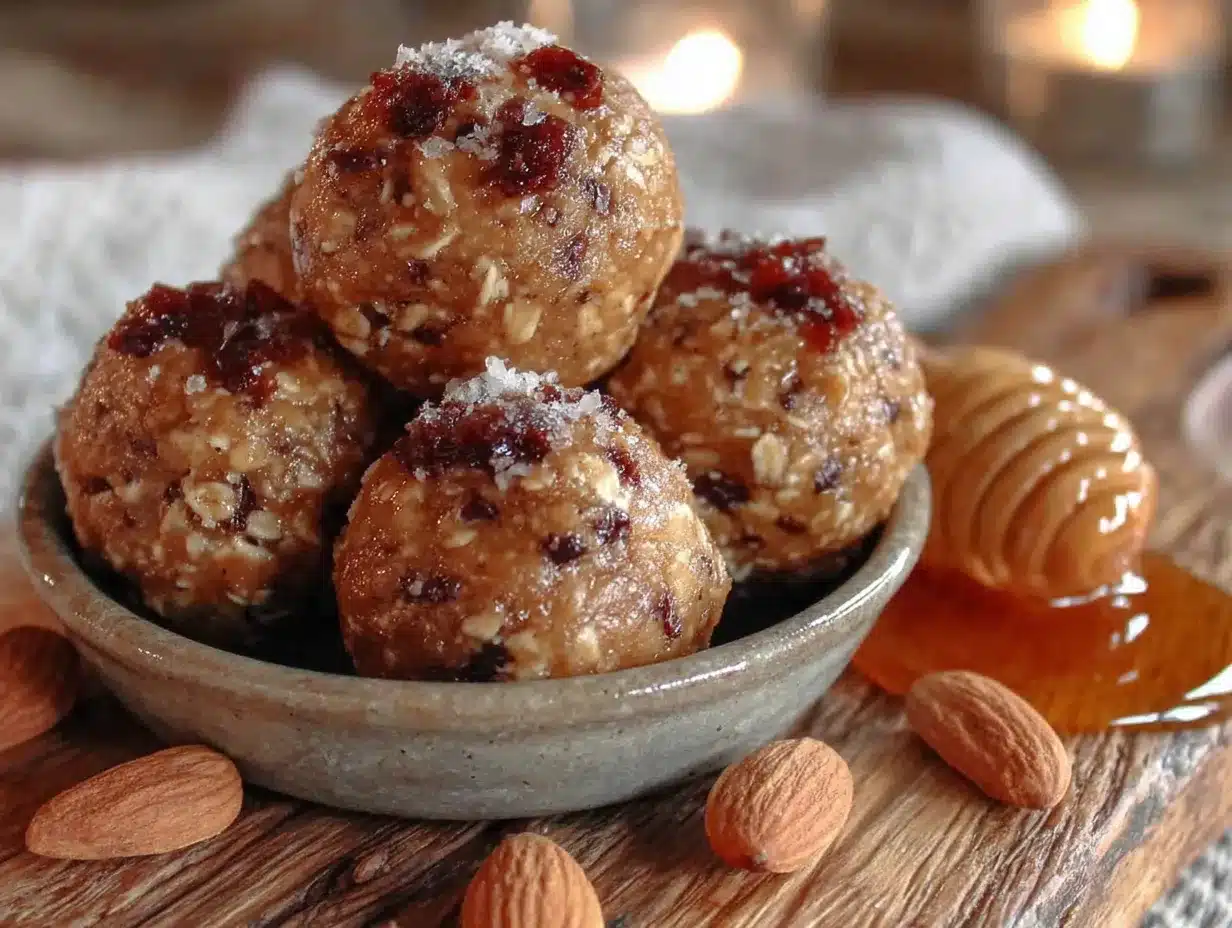
- Combine the dry ingredients. In your large mixing bowl, add 1 cup (90g) rolled oats, 2 tablespoons (14g) ground flaxseed (if using), and a pinch of salt. Stir them together with your spatula or spoon until evenly distributed. This step takes about 30 seconds but ensures the flax doesn’t clump later.
- Add the wet ingredients. Pour in 1/2 cup (130g) creamy peanut butter, 1/3 cup (110g) honey, and 1 teaspoon vanilla extract. Don’t add the chocolate chips yet—they’ll get crushed if you mix too vigorously. Start stirring everything together, pressing down firmly with your spatula to incorporate the peanut butter into the oats. At first, it will look dry and crumbly. Keep going. I promise it comes together.
- Check the consistency. After about a minute of mixing, the mixture should start clumping together. Squeeze a small amount in your hand—if it holds its shape without falling apart, you’re good. If it’s too dry, add a teaspoon of honey or a splash of milk. If it’s too sticky, add a tablespoon more oats. This is where your judgment comes in, and honestly, different brands of peanut butter behave differently. Don’t stress about it.
- Fold in the chocolate chips. Once the base mixture is well combined and holds together, gently fold in 1/3 cup (60g) mini chocolate chips. Stir just until they’re evenly distributed. Overmixing can break the chips and turn everything brown. Not the end of the world, but not as pretty.
- Chill the mixture (optional but helpful). If your kitchen is warm or your hands run hot, pop the bowl in the fridge for 10-15 minutes. This firms up the mixture and makes rolling much easier. I skip this step in winter but always do it in summer.
- Roll into bites. Scoop out about 1 tablespoon of the mixture and roll it between your palms to form a smooth ball. Place each ball on your parchment-lined baking sheet or plate. If the mixture sticks to your hands, lightly wet your palms with water or rub a tiny bit of oil on them. You should get about 18-20 bites from this recipe.
- Set the bites. Place the baking sheet in the refrigerator for at least 30 minutes. This allows the bites to firm up and the flavors to meld together. They’ll be slightly soft but hold their shape perfectly when chilled.
- Optional: Roll in toppings. If you want to get fancy, roll the chilled bites in shredded coconut, cocoa powder, or crushed peanuts before serving. I sometimes roll half the batch in unsweetened coconut for extra texture.
Visual cue: When properly mixed, the dough should look like a slightly sticky, cohesive mass with visible oat flakes and evenly distributed chocolate chips. It shouldn’t look dry or dusty, nor should it be wet or greasy. The perfect texture is somewhere between cookie dough and play dough.
Cooking Tips & Techniques
After making these Easy No-Bake Peanut Butter Energy Bites more times than I can count, I’ve collected a few hard-earned tips that make the process smoother and the results better.
The peanut butter temperature trick. Cold peanut butter is a nightmare to mix. It clumps, it refuses to incorporate, and you end up with pockets of dry oats. Let your peanut butter sit at room temperature for 15-20 minutes before starting. If you forgot to take it out, microwave it for 10 seconds—just don’t overdo it or it’ll get runny.
Don’t skip the chill time. I know, you’re hungry and you want to eat them immediately. But trust me, the 30-minute chill is non-negotiable. Without it, the bites are too soft and will fall apart in your hands. The chilling allows the oats to absorb some moisture from the honey and peanut butter, creating that perfect chewy texture. Plus, the flavors actually develop more during that time. They taste noticeably better after an hour in the fridge.
The sticky hands solution. This was my biggest struggle early on. The mixture would stick to my palms, and I’d end up with more on my hands than on the baking sheet. The fix is simple: keep a small bowl of water nearby and dip your fingers in it before rolling each bite. The thin layer of water prevents sticking without affecting the flavor. Alternatively, rub a drop of coconut oil on your hands—it works like magic.
Consistency troubleshooting. If your mixture is too dry and crumbly, you probably used a thick natural peanut butter or measured your oats generously. Add honey one teaspoon at a time until it holds together. If it’s too sticky and won’t form clean balls, you might have used a runny peanut butter or too much honey. Add oats a tablespoon at a time until it firms up. Remember, the mixture should be slightly tacky but not wet.
Batch size consistency. Using a cookie scoop isn’t just about speed—it ensures all your bites are the same size, which means they’ll chill evenly and look professional. If you’re making these for a party or gift, uniform bites just look better. I use a 1-tablespoon scoop and get exactly 19 bites every time.
Variations & Adaptations
One of the best things about this recipe is how adaptable it is. Here are some variations I’ve tried and loved:
Chocolate Peanut Butter Dream: Swap 2 tablespoons of the oats for unsweetened cocoa powder. The result is a richer, almost brownie-like flavor that satisfies serious chocolate cravings. I make this version when I want something that feels more like dessert than a snack.
Tropical Twist: Replace the chocolate chips with dried mango pieces and shredded coconut. Add a tablespoon of lime zest for brightness. This version is incredibly refreshing and tastes like summer. I brought this to a beach picnic and it was a hit.
Protein-Packed Version: Replace 1/4 cup of the oats with vanilla or chocolate protein powder. You’ll need to add an extra tablespoon of honey or a splash of milk to compensate for the dryness of the protein powder. This version is perfect for post-workout refueling.
Nut-Free School-Safe: Substitute the peanut butter with sunflower seed butter and use certified oat-free granola if needed. The flavor is different—more earthy and less sweet—but still delicious. I made these for a friend’s kid with nut allergies, and they disappeared just as fast.
Spiced Chai Variation: Add 1/2 teaspoon cinnamon, 1/4 teaspoon cardamom, and a pinch of nutmeg to the dry ingredients. The warm spices complement the peanut butter beautifully and make these feel cozy for fall. I make this version when I’m craving something seasonal.
My personal favorite variation? The one where I use dark chocolate chunks instead of mini chips and add a tablespoon of chia seeds. The chia seeds add a subtle crunch and boost the nutritional profile without changing the flavor. I’ve been making this version for months now and haven’t gotten tired of it yet.
Serving & Storage Suggestions
These Easy No-Bake Peanut Butter Energy Bites are best served cold or at room temperature. Straight from the fridge, they have a firm, satisfying chew that I personally love. If you prefer a softer texture, let them sit at room temperature for 5-10 minutes before eating.
Serving ideas: Pack them in lunchboxes for a school-friendly treat. Bring them on hikes or road trips for quick energy. Serve them alongside fresh fruit for a balanced snack plate. They also make excellent gifts—layer them in a mason jar with a pretty ribbon and a handwritten note.
For a complete snack spread, pair these bites with a glass of cold milk, a cup of coffee, or a smoothie. They also complement fresh apple slices or celery sticks beautifully—the crunch of the fruit contrasts nicely with the chewy texture of the bites.
Storage instructions: Keep the bites in an airtight container in the refrigerator for up to 2 weeks. Yes, they last that long—though in my house, they’re usually gone within 3 days. You can also freeze them for up to 3 months. Place them in a single layer on a baking sheet, freeze until solid, then transfer to a freezer-safe bag or container. Thaw in the refrigerator overnight or at room temperature for 15 minutes before eating.
Reheating tip: These don’t need reheating, but if you want a softer texture, microwave a single bite for 5-7 seconds. Be careful not to overdo it, or the chocolate chips will melt completely and make a mess.
Flavor development note: These bites actually taste better after a day in the fridge. The flavors meld together, the oats soften slightly, and the texture becomes more uniform. I’ve made batches on Sunday that tasted noticeably better on Tuesday. So don’t be shy about making them ahead of time.
Nutritional Information & Benefits
Per serving (1 bite, based on 18 bites per batch):
- Calories: 135
- Total Fat: 7g
- Saturated Fat: 2g
- Carbohydrates: 16g
- Fiber: 2g
- Sugar: 9g
- Protein: 4g
These numbers are estimates and will vary based on your specific ingredients. The bites made with natural peanut butter and dark chocolate chips will have slightly different values than those made with conventional peanut butter and milk chocolate chips.
Health benefits: Rolled oats provide slow-release energy and are rich in beta-glucan, a type of soluble fiber that supports heart health. Peanut butter offers plant-based protein and healthy monounsaturated fats that keep you feeling full. Flaxseed adds omega-3 fatty acids and additional fiber. The honey provides quick energy for an immediate pick-me-up.
Dietary considerations: This recipe is naturally vegetarian and can be made vegan by substituting maple syrup for honey. For gluten-free needs, use certified gluten-free oats. For nut-free needs, substitute sunflower seed butter. The recipe is dairy-free as written (assuming your chocolate chips are dairy-free).
Potential allergens: Peanuts, oats (may contain gluten cross-contamination), and chocolate (may contain dairy and soy). Always check your ingredient labels if cooking for someone with allergies.
I personally love that these bites give me sustained energy without the crash that comes from sugary snacks. They’re my go-to for long workdays when I need something that will keep me going without making me feel sluggish.
Conclusion
These Easy No-Bake Peanut Butter Energy Bites have become a non-negotiable part of my weekly routine. They’re the snack I reach for when I need something quick, satisfying, and actually good for me. The fact that they come together in five minutes with zero baking? That’s just the cherry on top.
I love that this recipe gives you room to play. Swap in different add-ins, adjust the sweetness, make them your own. That’s the beauty of a simple, forgiving recipe like this one. It’s a starting point, not a rigid set of rules. And honestly, some of my best variations came from mistakes—too much honey, not enough oats, accidental substitutions that turned out better than the original.
If you make these, I’d love to hear about it. Drop a comment below and tell me what variations you tried, or tag me in your photos. Did you add coconut? Swap in almond butter? Make a double batch because one wasn’t enough? I want to know. This recipe has brought me so much joy, and I hope it does the same for you.
Now go ahead—raid your pantry, grab a bowl, and make yourself a batch. Your future self (and your taste buds) will thank you.
Frequently Asked Questions
Can I use quick oats instead of rolled oats?
Yes, you can, but the texture will be different. Quick oats are more finely chopped, so they absorb moisture faster and create a denser, less chewy bite. The bites will still taste good, but they won’t have that satisfying chewiness that rolled oats provide. If you only have quick oats, reduce the honey slightly since they absorb more liquid.
How long do these energy bites last at room temperature?
These bites are best stored in the refrigerator. At room temperature, they’ll last about 1-2 days before they start getting too soft and potentially spoiling (especially if you’re using natural peanut butter without preservatives). If you’re taking them on a trip, pack them in a cooler or eat them within a few hours of leaving the fridge.
Can I make these without honey?
Absolutely. Maple syrup is the best substitute—use the same amount (1/3 cup). Agave nectar also works, though it’s sweeter so you might want to use slightly less. For a sugar-free option, try using 2-3 tablespoons of sugar-free maple syrup or a liquid stevia blend, but note that the texture will be less sticky and the bites may be more crumbly.
Why are my energy bites too crumbly?
This usually happens when the ratio of dry to wet ingredients is off. Either you used too many oats, not enough peanut butter, or not enough honey. The fix is simple: add a tablespoon of peanut butter or honey at a time until the mixture holds together when squeezed. Also, make sure your peanut butter isn’t too thick—if it’s stiff, warm it slightly before mixing.
Can I double this recipe?
Yes, this recipe doubles beautifully. Just use a larger bowl and make sure everything is thoroughly mixed. I often make a double batch on Sundays and keep them in the fridge for the week. They also freeze well, so don’t be afraid to make extra. The only thing to watch is that the mixing takes a bit more elbow grease with larger quantities.
Pin This Recipe!
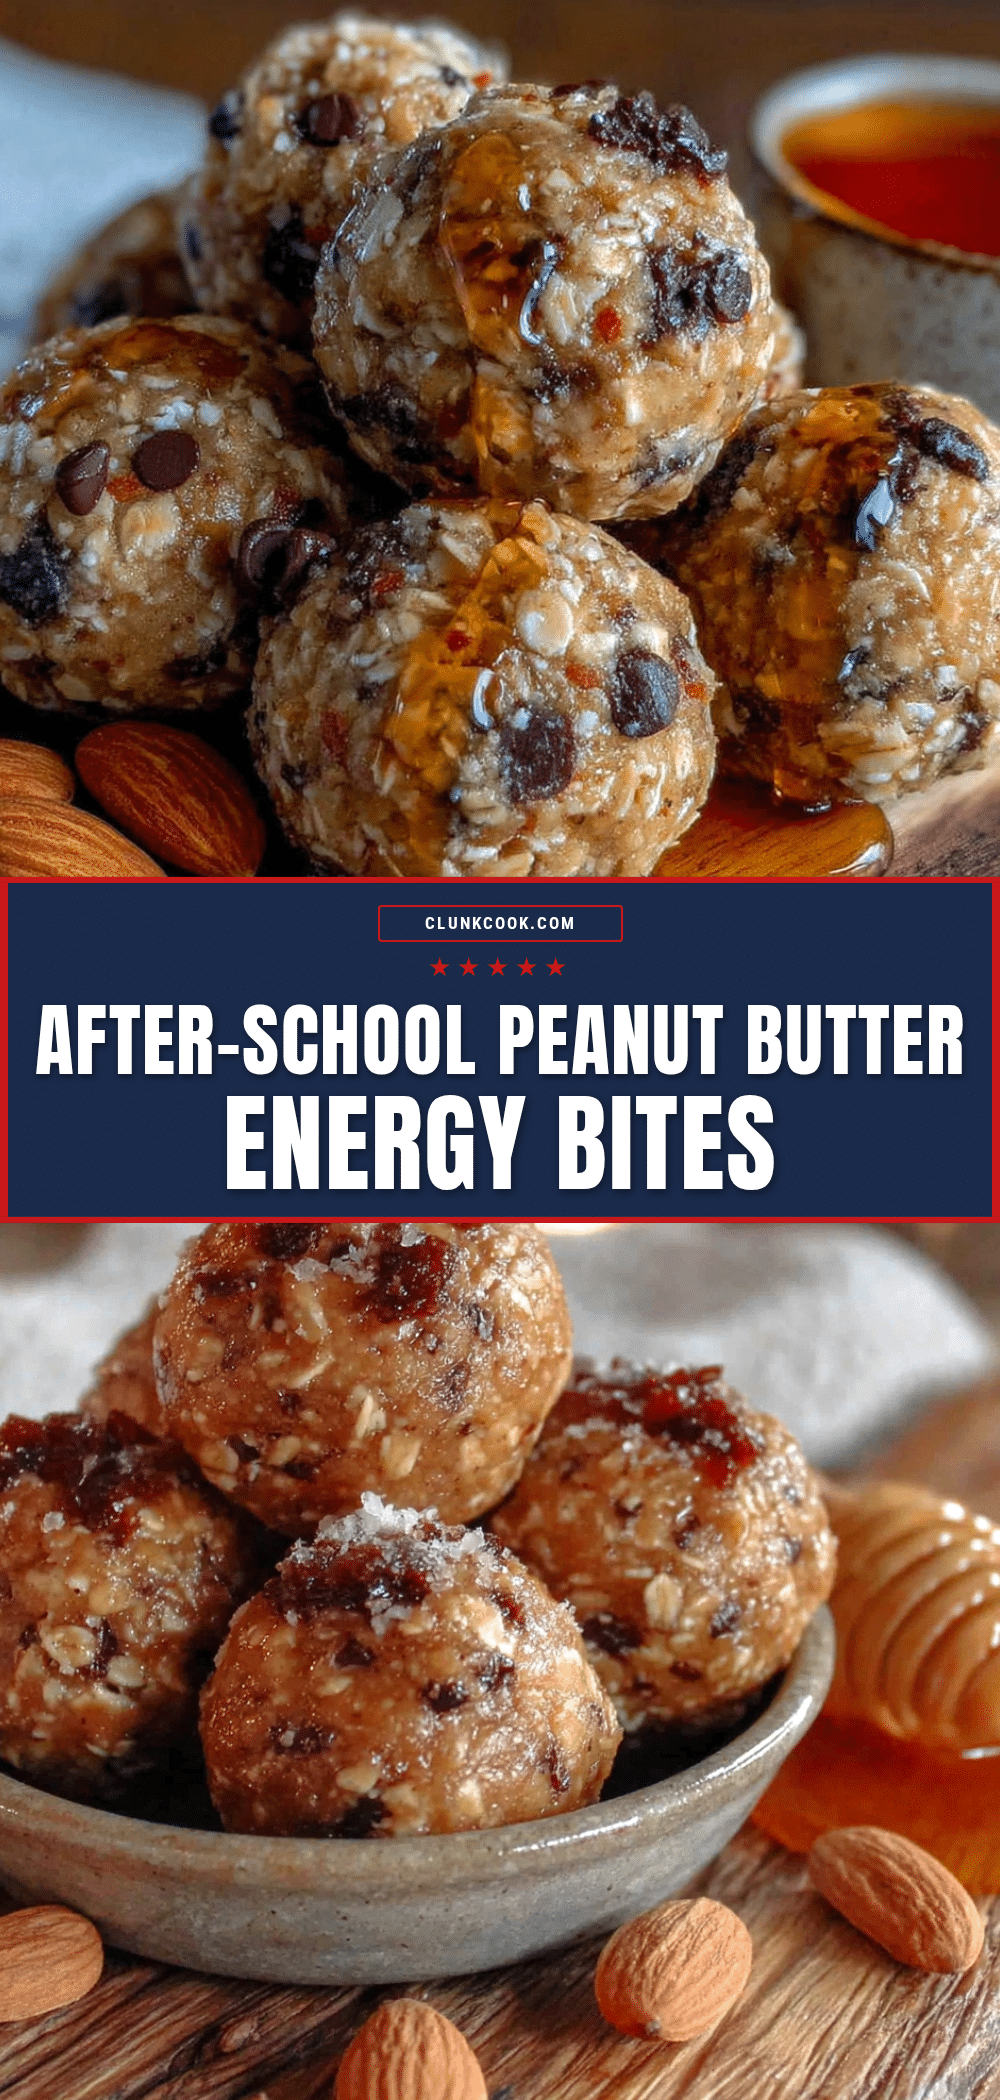
Easy No-Bake Peanut Butter Energy Bites: Best 5-Minute Recipe

These Easy No-Bake Peanut Butter Energy Bites come together in under five minutes with simple pantry ingredients. They’re chewy, satisfying, and perfect for busy days when you need a quick, wholesome snack.
- Prep Time: 5 minutes
- Cook Time: 0 minutes
- Total Time: 35 minutes (includes 30 minutes chilling)
- Yield: 18-20 bites 1x
- Category: Snack
- Cuisine: American
Ingredients
- 1 cup (90g) rolled oats (old-fashioned oats)
- 1/2 cup (130g) creamy peanut butter
- 1/3 cup (110g) honey
- 1/3 cup (60g) mini chocolate chips
- 2 tablespoons (14g) ground flaxseed (optional but recommended)
- 1 teaspoon vanilla extract
- Pinch of salt (about 1/8 teaspoon)
Instructions
- Combine the dry ingredients. In a large mixing bowl, add 1 cup (90g) rolled oats, 2 tablespoons (14g) ground flaxseed (if using), and a pinch of salt. Stir together until evenly distributed.
- Add the wet ingredients. Pour in 1/2 cup (130g) creamy peanut butter, 1/3 cup (110g) honey, and 1 teaspoon vanilla extract. Stir everything together, pressing down firmly with a spatula to incorporate the peanut butter into the oats. The mixture will look dry and crumbly at first but will come together.
- Check the consistency. Squeeze a small amount in your hand—if it holds its shape without falling apart, it’s ready. If too dry, add a teaspoon of honey or a splash of milk. If too sticky, add a tablespoon more oats.
- Fold in the chocolate chips. Gently fold in 1/3 cup (60g) mini chocolate chips until evenly distributed. Avoid overmixing to prevent the chips from breaking.
- Chill the mixture (optional but helpful). If your kitchen is warm, refrigerate the bowl for 10-15 minutes to firm up the mixture for easier rolling.
- Roll into bites. Scoop out about 1 tablespoon of the mixture and roll between your palms to form a smooth ball. Place each ball on a parchment-lined baking sheet or plate. If the mixture sticks, lightly wet your hands with water or rub a tiny bit of oil on them. You should get about 18-20 bites.
- Set the bites. Refrigerate the baking sheet for at least 30 minutes to allow the bites to firm up and the flavors to meld.
- Optional: Roll in toppings. Roll the chilled bites in shredded coconut, cocoa powder, or crushed peanuts before serving.
Notes
For best texture, use creamy peanut butter at room temperature. The bites taste even better after a day in the fridge. For a vegan version, substitute honey with maple syrup. For nut-free, use sunflower seed butter. Store in an airtight container in the refrigerator for up to 2 weeks or freeze for up to 3 months.
Nutrition
- Serving Size: 1 bite
- Calories: 135
- Sugar: 9
- Sodium: 50
- Fat: 7
- Saturated Fat: 2
- Carbohydrates: 16
- Fiber: 2
- Protein: 4
Keywords: no-bake energy bites, peanut butter energy balls, healthy snack, easy snack, no-bake recipe, energy bites, peanut butter bites


